
Setting Sail with the Ultimate Cash Gift
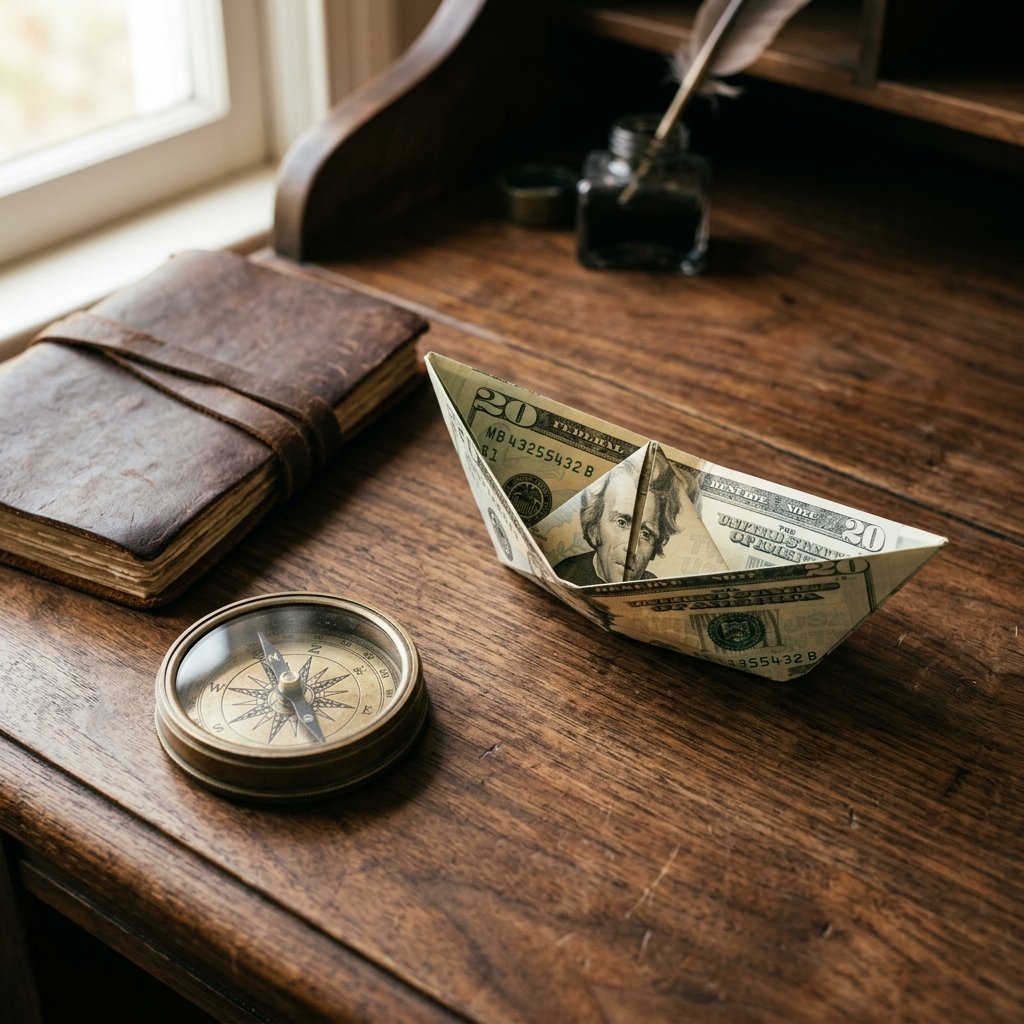
Let’s be honest: sliding a twenty into a generic grocery store card feels a bit… uninspired. While cash is always the most practical gift, it often lacks the personal touch that says, ‘I actually put thought into this.’ That is where the Money Origami Boat comes in. This isn’t just about folding paper; it’s about engineering a moment of surprise. Whether you are celebrating a graduate heading out into the ‘real world,’ a couple embarking on their ‘voyage of marriage,’ or a friend who just loves a clever, budget-savvy gesture, this nautical treasure is the perfect solution.
As a seasoned crafter who values both the rugged elegance of a well-made object and the cleverness of a zero-cost upgrade, I can tell you that the money boat is one of the most structurally sound and visually satisfying folds you can master. It requires no tape, no glue, and no extra materials—just a crisp bill and a few minutes of focused precision. In this guide, we will break down the ‘dry dock’ preparation, the ‘blueprints’ for the fold, and the ‘harbor’ presentation ideas to ensure your gift stands out from the sea of boring envelopes.
The Blueprint: Choosing Your Vessel and Materials
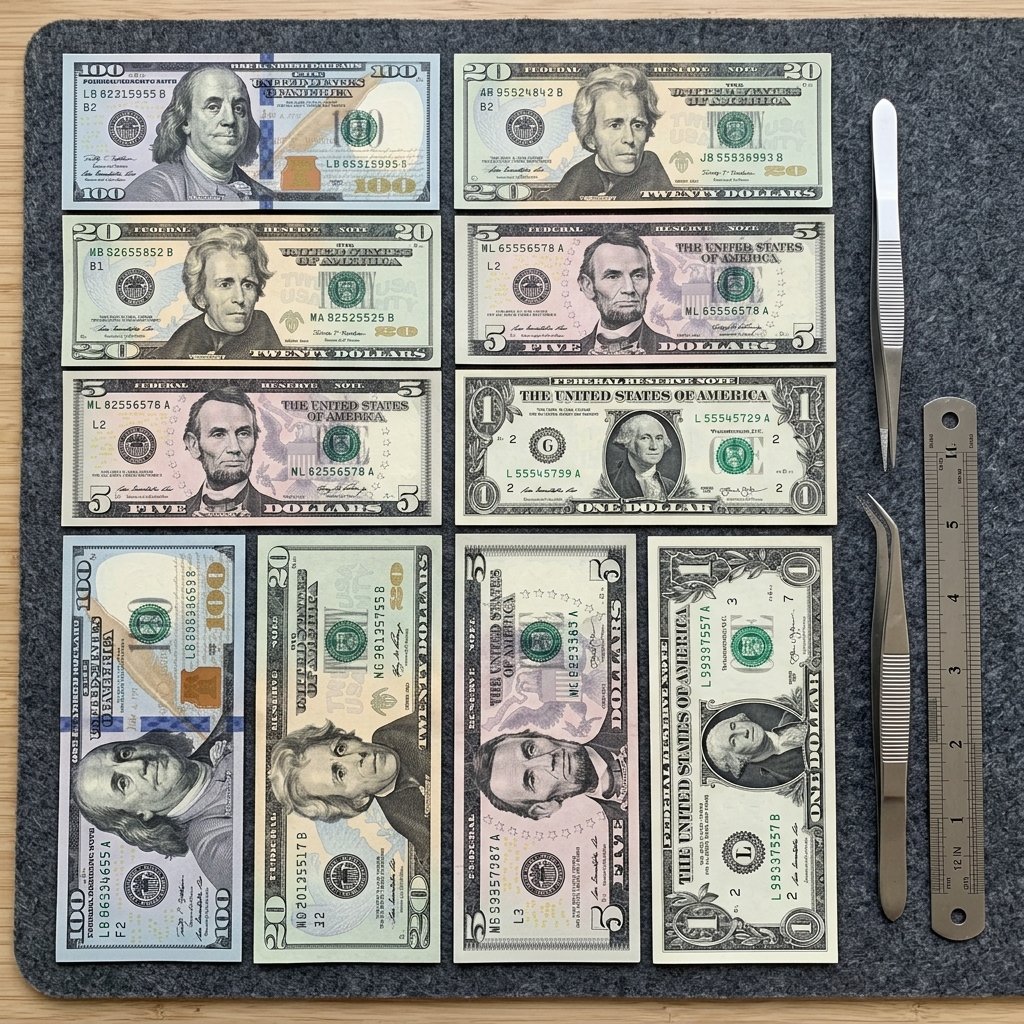
Before we start folding, we need to talk about the ‘lumber’ of the origami world: the currency. Not all bills are created equal when it comes to the structural integrity of a boat. To achieve those razor-sharp creases and a hull that doesn’t sag, you need a bill that hasn’t been through the laundry ten times. A crisp, uncirculated bill from the bank is your best friend here.
Why Denomination Matters
The beauty of the money origami boat is its versatility. You can fold a single $1 bill for a small ‘just because’ gift, or a fleet of $100 bills for a major milestone. Below is a matrix to help you choose the right ‘vessel’ for your specific gifting occasion.
| Denomination | Gift Occasion | Visual Impact Score |
|---|---|---|
| $1 Bill | Small ‘Good Luck’ token or tips | 3/10 (Great for practice) |
| $5 Bill | Kid’s birthday or ‘Coffee on me’ | 5/10 (Nice color contrast) |
| $20 Bill | Graduations, Birthdays, Father’s Day | 8/10 (The ‘Standard Cruiser’) |
| $50 – $100 Bill | Weddings or Major Milestones | 10/10 (The ‘Luxury Yacht’) |
Captain’s Pro-Tip: If you only have wrinkled bills, place them under a flat, heavy book overnight or very carefully—and I mean carefully—use a clothes iron on the lowest, driest setting to flatten them out. A crisp bill makes the difference between a sleek speedboat and a sinking ship.
Step-by-Step Navigation: Folding Your Money Boat
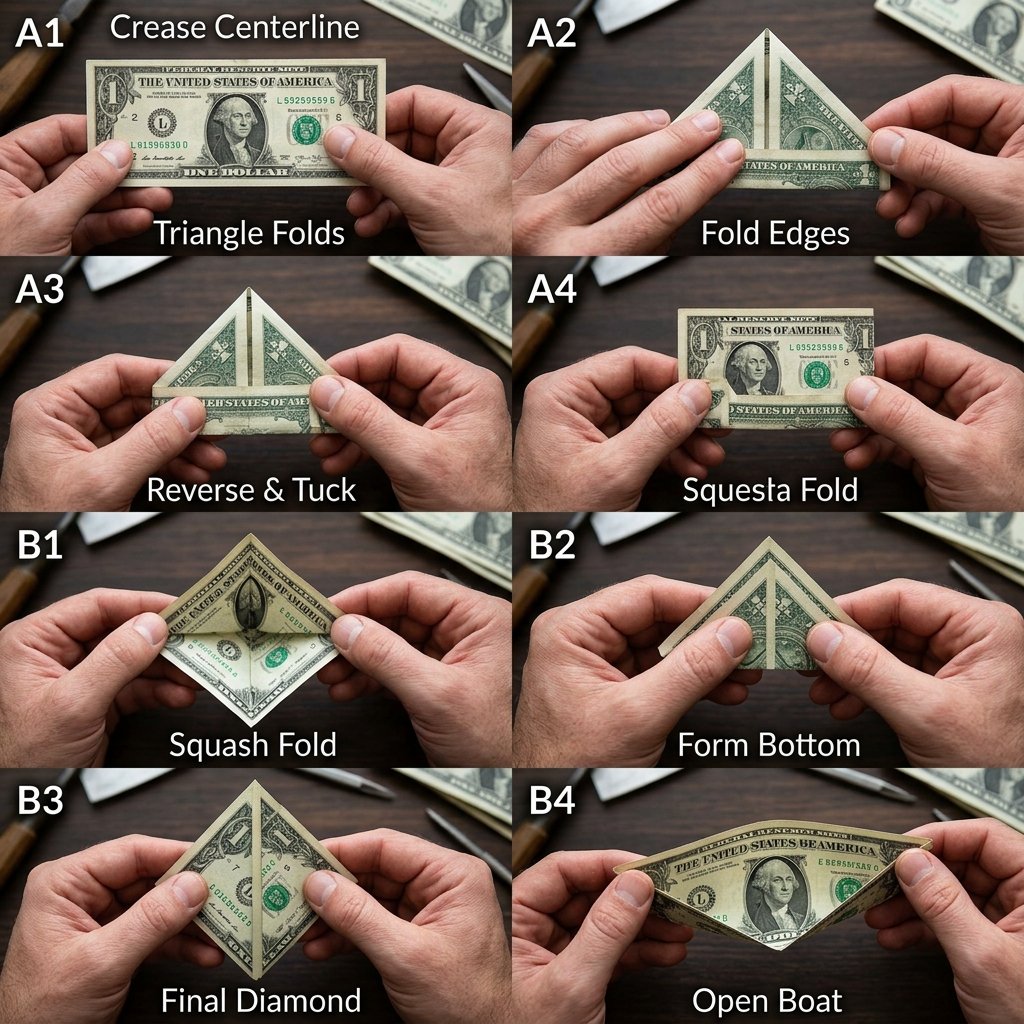
Now, grab your bill and clear a flat workspace. We are going to use a series of precise, geometric folds to transform this rectangle into a 3D boat. Follow these steps carefully, and remember: firm creases are the secret to success. Use your thumbnail or a credit card edge to sharpen every fold.
- The Foundation: Lay the bill flat in front of you horizontally. Fold it in half lengthwise (the long way), matching the corners perfectly. Crease it well and then unfold it. This gives you a center guideline.
- The Vertical Axis: Now, fold the bill in half widthwise (short end to short end). Crease it and leave it folded.
- The Triangle Peak: With the folded edge at the top, take the two top corners and fold them down toward the center crease you made in step 2. You should now have a triangle shape at the top with a rectangular strip at the bottom.
- The Hull Flaps: Take the top layer of the bottom rectangular strip and fold it upward against the base of the triangle. Flip the whole thing over and repeat with the other bottom strip. It should look like a paper hat now.
- Tucking the Corners: You’ll notice little triangles sticking out at the edges. Fold these over the main triangle to ‘lock’ the shape together. This creates a clean, snag-free profile.
- The Transformation: Pick up the ‘hat’ and put your thumbs inside the bottom opening. Gently pull the sides apart and flatten the shape into a diamond.
- Raising the Sails: With the diamond laying flat, take the bottom corner of the top layer and fold it up to the top corner. Flip it over and repeat. You now have a smaller triangle.
- The Final Launch: Once again, open the bottom of the triangle and flatten it into a diamond. Finally, take the two flaps at the top of the diamond and pull them outward. The boat will magically pop open!
Mantra for Success: “Measure twice, crease once. A sharp fold is a sturdy ship.”
The Harbor: Creative Ways to Present Your Gift

Elevating the Presentation
Folding the boat is only half the battle. To truly channel that resourceful and clever spirit, you need a presentation that tells a story. Just handing someone a tiny paper boat is fine, but placing it in a ‘harbor’ is what makes it a treasure. Here are a few budget-savvy ways to display your origami:
- The Message in a Bottle: Find a clean, clear glass bottle (upcycle an old soda or kombucha bottle). Drop some blue decorative sand or even just a bit of blue tissue paper at the bottom, then carefully slide your money boat inside using tweezers. Cork the top for a rugged, seafaring look.
- The Shadow Box Voyage: Use a small shadow box frame from a craft store (or a $1.25 Dollar Tree find). Paint the background a deep navy blue and mount the boat in the center using a tiny piece of double-sided tape. Add a caption like, “Wishing You Smooth Sailing!”
- The Nautical Card: Instead of a standard envelope, glue a piece of twine across the front of a card like a clothesline and ‘hang’ the boat from it using a tiny decorative clothespin.
| Presentation Method | Estimated Cost | Time to Assemble |
|---|---|---|
| Glass Bottle Upcycle | $0.00 (Trash-to-Treasure) | 5 Minutes |
| Dollar Tree Shadow Box | $1.25 – $3.00 | 15 Minutes |
| Nautical Twine Card | $0.50 | 10 Minutes |
Troubleshooting and Advanced Maneuvers
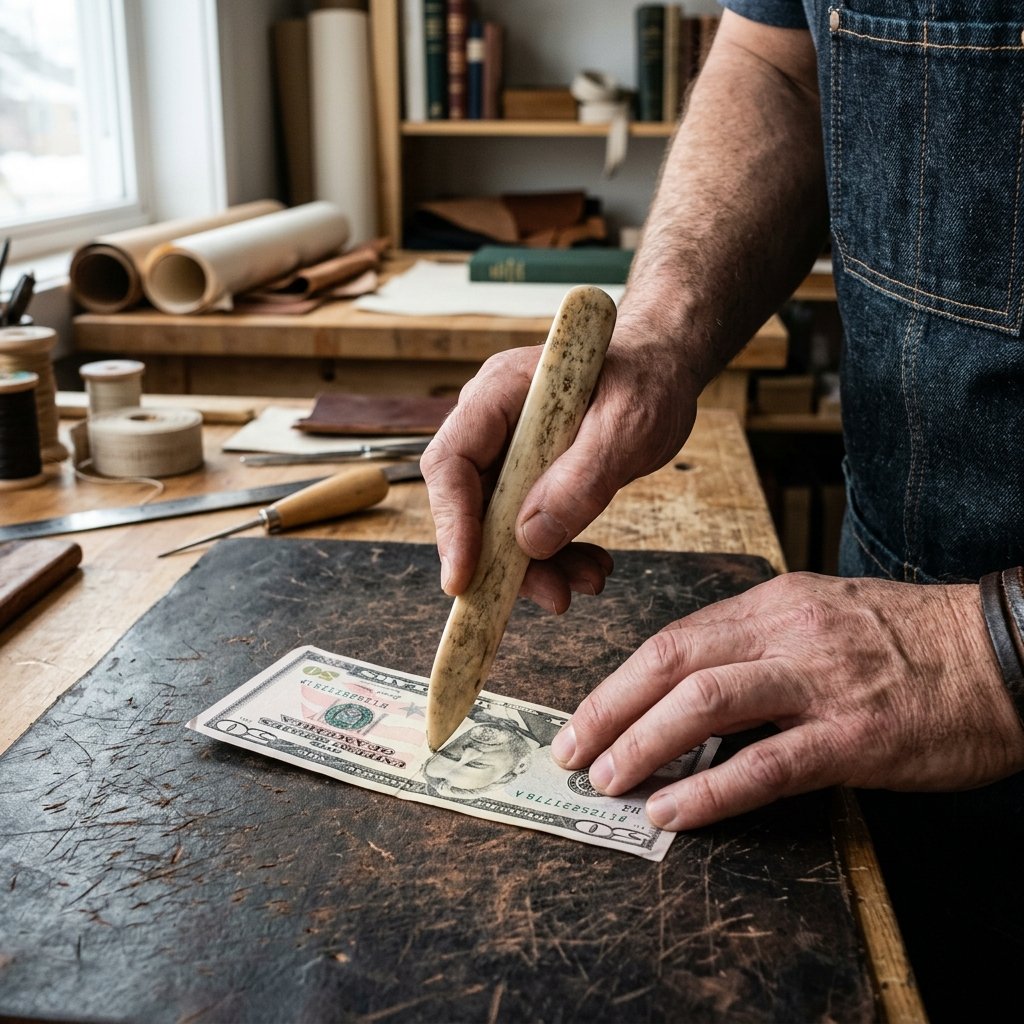
Even the most crafty expert hits a snag sometimes. If your boat looks more like a crumpled napkin than a seafaring vessel, check these common ‘leaks’:
The ‘Sinking’ Hull
If the middle of your boat won’t stay upright, it’s usually because the folds weren’t sharp enough. Go back and use the edge of a spoon to burnish the creases. This compresses the fibers of the bill and gives it mechanical strength.
The ‘Asymmetrical’ Sail
If one side is taller than the other, your very first fold (the center guideline) was likely off-center. In origami, precision is everything. Accuracy at step one saves the project at step eight.
Scaling Up: The Fleet Strategy
For a wedding gift, don’t just give one boat. Fold ten $10 bills and arrange them in a ‘fleet’ inside a large bowl of blue candies or sea-salt chocolate. It creates a high-volume visual impact that makes the gift look much more expensive and thoughtful than a simple check.
Safety Note: Never use tape or glue directly on the bill if you want the recipient to be able to spend it! The beauty of origami is that it relies on friction and geometry, not adhesives.
Conclusion
Anchors Aweigh on Your Gifting Journey
Folding a money origami boat is more than just a crafty trick; it is a way to show the recipient that you value their milestone enough to spend your most precious resource—time—on their gift. By turning a flat piece of currency into a three-dimensional symbol of adventure and journey, you’ve elevated a simple transaction into a lasting memory.
Remember, the first one might be a little ‘seaworthy’ at best, but keep practicing. Before long, you’ll be the go-to frugal guru for every graduation and wedding in your circle. So, grab those crisp bills, start folding, and give a gift that truly makes a splash. Happy folding!

Makenzie is the founder and lead writer at MoneyHackTips.com — a personal finance blog dedicated to delivering street-smart financial wisdom for real people on real budgets. With 300+ published articles covering everything from debt management to investing fundamentals, Makenzie’s mission is to make every dollar work harder. When not writing about money hacks, Makenzie is testing frugal living strategies, optimizing side hustles, and helping readers build financial freedom from scratch.