
The Art of the Eternal Sock
There is a certain heartbreak in pulling on your favorite pair of heavy-duty wool socks—the ones that have carried you through winter hikes and cozy mornings—only to feel your big toe poking through a fresh hole. In our modern ‘disposable’ culture, most people would toss those $25 socks into the bin without a second thought. But you? You know better. You understand that a well-made wool sock isn’t just clothing; it is an investment in comfort and performance. Mending is not just a way to save money; it is a rugged, practical skill that honors the craftsmanship of the original garment. By mastering the art of darning, you can extend the life of your woolens indefinitely, turning a potential piece of trash into a reinforced, personalized treasure. Let’s dive into the crafty world of invisible mending and traditional darning to ensure your feet stay warm for decades to come.
The Mender’s Arsenal: Tools for a Lifetime of Repair
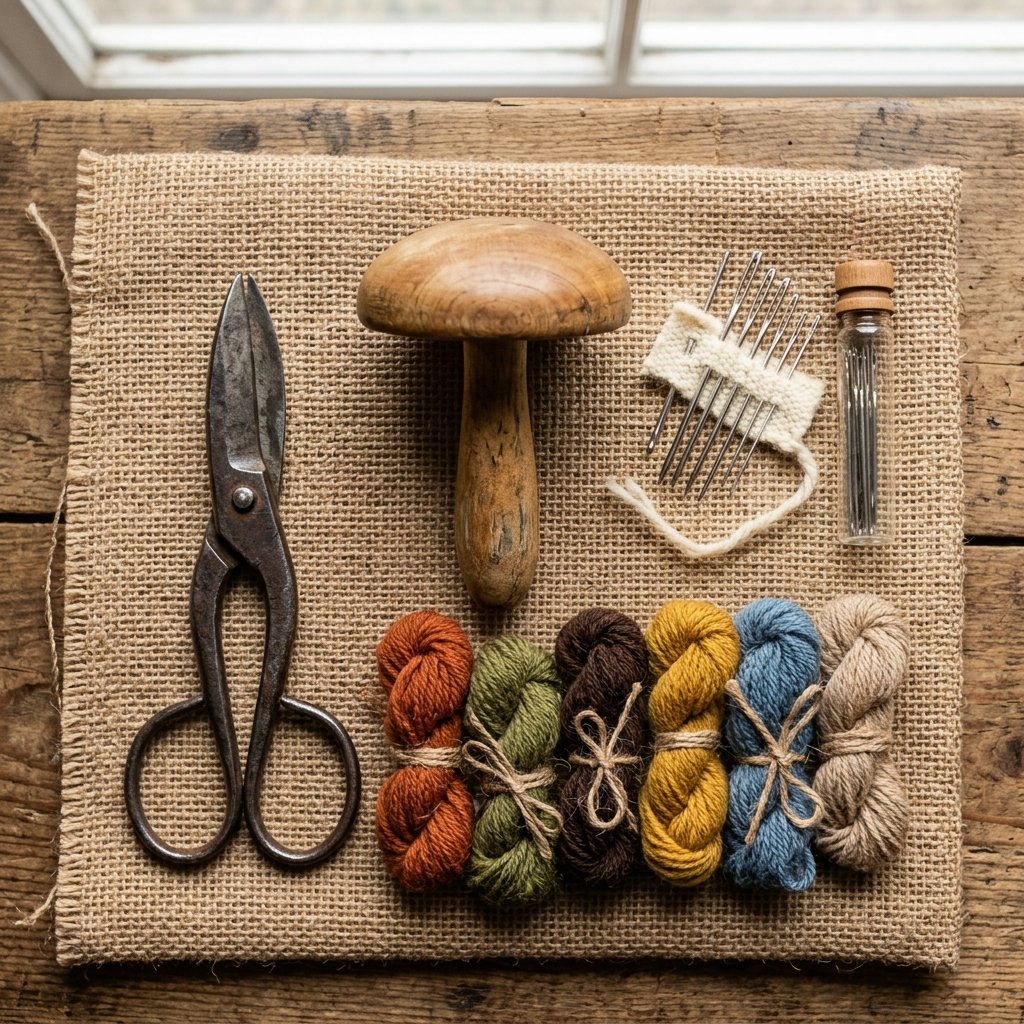
Before you take your first stitch, you need the right gear. Fortunately, mending wool socks is a low-overhead hobby. You likely have half of these items in your junk drawer already. The key to a professional-looking mend is matching the weight and fiber of your repair yarn to the original sock. Using thin polyester sewing thread on a thick Merino wool sock is a recipe for a lump that will cause blisters. Instead, we look for ‘darning wool’ or ‘tapestry yarn’ which provides the bulk and softness needed for a seamless feel.
Essential Materials and Budget Breakdown
If you were to buy a brand-new pair of high-end wool socks every time a hole appeared, you would be spending hundreds of dollars over a few years. Investing in a mending kit costs less than a single pair of premium socks.
| Essential Tool | Purpose | Estimated Cost |
|---|---|---|
| Darning Egg or Mushroom | Provides a firm, curved surface to tension the sock. | $5.00 – $12.00 |
| Tapestry Needles | Blunt-tipped needles that slide between fibers without splitting them. | $3.00 |
| Darning Wool/Yarn | Wool/Nylon blend yarn (2-ply or 3-ply) for durability. | $4.00 per skein |
| Small Sharp Scissors | For clean cuts that prevent fraying. | $0.00 (Use what you have) |
| Total Investment | Everything needed to fix 50+ pairs. | Under $20.00 |
The Mender’s Mantra: A stitch in time saves nine, but a darn in the heel saves twenty-five dollars and a trip to the landfill.
Anatomy of a Hole: Assessing the Damage

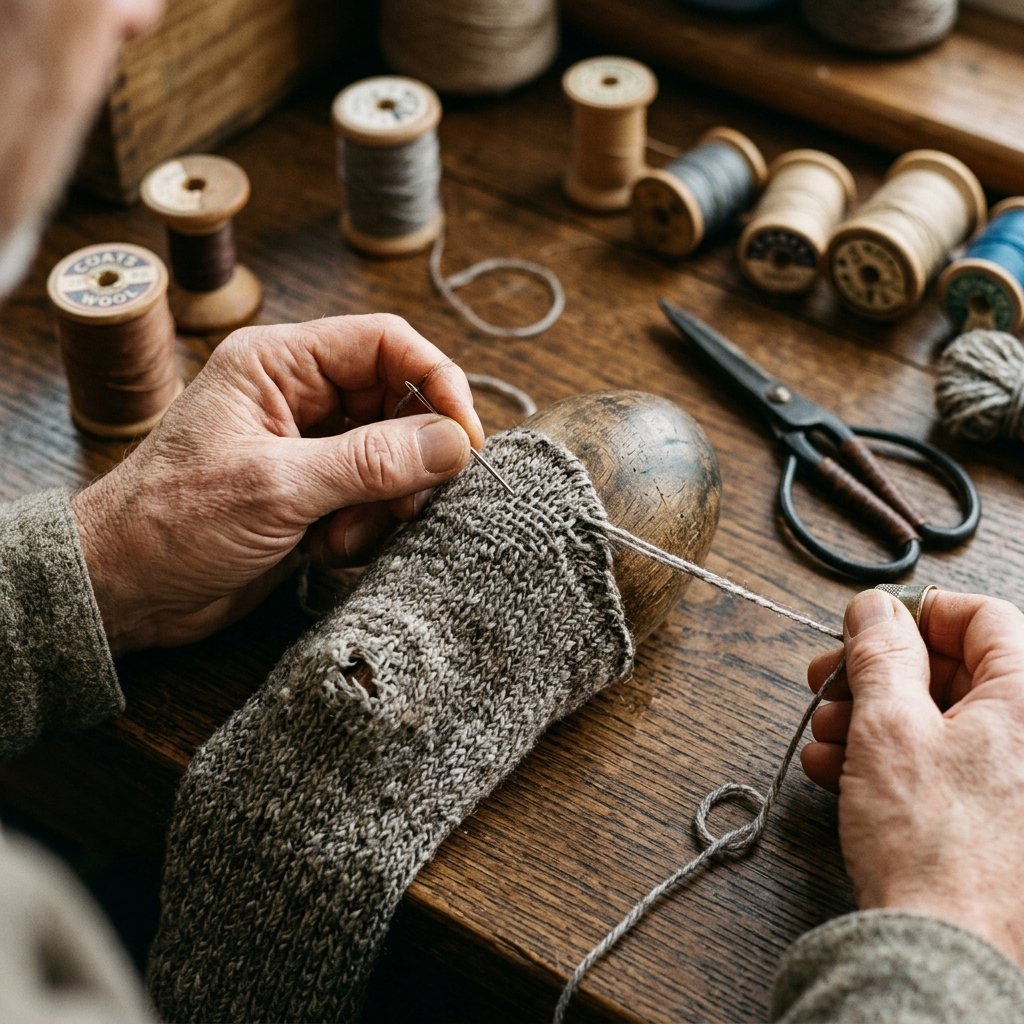
Not all holes are created equal. To mend effectively, you must first identify the type of wear you are dealing with. Is it a ‘blowout’ (a clean hole with missing fabric), or is it ‘thinning’ (where the base structure is still there but the fluff is gone)? Catching a thin spot early is the secret to a repair that is completely invisible to the foot.
- The Toe Blowout: Usually caused by long toenails or high friction against the boot box. Requires a full woven darn.
- The Heel Thinning: Caused by the constant ‘rub’ of walking. Best treated with Swiss Darning (duplicate stitch) to reinforce the area before a hole forms.
- The Ankle Snag: Often a clean break in the yarn from a stray bramble or a snag. Easiest to fix with a simple ladder stitch.
Problem vs. Tailoring Solution Guide
| Damage Type | Recommended Stitch | Difficulty Level |
|---|---|---|
| Small Hole (< 1cm) | Traditional Woven Darn | Beginner |
| Large Gaping Hole | Patching or Heavy Woven Darn | Intermediate |
| Thinning/Threadbare Spot | Swiss Darning (Duplicate Stitch) | Advanced (but worth it!) |
| Loose/Stretched Ribbing | Elastic Thread Integration | Intermediate |
Step-by-Step: The Traditional Woven Darn
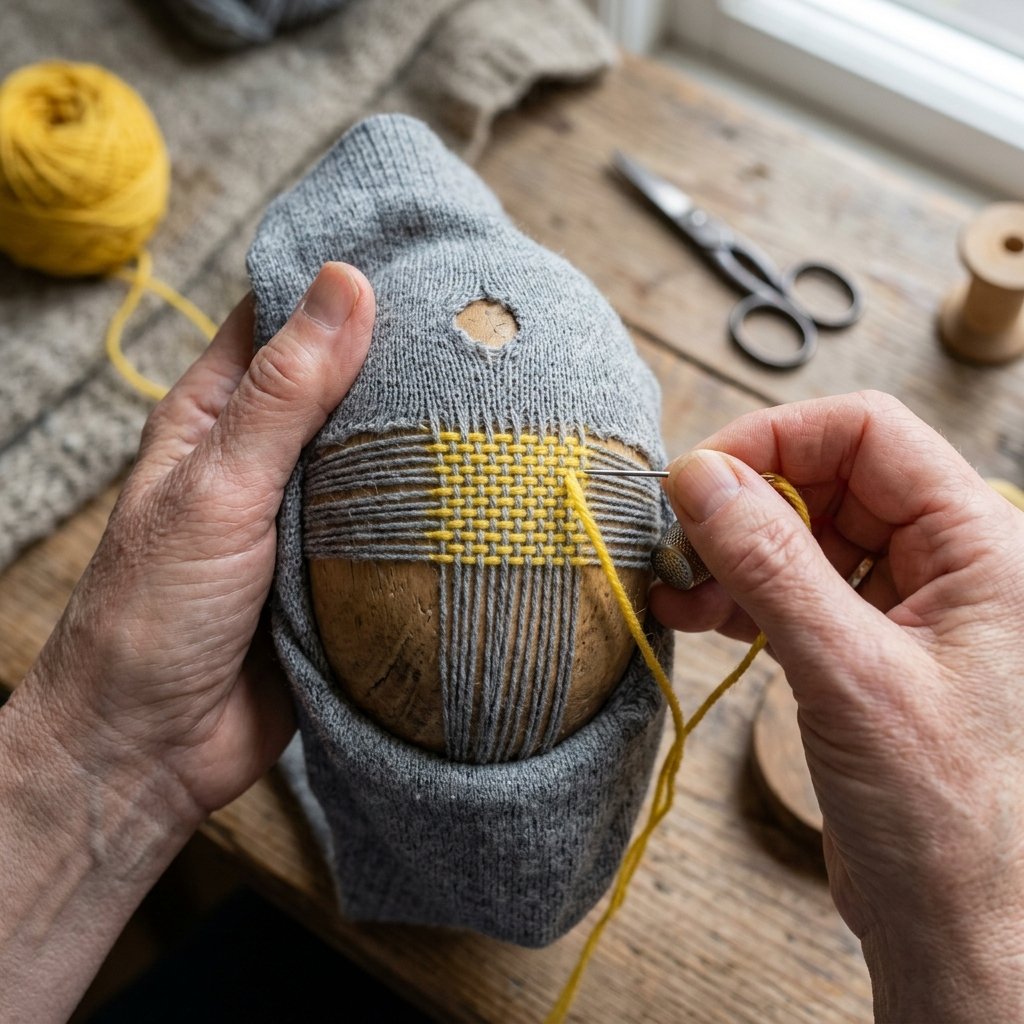
The woven darn is the gold standard for fixing actual holes where the fabric is missing. It creates a new piece of ‘fabric’ by weaving vertical and horizontal threads across the gap. Follow these steps for a rugged, flat repair.
- Prep the Sock: Slide your darning egg inside the sock and center the hole over the widest part of the egg. Secure the fabric with a rubber band if it feels slippery.
- Create the Frame: Start about 1/2 inch away from the edge of the hole. Stitch a series of long, vertical ‘warp’ threads across the hole. Keep them close together, but do not pull them so tight that the sock puckers.
- The Weave: Turn your work 90 degrees. Now, weave your needle over and under the warp threads you just created. On the next row, reverse the pattern (under then over).
- Anchor the Edges: Every time you reach the side of the hole, take a small ‘anchor’ stitch into the healthy fabric of the sock to lock the new weave in place.
- Finish: Once the hole is filled, weave your remaining tail into the back of the sock for 1 inch and snip. No knots allowed! Knots cause blisters.
Pro Tip: Use a contrasting color of yarn for your first few repairs. It makes it much easier to see the over-under pattern as you learn the rhythm of the weave.
Swiss Darning: The ‘Invisible’ Reinforcement

If you have a pair of expensive Merino wool socks that are starting to look ‘see-through’ at the ball of the foot, Swiss Darning is your best friend. This technique, also known as the duplicate stitch, follows the actual path of the knitted ‘V’ shapes in the sock. It effectively adds a second layer of wool on top of the old one.
Why Swiss Darning is Superior for High-Performance Socks:
- Elasticity: Unlike a woven darn, Swiss darning moves and stretches with the sock.
- Comfort: It creates zero bulk, meaning you won’t feel it inside your hiking boots.
- Aesthetics: If you match the yarn color perfectly, the repair is virtually invisible.
To perform this, you simply bring your needle up through the bottom of a ‘V’ stitch, pass it behind the ‘legs’ of the stitch above it, and bring it back down through the original entry point. You are essentially ‘re-knitting’ the sock with a needle.
Fiber Science: Choosing the Right Thread for the Job

Don’t make the mistake of using 100% cotton embroidery floss for wool socks. Cotton does not stretch, and it absorbs moisture differently than wool, which can lead to friction and—you guessed it—more holes. For the most rugged repair, look for a yarn blend. 80% Wool and 20% Nylon is the ‘magic ratio’ for darning. The wool provides warmth and breathability, while the nylon provides the tensile strength needed to withstand the friction of your heel.
| Fiber Type | Durability | Comfort | Best For |
|---|---|---|---|
| 100% Wool | Medium | High | Dress socks, light wear |
| Wool/Nylon Blend | Extreme | High | Hiking & Work socks |
| Cotton Floss | Low | Medium | Emergency only! |
| Acrylic Yarn | High | Low | Budget repairs, non-breathable |
Conclusion
Step into a Sustainable Future
By learning to mend your own wool socks, you have graduated from a mere consumer to a steward of your own wardrobe. You’ve saved roughly $20 to $30 per pair, kept textile waste out of the landfill, and mastered a meditative, practical craft that has been passed down through generations of handy folks. Whether you choose a bold, contrasting ‘visible mend’ as a badge of honor or a stealthy Swiss darn that hides your handiwork, your socks are now stronger than they were when they left the factory. So, the next time you spot a thinning heel, don’t toss it—reach for your darning egg and give that sock a second life. Your feet, and your wallet, will thank you.

Makenzie is the founder and lead writer at MoneyHackTips.com — a personal finance blog dedicated to delivering street-smart financial wisdom for real people on real budgets. With 300+ published articles covering everything from debt management to investing fundamentals, Makenzie’s mission is to make every dollar work harder. When not writing about money hacks, Makenzie is testing frugal living strategies, optimizing side hustles, and helping readers build financial freedom from scratch.