
The Art of the Rugged Stocking Stuffer
When the holidays roll around, or when you simply need a practical, high-quality gift for the ‘hard-to-buy-for’ person in your life, the answer isn’t found in a big-box store aisle. It is found in the palm of your hand, crafted with a few feet of 550 paracord and a touch of resourceful ingenuity. A heavy-duty paracord keychain isn’t just a way to hold keys; it is a survival tool, a statement of rugged elegance, and a testament to the maker’s skill. In this guide, we are going to dive into the world of ‘Everyday Carry’ (EDC) aesthetics to create a piece of gear that looks like it cost $25 at a boutique tactical shop, but actually costs you less than $2 in materials. Whether you are a frugal parent looking to fill stockings with items that won’t break by New Year’s, or a crafty individual who appreciates masculine-elegant design, this project is your gateway to becoming a master of functional upcycling.
The Anatomy of a Heavy-Duty EDC Essential
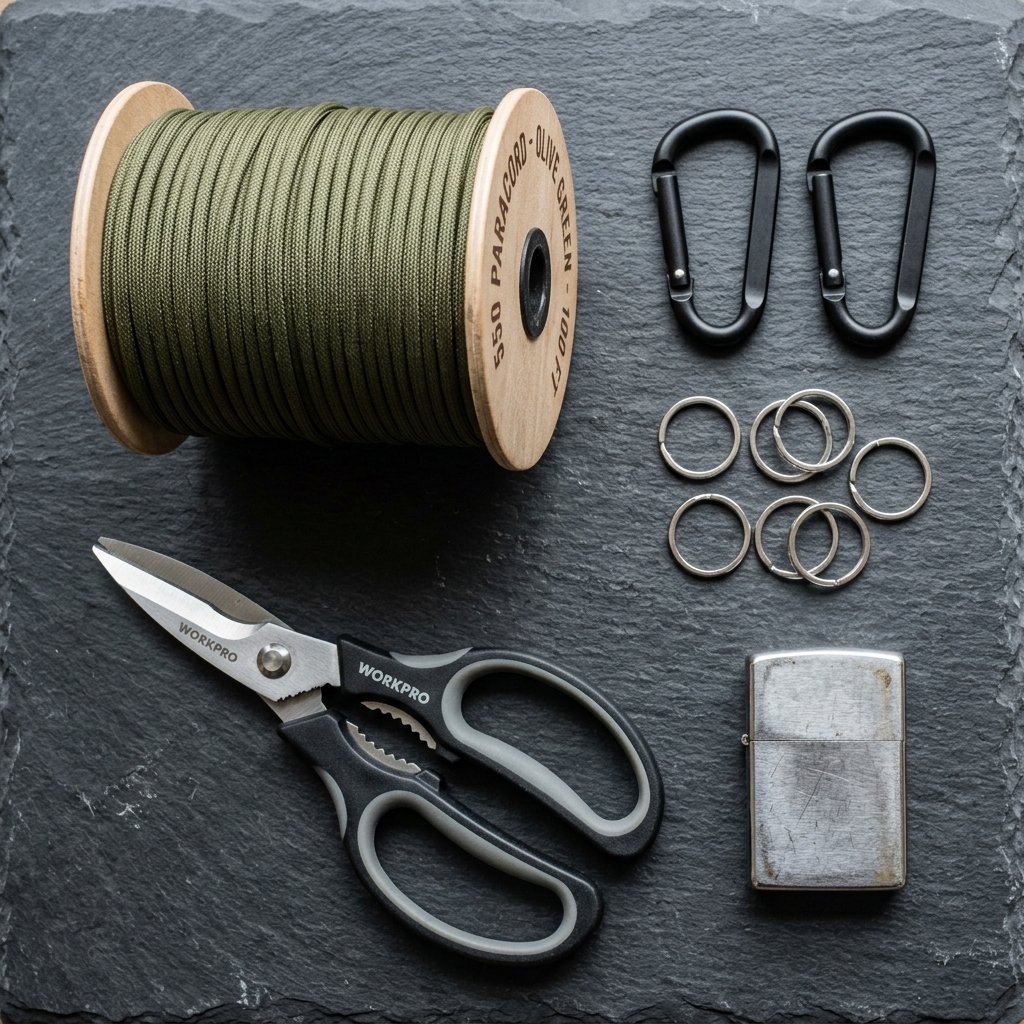
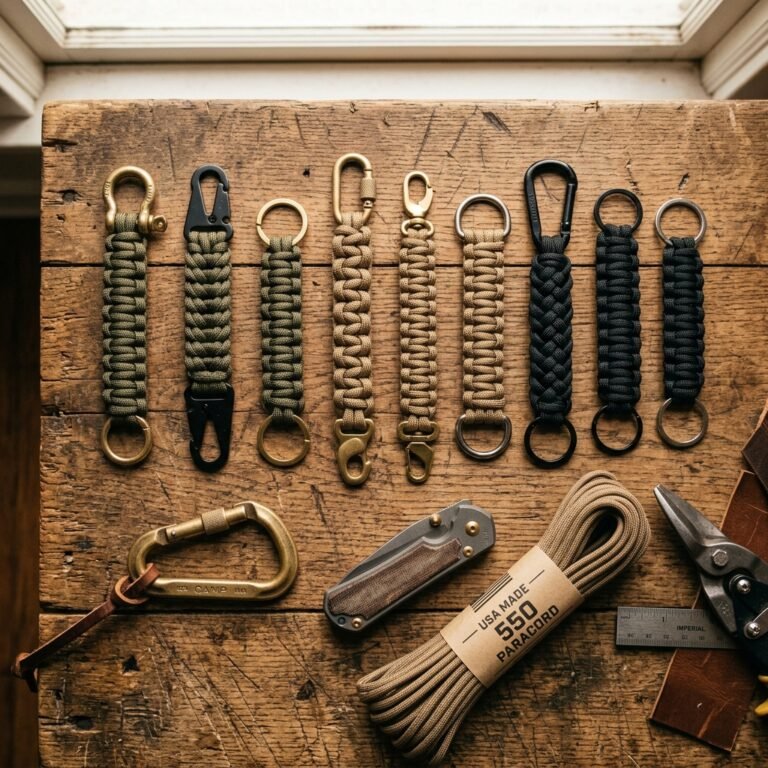
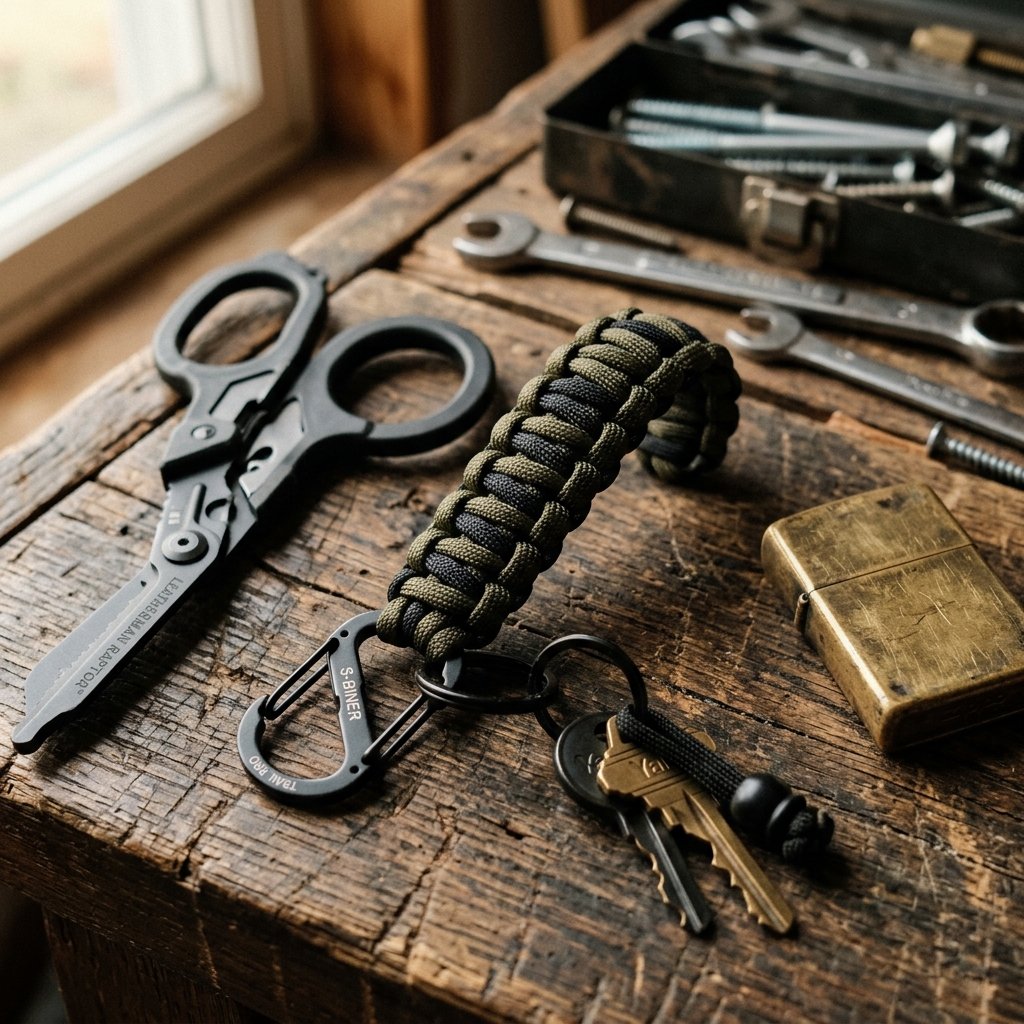
Before we start weaving, we need to understand what makes a keychain ‘heavy-duty.’ We aren’t using the flimsy string found in craft kits. We are using Type III 550 Paracord, which boasts a breaking strength of 550 pounds. This material was originally used in the suspension lines of parachutes during World War II, making it the ultimate heritage material for the modern DIYer. To complete the ‘tactical’ look and utility, we pair this cord with a functional carabiner. This allows the recipient to clip their keys to belt loops, backpacks, or internal bag organizers, ensuring they never lose their essentials again.
Sourcing Materials on a Dime
Being budget-savvy means knowing where to look. You can often find bulk spools of paracord at hardware stores or online for a fraction of the price of pre-cut lengths. For the carabiners, look for ‘not for climbing’ utility clips which provide the aesthetic and light-duty function needed for keys without the $15 price tag of climbing-rated gear.
| Material | Purpose | Estimated Cost |
|---|---|---|
| 550 Paracord (7-10 feet) | The main body of the keychain | $0.50 |
| 1-Inch Carabiner | Attachment point for belt/bags | $0.75 |
| 1-Inch Split Key Ring | Holding the actual keys | $0.15 |
| Lighter & Scissors | Cutting and sealing the ends | Owned |
Budget Maker’s Mantra: Utility is beauty. When you build something that lasts a lifetime for the price of a cup of coffee, you haven’t just saved money; you’ve mastered your environment.
The Cobra Weave: A Step-by-Step Tactical Tutorial
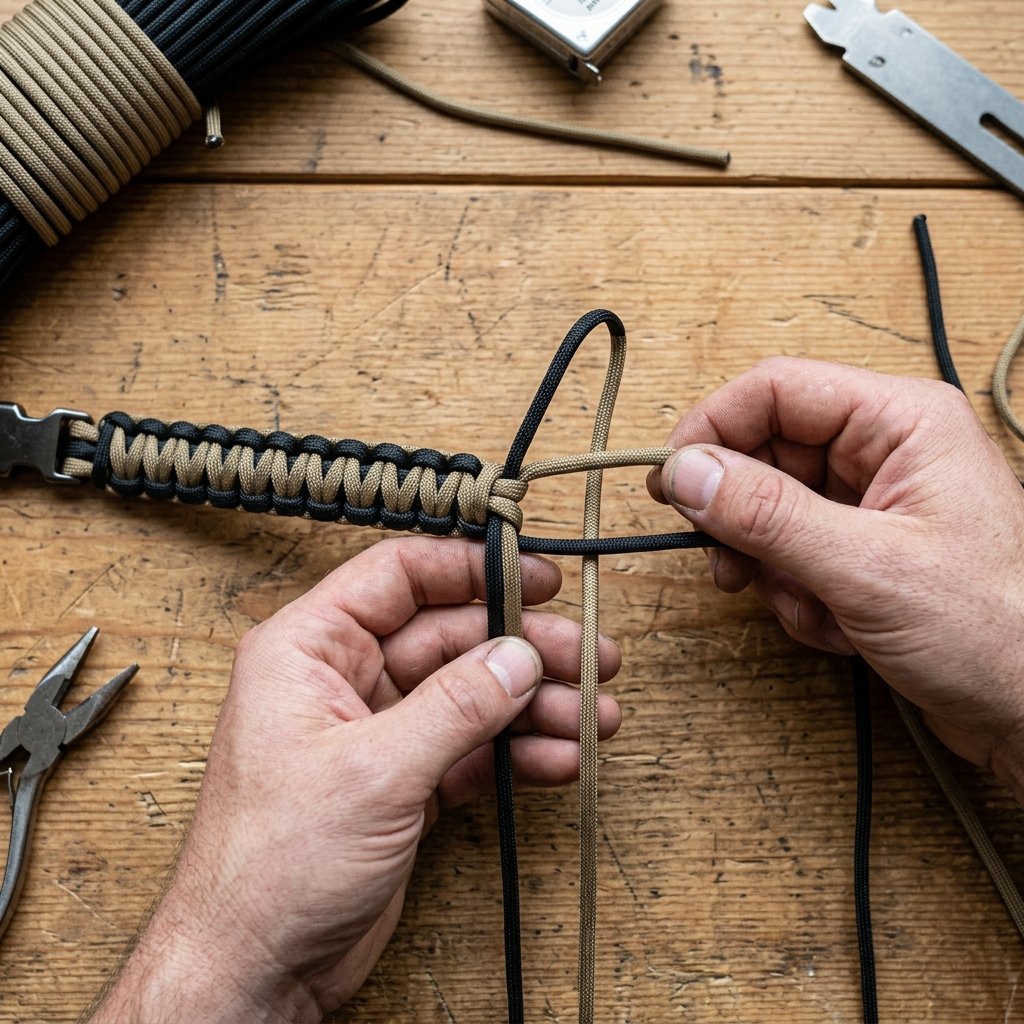
The Cobra Weave (also known as the Solomon Bar) is the gold standard for paracord projects. It is dense, attractive, and incredibly strong. Follow these steps to ensure a professional, tight finish that won’t unravel under pressure.
- Measure and Prep: Cut approximately 8 feet of paracord. This may seem long, but the weave consumes cord quickly. Use your lighter to singe the ends immediately to prevent fraying.
- The Anchor: Fold the cord in half. Thread the looped end through the eye of your carabiner, then pull the two loose ends through that loop (a cow hitch knot). Pull it tight against the carabiner base.
- Setting the Length: Slide your split key ring onto the two loose strands. Position the ring about 3 to 4 inches away from the carabiner. This distance determines the final length of your keychain.
- The First Knot: Take the left strand and lay it over the two center anchor strands, forming a ‘4’ shape. Take the right strand, lay it over the tail of the left strand, then thread it under the center anchor strands and up through the loop of the ‘4’ on the left side.
- The Switch: Tighten the knot. Now, repeat the process starting from the right side. Lay the right strand over the center, the left strand over that tail, under the center, and through the loop.
- The Rhythm: Continue alternating sides (Left, Right, Left, Right). If you forget which side is next, look for the ‘vertical bump’ on the side of the previous knot—that is the side you should start your next ‘4’ loop on.
Pro Tip: Keep your tension consistent. Pulling each knot with the same amount of force ensures the keychain looks like a factory-made product rather than a loose DIY project.
Finishing Like a Master Craftsman
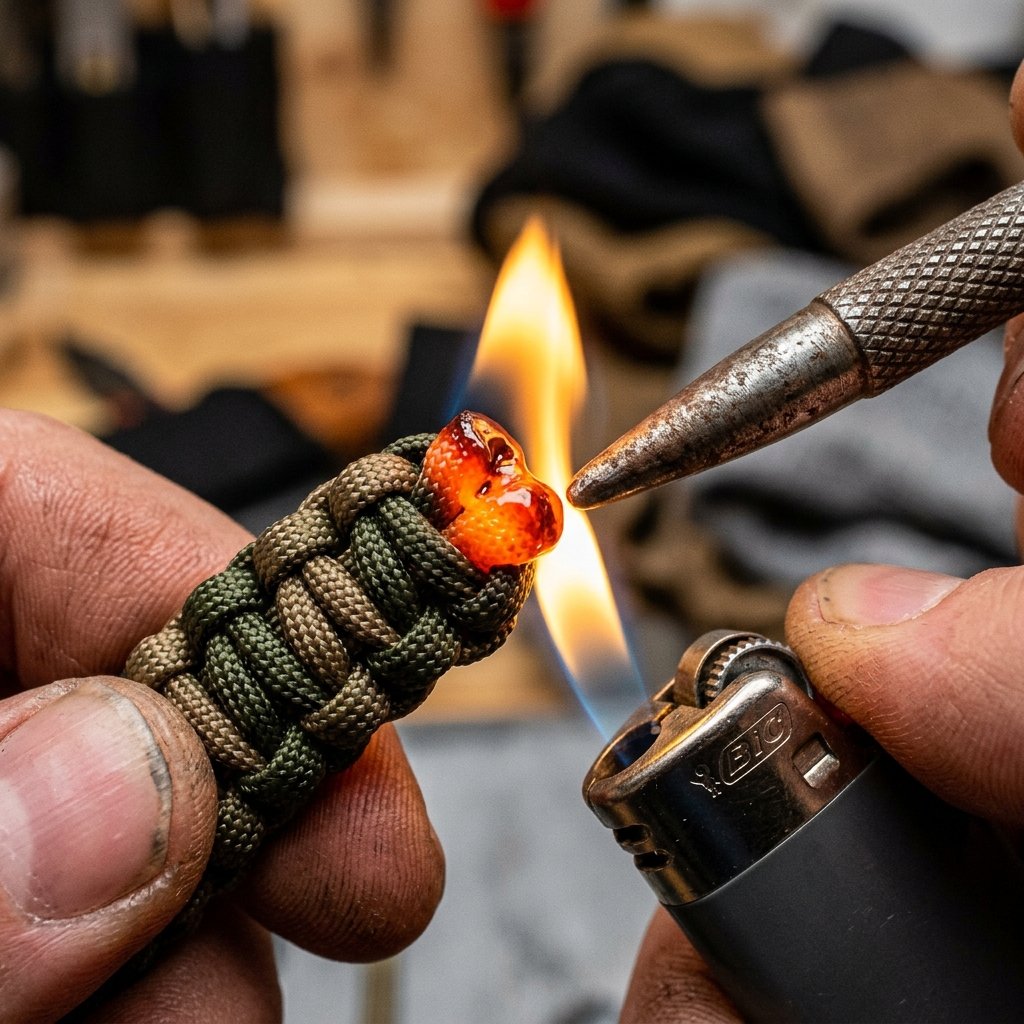
The difference between a ‘homemade’ look and a ‘handcrafted’ look lies in the finishing. When you reach the end of your weave (at the key ring), you will have two small tails of cord left. If you simply tie a knot, it will look bulky and amateur.
The ‘Cut and Melt’ Technique
To finish your keychain like a pro, follow this sequence:
- Use sharp scissors to trim the excess cord, leaving about 1/8th of an inch of tail.
- Use the blue part of the flame on your lighter (the hottest part) to carefully melt the tip of the cord until it turns into a molten mushroom shape.
- Quickly press the flat side of your lighter (or a metal spoon) against the molten end to ‘mushroom’ it down against the weave. This creates a permanent plastic bond that will never slip out.
| Feature | DIY Paracord Keychain | Store-Bought Tactical Brand |
|---|---|---|
| Cost | $1.40 | $18.00 – $28.00 |
| Durability | Extreme (550lb test) | Variable (often 100lb test) |
| Customization | Infinite colors/lengths | Limited to stock colors |
| Build Time | 10-15 Minutes | Instant (but no soul!) |
Safety Note: When melting paracord, work in a well-ventilated area. The molten nylon is extremely hot and will stick to skin—always use a tool like a lighter casing or a coin to press the ends down, never your fingers.
Advanced Modifications: Multi-Color & Survival Add-ons
Leveling Up Your Craft
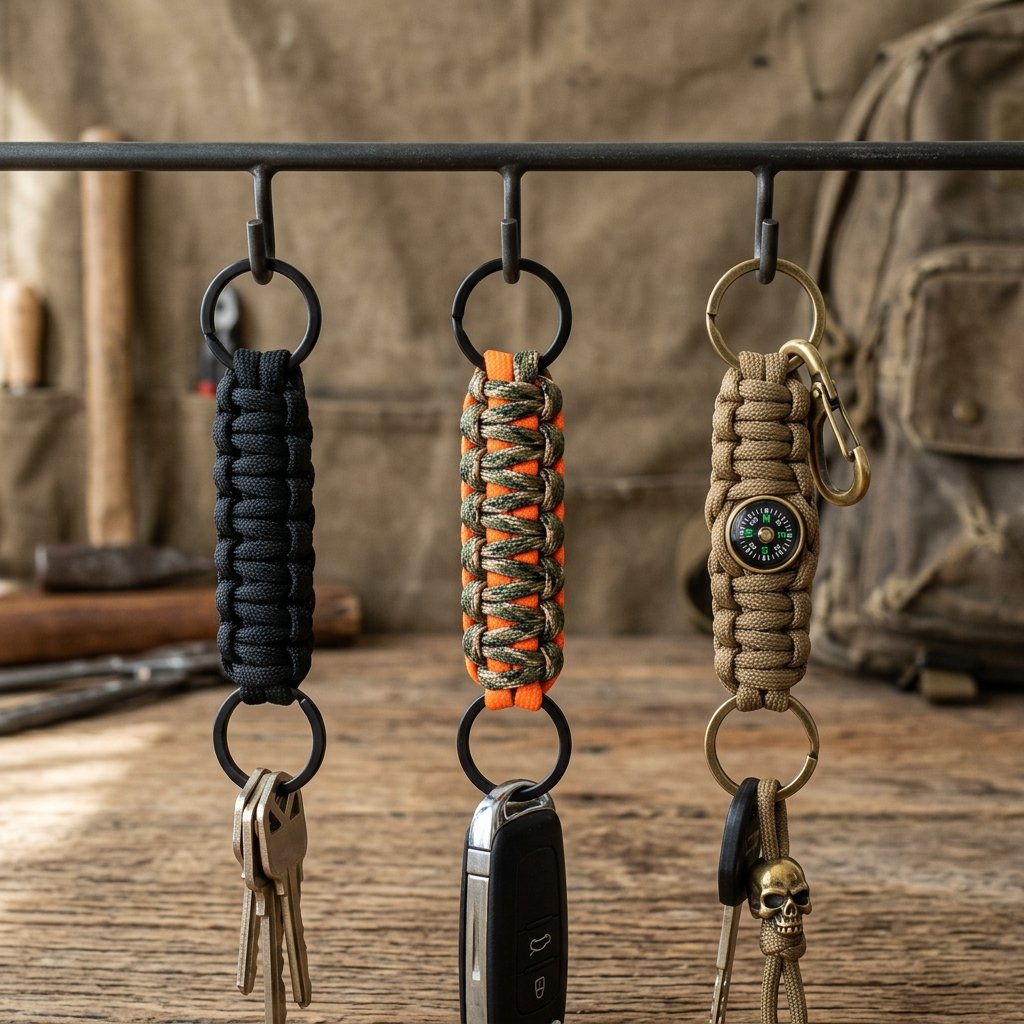
Once you have mastered the basic Cobra Weave, you can begin to experiment with more complex variations that add even more value to your gifts. For a two-tone effect, you can fuse two different colored pieces of paracord together at the start. This creates a striking visual contrast that highlights the intricate geometry of the weave.
Functional Upgrades
Consider adding these ‘survival’ elements to your keychain to make it even more rugged and useful:
- The Fire Starter: Thread a small ferrocerium rod toggle into the center of the weave. This turns a simple keychain into a life-saving tool that can start a fire in the wilderness.
- The Emergency Whistle: Use a carabiner that features a built-in emergency whistle on the gate.
- Reflective Cord: Use paracord with woven-in reflective tracers. This is a brilliant safety feature for kids’ backpacks or for finding dropped keys in the dark with a flashlight.
By adding these small details, you are moving from a simple craft to a piece of engineered equipment. This is the essence of the masculine-elegant DIY philosophy: every element must serve a purpose while looking impeccably sharp.
Conclusion
The Ultimate Frugal Victory
Crafting a heavy-duty paracord keychain is more than just a 15-minute project; it is a masterclass in resourceful gift-giving. You have taken basic, affordable materials and transformed them into a rugged, functional tool that the recipient will carry every single day. Whether it’s clipped to a father’s work bag, a student’s backpack, or a handy parent’s belt loop, this keychain serves as a constant reminder of your creativity and effort. In a world of disposable plastic trinkets, your handmade, 550-pound-test masterpiece stands out as a gift of true substance. So, grab your lighter, source some cord, and start weaving—your budget and your gift-recipients will thank you!

Makenzie is the founder and lead writer at MoneyHackTips.com — a personal finance blog dedicated to delivering street-smart financial wisdom for real people on real budgets. With 300+ published articles covering everything from debt management to investing fundamentals, Makenzie’s mission is to make every dollar work harder. When not writing about money hacks, Makenzie is testing frugal living strategies, optimizing side hustles, and helping readers build financial freedom from scratch.