
The Art of the Industrial Upcycle
There is a profound satisfaction in looking at a piece of literal garbage—a discarded soup can, a bulk-sized tomato paste tin, or a coffee canister—and seeing the potential for high-end interior design. The industrial aesthetic, characterized by raw textures, weathered metals, and utilitarian silhouettes, has dominated the luxury decor market for years. Brands like Restoration Hardware and West Elm often charge upwards of $30 to $50 for a single weathered metal planter. But for the resourceful DIYer, that same look is achievable for virtually $0 in base materials. By leveraging a few clever workshop tricks, we can turn thin, shiny aluminum into heavy, aged iron or cast concrete. This guide isn’t just about saving money; it’s about the rugged elegance of creating something beautiful from the mundane. We are going to dive deep into the process of cleaning, texturizing, aging, and planting these cans to ensure they last for years and provide a healthy home for your succulents. Whether you are a budget-savvy parent looking for a weekend project or a crafty gift-giver aiming for a masculine-elegant vibe, these planters are the ultimate solution for a high-impact, low-cost home upgrade.
Sourcing the Scraps: The Anatomy of a Perfect Planter

Selecting Your Cans
Not all cans are created equal. To achieve a high-end look, you want to look for variety in height and diameter. A cluster of three planters at different heights creates a more sophisticated visual hierarchy than a single isolated can. Look for the following types of containers in your recycling bin:
- Standard Soup Cans (10.5 oz): Perfect for small succulent offsets or ‘pups’.
- Tomato Paste Cans: Ideal for tiny, slow-growing varieties like Lithops (living stones).
- Bulk Vegetable Tins (100 oz): These make incredible statement centerpieces for larger succulent arrangements or even indoor herbs.
- Coffee Tins: Often have interesting ribbing that adds to the industrial ‘corrugated metal’ look.
The Cleaning and Safety Protocol
Before the transformation begins, you must prep the surface. Residual food oils will prevent paint from adhering, and sharp edges are a liability in a home environment.
Safety First: Always use a smooth-edge can opener if possible. If you use a traditional opener, use a metal file or heavy-duty sandpaper to grind down the inner rim until it is smooth to the touch.
Wash the cans in hot, soapy water and remove all paper labels. If there is stubborn adhesive residue, a small amount of cooking oil or a commercial adhesive remover will do the trick. Once clean, dry them immediately to prevent premature, uncontrolled rusting.
| Material Needed | Purpose | Estimated Cost |
|---|---|---|
| Discarded Tin Cans | The Planter Base | $0.00 |
| Dish Soap & Water | Cleaning | $0.05 |
| Sandpaper (80-120 grit) | Smoothing edges/Surface prep | $0.50 |
| Metal File | Safety/Smoothing | $1.00 |
The Faux-Finish Masterclass: Texture and Patina
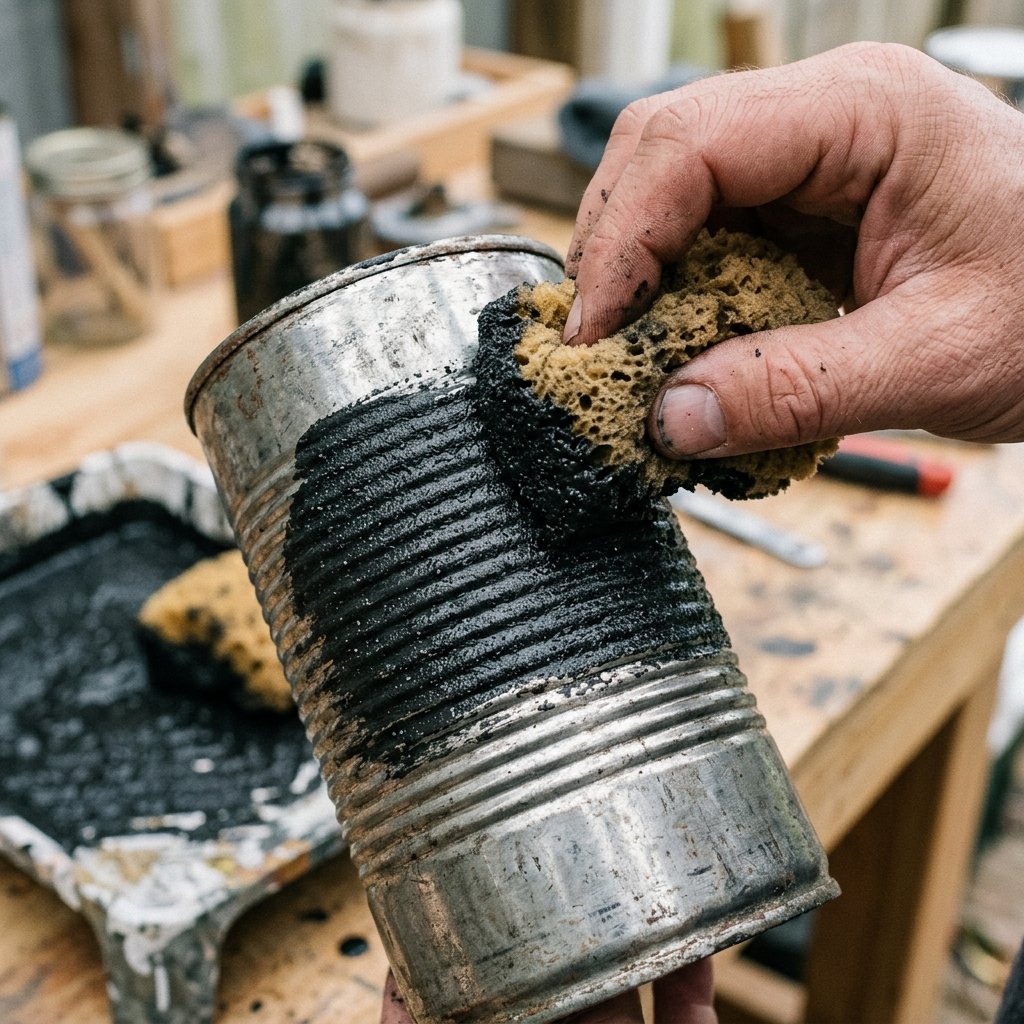
The Baking Soda Paint Trick
The secret to making a thin tin can look like heavy, expensive cast iron or ceramic is texture. Mixing simple baking soda into acrylic or chalk paint creates a gritty, stone-like consistency that hides the ‘tinny’ nature of the can. Use a ratio of 1 cup of paint to 1/4 cup of baking soda. Apply this mixture using a ‘stippling’ motion (dabbing with a brush or sponge) rather than smooth strokes. This creates a pitted surface that mimics weathered metal or concrete.
Creating the Industrial Patina
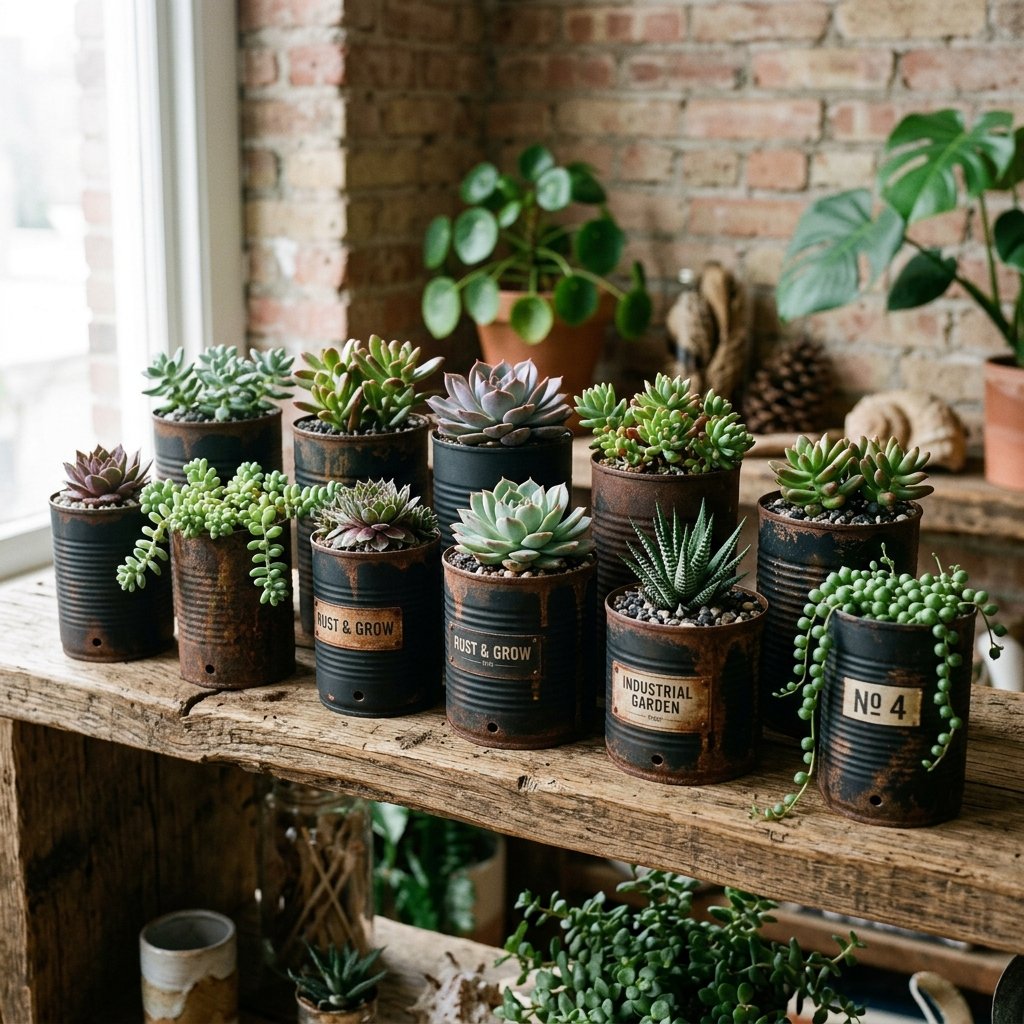
To achieve that rugged, masculine-elegant look, we need to layer colors. A flat matte black is a classic industrial base, but adding a faux-rust effect elevates the piece significantly. Here is how to create a high-end rust patina for pennies:
- Apply your textured base coat in matte black or dark charcoal.
- Once dry, take a sponge and lightly dab ‘burnt sienna’ or cinnamon-colored paint onto the areas where water would naturally collect (the bottom rim and the top edge).
- While the orange paint is still tacky, sprinkle a tiny amount of actual cinnamon or fine sand over it to add physical depth.
- Finish with a light mist of matte clear sealer to lock in the texture.
Pro Tip: For a truly authentic ‘oxidized’ look, use a dry brush technique with a metallic copper paint, then dab a sea-foam green (verdigris) over small sections to mimic aged bronze.
Structural Upgrades: Hardware, Feet, and Drainage
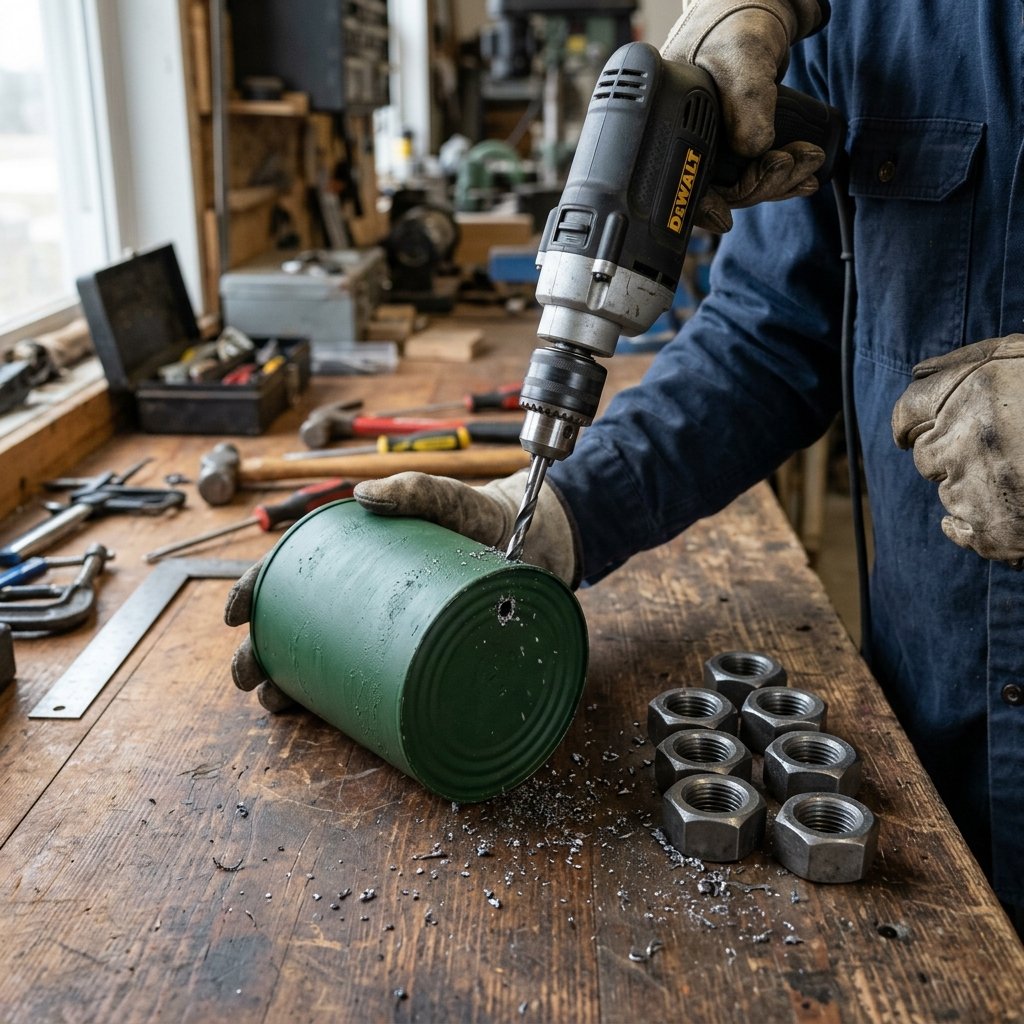
Ensuring Plant Health with Drainage
Succulents are the kings of drought, but they are the first to die in standing water. You must add drainage to your tin cans. Using a hammer and a large nail, or a power drill with a 1/4-inch metal bit, punch at least three holes into the bottom of the can. This is non-negotiable for long-term plant health.
Adding Industrial ‘Feet’
To prevent the bottom of the can from rusting onto your furniture and to elevate the aesthetic, add feet. This is where the ‘Industrial’ part of the design really shines. Visit your local hardware store’s bulk bin section to find these items for less than $1.00:
- Hex Nuts: Glue three or four large hex nuts to the bottom of the can using E6000 or hot glue. This gives the planter a mechanical, ‘gear’ look.
- Wooden Beads: For a ‘Mid-Century Modern meets Industrial’ vibe, use raw wooden beads.
- Old Bolts: Short, thick bolts glued to the base can act as sturdy, rugged legs.
| Hardware Item | Aesthetic Style | Cost per Planter |
|---|---|---|
| Large Hex Nuts (x4) | Machine/Factory | $0.40 |
| Short Carriage Bolts | Heavy Construction | $0.80 |
| Square Washers | Geometric/Modern | $0.60 |
The Greenery: Choosing and Planting Your Succulents
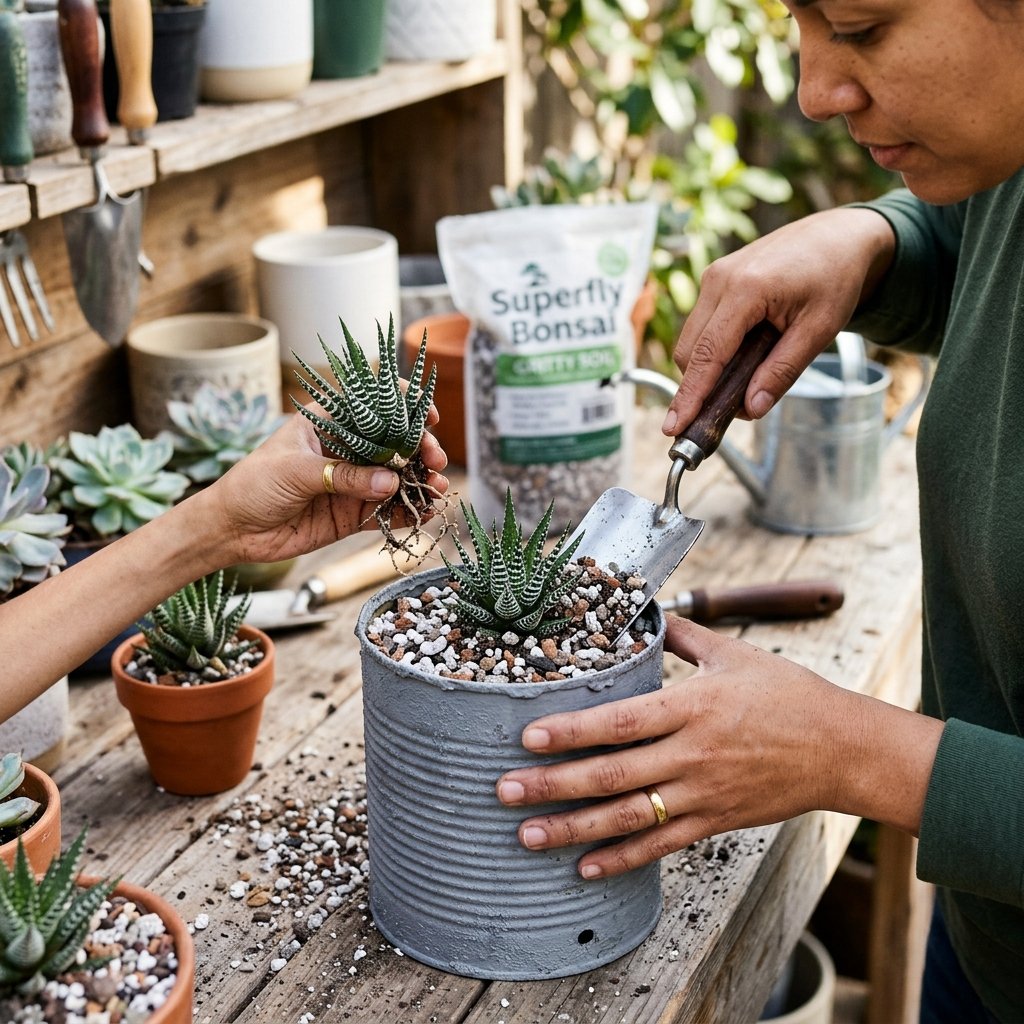
The Right Soil for the Job
Do not use standard potting soil. It retains too much moisture and will rot your succulents in a metal container. Instead, mix your own high-drainage substrate. A simple 1:1:1 ratio of potting soil, coarse sand, and perlite (or pumice) is perfect. This ensures that water moves through the tin can quickly, leaving the roots damp but not soaked.
Succulent Selection for Metal Planters
Since tin cans are relatively small, choose succulents that stay compact or ‘trail’ beautifully over the edges. Here are the best candidates for your new industrial vessels:
- Haworthia (Zebra Plant): Rugged, architectural, and very hardy. Their dark green and white stripes look stunning against a matte black or rusted can.
- Echeveria: These rosette-shaped beauties provide a soft contrast to the hard, industrial edges of the metal.
- Sedum Morganianum (Burro’s Tail): Perfect for taller coffee cans, as they will spill over the sides like green waterfalls.
- Crassula Ovata (Jade): A classic choice that can be pruned to look like a tiny, ancient tree in a metallic pot.
Mantra for Success: Succulents thrive on neglect. Water only when the soil is bone-dry to the touch, usually every 2-3 weeks depending on your climate.
The Budget Breakdown: DIY vs. High-End Boutique
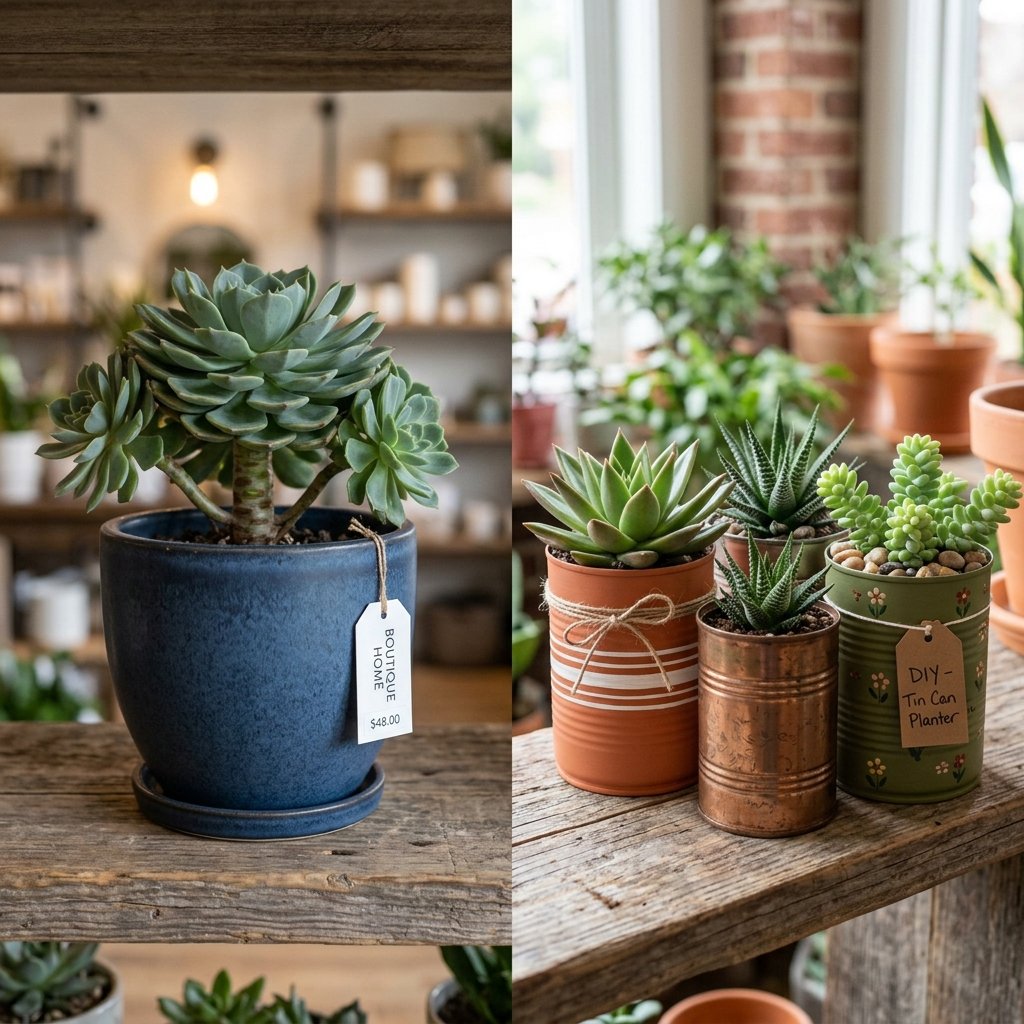
Why DIY Wins Every Time
When you walk into a boutique home store, you are paying for the brand, the shipping, and the retail markup. By upcycling tin cans, you are essentially ‘shopping your trash’ and only paying for the embellishments. Let’s look at how the math breaks down for a set of three industrial planters.
| Item | Store Bought (Set of 3) | DIY Tin Can (Set of 3) |
|---|---|---|
| Planter Vessels | $45.00 | $0.00 |
| Paint/Texture | Included | $1.50 (Pro-rated) |
| Hardware/Feet | Included | $1.20 |
| Potting Mix | $10.00 | $1.00 (Bulk) |
| Total Cost | $55.00 | $3.70 |
The savings are undeniable. By spending less than $5.00, you have created a bespoke set of decor that is indistinguishable from high-end alternatives. Furthermore, these make incredible, thoughtful gifts. A hand-crafted industrial planter with a live succulent is a perfect ‘thank you’ gift or a rugged addition to a father’s office desk.
Styling Your Industrial Collection
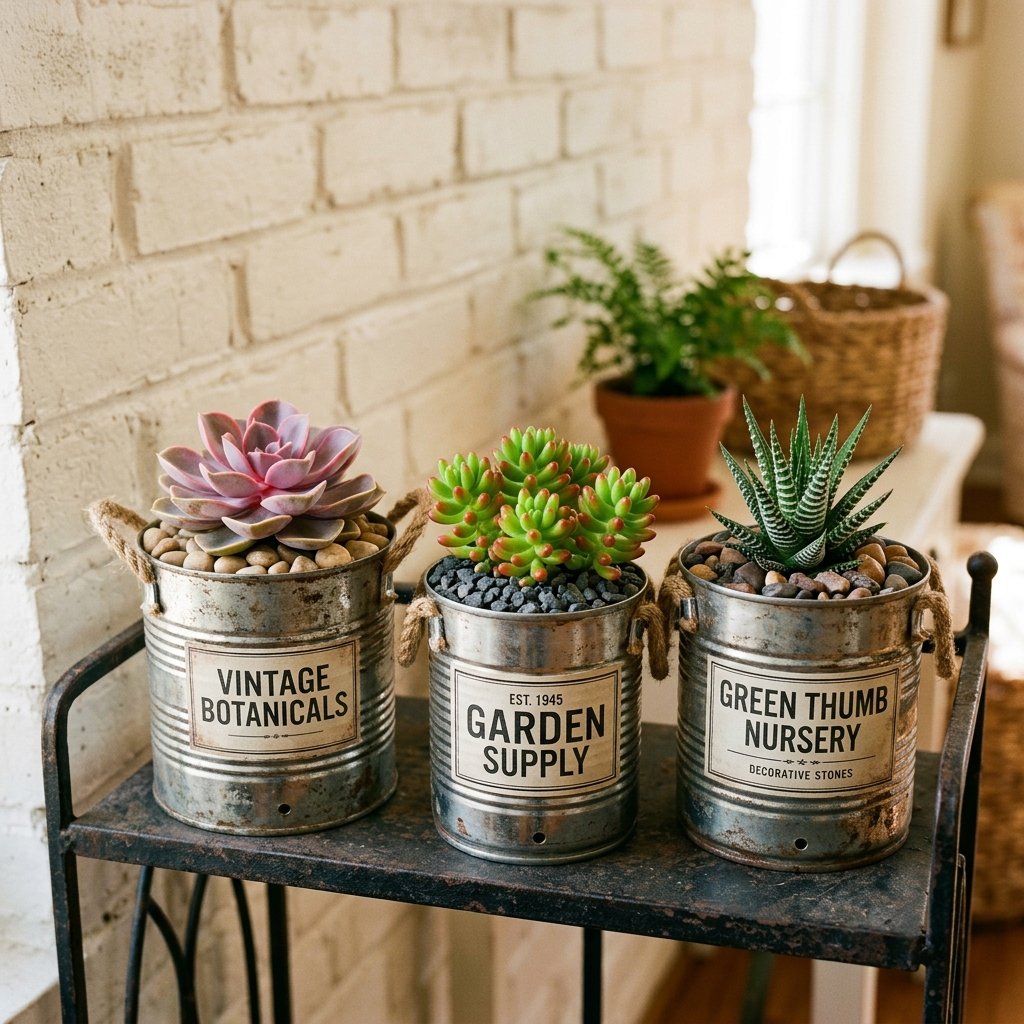
Creating a Cohesive Display
Now that your planters are finished, how you display them matters. Industrial design thrives on the ‘rule of three’ and the contrast between organic life and cold metal. Place your planters on a reclaimed wood shelf, a concrete countertop, or a metal bar cart. To enhance the look, consider these styling tips:
- Top Dressing: Cover the exposed soil with small black lava rocks, white pebbles, or even crushed glass. This hides the dirt and gives the planter a professional, ‘finished’ look.
- Grouping: Mix and match your finishes. Place a ‘rusted’ can next to a ‘matte black’ can and a ‘faux-concrete’ can for a curated, collected-over-time feel.
- Height Variation: If your cans are all the same size, use the ‘feet’ strategy to vary their heights, or place one on a small stack of vintage books.
These planters aren’t just for succulents, either. They work beautifully as desk organizers for pens, rugged candle holders (if you skip the drainage holes), or even as a unique way to serve wrapped snacks at a masculine-themed party. The versatility of the tin can is limited only by your imagination.
Conclusion
From Waste to Worth
The journey from a discarded soup tin to a high-end industrial centerpiece is a testament to the power of resourceful creativity. We’ve taken an item that usually ends its life in a recycling bin and transformed it into a piece of decor that exudes rugged elegance and practical style. For under $5, you have mastered the art of texture, the science of succulent care, and the satisfaction of the ‘Trash-to-Treasure’ philosophy. These planters serve as a daily reminder that with a little paint, some spare hardware, and a bit of ingenuity, luxury is accessible to everyone. So, the next time you finish a can of beans, don’t toss it. Instead, see it for what it truly is: a blank canvas for your next great DIY masterpiece. Happy crafting!

Makenzie is the founder and lead writer at MoneyHackTips.com — a personal finance blog dedicated to delivering street-smart financial wisdom for real people on real budgets. With 300+ published articles covering everything from debt management to investing fundamentals, Makenzie’s mission is to make every dollar work harder. When not writing about money hacks, Makenzie is testing frugal living strategies, optimizing side hustles, and helping readers build financial freedom from scratch.