The Art of the Rugged Gift: Why Concrete Wins
Finding the perfect gift for the man who already has a garage full of tools and a closet full of gadgets is a notorious challenge. You want something that speaks to a sense of practical elegance—something rugged, functional, and undeniably cool. Enter the Industrial DIY Concrete Desk Lamp. This isn’t just a lighting fixture; it’s a heavy-duty piece of functional art that anchors a home office or a bedside table with a raw, architectural presence. By combining the brutalist beauty of wet-cast concrete with the warm, nostalgic glow of a vintage Edison bulb, you’re creating a gift that looks like it stepped out of a high-end boutique in SoHo, but for a fraction of the price. As a frugal maker, you know the secret: luxury isn’t about the price tag; it’s about the craftsmanship and the resourcefulness used to bring a vision to life. Let’s get our hands dirty and build something that will last a lifetime.
The Blueprint: Materials and Budget Breakdown

One of the most satisfying aspects of concrete crafting is the incredible cost-to-value ratio. A single 80-pound bag of pre-mixed concrete costs less than $6 and can produce nearly a dozen lamps. When you compare that to the $150+ price tags found at modern furniture retailers, the savings are staggering. For this project, we are focusing on high-quality components where they matter—the electrical bits—while being clever and resourceful with our mold-making materials.
Budget Comparison: DIY vs. High-End Retail
| Item | Retail Store Price | DIY Project Cost |
|---|---|---|
| Concrete Base | $85.00 | $0.50 (Pro-rated) |
| Edison Bulb | $15.00 | $4.00 |
| Cloth-Covered Cord Kit | $45.00 | $12.00 |
| Labor & Branding | $50.00+ | $0.00 (Handmade Pride) |
| Total | $195.00 | $16.50 |
By sourcing your electrical components online or at local hardware stores and using upcycled containers for your molds, you achieve a 91% savings. This allows you to spend your budget on a truly premium, vintage-style braided cord that adds that final touch of masculine elegance.
The Mold Masterclass: Upcycling Household Containers

You don’t need expensive silicone molds to create a professional finish. The secret of the budget-savvy crafter lies in the recycling bin. Look for containers with smooth interiors and interesting geometric shapes. Plastic juice bottles, cardboard milk cartons, and even large yogurt tubs make excellent single-use molds. The key is ensuring the material is sturdy enough to hold the weight of the wet concrete without bowing.
“The beauty of concrete is that it takes the exact texture of its vessel. A smooth plastic mold yields a polished, marble-like finish, while a textured cardboard mold provides a raw, industrial grit.”
- Select Your Shape: A 1-quart milk carton provides a classic square pillar shape that fits perfectly on a desk.
- Prep the Electrical Path: You must create a void for the light socket. Use a piece of 1-inch PVC pipe or a dedicated socket housing wrapped in painters tape to ensure it can be removed later.
- The Cord Exit: Drill a small hole near the bottom of your mold. Thread a straw through this hole—this will create the channel for your electrical cord to exit the base of the lamp.
- Lubrication: Lightly coat the inside of your mold with a thin layer of vegetable oil or cooking spray. This acts as a release agent, making it easy to peel the mold away once the concrete has cured.
The Perfect Pour: Mixing for Strength and Style

Mixing concrete is as much an art as it is a science. For a desk lamp, you want a high-strength, fine-grain mix. If you are using standard concrete, consider sifting out the large gravel to achieve a smoother aesthetic. The goal is a consistency similar to thick peanut butter—not so runny that it leaks, but not so dry that it won’t settle into the corners of your mold.
The Golden Ratio for Small Batches
| Ingredient | Ratio/Measurement | Purpose |
|---|---|---|
| Concrete Mix (Sifted) | 4 Parts | Structural Base |
| Water | 1 Part (Add slowly) | Activation Agent |
| Liquid Cement Color (Optional) | A few drops | For a charcoal or jet-black look |
Once mixed, pour the concrete into your mold in 2-inch layers. After each layer, tap the sides of the mold vigorously with a hammer or vibrate the table. This removes trapped air bubbles that can cause unsightly pits (unless, of course, you prefer the ‘pock-marked’ industrial look). Fill the mold to your desired height and insert your socket-void tool into the center, securing it with tape so it doesn’t float upward as the concrete sets. Let the piece cure for at least 24 to 48 hours in a cool, dry place.
Lighting the Spark: Safe and Simple Wiring
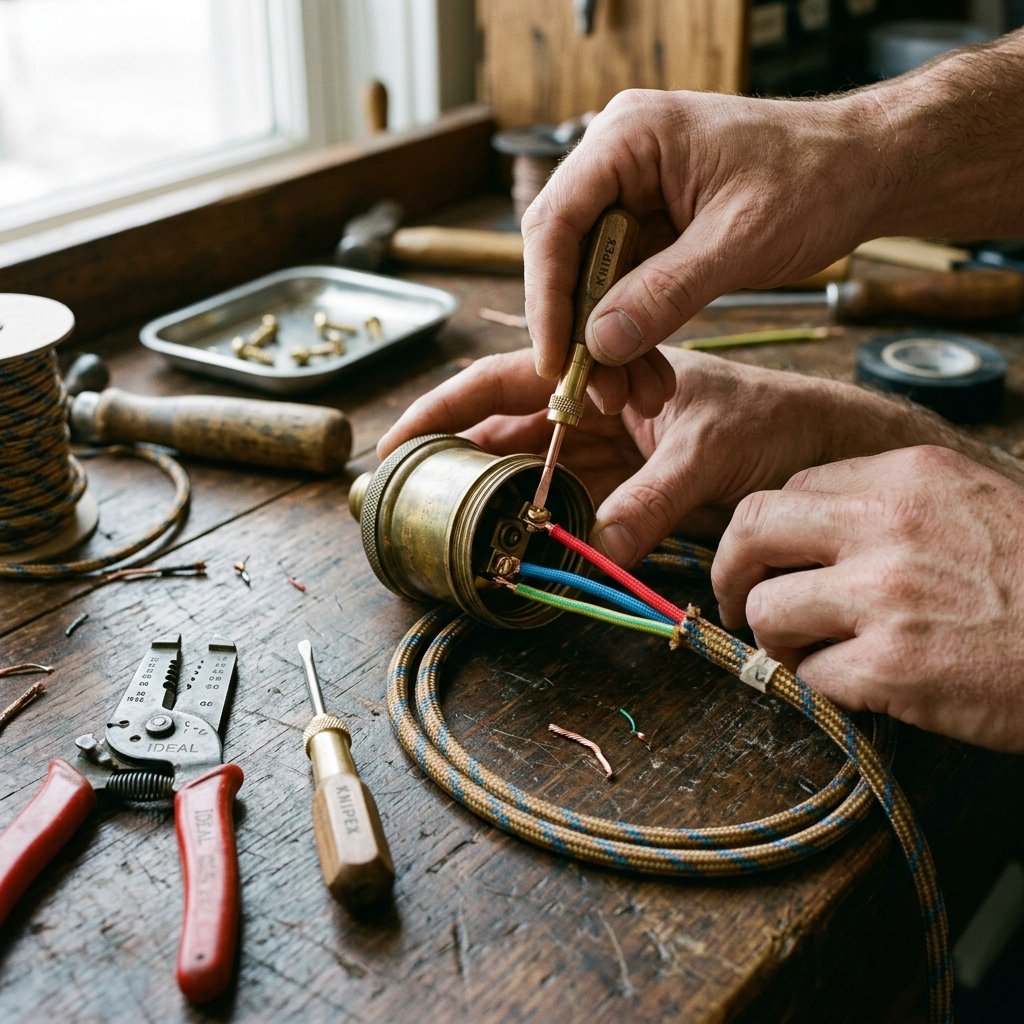
Now that your base is cured and you’ve peeled away the mold, it’s time for the electrical assembly. While wiring might seem intimidating, it is a straightforward process of connecting hot to hot and neutral to neutral. For a gift-worthy lamp, I always recommend a pre-wired cord set with an inline switch; it ensures safety and provides a professional finish without the need for complex soldering.
SAFETY FIRST: Always ensure the lamp is unplugged during assembly. If you are using a metal socket, ensure it is properly grounded. When in doubt, consult a local electrician or use a UL-listed ‘plug-and-play’ lamp kit.
- Thread the Cord: Pass your cord through the hole you created with the straw at the base and up through the center void.
- Secure the Socket: Use a heavy-duty epoxy or a threaded pipe nipple to secure the socket into the top of the concrete base.
- The Connection: Strip about 1/2 inch of insulation from the cord wires. Wrap the wires around the terminal screws on the socket (usually the ribbed wire goes to the silver screw, and the smooth wire goes to the brass screw) and tighten firmly.
- The Final Test: Before adding the bulb, double-check that no stray copper strands are touching other metal parts.
Rugged Refinement: Finishing Touches for a High-End Look
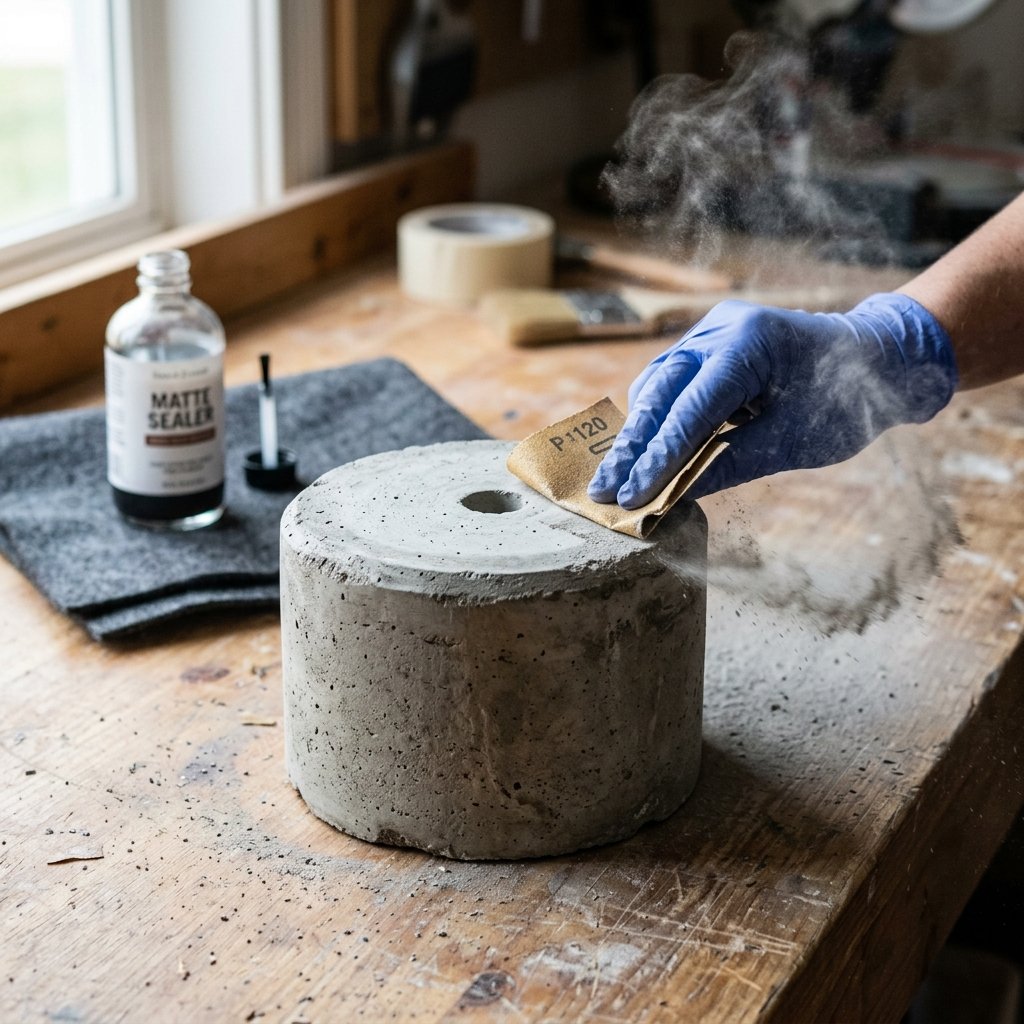
The difference between a ‘craft project’ and a ‘designer piece’ lies in the finishing. Raw concrete can be dusty and abrasive, which isn’t ideal for a polished wooden desk. To elevate the lamp, we need to apply some masculine-elegant finishes.
Finishing Checklist
- Sanding: Use 120-grit sandpaper to smooth out the edges and 400-grit for a silky-smooth top surface. Sanding also reveals the beautiful aggregate (tiny stones) inside the concrete.
- Sealing: Apply a matte water-based sealer or a coat of beeswax. This darkens the concrete slightly, giving it a rich, wet look while preventing dust and stains.
- The Base: To protect furniture, glue a piece of thick cork or dark grey felt to the bottom of the lamp. This also hides the cord channel entry.
- The Bulb: Choose an oversized Edison bulb with a spiral filament. The warmth of the amber glass perfectly balances the coldness of the concrete.
By taking these extra 15 minutes to sand and seal, you transform the object from a block of stone into a sophisticated piece of home decor that any man would be proud to display.
Conclusion
The Ultimate Handmade Statement
You’ve done it. With a little bit of patience and a few dollars’ worth of materials, you’ve crafted a bespoke industrial masterpiece. This DIY concrete desk lamp is more than just a gift; it’s a testament to your resourcefulness and your eye for design. It’s heavy, it’s durable, and it carries a story of creation that no store-bought item can match. Whether it’s for a Father’s Day surprise, a graduation gift, or a ‘just because’ gesture for the man who has everything, this lamp will stand as a bright reminder of your crafty expertise. So, go ahead—wrap it up in some simple brown butcher paper, tie it with a bit of twine, and watch his face light up when he realizes you built this rugged beauty from scratch. Happy making!

Makenzie is the founder and lead writer at MoneyHackTips.com — a personal finance blog dedicated to delivering street-smart financial wisdom for real people on real budgets. With 300+ published articles covering everything from debt management to investing fundamentals, Makenzie’s mission is to make every dollar work harder. When not writing about money hacks, Makenzie is testing frugal living strategies, optimizing side hustles, and helping readers build financial freedom from scratch.