
The Ultimate High-End Hack for Frugal Decorators
Let us face a hard truth about home decor: giant, heavy, gorgeous arched mirrors are outrageously expensive. If you have ever flipped through a high-end catalog or scrolled through a trendy interior design feed, you have undoubtedly seen those breathtaking, vintage-inspired floor mirrors. They open up a space, bounce natural light beautifully across the room, and serve as a massive focal point. But when you check the price tag, you are quickly slammed with a reality check of $800 to $1,500. For the frugal DIYers, resourceful parents, and budget-savvy home decorators among us, dropping a mortgage payment on a piece of reflective glass is simply out of the question.
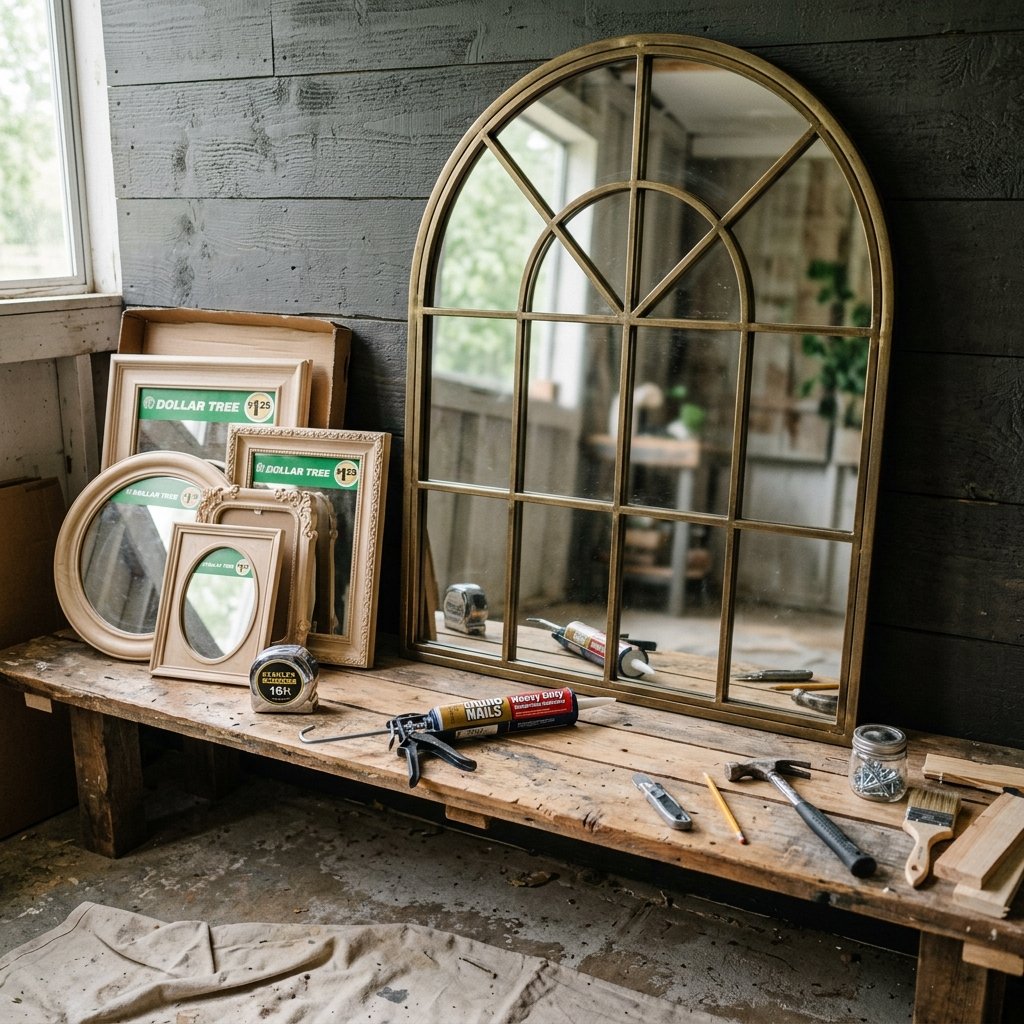
But what if I told you that you could capture that exact same luxurious, masculine-elegant, architectural vibe for under $40? Welcome to the ultimate trash-to-treasure masterclass. By utilizing clever engineering, a little bit of rugged elbow grease, and a stack of $1.25 framed mirrors from your local Dollar Tree, we are going to build a spectacular, giant DIY arched windowpane mirror. This project perfectly marries the crafty ingenuity of a master upcycler with the practical, heavy-duty skills of a weekend woodworker.
“True style isn’t about how much money you spend; it’s about how resourcefully you can manipulate inexpensive materials to look like a million bucks.”
Whether you are a budget bride looking for an epic seating chart display, a handy parent wanting to upgrade a master bedroom on a dime, or a clever crafter who loves the thrill of a high-end dupe, this project is designed for you. We will walk through everything from safely extracting the glass panes and building a rock-solid structural backing, to mastering the exact grid math and applying a custom faux-antique metal finish. Roll up your sleeves, grab your heavy-duty adhesive, and let’s turn cheap plastic frames into a heavy, stunning architectural masterpiece.
Section 1: The Master Plan & Budget Breakdown
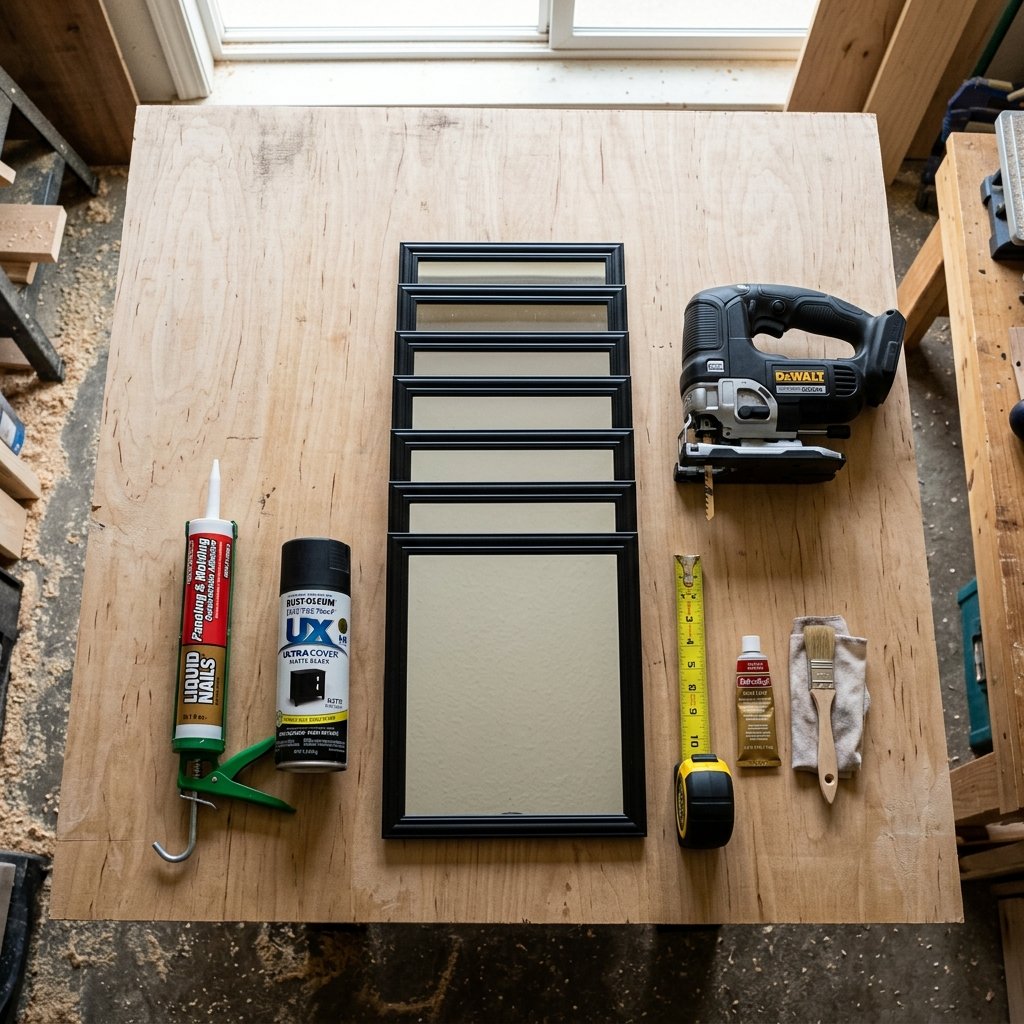
Every great DIY project starts with a solid blueprint and a ruthless budget. To achieve the look of a massive, multi-paned arched window mirror, we need to create a grid system using identical, small mirrors. The Dollar Tree is a goldmine for this. They consistently stock basic 5×7 or 8×10 plastic-framed mirrors. For a giant floor mirror (approximately 6 feet tall), you will need about 20 to 30 of these individual mirrors, depending on your desired width and height.
Materials Gathering
Before you begin, you need to assemble your materials. The beauty of this project lies in its accessibility. You can find almost everything at your local dollar store and hardware store.
- Dollar Tree Framed Mirrors: 25 to 30 units. Inspect them in the store to ensure the glass isn’t scratched or warped.
- Backing Material: A 4×8 foot sheet of 1/4-inch plywood, MDF, or, for a zero-power-tool alternative, heavy-duty foam insulation board.
- Adhesive: High-grab construction adhesive (like Liquid Nails or Gorilla Heavy Duty) and standard hot glue.
- Trim & Framing: Flexible PVC trim or thin wood lattice strips to create the borders and the arch.
- Paint & Finish: Matte black spray paint, and a metallic wax like Rub ‘n Buff (Antique Gold or Spanish Copper) for that heavy, masculine-elegant cast-iron look.
- Tools: A jigsaw (if using wood), a heavy-duty utility knife, a T-square, a tape measure, and safety goggles.
The Frugal Reality Check
To truly appreciate the value of your labor, let’s look at the numbers. Building this yourself isn’t just a fun weekend craft; it is an incredible financial victory. Below is a breakdown of what you would pay retail versus our resourceful DIY method.
| Item / Expense | Store-Bought (High-End Retail) | Zero-Budget / Dollar Tree DIY |
|---|---|---|
| The Mirror Base / Glass | $450 – $800 | $35.00 (28 Dollar Tree Mirrors) |
| Frame Structure & Backing | $200 – $350 (Solid Wood/Metal) | $15.00 (1/4-inch Plywood or Foam) |
| Finish & Hardware | $100 – $150 (Custom Patina) | $12.00 (Spray Paint & Rub ‘n Buff) |
| Total Estimated Cost | $750 – $1,300+ | $62.00 |
By investing about 4 to 6 hours of your time, you are effectively paying yourself hundreds of dollars an hour in savings. That is the ultimate budget-savvy flex.
Section 2: Prepping the Base & Cutting the Perfect Arch
The foundation of your mirror dictates its durability. If you are building a massive 6-foot floor mirror, it needs a spine. Flimsy cardboard will not survive the weight of 30 glass panes. We recommend using 1/4-inch plywood or MDF for a rugged, permanent piece of furniture. However, if you live in an apartment, lack power tools, or need something lightweight, thick rigid foam insulation board (the pink or blue panels from the hardware store) is a brilliantly resourceful alternative.
The String and Pencil Method
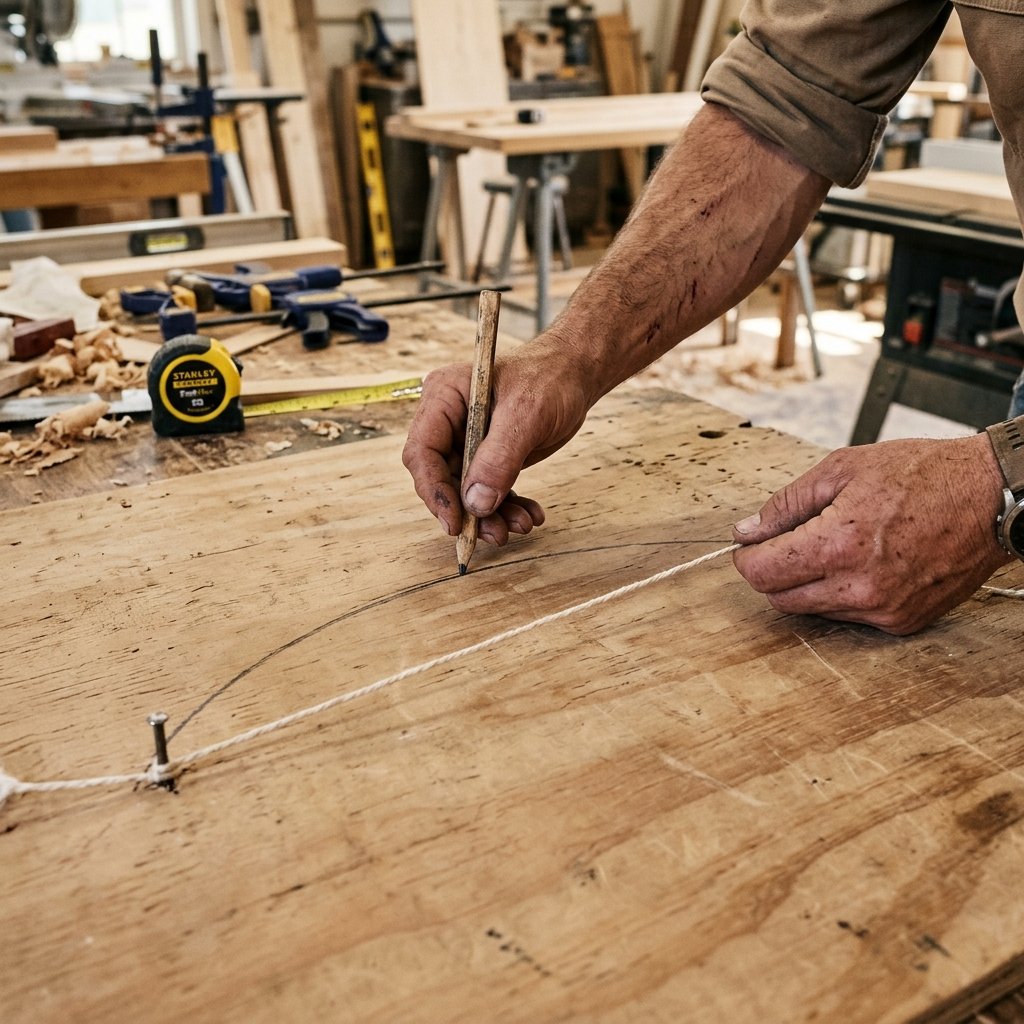
Creating a perfectly symmetrical arch can seem intimidating, but it requires zero advanced geometry—just a clever old-school carpenter’s trick. First, determine the total width of your mirror based on how many glass panes you want horizontally. Let’s say you want it 3 panes wide. Lay your panes side by side with a 1/2-inch gap between them to determine the exact width of your backing board.
- Cut your rectangular base first, leaving extra length at the top for the arch.
- Find the exact top-center point of your board and mark it.
- Measure down from the top edge by exactly half the width of your board. This is your anchor point.
- Tap a small nail into this anchor point. Tie a piece of string to the nail, and tie a pencil to the other end so the string length equals exactly half the width of your board.
- Pull the string taut and sweep the pencil from one side of the board, up over the top, and down to the other side. You now have a flawless, mathematically perfect half-circle.
Cutting the Backing
If you are using plywood, clamp the board securely to a sturdy workbench. Put on your safety glasses, grab your jigsaw, and slowly follow your pencil line. Let the blade do the work; do not force it, or you risk splintering the wood. If you are using foam board, a fresh, razor-sharp utility knife is your best friend. Make several shallow passes rather than trying to cut all the way through on the first slice. This prevents the foam from tearing and gives you a crisp, clean edge.
“Measure twice, cut once, and always use a fresh blade. A dull tool is the enemy of a high-end finish.”
Section 3: Disassembling the Dollar Tree Mirrors
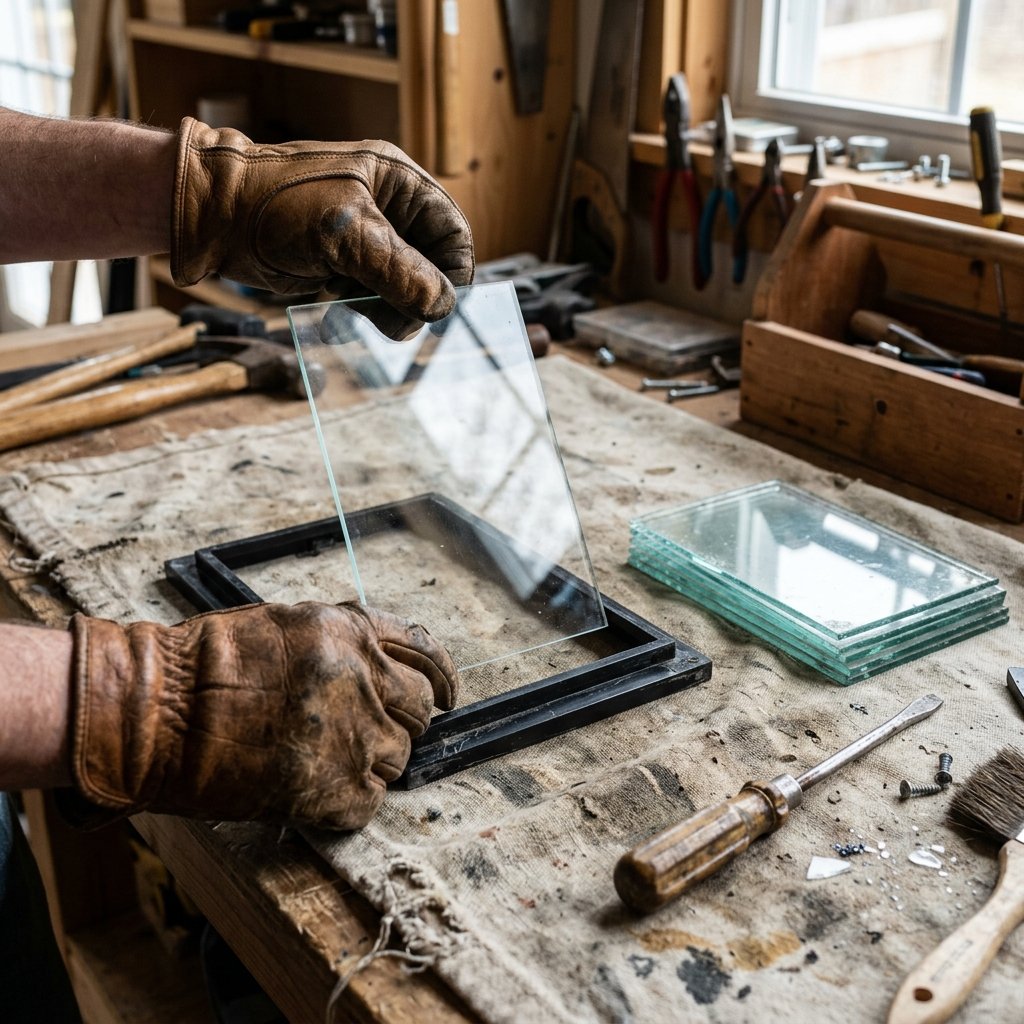
Now comes the slightly tedious, but highly satisfying, deconstruction phase. Dollar Tree mirrors are cheap for a reason—the plastic frames are flimsy, and the glass is thin. This works to our advantage for easy removal, but it demands respect and caution. You are handling raw glass, and safety is paramount.
Safe Extraction Techniques
Set up a dedicated workstation. Lay down an old drop cloth or a thick blanket to catch any accidental shards. Wear protective leather or cut-resistant gloves and safety glasses. Do not skip the protective gear; a trip to the emergency room will instantly ruin your budget-savvy savings!
- Flip the mirror face down. Most cheap frames use small metal tabs or a bead of hot glue to hold the cardboard backing in place.
- Use a flathead screwdriver or needle-nose pliers to bend the metal tabs straight up.
- Remove the cardboard backing. Carefully push the glass pane out from the front of the frame. If it is glued in, take your utility knife and gently score along the edge to break the glue seal.
- Once the glass is free, immediately wipe it down with glass cleaner. You want to remove any factory dust or fingerprints now, as it will be harder to clean once it is glued into the deep grid of your new frame.
- Stack the clean glass panes safely out of the way.
Upcycling the Leftovers
As a true crafty upcycler, you know that nothing goes to waste. You are now left with 30 empty plastic frames. Do not throw them away! These can be spray-painted and glued to a blank wall to create faux wainscoting or picture-frame molding. They can also be used to frame family photos for an epic, budget-friendly gallery wall. Resourcefulness is about maximizing every single material.
Section 4: The Paned Grid Layout & Adhesion Tactics
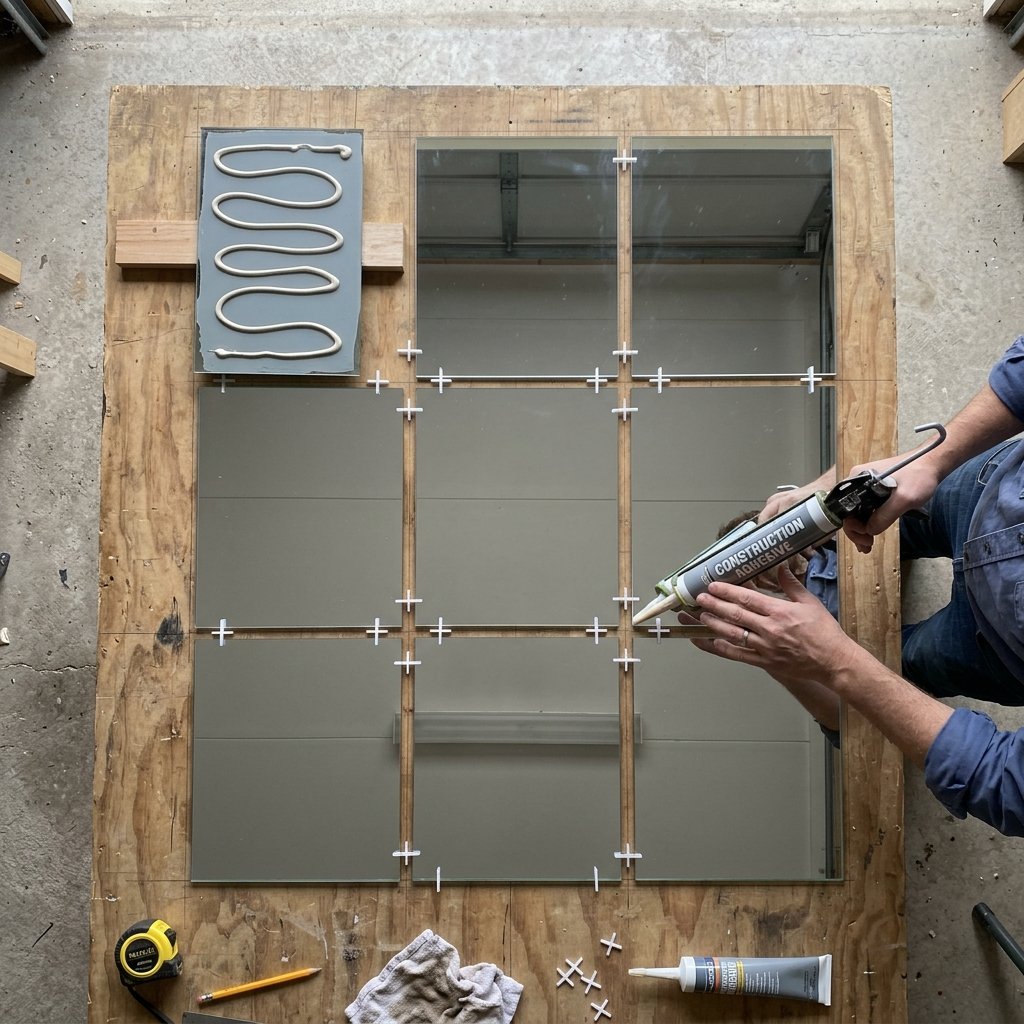
This is the make-or-break moment of the project. The difference between a mirror that looks like it came from a luxury boutique and one that looks like a chaotic middle-school craft project is the precision of your grid layout. A windowpane mirror relies on perfect spacing to create the illusion of a single, massive piece of glass divided by iron mullions.
Drafting the Grid
Lay your cut backing board flat on the floor. Begin dry-fitting your glass panes. You need to account for the gaps between the mirrors, which will later be covered by your trim (the mullions). A standard gap is usually 1/2 inch to 3/4 inch. Use a T-square and a long straight edge to draw a physical grid directly onto your backing board. This grid will be your map. Do not rely on eyeballing it; use tile spacers or small blocks of scrap wood to ensure the gap between every single mirror is exactly the same.
The Glue Strategy
When attaching heavy glass to wood, standard craft glue will fail. You need industrial strength. However, some heavy-duty construction adhesives contain solvents that can eat through the silver backing of the mirror, ruining the reflective surface. You must use an adhesive specifically labeled as “Mirror Safe” or a high-quality 100% silicone sealant.
- Step 1: Apply the mirror-safe adhesive in a wavy pattern or large dollops on the back of the glass pane. Keep the glue about an inch away from the edges so it doesn’t squish out when pressed.
- Step 2: Add a dab of hot glue to the four corners of the glass. The hot glue acts as a clamp, holding the mirror instantly in place while the heavy-duty adhesive cures over 24 hours.
- Step 3: Carefully press the glass into its designated square on your drawn grid. Apply firm, even pressure.
- Step 4: Repeat this process row by row, constantly checking your spacing with your straight edge and spacers.
“Precision is the hallmark of craftsmanship. Take your time with the grid. A 1/8-inch mistake at the bottom will become a 1-inch disaster at the top.”
Once all the square and rectangular panes are down, you will be left with the arched top. For the arch, you will need to map out where the glass overlaps the curved edge. You can either use a specialized glass cutter to score and snap the mirrors into curved shapes (a great skill for the handy DIYer to learn!), or you can simply let the wooden frame/trim cover the square edges of the glass at the top, creating the illusion of a curved pane.
Section 5: Framing & The Faux-Metal Finish
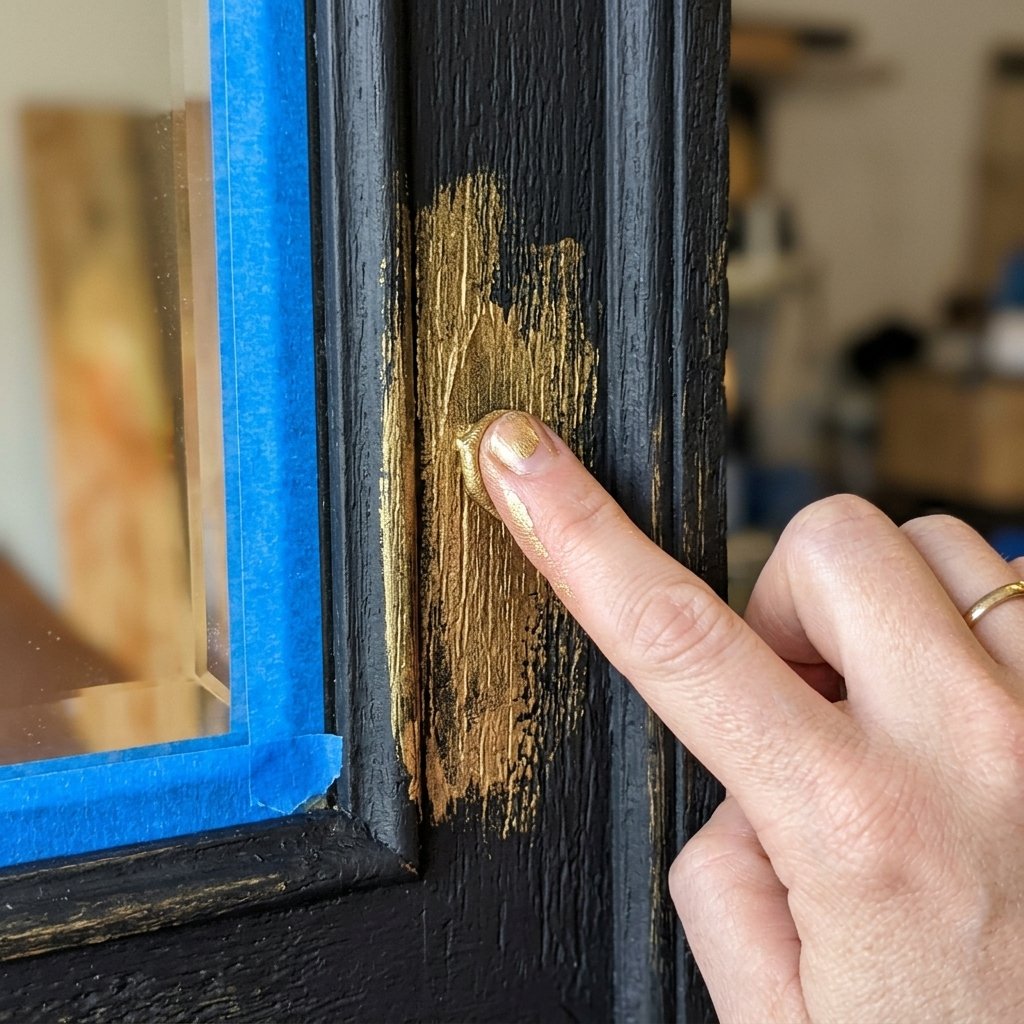
With the glass securely mounted, it is time to build the windowpane grid and the outer frame. This is where the magic happens. We are going to take cheap, lightweight wood or flexible PVC trim and make it look like heavy, forged antique iron or brass.
Building the Mullions
For the grid lines (mullions) between the mirrors, use thin wood lattice strips or flat screen molding. Measure and cut the vertical strips first, running them continuously from the bottom of the mirror to the top of the arch. Then, measure and cut the shorter horizontal pieces to fit snugly between the vertical strips. Secure them directly to the backing board (in the gaps between the glass) using wood glue and small brad nails, or heavy-duty construction adhesive.
For the outer curved frame, flexible PVC trim is a lifesaver. It bends easily around the arch without snapping. Secure it around the entire perimeter of your backing board to encapsulate the raw edges of the plywood and the outer glass panes.
The Faux-Antique Painting Technique
To achieve a rugged, masculine-elegant, or antique glam finish, you need layers. A flat coat of paint looks cheap; layered texture looks expensive.
- The Base Coat: Tape off all the glass panes meticulously using painter’s tape and old newspaper. Spray the entire frame and grid with a matte black or oil-rubbed bronze spray paint. The matte finish acts as a forged iron base.
- The Texture: Mix a small amount of baking soda into some black acrylic paint to create a textured paste. Dab this randomly onto the frame, especially at the joints. This mimics the look of cast metal or old welding joints.
- The Metallic Highlighting: Once the black base is completely dry, take your tube of Rub ‘n Buff (Antique Gold or European Gold). Put a tiny amount on your fingertip or a dry, stiff brush. Lightly graze the high points, edges, and corners of the trim. Do not cover the black completely; let the dark base show through the recesses. This creates an authentic, aged patina that looks incredibly high-end.
Section 6: Mounting, Styling, and Pro-Tips
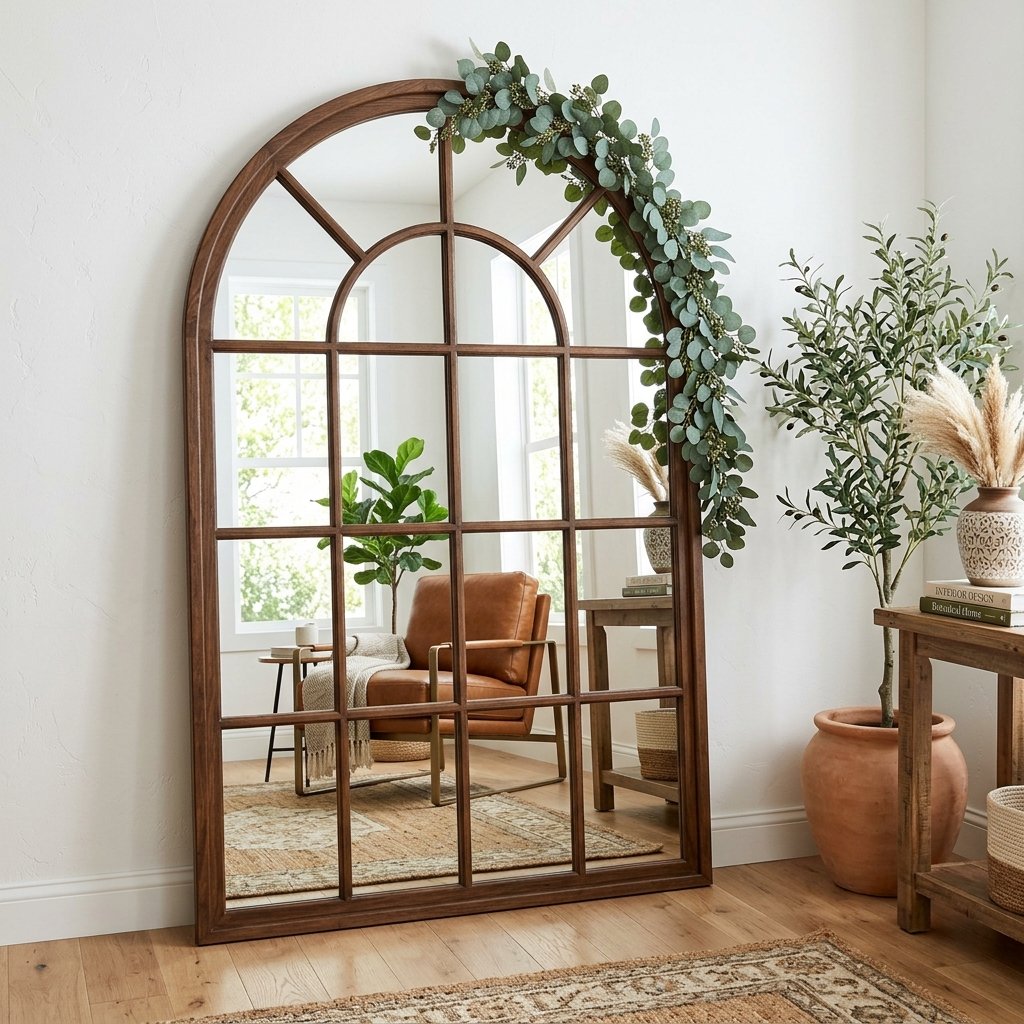
Your giant DIY arched mirror is now fully assembled and beautifully finished. It looks heavy, expensive, and utterly stunning. But before you step back to admire your handiwork, we must discuss installation and styling. Because this piece is large and contains real glass, safety and secure mounting are critical, especially for handy parents with kids or pets running around.
Safe Anchoring and Leaning
Even if your mirror is built on a lighter-weight foam board, it still poses a tipping hazard. If you built it on 1/4-inch plywood, it will be quite heavy. Most people prefer to lean these giant arched mirrors against the wall for that effortless, modern-rustic studio look. However, you must secure it.
- Attach heavy-duty D-rings to the top left and right corners of the wooden backing.
- Install heavy-duty drywall anchors into the wall directly behind the top of the mirror.
- Run a strong piece of picture wire or a zip-tie through the D-rings and secure them to the wall anchors. This creates an invisible tether that allows the mirror to lean naturally while completely eliminating the risk of it falling forward.
- Place a strip of rubber shelf liner or a non-slip furniture pad under the bottom edge of the mirror to prevent it from sliding on hardwood or tile floors.
Styling Your Masterpiece
Now for the fun part. This mirror is incredibly versatile. For a budget wedding, place it on an easel, use a white chalk marker to write your seating chart on the glass panes, and drape it with a lush, budget-friendly faux eucalyptus garland. For a masculine-elegant bedroom, lean it next to a leather armchair, add a rugged concrete valet tray on a nearby side table, and let the mirror bounce the warm light of a vintage Edison bulb across the room. For a bright, airy living room, position it opposite a window to instantly double the natural light and make your space feel twice as large.
Keep a bottle of glass cleaner and a microfiber cloth handy. The grid design means there are lots of corners for dust to settle, but a quick weekly wipe-down will keep your $40 masterpiece sparkling like a $1,000 designer original.
Conclusion
The Final Reflection on a Frugal Masterpiece
Stepping back and looking at your giant DIY arched mirror, it is almost hard to believe that its humble beginnings were a stack of $1.25 plastic frames from the local Dollar Tree. By combining resourceful materials, clever construction techniques, and a little bit of artistic faux-finishing, you have successfully bypassed the outrageous retail markups of the interior design industry. You didn’t just save nearly $1,000; you built a custom, durable, and breathtaking piece of architectural decor with your own two hands.
This project is the ultimate testament to the frugal DIYer’s mindset: with patience, a willingness to get a little dusty, and an eye for potential, there is absolutely no limit to the luxury you can create on a budget. Whether you are using it to elevate your home’s entryway, adding a touch of grandeur to your bedroom, or creating an unforgettable piece of wedding decor, this mirror will be a conversation starter for years to come. So keep your jigsaw sharp, keep your creative eyes open in the dollar store aisles, and never settle for paying retail when you have the power to build it better yourself. Happy crafting, and enjoy your stunning new space!

Makenzie is the founder and lead writer at MoneyHackTips.com — a personal finance blog dedicated to delivering street-smart financial wisdom for real people on real budgets. With 300+ published articles covering everything from debt management to investing fundamentals, Makenzie’s mission is to make every dollar work harder. When not writing about money hacks, Makenzie is testing frugal living strategies, optimizing side hustles, and helping readers build financial freedom from scratch.