
The Heartbreak of the Silk Snag
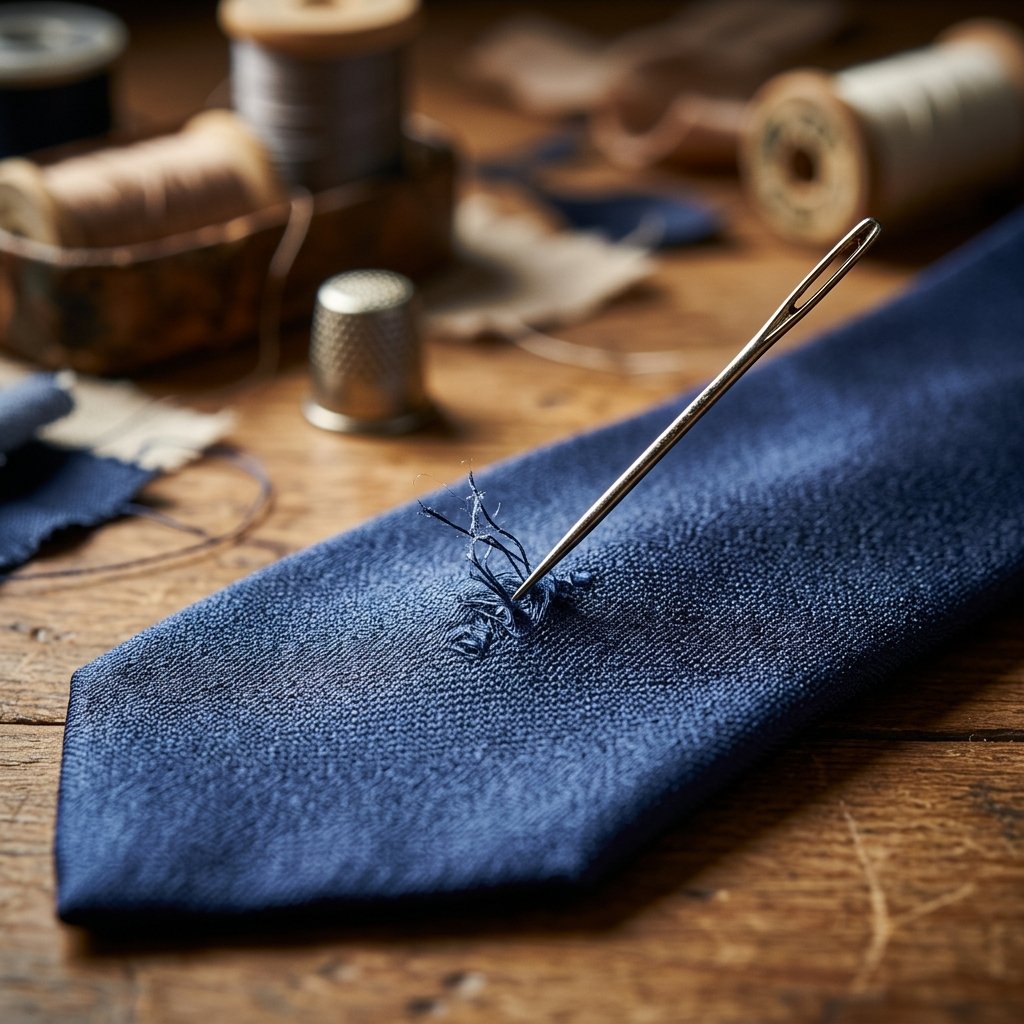
It happens in a heartbeat. You’re at a wedding, a gala, or an important board meeting, and your sleeve catches on a stray splinter, a jewelry clasp, or even a rough fingernail. That sickening ‘pop’ followed by the sight of a long, puckered line across your expensive silk or satin garment is enough to make any budget-conscious dresser wince. In the world of high-end textiles, silk and satin are the kings of elegance, but they are also the most vulnerable to damage. However, before you resign that $150 silk blouse to the rag bin or pay a professional tailor $40 for a repair, I am going to teach you the ‘Secret Trick.’ This isn’t just a patch job; it is a surgical relocation of the thread that restores the garment’s face to its original, pristine glory. We are talking about zero-cost, high-impact maintenance that every crafty gentleman and handy mom needs in their arsenal.
Understanding the Enemy: The Physics of the Satin Snag
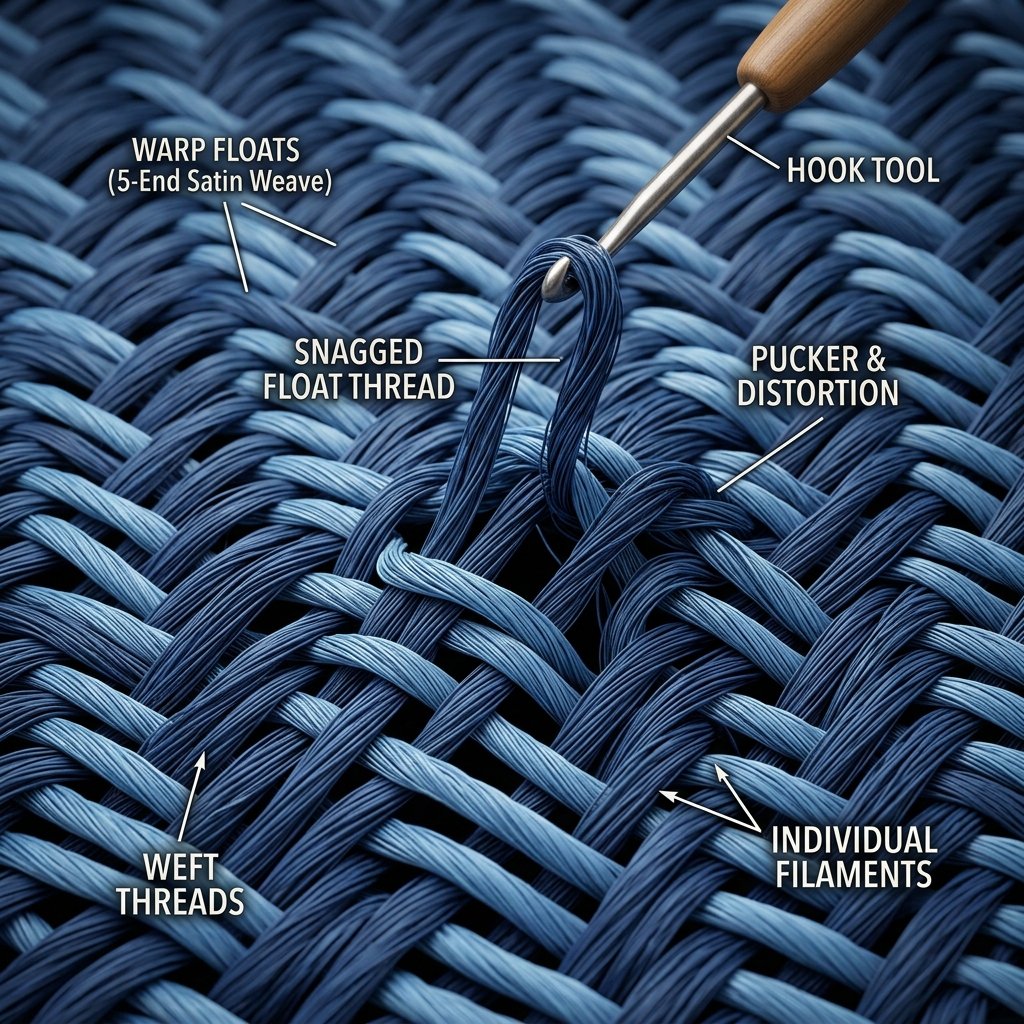
To fix a snag, you must first understand what has actually happened to the fabric. Unlike cotton or wool, which have shorter fibers, silk and satin (which can be silk, polyester, or acetate) are often created using a ‘float’ weave. In a satin weave, the warp threads ‘float’ over several weft threads before interlacing. This creates that signature smooth, lustrous surface we love, but it also means there are long, exposed sections of thread just waiting to be hooked.
Why You Must Never Cut the Thread
The most common mistake people make is reaching for the scissors. Never cut a snagged thread. Because the thread is part of the structural integrity of the weave, cutting it creates a permanent hole that will eventually unravel. Instead, we must treat the snag as a ‘displacement.’ The thread hasn’t been added; it has simply been pulled out of its proper alignment. Our goal is to pull that excess loop through to the ‘wrong side’ (the inside) of the garment where it can live invisibly without compromising the fabric.
| Fabric Type | Snag Risk Level | Repair Difficulty |
|---|---|---|
| Silk Charmeuse | High | Moderate |
| Polyester Satin | Medium | Easy |
| Silk Twill (Ties) | High | Precision Required |
| Crepe de Chine | Low | Very Easy |
The Minimalist Toolkit: Precision Instruments for the Frugal Tailor
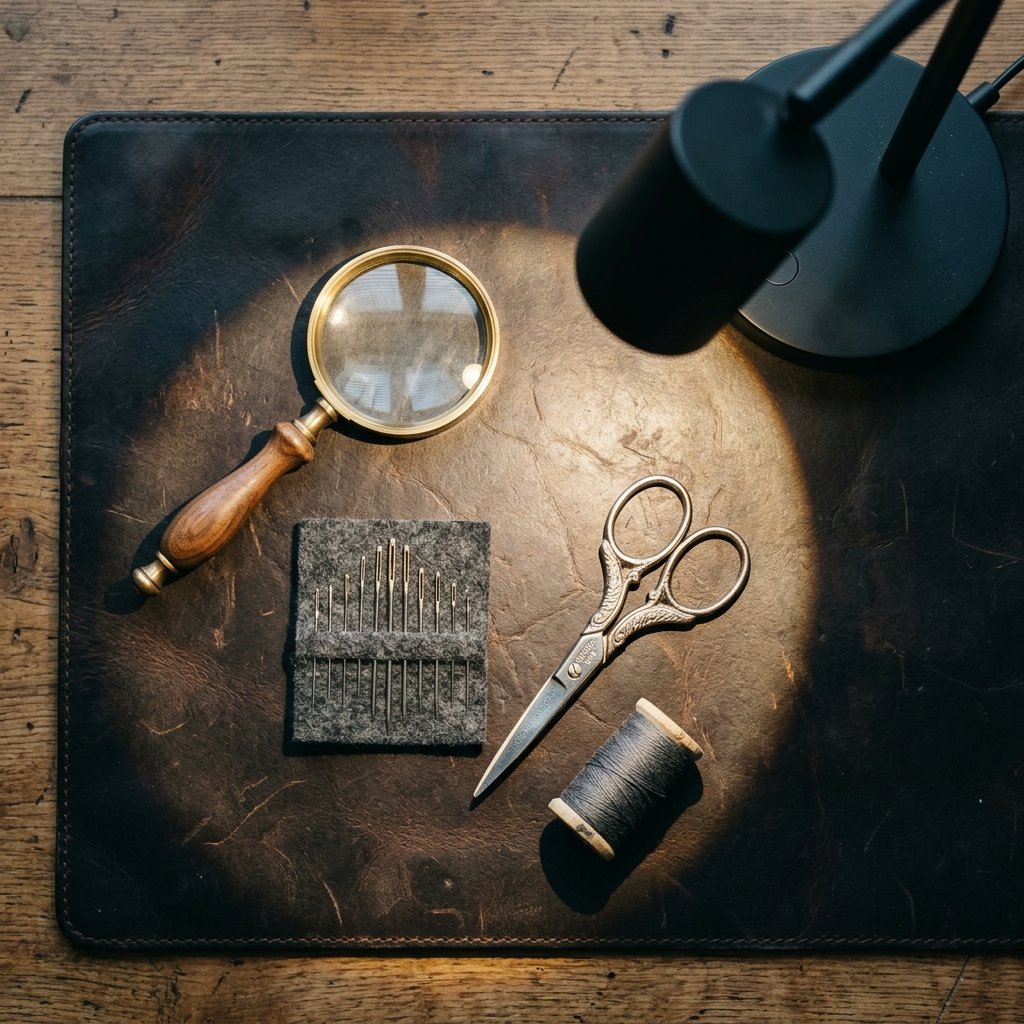
You don’t need a $500 sewing machine to fix a snag. In fact, the best tools are likely already in your junk drawer or sewing kit. If you want to be truly professional, you can buy a specialized tool called a ‘Snag Nab-it,’ but I’m going to show you how to do it with a standard hand-sewing needle. The key is the eye of the needle.
- The Snag Nab-it (The Pro Choice): A tiny needle with a textured, sandpaper-like end that grabs the thread.
- A Fine Hand-Sewing Needle (The Frugal Choice): Ensure it is a ‘sharp’ or ‘between’ needle, size 9 or 10.
- Magnifying Glass: Essential for seeing the individual silk filaments.
- Bright, Directional Lighting: A desk lamp is your best friend here.
“Precision is the hallmark of the frugal expert. A steady hand and a 10-cent needle can save a 100-dollar garment.”
The Invisible Pull-Through: A Step-by-Step Surgical Guide
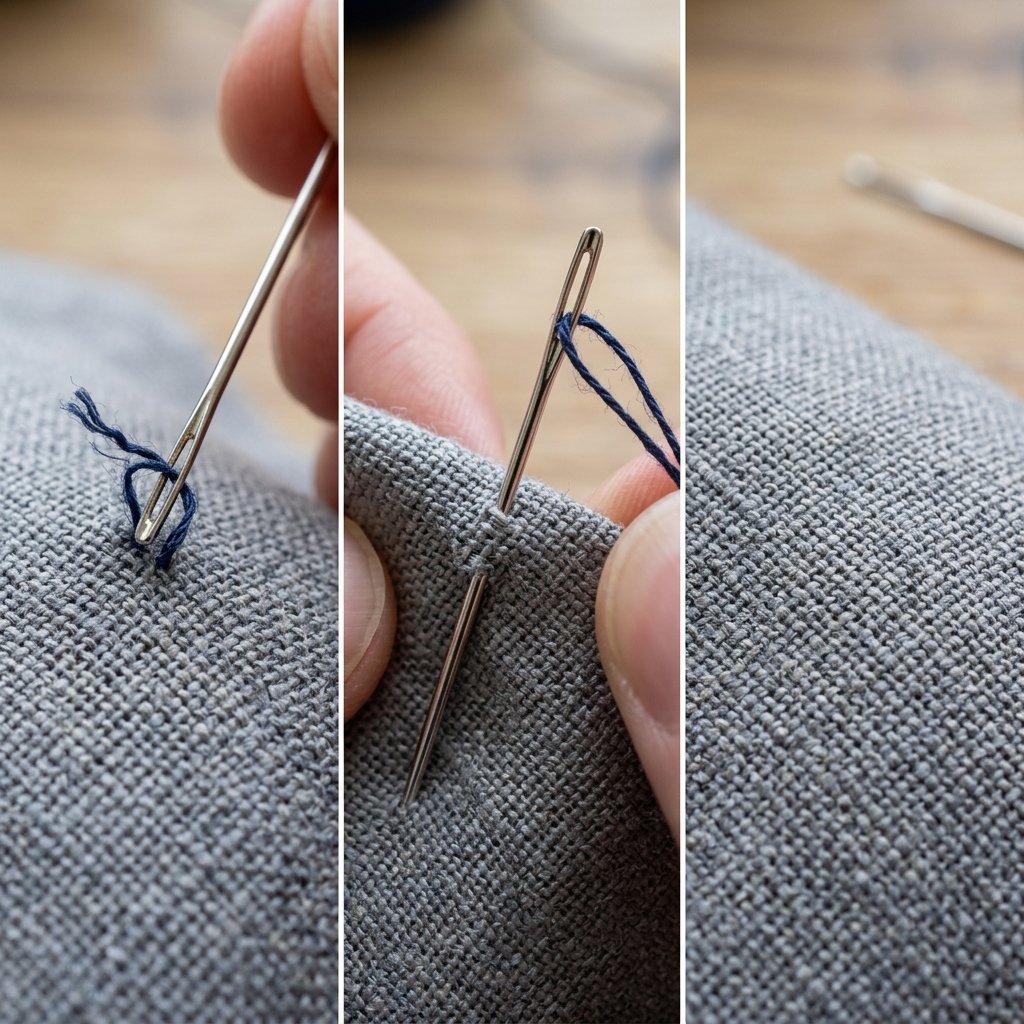
This is the ‘Secret Trick.’ We are going to use the needle to ‘lasso’ the snag and pull it to the back of the fabric. Follow these steps with patience and gentle pressure.
- Step 1: Prep the Area. Lay the garment on a flat, hard surface. Gently stretch the fabric diagonally from the snag to see if some of the thread will naturally slide back into the weave. Do not pull hard.
- Step 2: Insert the Needle. Take your fine needle (unthreaded). Insert the sharp end of the needle directly into the base of the snag—the exact point where the thread is coming out of the fabric.
- Step 3: Push Halfway. Push the needle through until only the eye of the needle is sticking out of the ‘right side’ (the front) of the fabric.
- Step 4: Lasso the Snag. Thread the snagged loop through the eye of the needle. This is the ‘secret.’ By using the snag itself as the thread, you ensure a perfect relocation. If the snag is too small to thread, use the ‘Snag Nab-it’ tool to catch it.
- Step 5: The Disappearing Act. Carefully pull the needle all the way through to the back of the fabric. The snagged loop will follow the needle, disappearing from the front and reappearing on the inside of the garment.
- Step 6: Massage the Fabric. Once the loop is on the back, use your fingernail or the smooth end of the needle to gently ‘massage’ the fabric on the front to close the tiny hole where the needle entered.
The “Broken Thread” Recovery: Advanced Invisible Mending

Sometimes, the snag has already snapped. This is a more dire situation, but it’s not hopeless. If you have a broken thread on silk, you cannot simply pull it through. You must secure it to prevent a run (like a ladder in stockings).
The Ladder Stitch Technique
If there is a small gap where the thread broke, you can use a matching silk thread to perform a Ladder Stitch. This stitch stays hidden inside the weave. You will need to anchor the thread 1/4 inch away from the break and weave it back and forth with surgical precision. For those who prefer a more ‘rugged’ look, you can embrace the Japanese art of Sashiko, using a contrasting thread to turn the repair into a decorative feature, though for formal wear, the invisible method is king.
| Repair Scenario | Recommended Stitch | Time Estimate |
|---|---|---|
| Single Loop Snag | Pull-Through | 2 Minutes |
| Broken Filament | Dot of Fray-Check | 1 Minute |
| Large Pucker | Steam & Massage | 5 Minutes |
| Structural Tear | Ladder Stitch | 15 Minutes |
Preservation Tactics: Keeping Your Finery Snag-Free

An ounce of prevention is worth a pound of cure—and a lot of saved money. To avoid having to use the ‘Secret Trick’ every week, follow these rugged yet elegant care rules:
- The Sandpaper Test: Periodically check your jewelry, watches, and even your fingernails for rough edges. A single jagged nail is the #1 enemy of silk.
- Storage Wisdom: Never hang silk or satin on cheap wire hangers. Use padded or wide wooden hangers to prevent the fabric from catching on metal burrs.
- Laundering: Always wash silk in a mesh ‘delicates’ bag. This prevents the fabric from snagging on zippers or buttons of other clothes in the wash.
- The Steam Rule: Never iron silk directly. Use a steamer or a pressing cloth. Direct high heat can make the fibers brittle and more prone to snapping when snagged.
“A well-maintained wardrobe is a sign of a disciplined mind. Treat your fabrics with respect, and they will return the favor for decades.”
Conclusion
The Power of the Invisible Mend
Mastering the art of fixing a snagged thread is more than just a laundry hack; it’s a philosophy of resourcefulness. By taking five minutes to carefully pull a thread through to the back of a garment, you are rebelling against the ‘disposable fashion’ culture. You are saving your hard-earned money—potentially hundreds of dollars over a lifetime—and keeping beautiful textiles in circulation. Whether it’s your favorite power tie or a family heirloom gown, you now have the secret trick to make it look brand new again. So, the next time you see a snag, don’t panic. Just grab your needle, find your light, and perform a little bit of invisible magic.

Makenzie is the founder and lead writer at MoneyHackTips.com — a personal finance blog dedicated to delivering street-smart financial wisdom for real people on real budgets. With 300+ published articles covering everything from debt management to investing fundamentals, Makenzie’s mission is to make every dollar work harder. When not writing about money hacks, Makenzie is testing frugal living strategies, optimizing side hustles, and helping readers build financial freedom from scratch.