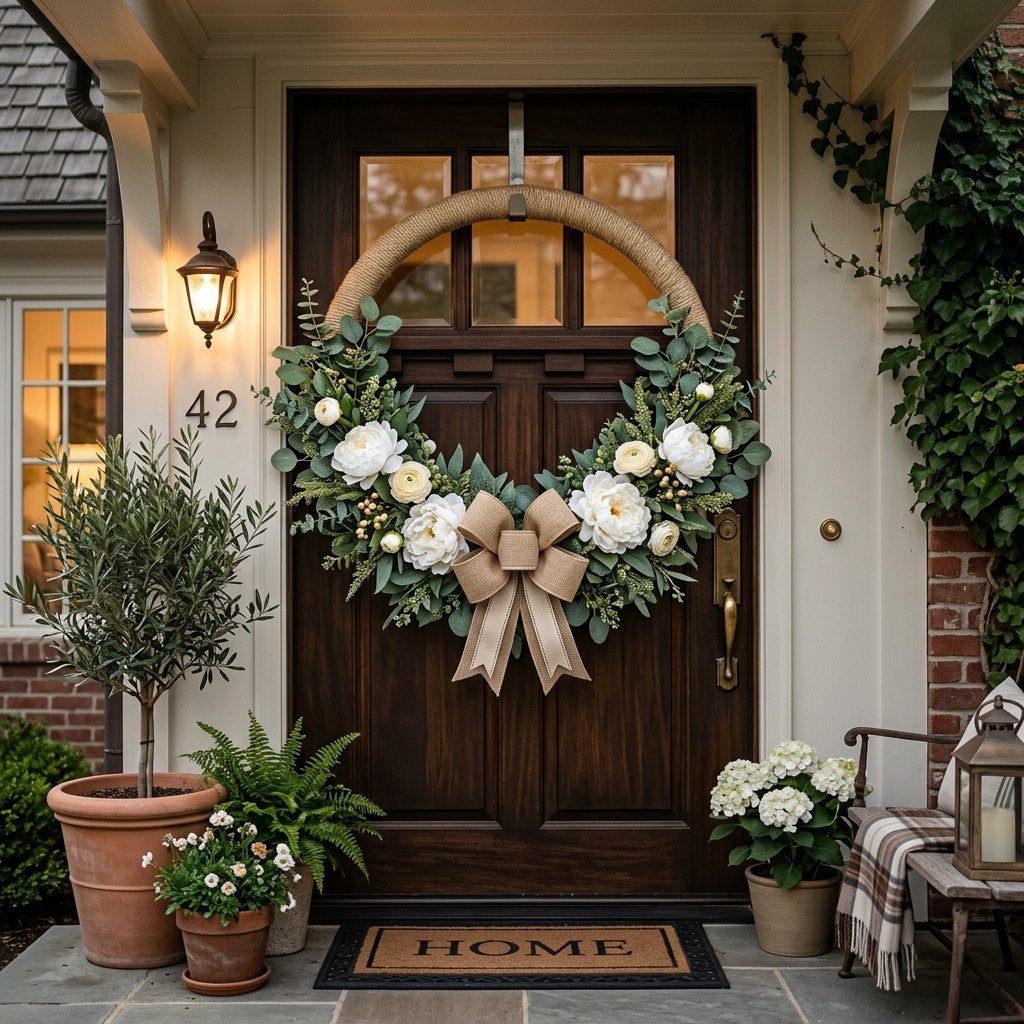

Let us talk about curb appeal on a dime. If you have ever strolled through the aisles of a high-end home decor boutique or flipped through a Pottery Barn catalog, you have undoubtedly seen those massive, architectural, oversized wreaths. They are stunning, they are welcoming, and they usually come with a price tag that makes your wallet weep—often ringing in at $100 to $150 or more. But what if I told you that you could achieve that exact same grand, rustic-chic aesthetic using a neon plastic toy from the dollar store?
Welcome to the ultimate frugal upcycling flex. Today, we are taking a standard $1.25 kids’ hula hoop and transforming it into a high-end, weather-resistant statement piece for your front porch. This is not just a craft; it is a clever, budget-savvy engineering project that combines resourceful materials with masculine-elegant design principles. Whether you are a handy parent looking to repurpose backyard clutter, a budget bride designing reception decor, or a crafty gift-giver wanting to impress a new homeowner, this project is your golden ticket.
“True craftsmanship is not about how much you spend on the materials, but the vision and ingenuity you apply to them. Trash to treasure is a mindset.”
By utilizing clever wrapping techniques, strategic faux floral placement, and heavy-duty structural securing methods, we are going to build a piece of home decor that is rugged enough to withstand the elements and elegant enough to make your neighbors ask for your interior designer’s number. Roll up your sleeves, plug in the hot glue gun, and let us get to work.
The Master Supply List: High-End Look, Dollar Store Budget

Before we start cutting, painting, and gluing, we need to gather our materials. The beauty of this project lies in its accessibility. Almost everything you need can be sourced from your local Dollar Tree, a hardware store, or your own scrap bins. The goal here is maximum visual impact for minimal financial output.
Core Materials Needed
- 1 Plastic Hula Hoop: The foundation of our build. You can find these in the toy aisle for $1.25. Do not worry about the neon colors; we will be covering them completely.
- Jute Twine or Nautical Rope: You will need about 3 to 4 rolls of the standard Dollar Tree jute twine, or one thick coil of nautical rope for a chunkier, more rugged aesthetic.
- Faux Florals and Greenery: Look for eucalyptus, lamb’s ear, or fern sprigs for the base, and 3 to 5 large statement flowers (like peonies, sunflowers, or magnolias) for the focal point.
- Zip Ties: A handy DIYer’s best friend. These provide the structural integrity that hot glue alone cannot offer.
- Floral Wire: For delicate positioning of leaves and stems.
- Matte Spray Paint (Optional): If you prefer an exposed hoop look (like a modern minimalist metal ring), a can of matte black or oil-rubbed bronze spray paint works wonders.
- Heavy-Duty Hot Glue Sticks: Do not skimp here. Use Gorilla Glue sticks or a high-temp construction adhesive if your porch gets direct, blistering sun.
Budget Breakdown: DIY vs. Retail
Let us look at the numbers. Frugality is about knowing exactly where your money is going and celebrating the savings.
| Material / Component | Our DIY Cost | High-End Retail Equivalent |
|---|---|---|
| Oversized Base (Hula Hoop vs Grapevine) | $1.25 | $25.00 – $40.00 |
| Faux Greenery & Florals | $6.25 (5 stems) | $35.00 – $60.00 |
| Jute Twine / Rope Wrap | $3.75 (3 rolls) | $15.00 (Pre-wrapped) |
| Hardware & Adhesives | $2.00 (from stash) | Included |
| Total Estimated Cost | $13.25 | $75.00 – $115.00 |
By investing just over $13 and about 90 minutes of your time, you are saving roughly 88% compared to retail pricing. That is the kind of budget-savvy craftsmanship we love.
Prepping the Base: Erasing the Neon Plastic
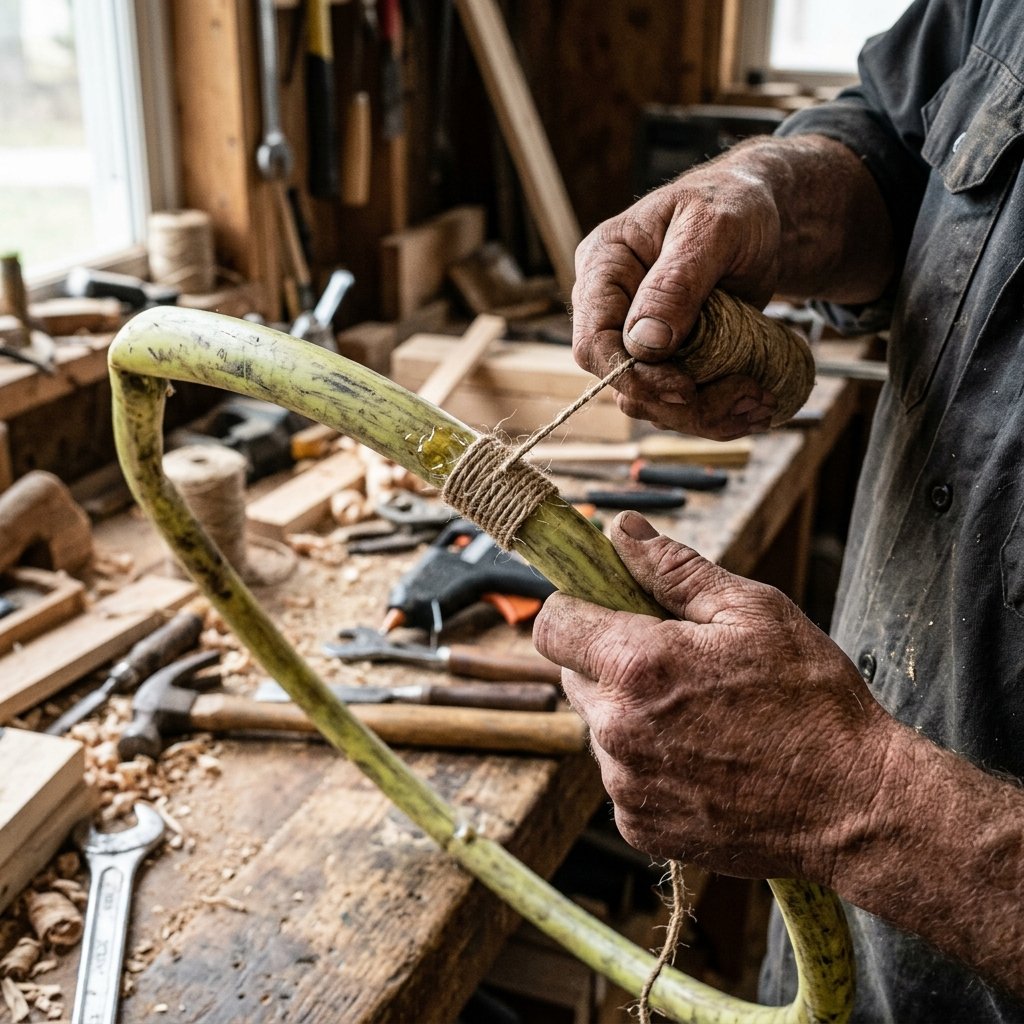
The secret to making a cheap plastic toy look like a piece of artisan home decor is completely masking its original identity. You have two primary options for transforming the hula hoop: the Textured Wrap Method or the Faux Metal Spray Method. We will focus primarily on the wrap method, as it adds incredible rustic texture and volume, making the hoop look like a thick, expensive grapevine or rattan base.
The Textured Wrap Method (Jute or Rope)
This process requires patience, but it is incredibly meditative. Grab a cup of coffee, put on your favorite podcast, and let us get wrapping.
- Sand the Hoop: Take a medium-grit sandpaper (around 120-grit) and lightly scuff the entire surface of the hula hoop. Plastic is notoriously slick, and hot glue needs a textured surface to grip properly. This takes about 5 minutes but saves you hours of frustration later.
- Anchor the Twine: Apply a thick, 1-inch line of high-temp hot glue to the inside curve of the hoop. Carefully press the end of your jute twine or rope into the glue. Hold it firmly for 30 seconds until the glue sets. Safety Note: High-temp hot glue can cause severe burns. Use a silicone finger protector or the end of a pencil to press the twine into the glue.
- The Wrapping Technique: Begin wrapping the twine tightly around the hoop. You want zero gaps. Every 3 to 4 inches, apply a small dab of hot glue to the back (the side that will face the door) to secure the tension.
- Splicing New Rolls: When you reach the end of a twine roll, glue the tail flat against the back of the hoop. Start the new roll directly over the tail to hide the seam, gluing it securely.
“Tension is everything. Keep your wrapping hand tight and your spacing perfectly flush. A loosely wrapped hoop will unravel in the wind and give away your dollar-store secret.”
The Faux Metal Spray Method (Alternative)
If you prefer a sleek, modern, asymmetrical hoop wreath, wrapping the whole thing might be too rustic. Instead, after scuffing the plastic, wipe it down with rubbing alcohol. Apply two coats of a high-quality matte black or hammered bronze spray paint designed specifically for plastic (like Rust-Oleum 2X). Let it cure for a full 24 hours before attaching any florals.
Structural Integrity: The Zip-Tie Foundation
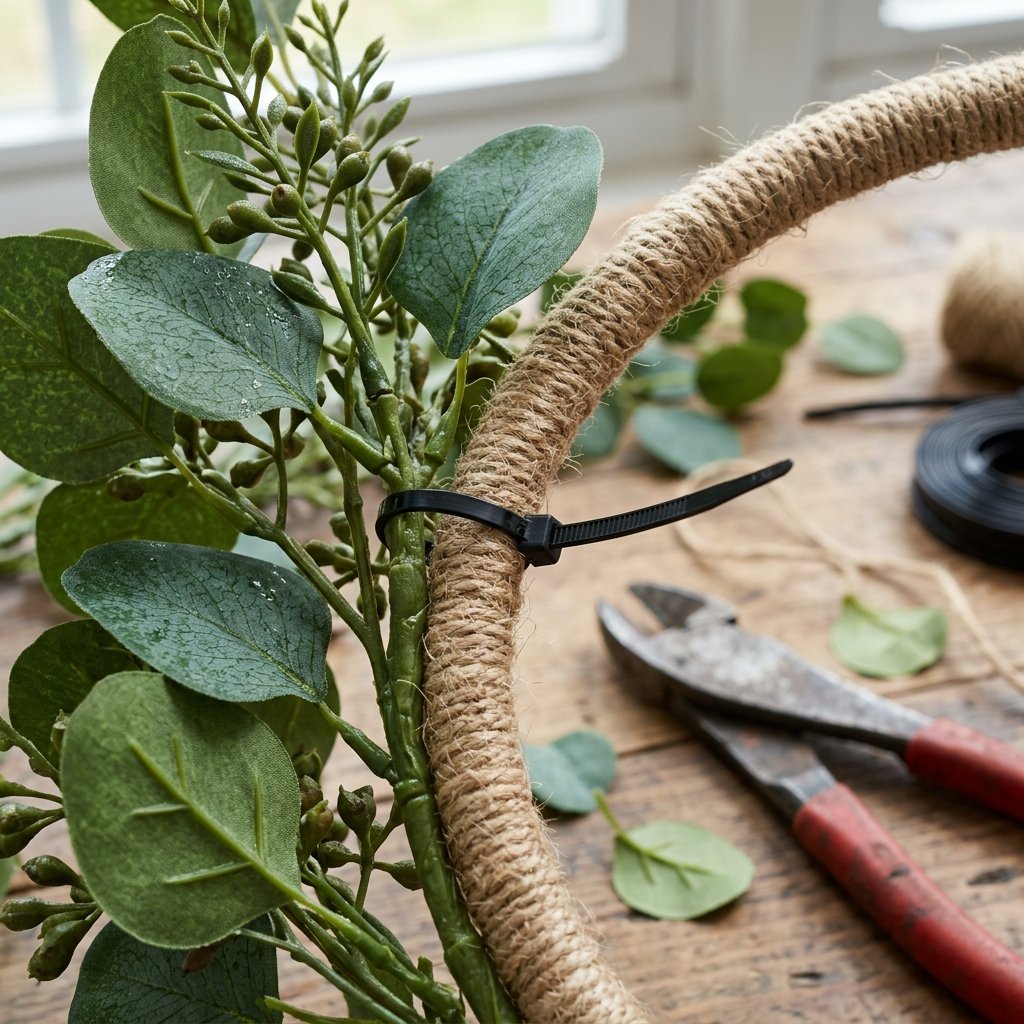
Here is where many amateur crafters go wrong: they rely entirely on hot glue to attach heavy faux florals to their base. Hot glue is fantastic for indoor crafts, but on a front porch facing summer heat or winter freezes, hot glue becomes brittle and snaps. We are building this wreath to be rugged and durable. Enter the zip tie.
Creating the Floral Anchor Point
Instead of gluing stems directly to the twine, we are going to create a mechanical bond.
- Determine Your Design Layout: Decide if you want a symmetrical design (florals covering the bottom half) or an asymmetrical design (florals sweeping up the left or right side). Mark your boundaries with a piece of chalk.
- Strip the Stems: Take your base greenery (e.g., eucalyptus or fern). Use heavy-duty wire cutters to trim the thick plastic stems, leaving about 3 inches of stem exposed at the bottom of the leaves.
- The Cross-Hatch Zip Tie Method: Lay your first piece of greenery against the hoop. Take a small, thin zip tie (black or green, depending on your foliage) and wrap it tightly around the stem and the hoop. Pull it as tight as mechanically possible. Snip the excess tail flush.
- Layering for Volume: Place the next piece of greenery so that its leaves cover the zip tie of the previous piece. Secure the new stem with another zip tie. This overlapping method hides all your mechanics while building massive, expensive-looking volume.
By using zip ties, your greenery is physically locked to the hoop. You could swing this wreath like a lasso, and those leaves are not going anywhere. This is the practical, handy-parent approach to crafting—build it once, build it right.
Floral Design 101: Arranging Like a Pro
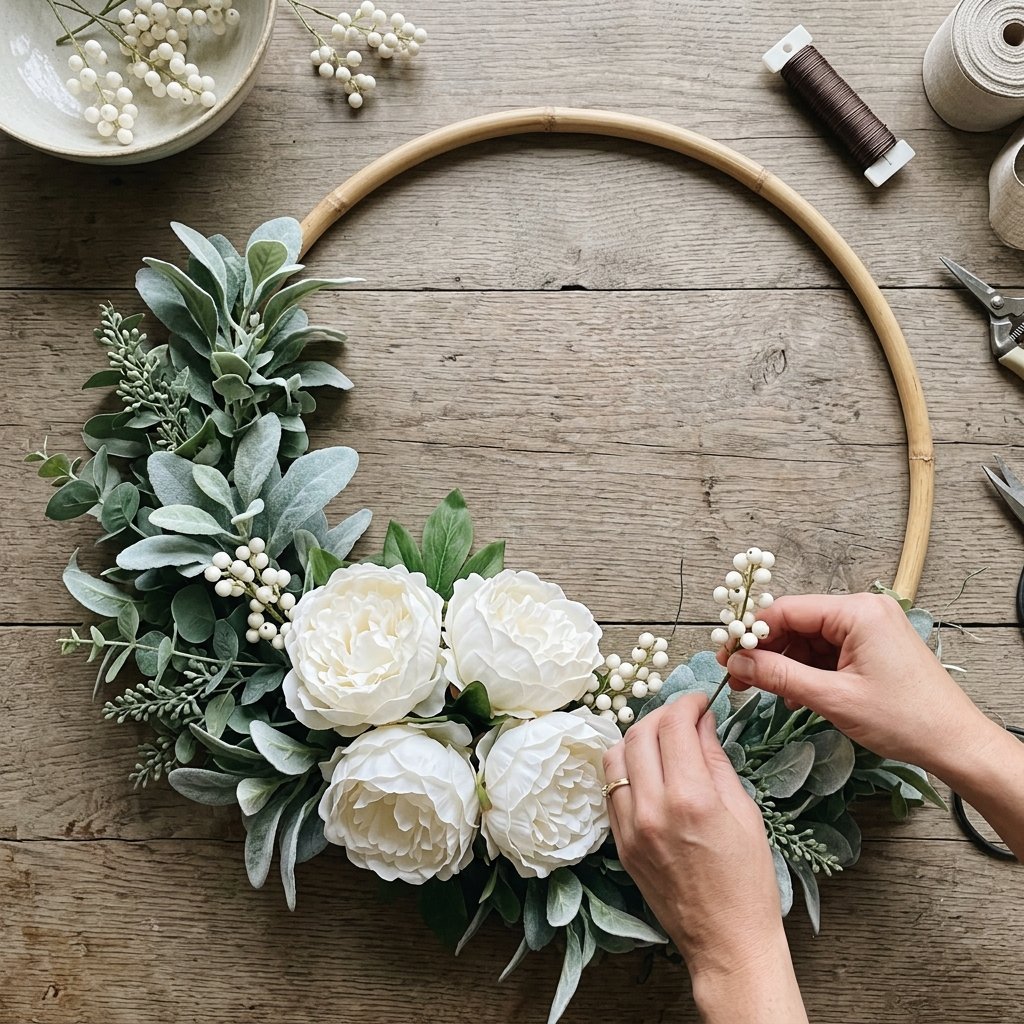
Now that our base is wrapped and our greenery foundation is mechanically secured, it is time to add the focal points. This is where the aesthetic magic happens, elevating the project from a “craft” to “high-end decor.” You do not need to be a professional florist to make this look incredible; you just need to follow the Rule of Threes and understand visual weight.
Step-by-Step Floral Layering
- Establish the Base Greenery: As discussed in the previous section, your base leaves should fan out from a central point. If you are doing a bottom-heavy wreath, have the greenery stems pointing up the left side and up the right side, meeting in the bottom center.
- Place the Focal Flowers: Choose 3 large blooms (odd numbers are universally more pleasing to the human eye). Snip the stems down to 1 inch. These will be placed at the center point where your greenery meets. Because these stems are short, you will use a combination of floral wire poked through the base of the flower head and a generous dollop of hot glue to secure them to the twine base.
- Add Filler Elements: To make the wreath look lush and expensive, fill in the gaps around the focal flowers with smaller elements. Dollar Tree sells fantastic faux baby’s breath, berries, or small cotton bolls. Use these to hide any exposed stems or glue blobs.
“High-end design is all about depth and texture. Mix soft, velvety leaves like lamb’s ear with spiky ferns, and pair smooth, delicate petals with rough burlap. Contrast is the currency of luxury.”
Seasonal Swaps
To be truly budget-savvy, you can make this wreath a year-round staple by lightly wiring (instead of gluing) your focal flowers.
| Season | Greenery Base | Focal Elements | Accent Textures |
|---|---|---|---|
| Spring | Eucalyptus & Ferns | Pink Peonies & Tulips | Faux Robin’s Eggs |
| Summer | Monstera & Palm Leaves | Bright Sunflowers | Sliced Faux Lemons |
| Autumn | Faux Maple & Oak Leaves | White Pumpkins & Mums | Pinecones & Burlap |
| Winter | Pine & Cedar Branches | Deep Red Poinsettias | Holly Berries & Bells |
The Statement Bow and Hanging Hardware
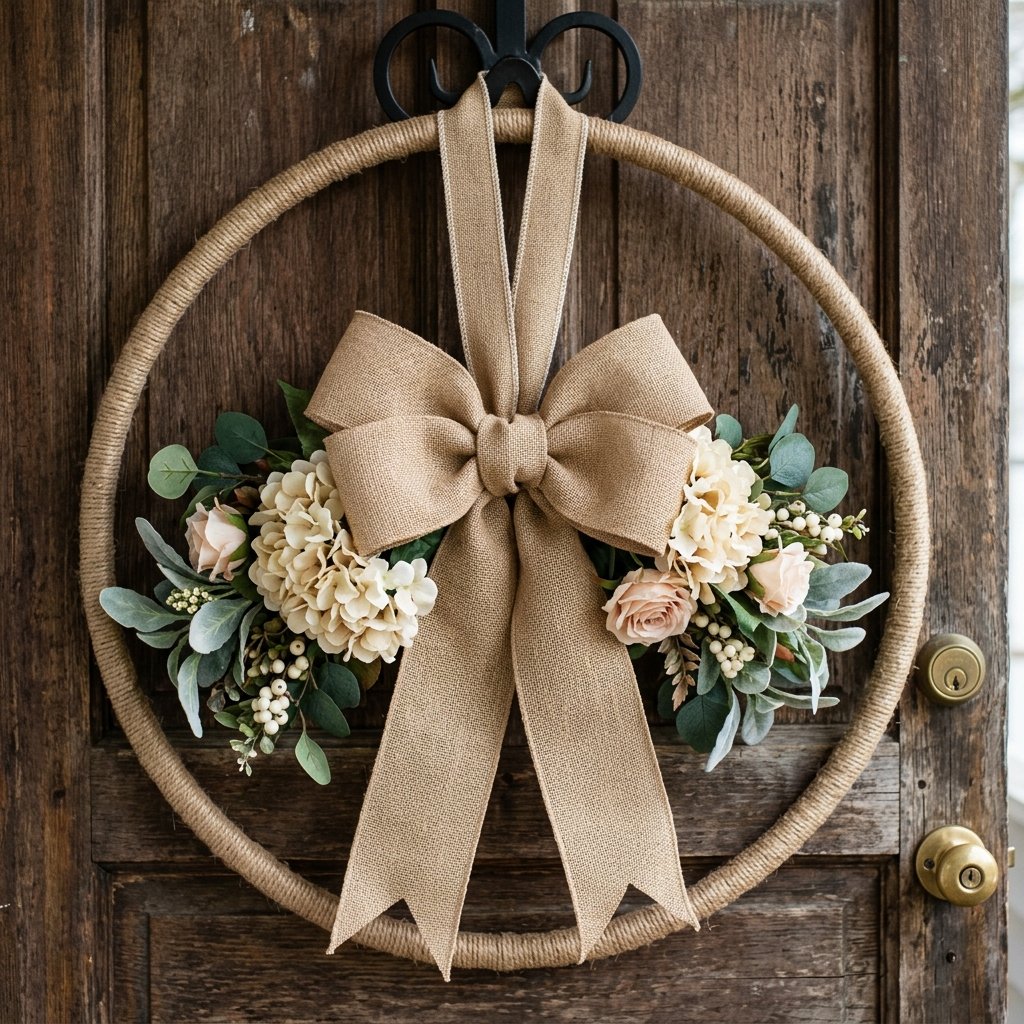
No oversized porch wreath is complete without a statement bow to anchor the design and hide the final mechanics. Furthermore, because this wreath is significantly larger than a standard door wreath (a hula hoop is typically 28 to 32 inches in diameter), we need a reliable way to hang it so it doesn’t bang against the glass every time the door opens.
Crafting the Perfect Burlap Bow
Skip the pre-made bows; they often look cheap and crushed. Making your own is simple and allows you to customize the tails.
- Take a roll of wide, wire-edged ribbon (burlap or heavy canvas works best for a rugged, farmhouse look).
- Create two large loops, resembling a figure-eight, leaving a long tail hanging down.
- Pinch the center of the figure-eight tightly.
- Take a piece of floral wire and wrap it tightly around the pinched center, twisting the wire at the back to secure the loops.
- Cut a small, 3-inch piece of ribbon, fold it in half lengthwise, and wrap it over the center wire to hide it, gluing it in the back.
- Dovetail the ends of your tails by folding the ribbon in half and cutting at a 45-degree angle.
- Use the excess floral wire at the back of the bow to tie it directly onto the hula hoop, right where your greenery stems meet.
Rugged Hanging Solutions
A standard over-the-door metal wreath hanger might struggle with the diameter of a hula hoop, pushing the wreath too far down the door. Here are two clever, secure alternatives:
- The Heavy-Duty Suction Hook: If your door has a large glass pane, invest in a heavy-duty, outdoor-rated suction cup with a metal hook. Clean the glass with rubbing alcohol before applying. This allows you to position the wreath perfectly at eye level.
- The Invisible Command Hook Trick: For solid wood or fiberglass doors, place a large, outdoor-rated Command Hook upside down on the inside of your door, near the top edge. Tie a piece of clear heavy-duty fishing line or a thick ribbon to your wreath, run it over the top of the door, and loop it onto the upside-down hook inside. This provides a perfectly flush, invisible hang on the outside.
Weatherproofing: Protecting Your Investment
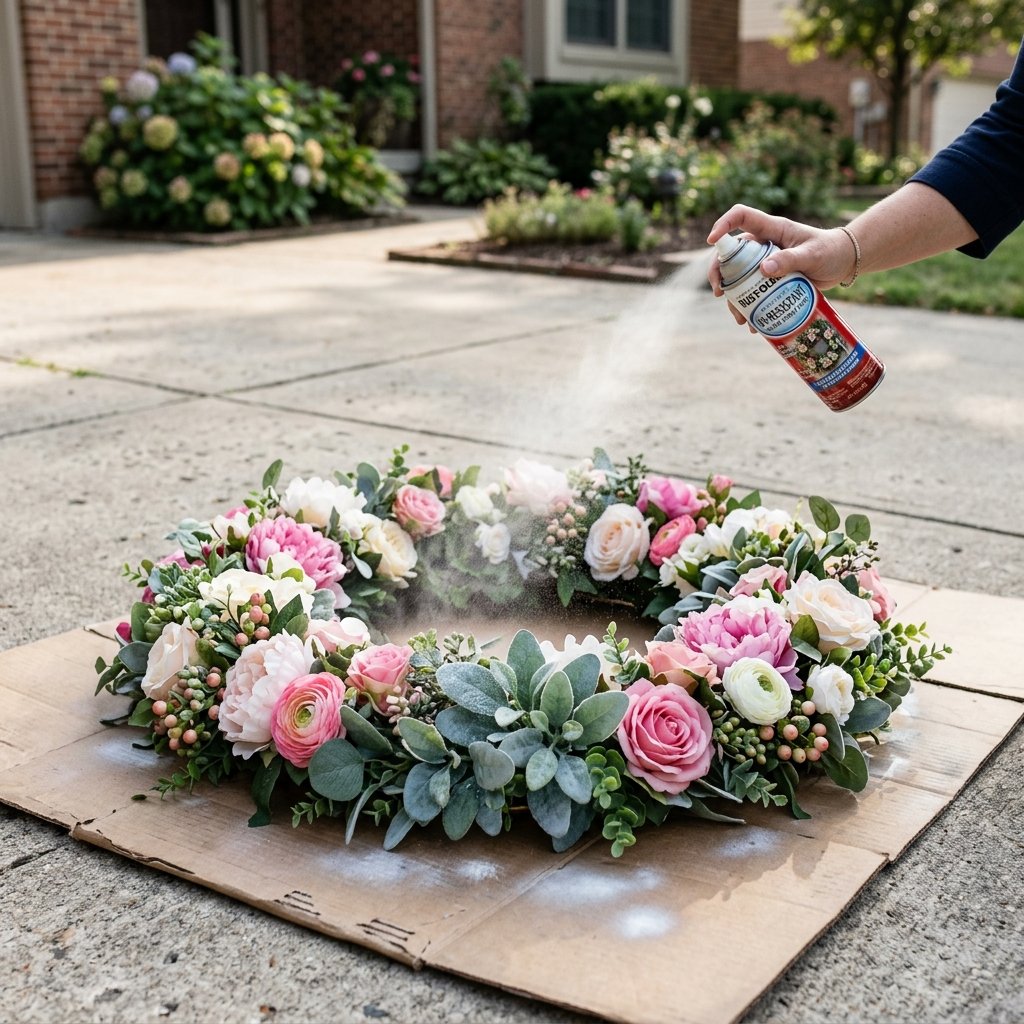
You have just created a masterpiece that looks like it cost $100. Now, we need to ensure it survives the elements. Front porches are notorious for destroying crafts via UV fading, humidity, and wind. As practical upcyclers, we build things to last.
The UV Clear Coat
Faux florals from the dollar store are not UV-treated. If left in direct sunlight, vibrant greens will turn an ugly, sickly blue within a month. To prevent this, take your finished wreath to a well-ventilated area and spray the florals and the jute twine with a UV-resistant clear acrylic matte spray (like Krylon UV-Resistant Clear). Apply two light coats, allowing 15 minutes of drying time between coats. This acts as sunscreen for your wreath and locks the fibers of the jute twine in place.
Wind Mitigation
If you live in a windy area, a large hula hoop wreath can act like a sail, banging against your door and potentially scratching the paint. To solve this, apply small, clear rubber cabinet bumpers (you can buy a sheet of 100 for a few dollars) to the back of the hoop at the 3 o’clock, 6 o’clock, and 9 o’clock positions. These invisible bumpers will provide a soft, grippy cushion between the wreath and your door, completely silencing any movement in the wind.
“A true DIY expert doesn’t just make it look good for a photograph; they engineer it to withstand the real world. Protect your time and your materials.”
Conclusion
And there you have it—a masterclass in frugal engineering and high-end design. By looking past the neon plastic and seeing the structural potential of a simple $1.25 hula hoop, you have crafted a massive, breathtaking piece of front porch decor that commands attention. Your neighbors will be convinced you spent a small fortune at a boutique, but you will have the quiet satisfaction of knowing it was built with budget-savvy brilliance, a few zip ties, and a lot of creative vision.
This project proves that you do not need deep pockets to have a beautiful home; you just need to be resourceful, clever, and willing to put in a little elbow grease. Whether you adapt this design for a rustic autumn vibe, a crisp winter welcome, or a bright summer statement, you now possess the foundational skills to build oversized decor for pennies on the dollar. So hang that wreath with pride, stand back, and admire your handiwork. You have officially turned trash into absolute treasure.

Makenzie is the founder and lead writer at MoneyHackTips.com — a personal finance blog dedicated to delivering street-smart financial wisdom for real people on real budgets. With 300+ published articles covering everything from debt management to investing fundamentals, Makenzie’s mission is to make every dollar work harder. When not writing about money hacks, Makenzie is testing frugal living strategies, optimizing side hustles, and helping readers build financial freedom from scratch.