
Welcome, frugal DIYers, crafty gift-givers, and budget-savvy upcyclers! If you have ever walked through a high-end home decor store and scoffed at a $80 price tag on a simple glass terrarium, you are in the right place. We know that true style isn’t about how much money you throw at a room; it is about resourcefulness, creativity, and a little bit of crafty elbow grease.
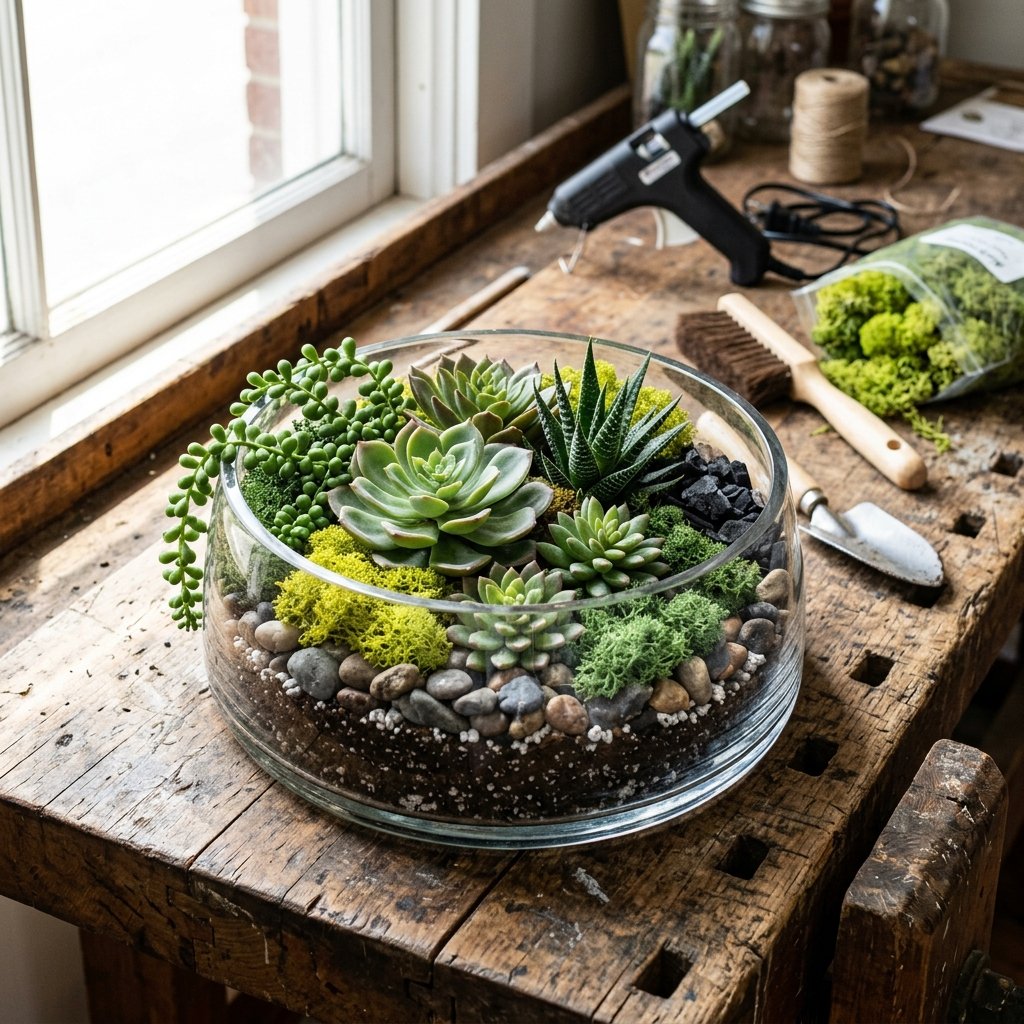
Today, we are diving deep into the art of the high-end dupe. We are going to build a stunning, chic, and slightly rugged glass bowl succulent terrarium using almost entirely Dollar Tree supplies. Whether you are looking for a sophisticated centerpiece for a budget wedding, a handsome addition to a masculine home office, or a thoughtful, zero-maintenance gift for a handy parent, this project delivers maximum impact for minimal cash.
“Luxury is an illusion created by texture, layering, and intention. With the right techniques, a $1.25 plastic plant can look like a rare desert botanical.”
By the end of this masterclass, you will have a gorgeous piece of botanical architecture that looks like it was plucked straight from a West Elm catalog. Grab your hot glue gun, roll up your sleeves, and let’s turn some budget basics into an absolute masterpiece.
The Anatomy of a High-End Terrarium: Gathering Your Supplies
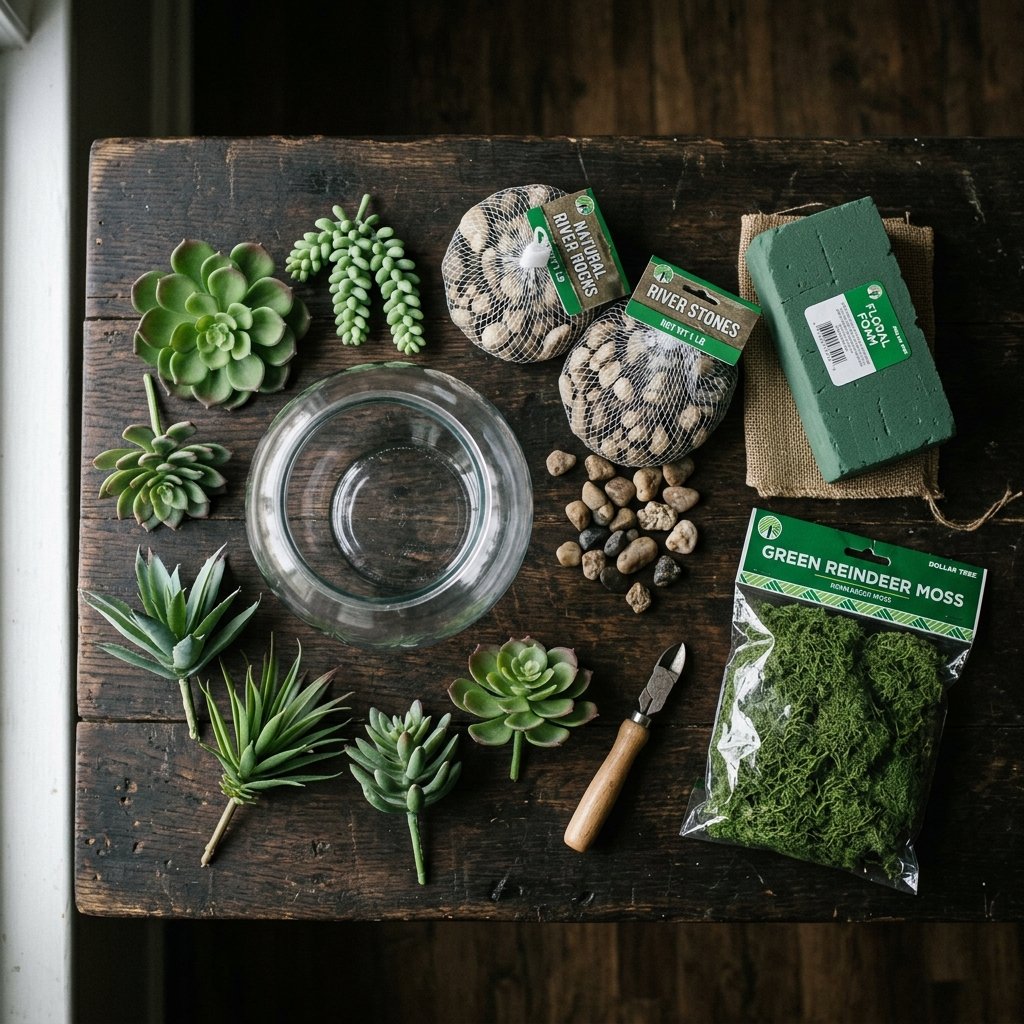
Before we start assembling, we need to go on a strategic sourcing mission. The secret to making Dollar Tree items look expensive is knowing exactly what to look for and what to leave behind. You want to bypass the overly shiny, neon-colored plastics and hunt for items with natural textures and muted tones.
Your Dollar Tree Shopping List
- The Vessel: Look for the large, heavy-bottomed glass bowls in the floral or glassware section. You want something with clean lines. A classic fishbowl shape or a slanted glass vase works perfectly. $1.25
- The Drainage Layer: Grab a bag of natural river rocks or polished black pebbles. Avoid the brightly dyed glass gems; we are going for natural, rugged elegance. $1.25
- The Foundation: Pick up a block of green floral foam. This will act as our anchor, keeping our faux succulents firmly in place without the need for heavy, messy soil. $1.25
- The Top Dressing: Reindeer moss or Spanish moss. Dollar Tree often carries small bags of this in the floral aisle. It adds incredible organic texture and hides our foam foundation. $1.25
- The Star of the Show: Faux succulents. This is where you need to be picky. Look for succulents that have a dusty, “flocked” appearance rather than a glossy plastic sheen. Grab 3 to 5 different varieties for visual interest. $3.75 – $6.25
If you want to add a masculine, elegant touch, look around your workshop or garage for a scrap piece of wood, a slice of a log, or a thrifted leather coaster to use as a rugged base for your finished glass bowl.
Budget Breakdown: High-End Retail vs. Dollar Tree DIY

Let’s talk numbers. As budget-savvy creators, there is nothing quite as satisfying as seeing exactly how much cash we are keeping in our wallets. High-end retailers charge a premium for assembly and styling. By taking on the role of the designer, you slash the cost by over 80%.
| Terrarium Component | High-End Store Cost (Est.) | Our Dollar Tree DIY Cost | Your Savings |
|---|---|---|---|
| Glass Bowl/Vessel | $25.00 | $1.25 | $23.75 |
| Decorative Rocks & Moss | $15.00 | $2.50 | $12.50 |
| Faux Succulents (Assorted) | $35.00 | $5.00 | $30.00 |
| Assembly/Labor Premium | $15.00 | $0.00 (Your Crafty Hands) | $15.00 |
| Total Project Cost | $90.00 | $8.75 | $81.25 Saved! |
With a savings of over $80, you could build ten of these terrariums for the cost of one retail version. They make incredible, budget-friendly centerpieces for rustic weddings or high-volume corporate gifts!
The Crafty Expert’s Secret: De-Shining Faux Succulents
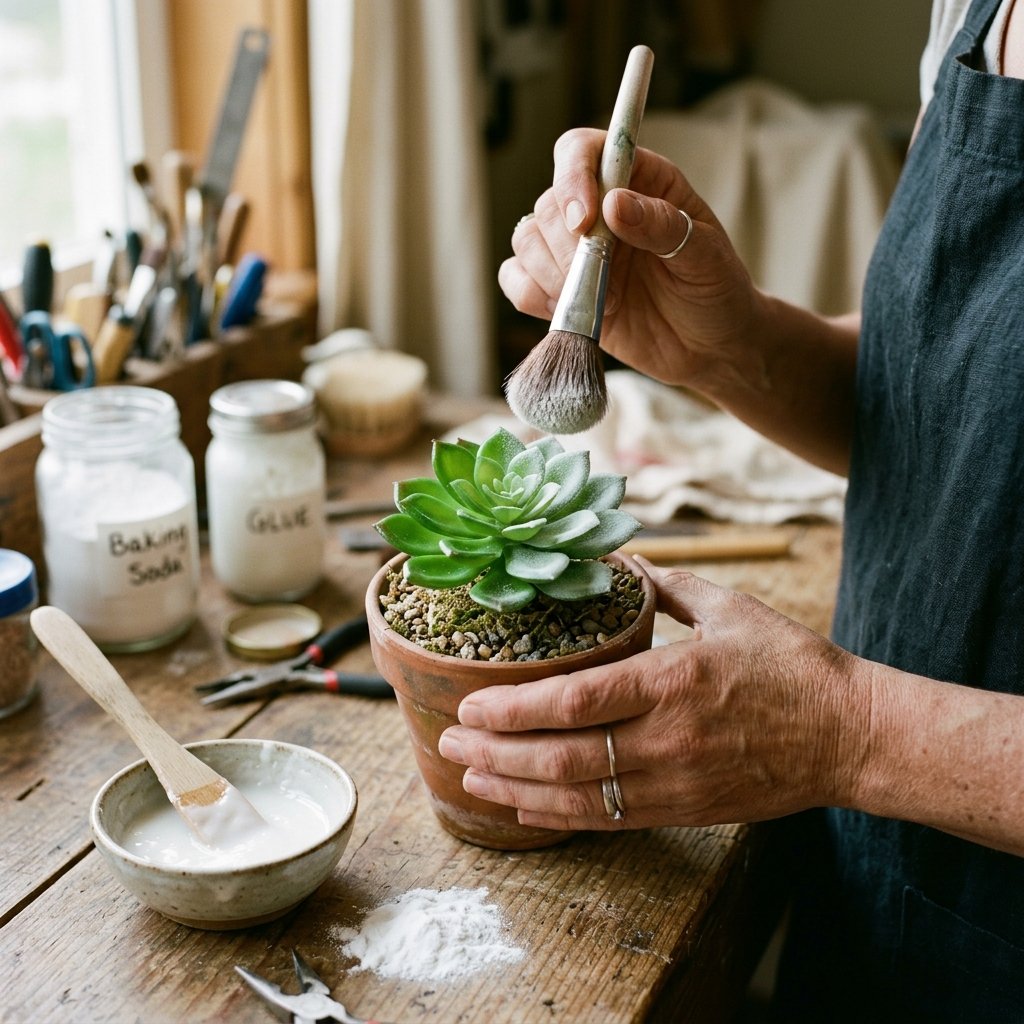
Here is the absolute most critical step in this entire tutorial. If you skip this, your terrarium will look like it came from a dollar store. If you do this, people will be touching the leaves to see if they are real.
Inexpensive faux plants suffer from “plastic shine.” Real succulents have a natural, chalky coating called farina that protects them from the sun. We are going to replicate that farina using a brilliant, budget-friendly hack.
The Baking Soda Dusting Technique
- Prep Your Plants: Remove the tags from your Dollar Tree succulents and gently pull off any obvious plastic seams or strings of hot glue from the manufacturing process.
- Create the Mixture: In a small bowl, mix 1 part matte Mod Podge (or watered-down white school glue) with 1 part water.
- Apply the Wash: Take a cheap, stiff-bristled paintbrush and lightly dab the glue mixture onto the leaves of your succulents. Do not soak them; you just want a light, uneven coat.
- The Magic Dusting: While the glue is still tacky, take a pinch of regular household baking soda and lightly dust it over the succulent. You can also use a soft makeup brush to tap the baking soda onto the leaves.
- Set and Shake: Let the succulents dry for 15 minutes. Once dry, tap them firmly against the edge of your table to knock off the excess powder.
“Safety Note: While baking soda and school glue are perfectly safe, always work in a well-ventilated area to avoid inhaling fine dust powders, and keep your workspace protected with an old newspaper or drop cloth.”
The result? A matte, chalky, ultra-realistic succulent that looks incredibly high-end. This rugged, hands-on approach transforms cheap plastic into botanical art.
Step-by-Step Assembly: Building the Foundation
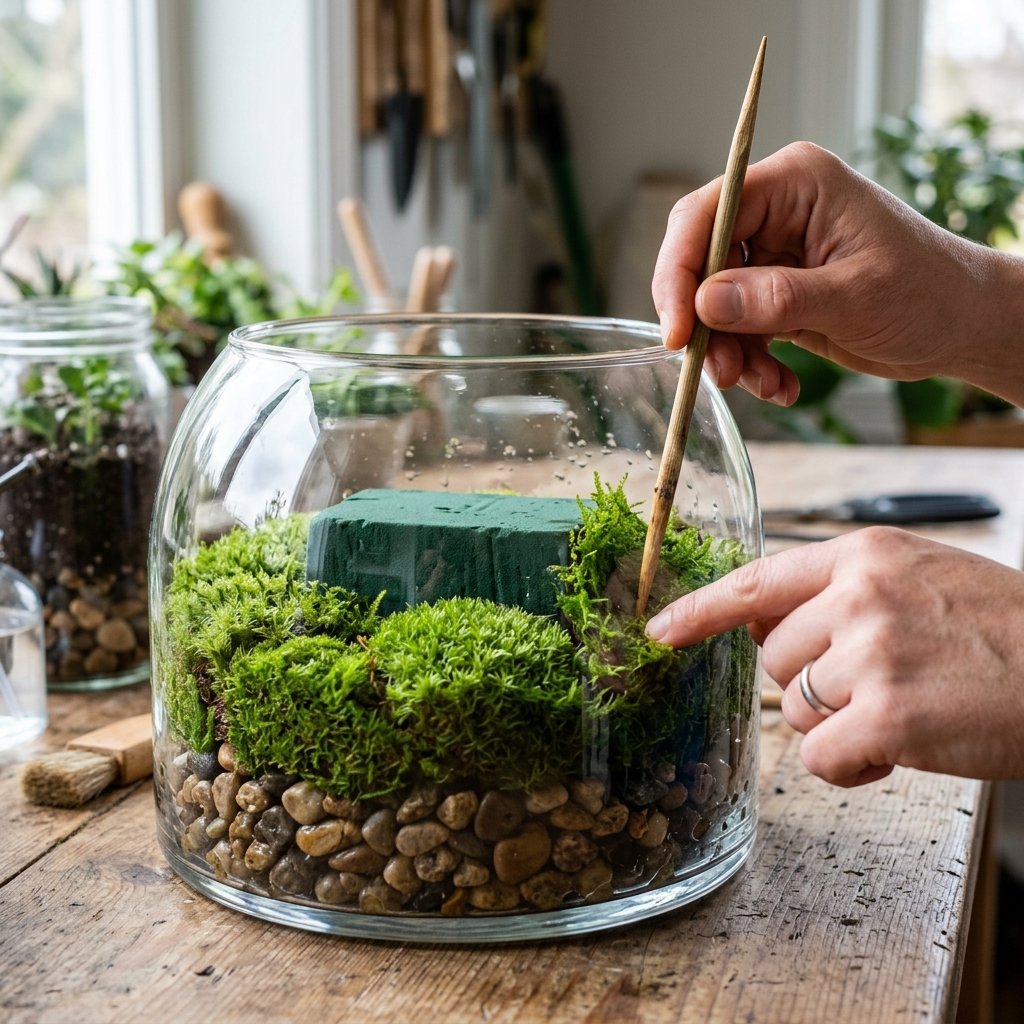
Now that our flora is prepped and looking expensive, it is time to build the architecture of our terrarium. A good terrarium, even a faux one, relies on distinct, visible layers. This gives it that earthy, grounded, and practical look.
Step 1: The Drainage Layer
Pour your bag of Dollar Tree river rocks into the bottom of your glass bowl. You want a layer that is about 1.5 to 2 inches thick. Use your fingers to level the rocks, ensuring they create a flat, stable base. This layer adds weight to the bowl, giving it a premium, heavy feel.
Step 2: The Structural Anchor
Take your block of green floral foam. Using a utility knife or an old serrated kitchen knife, carve the foam into a dome shape that is slightly smaller than the diameter of your bowl. You want the foam to sit on top of the rocks without touching the glass sides. Hot glue the bottom of the foam dome directly onto the center of your rock layer to keep it from shifting.
Step 3: The Earthy Top Dressing
Now we need to hide the mechanics. Take your reindeer moss or Spanish moss and begin packing it around the foam block, filling the gap between the foam and the glass. Use a pencil or a wooden skewer to push the moss down into tight spaces. Once the sides are covered, hot glue a thick layer of moss directly onto the top of the foam dome. Your bowl should now look like a miniature, mossy landscape resting on a bed of river stones.
The Art of Placement: Styling Your Succulents
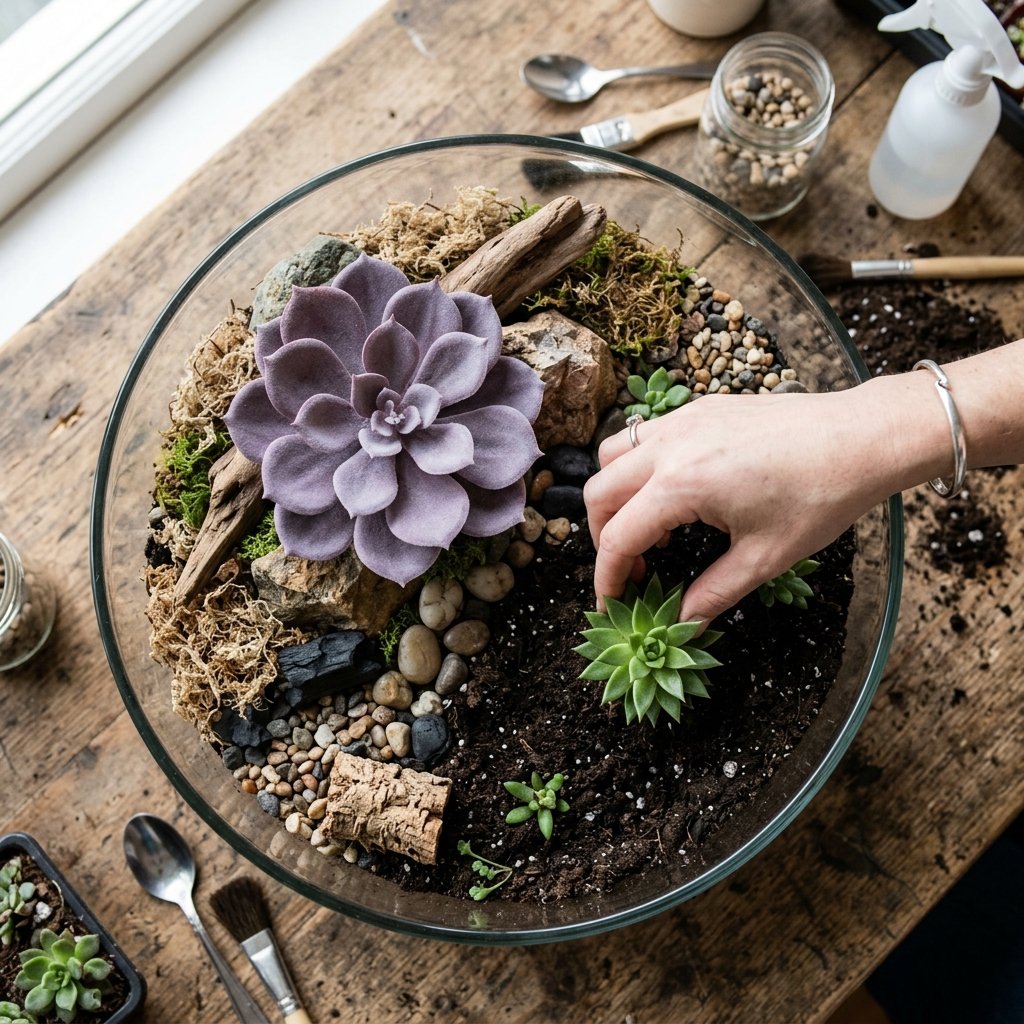
Styling is where your inner designer gets to play. We are not just shoving plastic stems into foam; we are creating a micro-landscape. To do this, we use the classic “Thriller, Filler, Spiller” method, adapted for a terrarium scale.
The Thriller (The Focal Point)
Choose your largest, most visually striking succulent. This is your “Thriller.” Trim the plastic stem down to about 1 inch using heavy-duty wire cutters. Decide on the “front” of your terrarium, and insert the Thriller slightly off-center into the moss-covered foam. Pushing it slightly off-center makes the arrangement look organic and natural, rather than rigid and manufactured.
The Fillers (The Supporting Cast)
Take your medium-sized succulents. These are your “Fillers.” You want to group these around the base of your Thriller. Pro-Tip: In nature, plants grow in clusters. Group two identical succulents tightly together on one side, and place a different variety on the opposite side to balance the visual weight.
The Spiller (The Drape)
If you managed to find a trailing succulent at Dollar Tree (like a faux String of Pearls or a draping sedum), this is your “Spiller.” Pin it near the edge of the foam so that it playfully spills over the moss and rests against the glass. It breaks up the hard lines of the bowl and adds a touch of untamed elegance.
“Design Mantra: Odd numbers are your friend. Always aim for 3 or 5 main succulent heads in your arrangement. The human eye finds asymmetry and odd numbers far more natural and appealing than perfect symmetry.”
Rugged & Elegant Finishing Touches: The Display
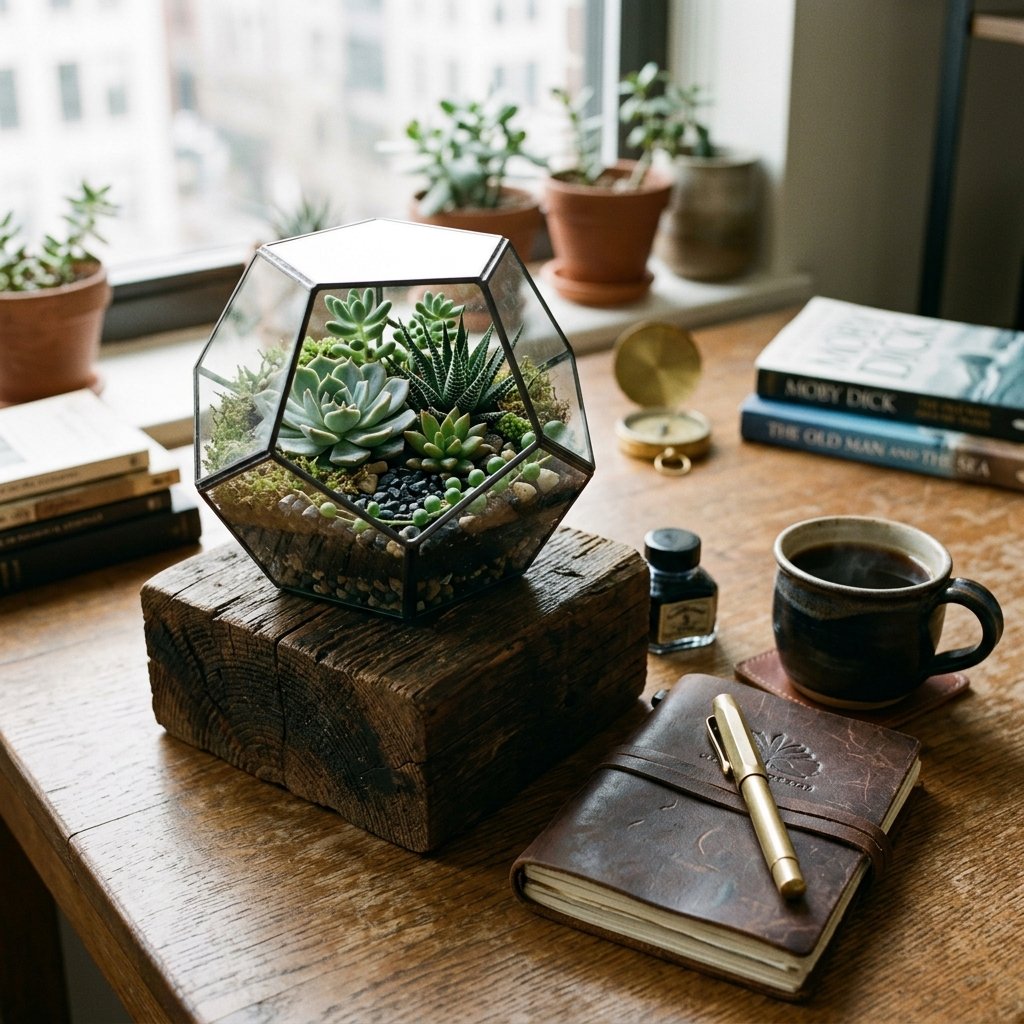
Your terrarium is built, but presentation is everything. To truly elevate this from a “craft project” to “masculine-elegant home decor,” we need to think about how it sits in a room.
Building a Custom Pedestal
A glass bowl sitting flat on a table is fine, but elevating it gives it presence. Head to your scrap wood pile. Find a square off-cut of a 2×4 or a chunky piece of cedar. Sand the edges down until they are smooth, and apply a quick coat of dark walnut stain or even just rub it with some mineral oil to bring out the grain. Place your finished terrarium on top of this rugged wooden block.
Alternatively, look for a cheap, flat cork trivet or a faux leather placemat. Cutting a custom-sized circle to sit under your bowl protects your furniture and adds a layer of intentional, high-end texture.
Maintenance & Care (The Best Part!)
Because you are a clever, budget-savvy upcycler, your new terrarium requires exactly zero water, zero sunlight, and zero stress. To keep it looking fresh, simply take a hairdryer on the “cool” setting and give it a quick blast once a month to remove any household dust. If your baking soda “farina” ever wears off, a quick touch-up with a dry brush will bring it right back to life.
You have just created a bulletproof, stunning piece of home decor that brings the outdoors in, without the hassle of keeping real plants alive.
Conclusion
And there you have it! By combining a few $1.25 items from the Dollar Tree with a bit of clever styling, a dusting of baking soda, and a resourceful mindset, you have crafted a chic, high-end glass bowl succulent terrarium. You bypassed the outrageous retail markups and created something custom, durable, and incredibly stylish.
Whether you are crafting these in bulk for a budget-friendly wedding centerpiece, building one as a rugged Father’s Day gift for a desk, or just elevating your own living space on a dime, this project proves that great style is about ingenuity, not income. Keep upcycling, keep hunting for those bargains, and never underestimate the power of a little hot glue and imagination. Happy frugal crafting!

Makenzie is the founder and lead writer at MoneyHackTips.com — a personal finance blog dedicated to delivering street-smart financial wisdom for real people on real budgets. With 300+ published articles covering everything from debt management to investing fundamentals, Makenzie’s mission is to make every dollar work harder. When not writing about money hacks, Makenzie is testing frugal living strategies, optimizing side hustles, and helping readers build financial freedom from scratch.