
The Hidden Potential of the Kitchen Aisle
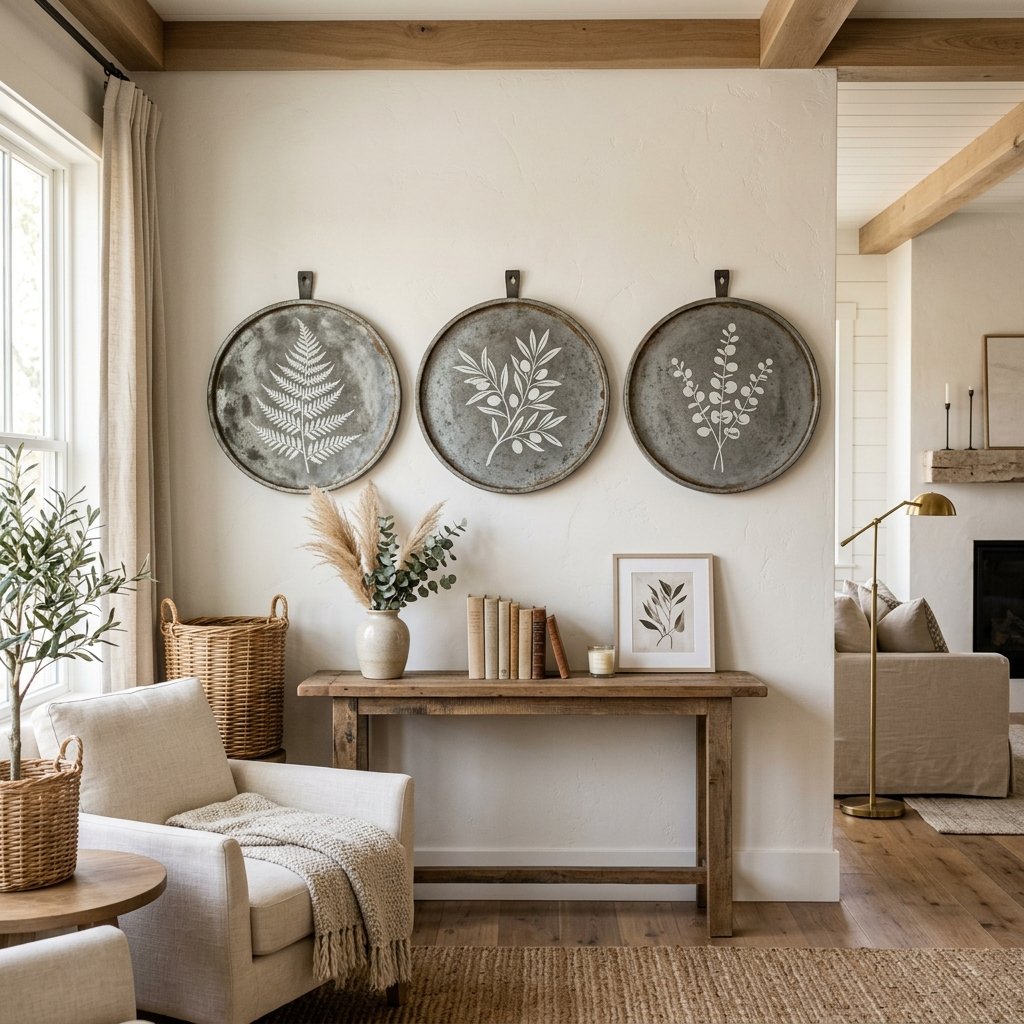
In the world of high-end home styling, designers often look for structural silhouettes rather than finished products. One of the most overlooked items in the local Dollar Tree is the humble tin burner cover. To the untrained eye, it is a utilitarian kitchen accessory; to the resourceful DIYer, it is a circular canvas with a perfectly uniform lip, ready to be transformed into designer-grade farmhouse wall art. This hack is not just about saving money—it is about achieving that rugged, masculine-elegant aesthetic that blends industrial textures with rustic charm. By the end of this guide, you will know how to turn a $1.25 piece of tin into a $40 boutique-style accent piece.
The Economics of Upcycling: Why This Hack Works

Strategic Sourcing and Cost Analysis
When you walk into a home goods store, a set of three metal wall medallions can easily set you back $60 to $120. By utilizing Dollar Tree burner covers, we are leveraging a cheap, lightweight substrate that mimics the look of heavy galvanized steel once treated. The circular shape provides a geometric break from the standard rectangular frames found in most homes, adding immediate visual interest to your gallery wall.
| Item | Boutique Price | DIY Cost | Savings |
|---|---|---|---|
| Set of 2 Metal Medallions | $45.00 | $2.50 | 94% |
| Chalk Paint & Wax | Included | $3.00 (pro-rated) | – |
| Mounting Hardware | Included | $0.50 | – |
| Total | $45.00 | $6.00 | $39.00 |
The efficiency of this project lies in the materials. You aren’t just buying a ‘cheap’ item; you are buying a blank industrial component. The metal is thin enough to be easily manipulated for mounting but sturdy enough to hold heavy-bodied paints and textures without warping.
The Supply List: Tools for a Professional Finish
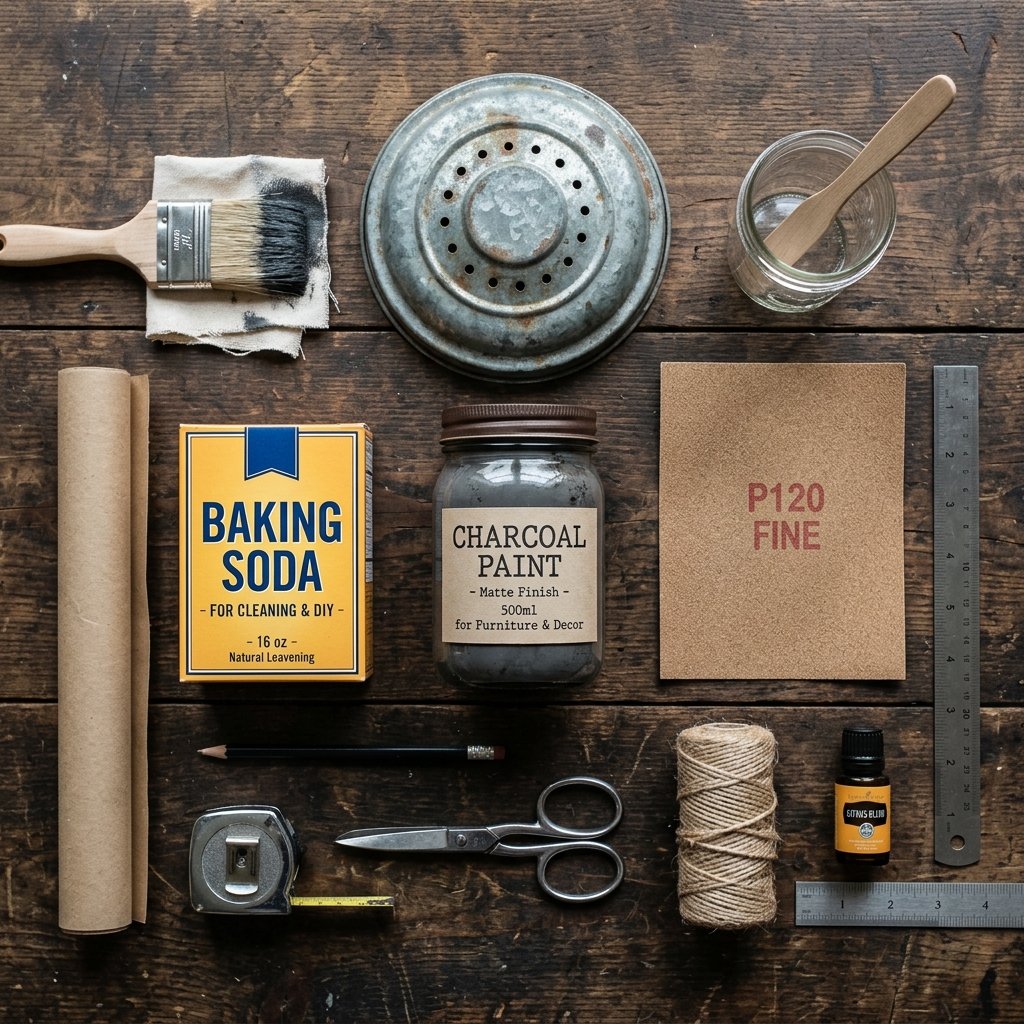
The Gear You Need
To move from ‘crafty’ to ‘designer,’ you need the right arsenal. We aren’t just slapping paint on tin; we are building a layered patina. This requires specific materials that add grit and age to the surface.
- Dollar Tree Burner Covers: Usually sold in packs of two (one large, one small).
- Baking Soda: This is the secret ingredient for creating a faux-ceramic or aged stone texture.
- Matte Acrylic or Chalk Paint: Stick to neutral tones like Charcoal, Slate, or Off-White.
- Coarse Sandpaper (80-120 grit): Essential for scuffing the slick tin surface so paint adheres.
- Stencils or Decoupage Paper: Botanical prints or minimalist typography work best for the farmhouse look.
- E6000 Adhesive: For a permanent, rugged bond when adding hanging hardware.
Budget Guru Tip: Never skip the sanding step. The factory coating on burner covers is designed to repel grease, which means it will also repel your paint if you don’t break the surface tension first.
Step-by-Step: Creating the Faux Zinc Texture
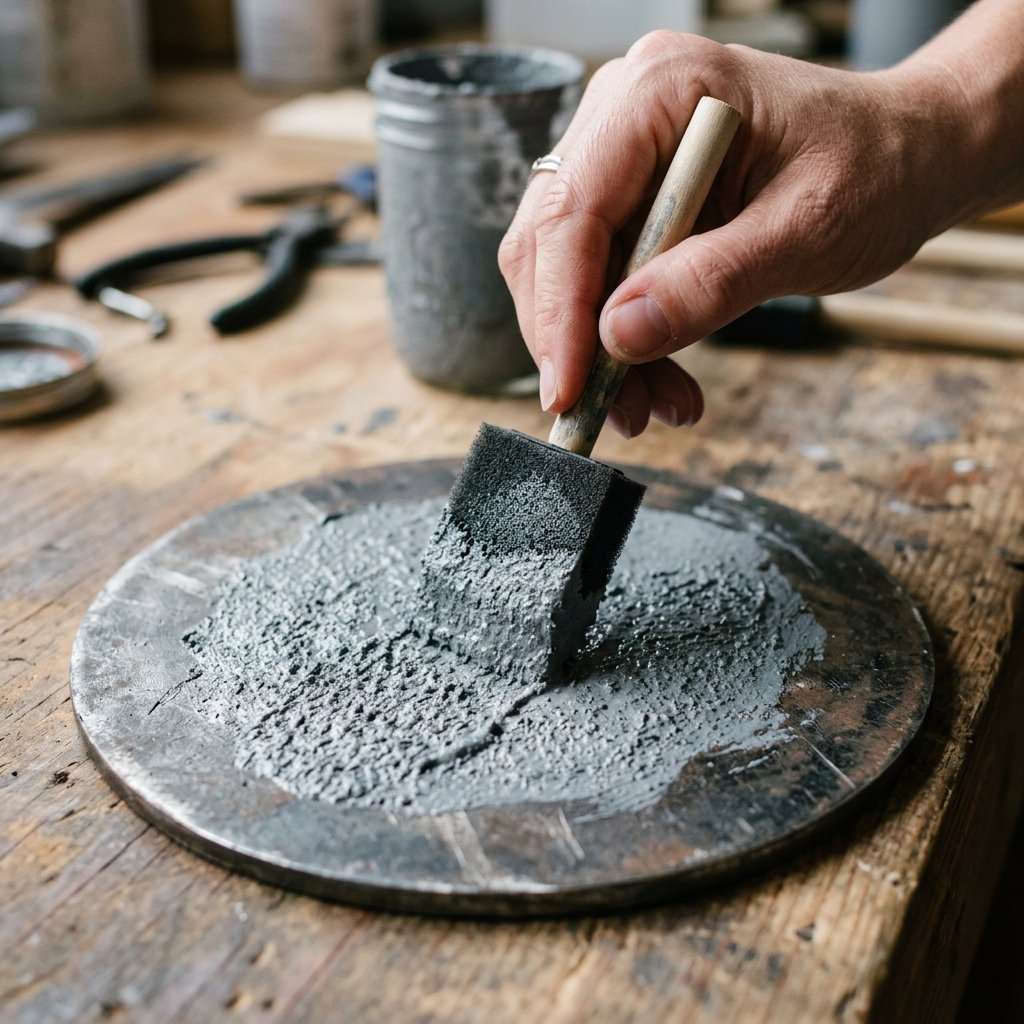
The ‘Baking Soda Paint’ Technique
The hallmark of expensive farmhouse decor is texture. We want our wall art to look like it was forged in an old workshop, not stamped in a factory. This is where the baking soda trick comes into play.
- Scuff the Surface: Use your sandpaper to vigorously sand the entire top and sides of the burner cover. You want to see fine scratches; this provides ‘tooth’ for the paint.
- The Formula: Mix your paint with baking soda.
The Texture Ratio: 1 cup of matte paint to 1/4 cup of baking soda. Stir until it reaches a thick, slightly gritty consistency similar to wet concrete.
- Apply the Base Coat: Use a stippling motion (dabbing up and down) rather than long strokes. This creates tiny peaks and valleys that mimic the look of cast iron or aged zinc.
- Dry and Repeat: Let the first coat dry for at least 30 minutes. Apply a second coat if the silver tin is still visible.
This process transforms the lightweight tin into something that looks and feels substantial. It removes the ‘tinny’ sound and gives the item a weighted, premium appearance.
Designing the Face: Stencils and Transfers
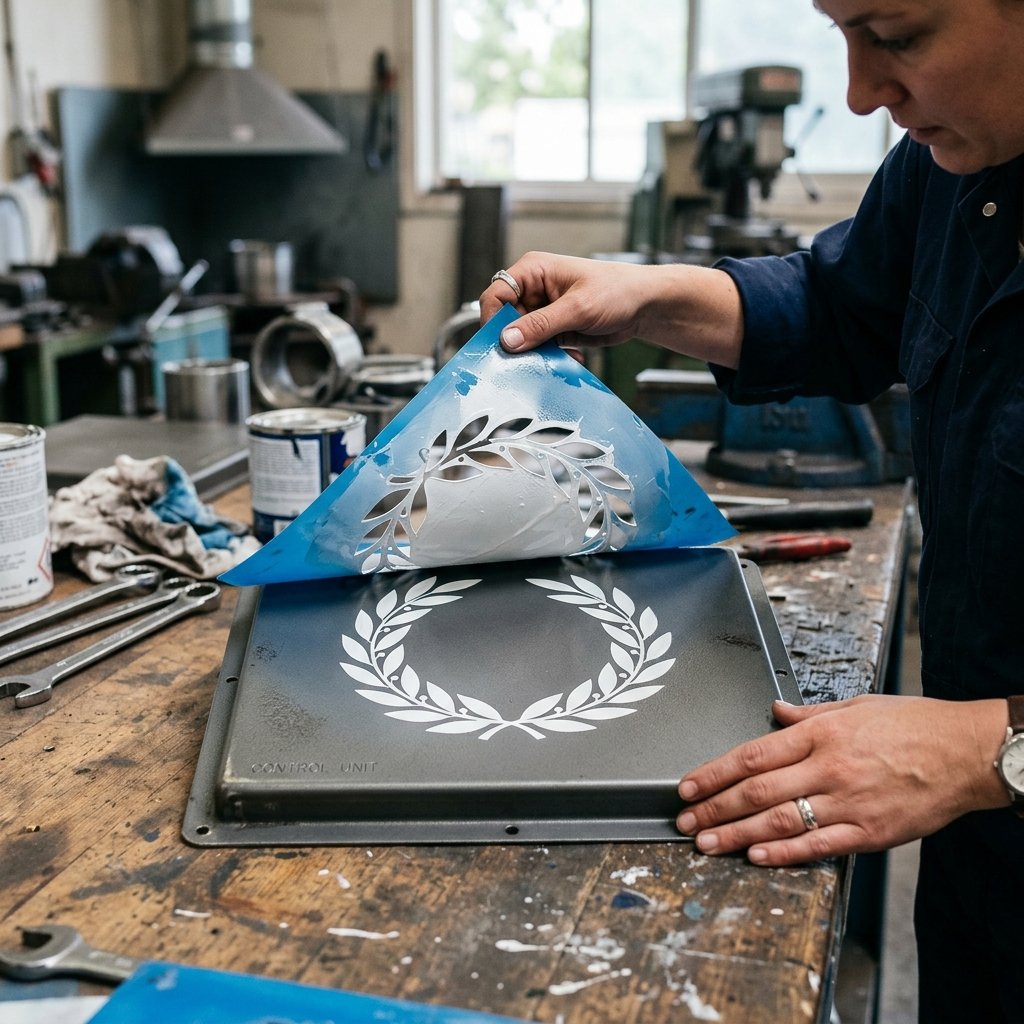
Adding the Designer Detail
Once your base is dry and textured, it’s time to add the focal point. For a rugged farmhouse aesthetic, less is more. Avoid overly bright colors; stick to a high-contrast monochromatic palette.
Option A: The Stenciled Wreath
Place a circular botanical stencil in the center. Use a very dry brush with a contrasting color (if the base is charcoal, use cream). Lightly tap the paint over the stencil. The goal is a slightly faded, ‘weathered’ look, as if the paint has been there for decades.
Option B: The Industrial Typography
Use letter stencils to add a single family initial or coordinates of a meaningful location. This adds a personalized, masculine touch that fits perfectly in an office or entryway.
| Design Style | Best Color Palette | Vibe |
|---|---|---|
| Botanical | Sage Green on White | Soft Farmhouse |
| Industrial | White on Charcoal | Rugged & Modern |
| French Country | Black on Cream | Elegant & Timeless |
Pro-Tip: If you mess up the stencil, don’t worry. Wait for it to dry, sand it down slightly, and re-apply your textured base coat. This project is 100% forgiving.
Structural Mounting: How to Hang Your Art
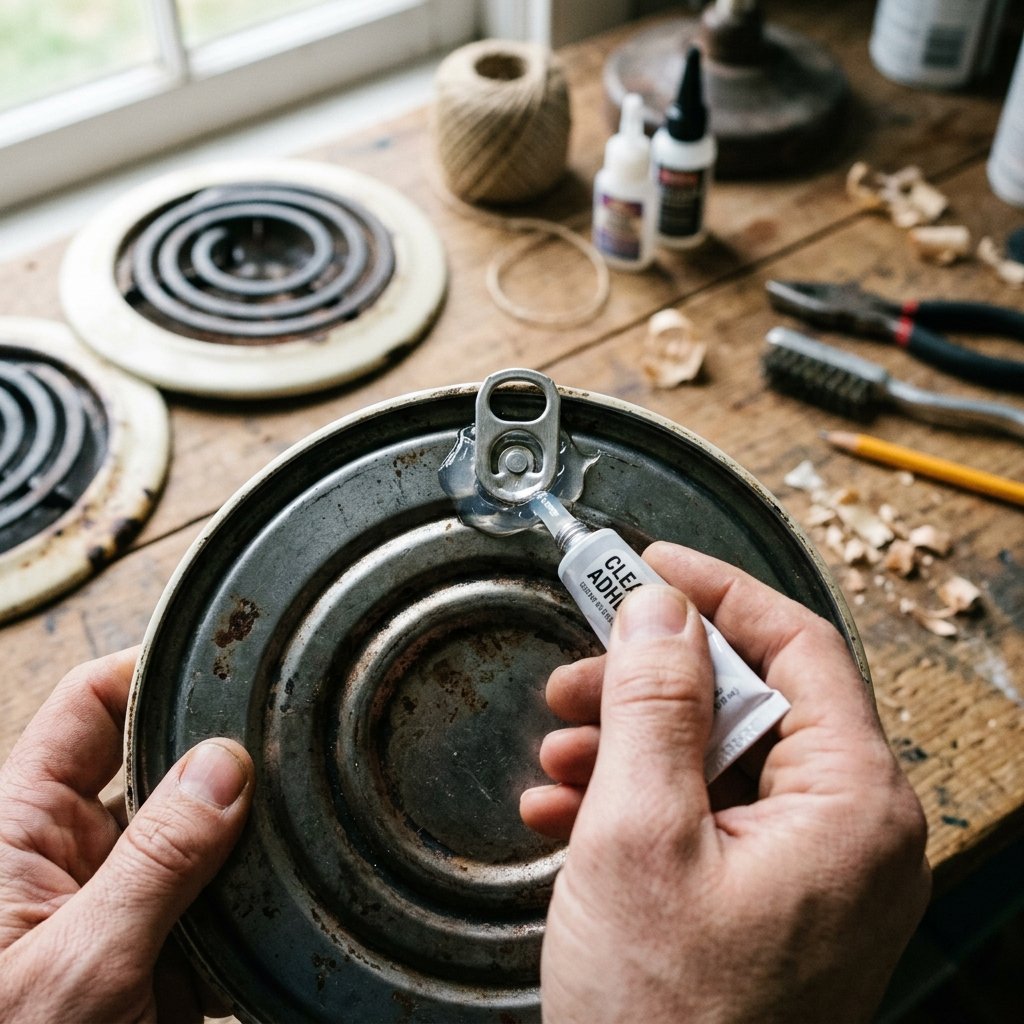
Securing the Piece for a Professional Display
Because burner covers are hollow on the back, they don’t have a built-in hanging mechanism. We need to create one that is secure and sits flush against the wall.
- The Soda Tab Trick: For a zero-budget solution, use a metal tab from a soda can. Bend it slightly and glue the bottom half to the back of the cover using E6000 glue.
- The Twine Loop: For a more rustic look, glue a loop of heavy jute twine to the top back. This allows the art to hang from a decorative nail or hook.
- Command Strips: If you are a renter, these covers are light enough to be held by a single small Command strip on the interior rim.
Wait 24 hours for the glue to fully cure before hanging. This ensures the bond is strong enough to withstand the weight of the paint and texture layers.
The Final Reveal: Styling Your Gallery Wall
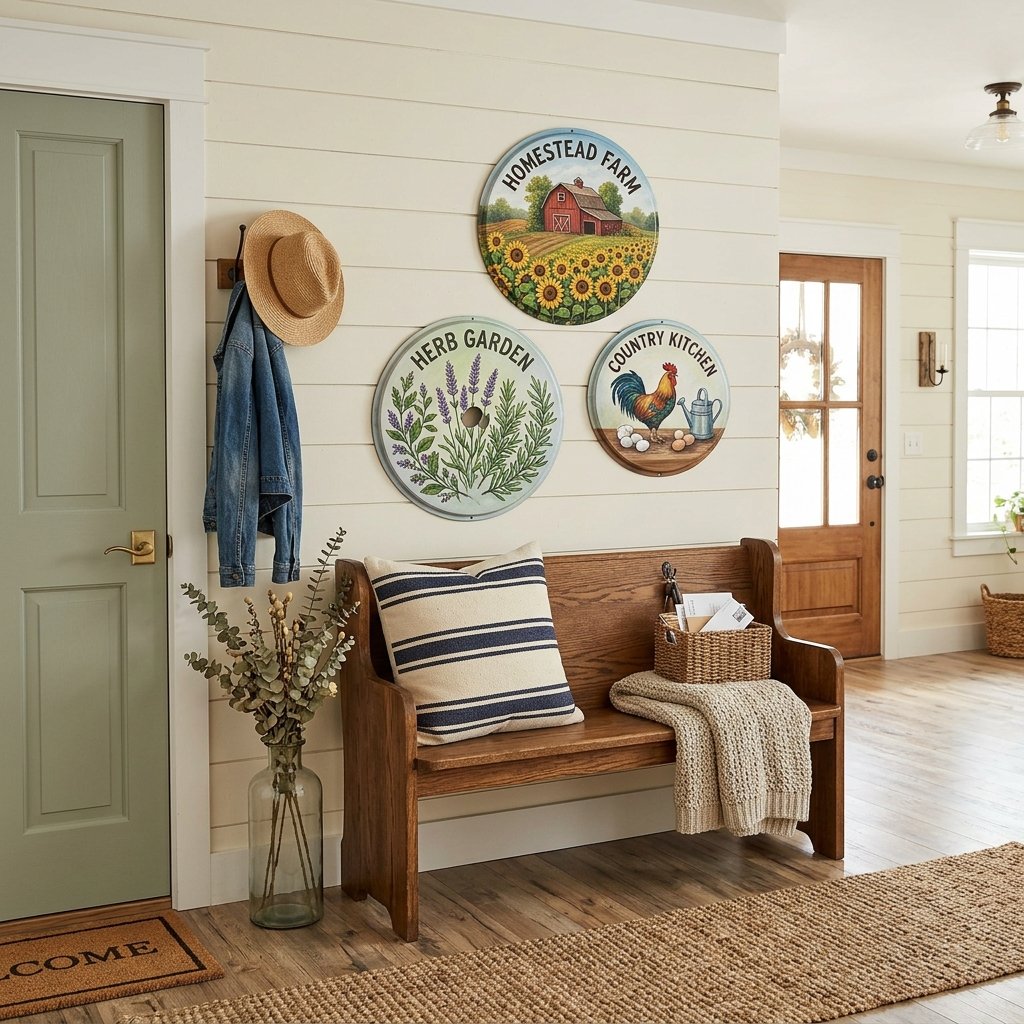
Creating a Cohesive Look
One burner cover looks like a craft; three burner covers look like a curated collection. When hanging your new art, consider the ‘Rule of Three.’ Group two small covers with one large cover in the center to create a balanced, asymmetrical layout.
These pieces look best when paired with other natural textures. Place them near:
- Raw wood shelving
- Potted greenery (like eucalyptus or ferns)
- Woven baskets
By using the same color palette across all three pieces but varying the stencils (e.g., one with a wreath, one with an initial, and one with a simple border), you create a sophisticated designer story without spending more than $10 total.
Conclusion
The Power of Resourceful Design
Transforming a Dollar Tree burner cover into farmhouse wall art is the ultimate exercise in creative frugality. It proves that you don’t need a massive budget to have a home that feels curated and high-end. By focusing on texture, neutral palettes, and rugged materials, you can bypass the ‘cheap’ look of dollar store items and create something truly remarkable. Now, grab a pack of covers, some baking soda, and start building your custom gallery wall today. Your walls—and your wallet—will thank you.

Makenzie is the founder and lead writer at MoneyHackTips.com — a personal finance blog dedicated to delivering street-smart financial wisdom for real people on real budgets. With 300+ published articles covering everything from debt management to investing fundamentals, Makenzie’s mission is to make every dollar work harder. When not writing about money hacks, Makenzie is testing frugal living strategies, optimizing side hustles, and helping readers build financial freedom from scratch.