
The Art of the High-End Hustle
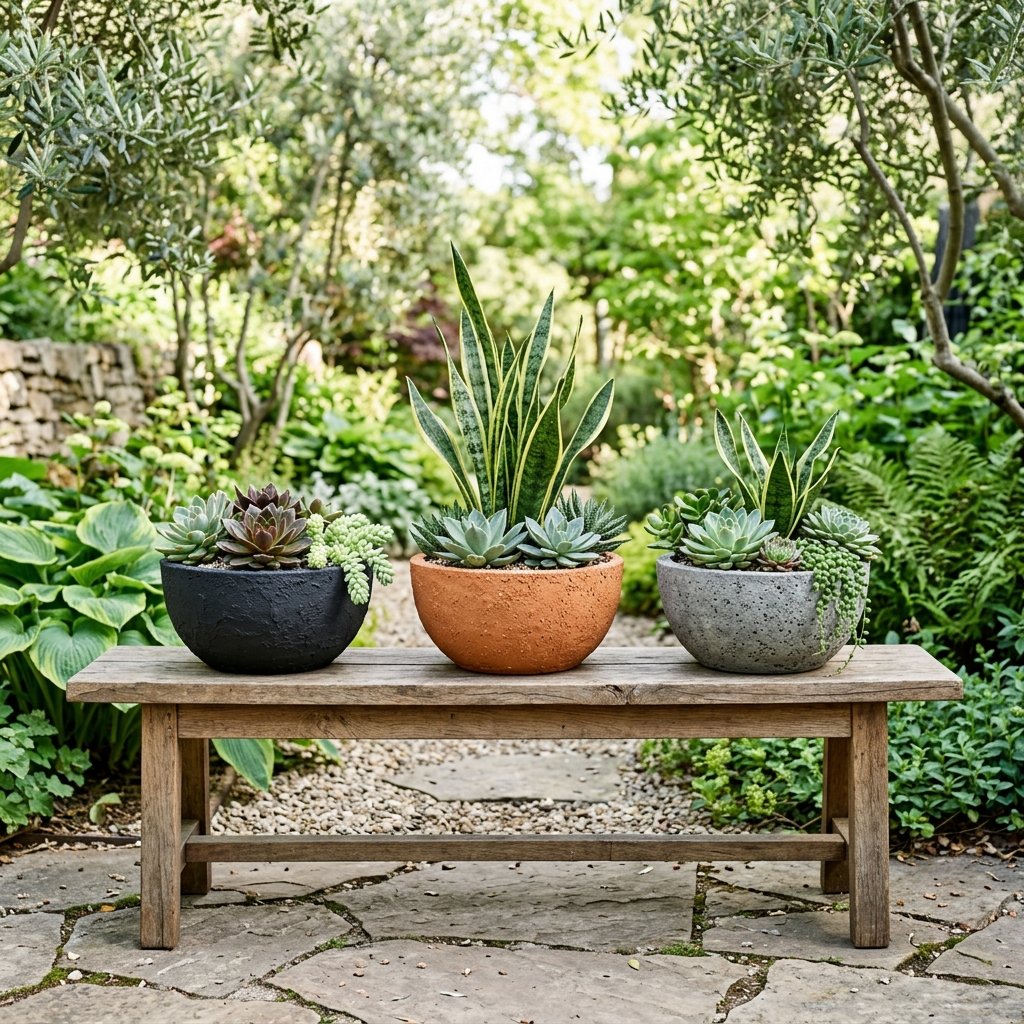
Let’s be honest: walking through a high-end home goods store like West Elm or Pottery Barn can be a soul-crushing experience for the budget-conscious decorator. You see a beautiful, matte-textured stone planter, flip over the price tag, and realize it costs more than your monthly grocery bill. But here’s a secret from the resourceful crafter’s playbook: expensive aesthetics are often just about texture and silhouette, not the material itself. In this guide, we are going to strip away the ‘cheap plastic’ look of Dollar Tree bowls and replace it with a rugged, masculine-elegant finish that will fool even the most discerning eye. We aren’t just crafting; we are engineering luxury from the mundane. Grab your brush, find your grit, and let’s turn $1.25 into $50 style.
The Hunting Grounds: Selecting Your Blanks
Finding the Right Silhouette
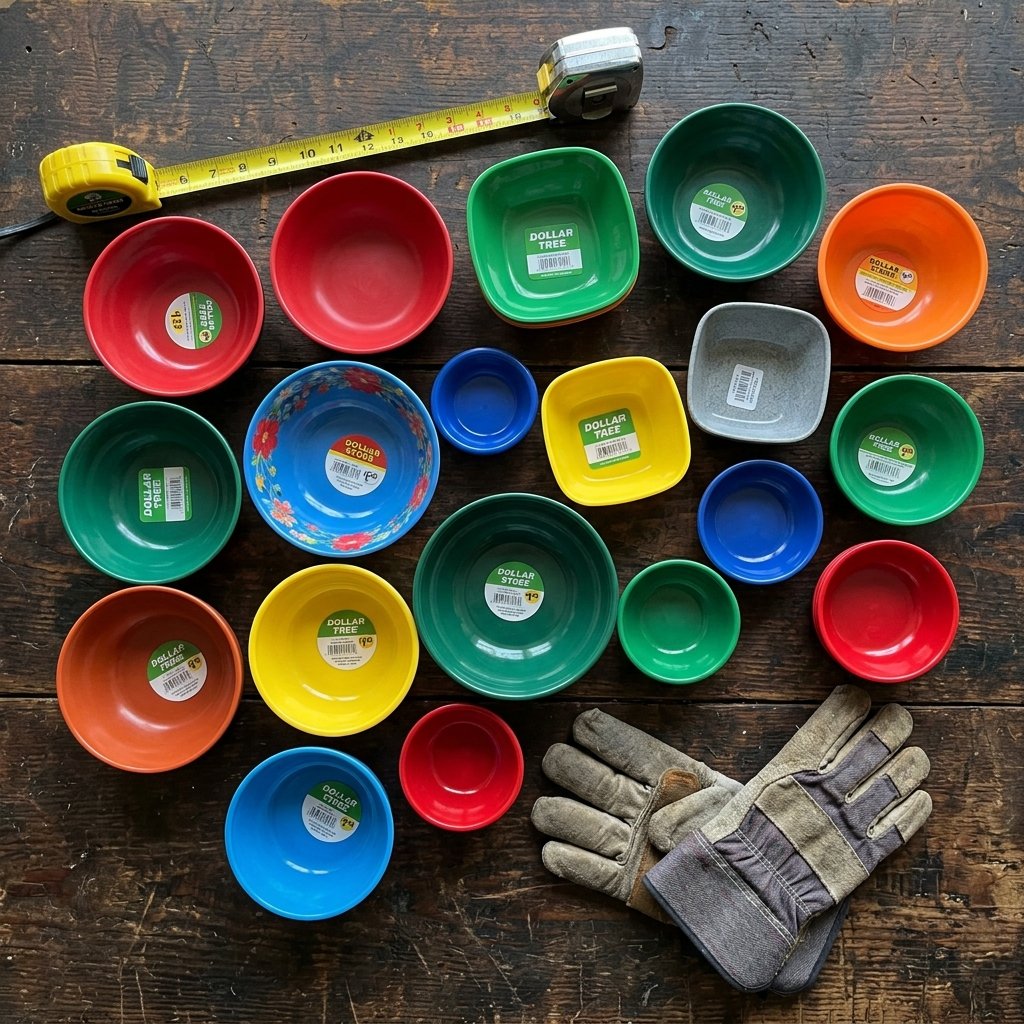
Not every bowl at the Dollar Tree is destined for greatness. To achieve that modern, high-end look, you need to look past the neon colors and focus on the shape. We are looking for clean lines, geometric profiles, and substantial sizes. Look for the large mixing bowls in the kitchen aisle or the sturdy plastic planters in the seasonal garden section.
- The Salad Bowl: Excellent for wide, shallow succulent gardens.
- The Deep Mixing Bowl: Perfect for taller foliage like Snake Plants.
- The Scalloped Edge: If you want a more traditional, ornate look, these can be transformed into ‘faux-stone’ antique pots.
| Item Type | Best For… | Expected Cost |
|---|---|---|
| Large Plastic Mixing Bowl | Floor Planters | $1.25 |
| Melamine Salad Bowl | Tabletop Succulents | $1.25 |
| Stackable Planter Inserts | Vertical Herb Gardens | $1.25 |
Pro Tip: If you find two bowls of different sizes, you can glue them base-to-base to create a sophisticated ‘hourglass’ or ‘pedestal’ planter that mimics mid-century modern designs.
Step 1: The Surface Prep & Structural Integrity
Giving the Paint Something to Grab
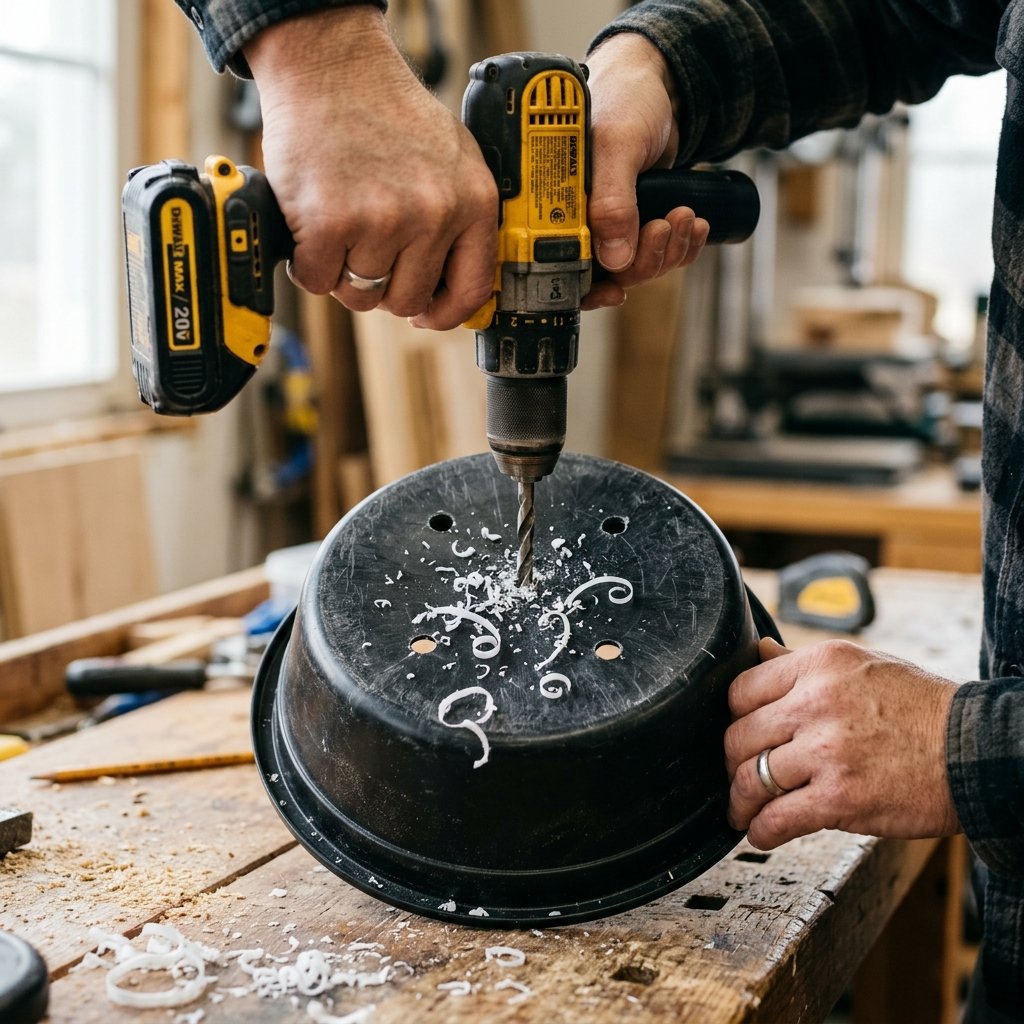
The biggest mistake DIYers make is painting directly onto slick plastic. Without proper prep, your ‘high-end’ finish will peel off in a week. We need to create a ‘mechanical bond.’ Take a 120-grit sandpaper and scuff the entire exterior surface of the bowl until the shine is completely gone. This creates micro-grooves that hold the paint for a lifetime.
The Vital Drainage Hole
Plants hate ‘wet feet.’ Without drainage, your roots will rot. Since we are using plastic, this is easy. You can use a power drill with a 1/4 inch bit or, if you’re feeling resourceful, heat up a metal skewer or a large nail with a lighter and melt 3-5 holes into the bottom. Safety first: Always wear eye protection when drilling plastic, as it can occasionally chip or crack.
“A planter without a hole is just a decorative bucket. Give your plants a chance to breathe.”
Step 2: The Secret Sauce (Baking Soda Paint Technique)
The Chemistry of Texture
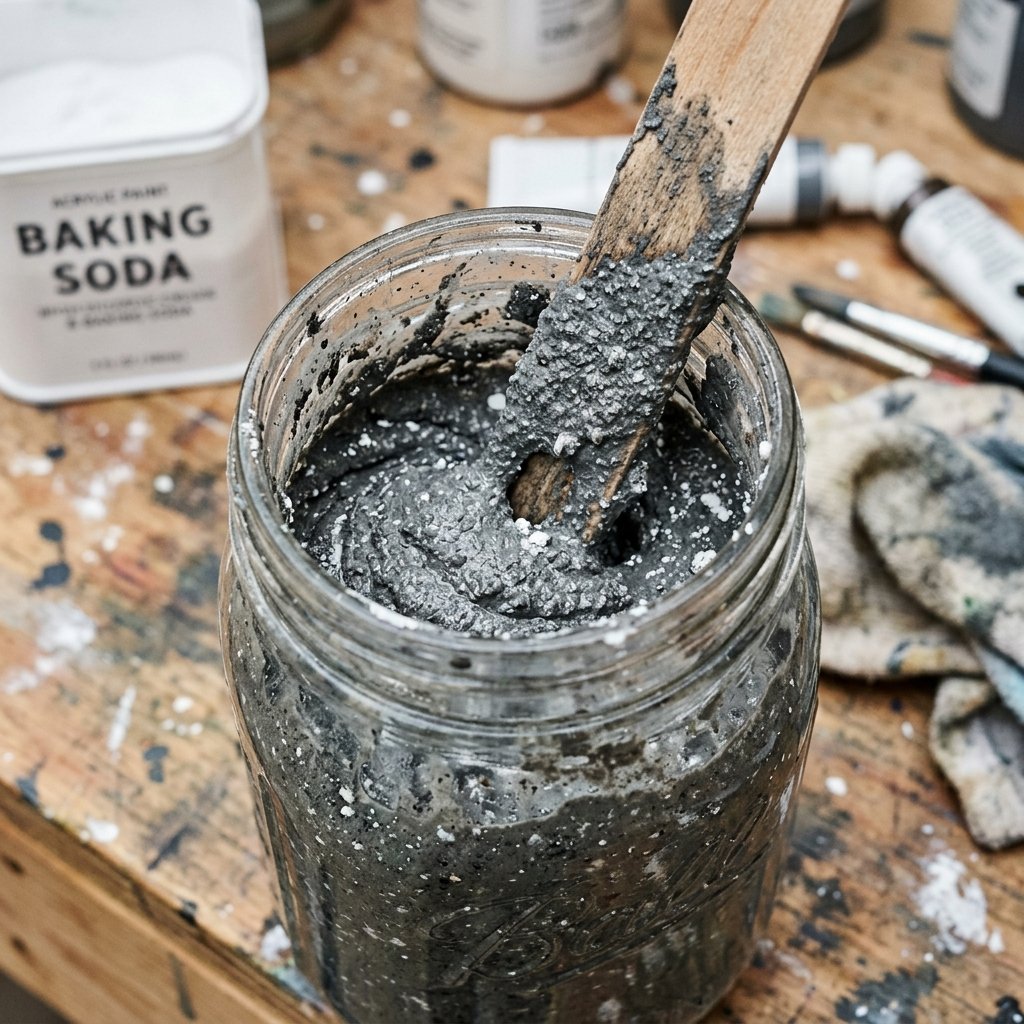
This is where the magic happens. We are going to turn standard acrylic paint into a thick, gritty ‘stone’ paste using a common pantry staple: baking soda. This mixture creates a matte, ceramic-like finish that hides the imperfections of the plastic and gives the piece weight and character.
The Master Formula
| Ingredient | Ratio | Purpose |
|---|---|---|
| Matte Acrylic Paint | 1 Cup | Base Color (Charcoal, Sage, or Terracotta) |
| Baking Soda | 1/4 to 1/2 Cup | The ‘Stone’ Texture & Matte Agent |
| Water | 1 Teaspoon | Only if the mixture is too thick to spread |
Mix the paint and baking soda in a small container. It will start to fluff up and look like thick cake batter. Using a coarse bristle brush, apply the mixture to the bowl using a ‘stippling’ motion (dabbing) rather than long strokes. This creates the organic, uneven texture found in real concrete or hand-fired clay. Let the first coat dry for 45 minutes, then apply a second coat to ensure no plastic is peeking through.
Step 3: Finishing, Weathering & Styling
Adding the Designer Touch
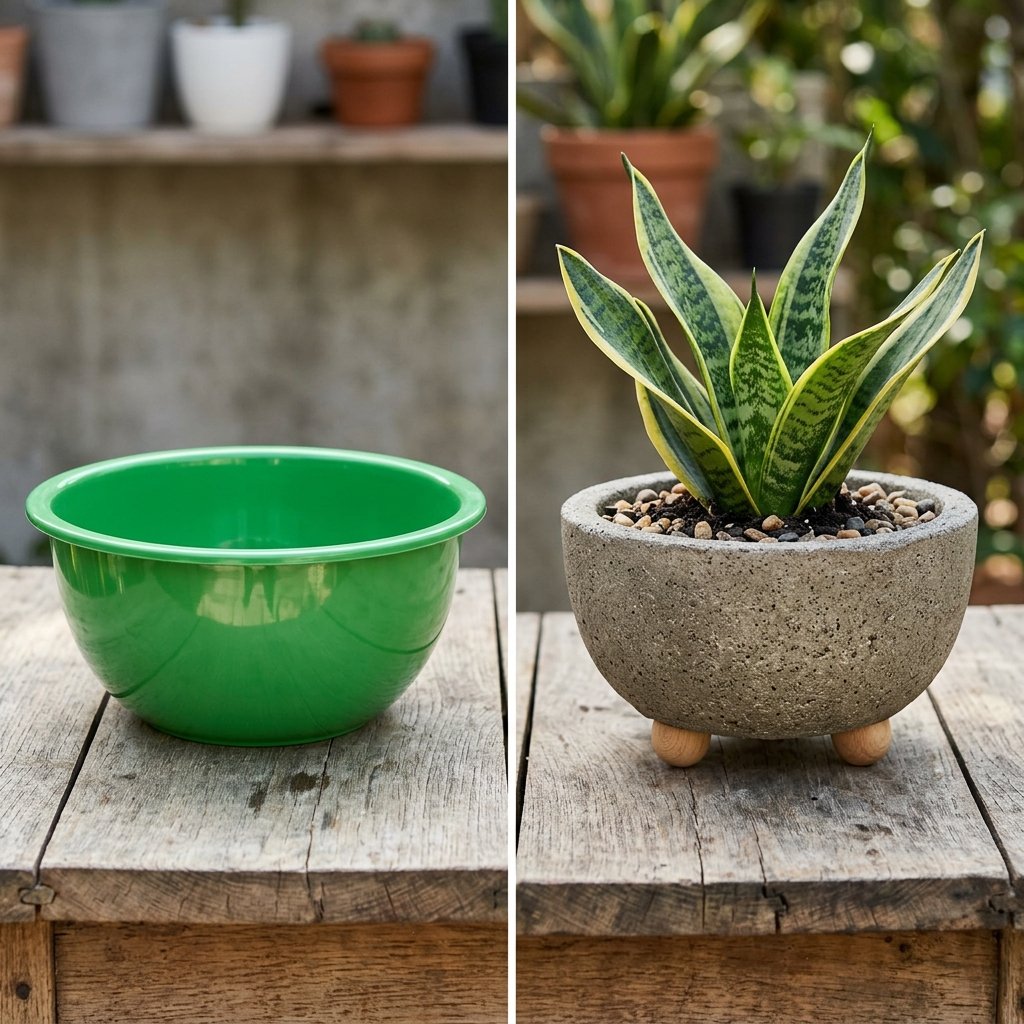
Once your final coat is dry, your bowl should look like heavy stone. But we can take it further. To achieve a ‘weathered’ or ‘aged’ look, take a dry brush with a tiny amount of lighter gray or white paint and lightly flick it over the high points of the texture. This is called ‘dry brushing’ and it adds incredible depth.
Elevating the Base
To truly mimic high-end brands, consider adding ‘feet’ to your planter. You can glue three wooden tumbling tower blocks (also from Dollar Tree) to the bottom of the bowl. Paint them the same color or leave them natural wood for a beautiful contrast. This elevates the planter, literally and figuratively, making it look like a custom furniture piece.
The Cost Comparison: DIY vs. Retail
| Feature | Store-Bought Modern Planter | Our Dollar Tree Upcycle |
|---|---|---|
| Material | Ceramic/Stone | Textured Upcycled Plastic |
| Durability | Fragile/Heavy | Lightweight/Shatterproof |
| Average Cost | $35.00 – $65.00 | $2.50 – $4.00 |
| Time Investment | 30 min (Driving/Shopping) | 60 min (Including drying) |
Conclusion
Luxury is a Mindset, Not a Price Tag
By following these three steps—prep, texture, and finish—you’ve successfully bypassed the ‘big box’ markup and created something truly unique. These planters don’t just hold plants; they hold the story of your resourcefulness. Whether you’re lining your front porch or gifting a succulent garden to a friend, these high-end dupes prove that with a little bit of baking soda and a lot of creativity, you can live a champagne lifestyle on a soda-water budget. Now go forth, scavenge those aisles, and start your own modern garden revolution.

Makenzie is the founder and lead writer at MoneyHackTips.com — a personal finance blog dedicated to delivering street-smart financial wisdom for real people on real budgets. With 300+ published articles covering everything from debt management to investing fundamentals, Makenzie’s mission is to make every dollar work harder. When not writing about money hacks, Makenzie is testing frugal living strategies, optimizing side hustles, and helping readers build financial freedom from scratch.