
The High-End Illusion: Outsmarting the Price Tag
Have you ever walked through the aisles of a high-end home decor store, spotted a gorgeous, textured fluted planter, flipped over the price tag, and felt your jaw hit the floor? We are talking about $80, $120, or even $200 for a vessel that simply holds dirt. As frugal DIYers and resourceful upcyclers, we know a secret that the big-box designer stores do not want you to realize: beautiful, masculine-elegant design is rarely about expensive materials. It is about texture, shape, and a little bit of crafty ingenuity.
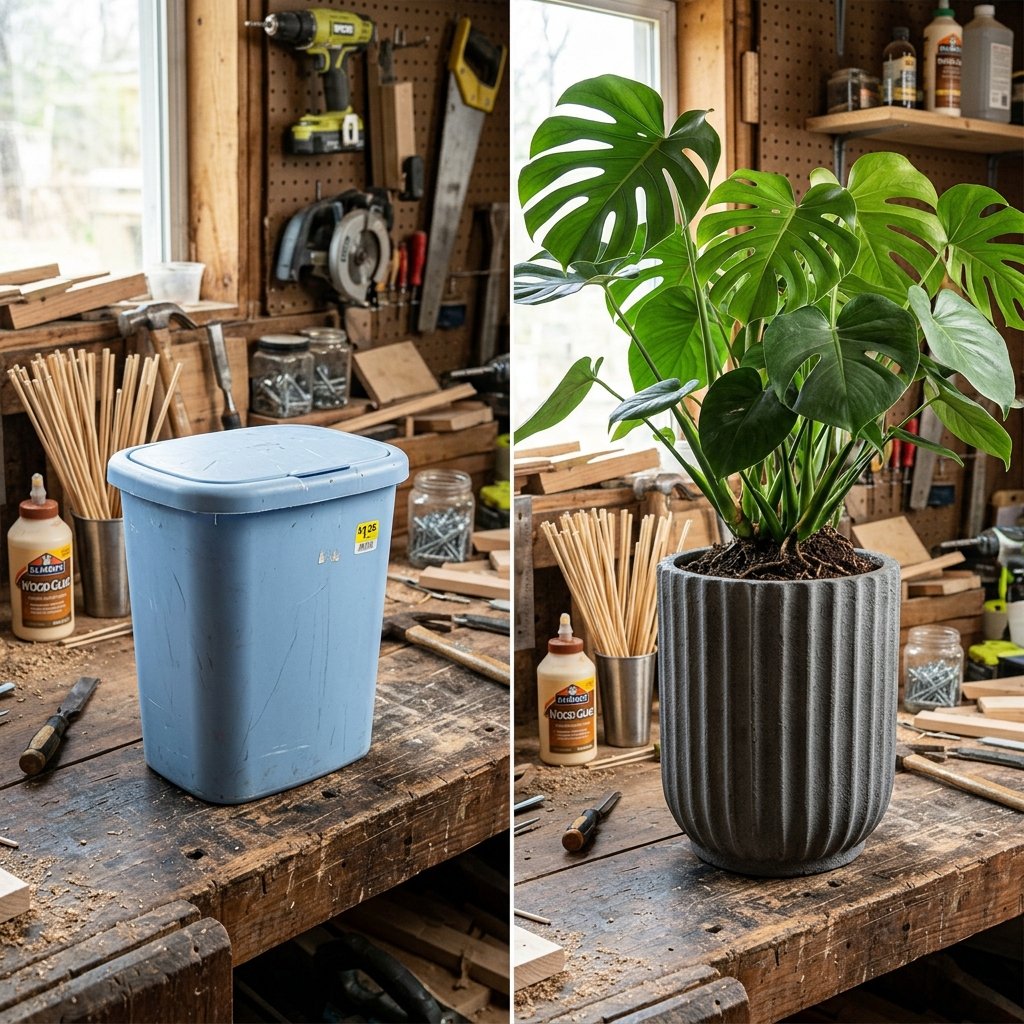
Today, we are going to dive deep into the ultimate trash-to-treasure project. We are taking a basic, flimsy $1.25 plastic wastebasket from the Dollar Tree and transforming it into a heavy, faux-stone, architectural masterpiece that looks exactly like it belongs in a Pottery Barn catalog. Whether you are a handy parent looking for a weekend project, a budget-savvy decorator upgrading your porch, or someone crafting a thoughtful, rugged gift for a plant-loving friend, this tutorial is your blueprint.
“Frugality isn’t about depriving yourself of beautiful things; it’s about outsmarting the price tag with your own two hands and a little bit of construction adhesive.”
By utilizing cheap wooden dowels (or bamboo skewers) and the legendary baking soda paint trick, you will create a piece that commands attention without draining your wallet. Roll up your sleeves, clear off your workbench, and let us get crafty.
The Scavenger’s Arsenal: Materials, Tools, and the Ultimate Budget Breakdown
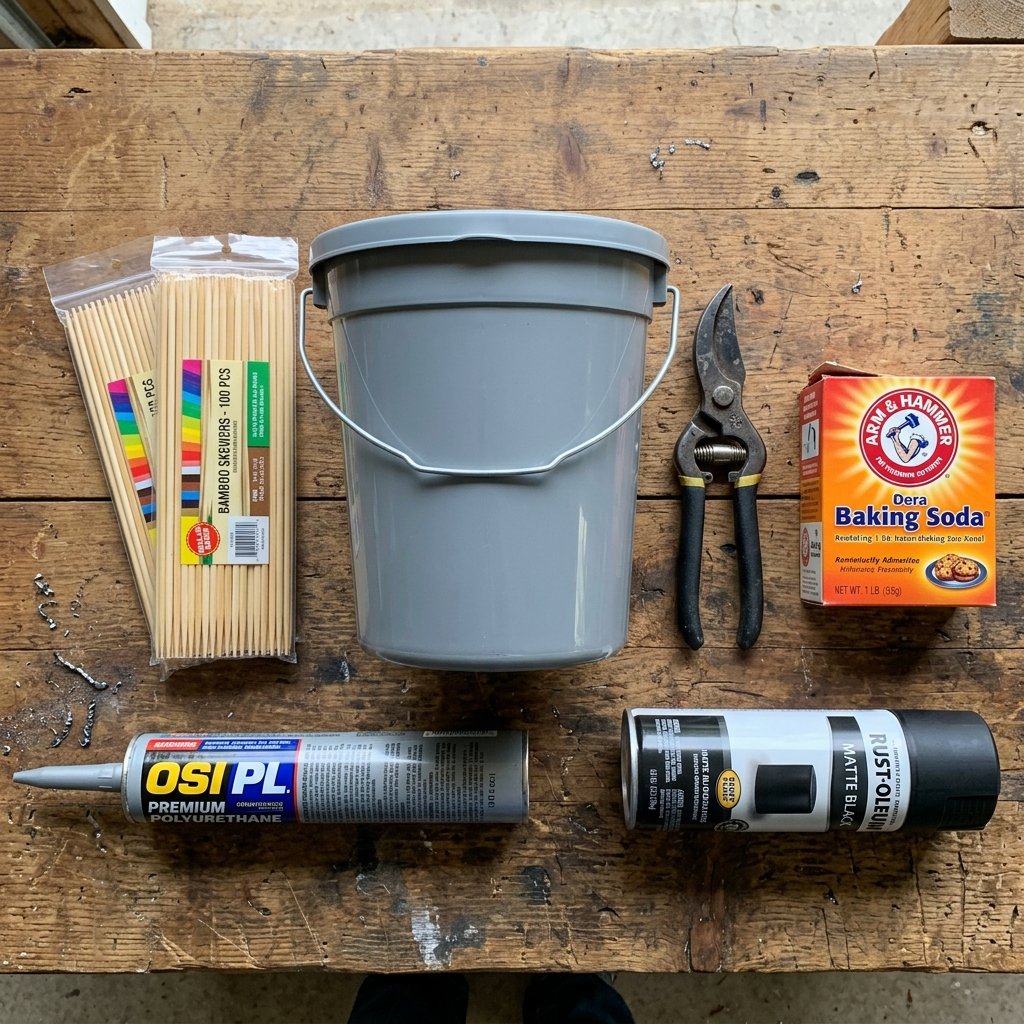
Every great project begins with a well-planned materials list. The beauty of this dollar store hack lies in its accessibility. You likely already have half of these items sitting in your garage or craft closet. For the base, we are hunting for smooth, straight-sided plastic bins. The Dollar Tree often sells small wastebaskets or tall storage buckets that serve as the perfect foundation.
Your Master Material List
- The Base: One plastic trash can or bucket from the dollar store (straight sides are crucial).
- The Fluting: 2 to 3 packs of long bamboo skewers, or wooden half-round dowels from the hardware store if you want a thicker, more rugged look.
- The Adhesive: Heavy-duty construction adhesive (like Liquid Nails) or high-quality hot glue (though construction adhesive offers a more permanent, masculine hold).
- The Cutting Tool: Heavy-duty pruning shears, a small hand saw, or strong wire cutters to trim the dowels.
- The Paint: Matte spray paint or acrylic craft paint in your chosen color (terracotta, charcoal, or muted sage work beautifully).
- The Magic Ingredient: Baking soda (to create that expensive, porous stone texture).
- The Sealant: A clear matte water-based polyurethane spray to protect your masterpiece from moisture.
Store-Bought vs. Zero-Budget DIY Comparison
| Item / Expense | Retail Designer Cost | Our DIY Cost |
|---|---|---|
| Large Fluted Planter Base | $85.00 – $150.00 | $1.25 |
| Textured Finish / Paint | Included | $3.00 |
| Wooden Fluting Details | Included | $2.50 |
| Adhesive & Sealant | Included | $2.00 (fraction of bottle) |
| Total Estimated Cost | $150.00 | $8.75 |
As you can see, the savings are astronomical. You are keeping over $140 in your pocket while gaining the immense satisfaction of building it yourself.
Safety First: When using heavy-duty construction adhesive or cutting wooden dowels, always work in a well-ventilated area and wear protective eyewear. A rugged DIYer always protects their most valuable tools: their eyes and lungs.
Step 1: Selecting and Prepping Your Dollar Store Base
The foundation of this high-end home decor dupe relies entirely on the shape of your base. When you walk into the dollar store, ignore the intended purpose of the items. Look at them purely for their geometry. You want a plastic wastebasket or storage bin that has straight, vertical sides. If the bin is heavily tapered (much wider at the top than the bottom), attaching straight dowels will create unsightly gaps.
Preparation Steps
- Clean the Base: Wipe down the plastic bin with rubbing alcohol. Dollar store plastics often have an oily residue from the manufacturing process that will prevent your adhesive from sticking properly. Let it dry completely.
- Measure the Height: Take a measuring tape and measure the exact height of your bin from the outer bottom edge to the top rim.
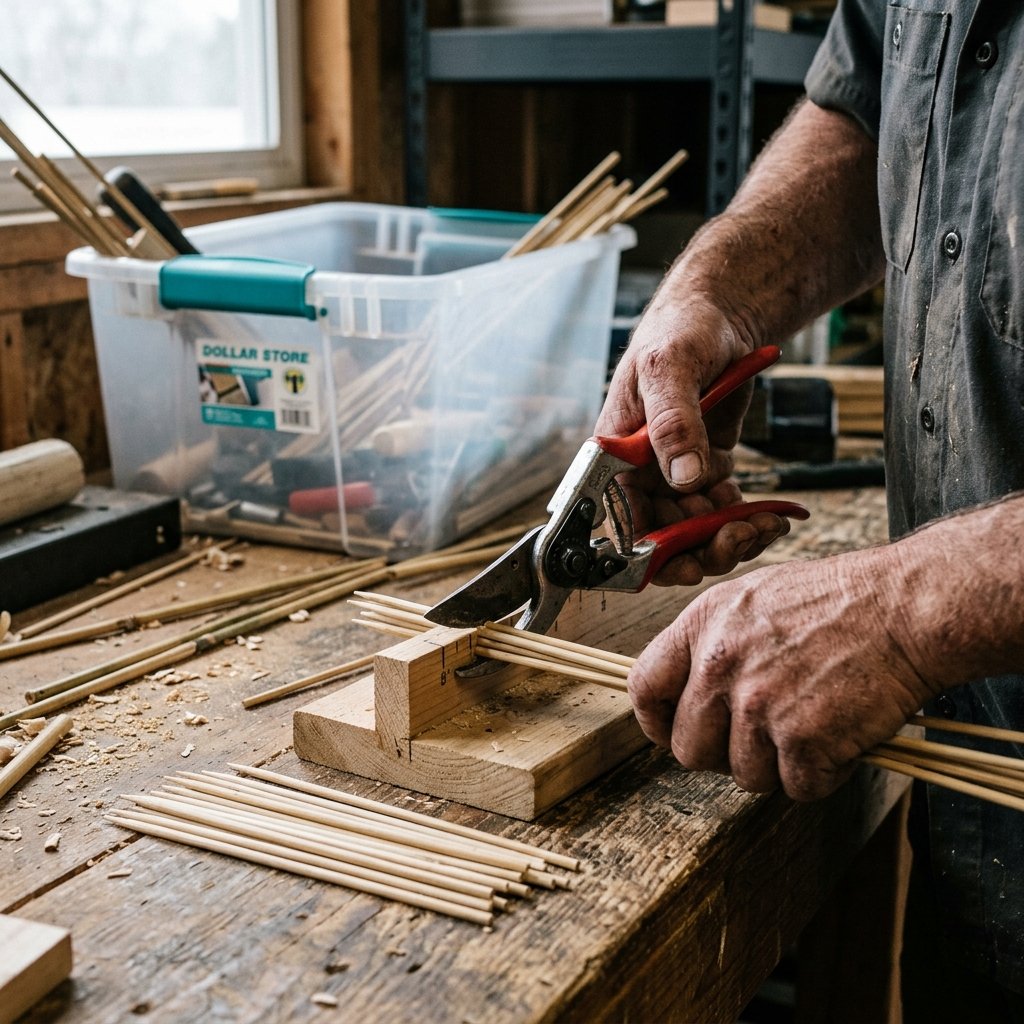
- Cut the Dowels: Using your heavy-duty shears or a small hand saw, cut your bamboo skewers or wooden dowels to match the exact height of the bin. If you want a slightly more elevated look, cut the dowels 1/2 inch longer than the bin to create a faux ‘lip’ at the top, hiding the plastic rim entirely.
- Sand the Edges: Quickly run a piece of medium-grit sandpaper over the cut ends of your dowels to remove any splinters. This attention to detail is what separates a cheap craft from a masculine-elegant, professional-looking piece.
Take your time during the cutting phase. Consistency is key. If you are cutting 100 bamboo skewers, setting up a simple stop-block on your workbench will ensure every single piece is perfectly uniform, saving you 20 minutes of measuring.
Step 2: The Precision Glue-Up (Where the Magic Happens)
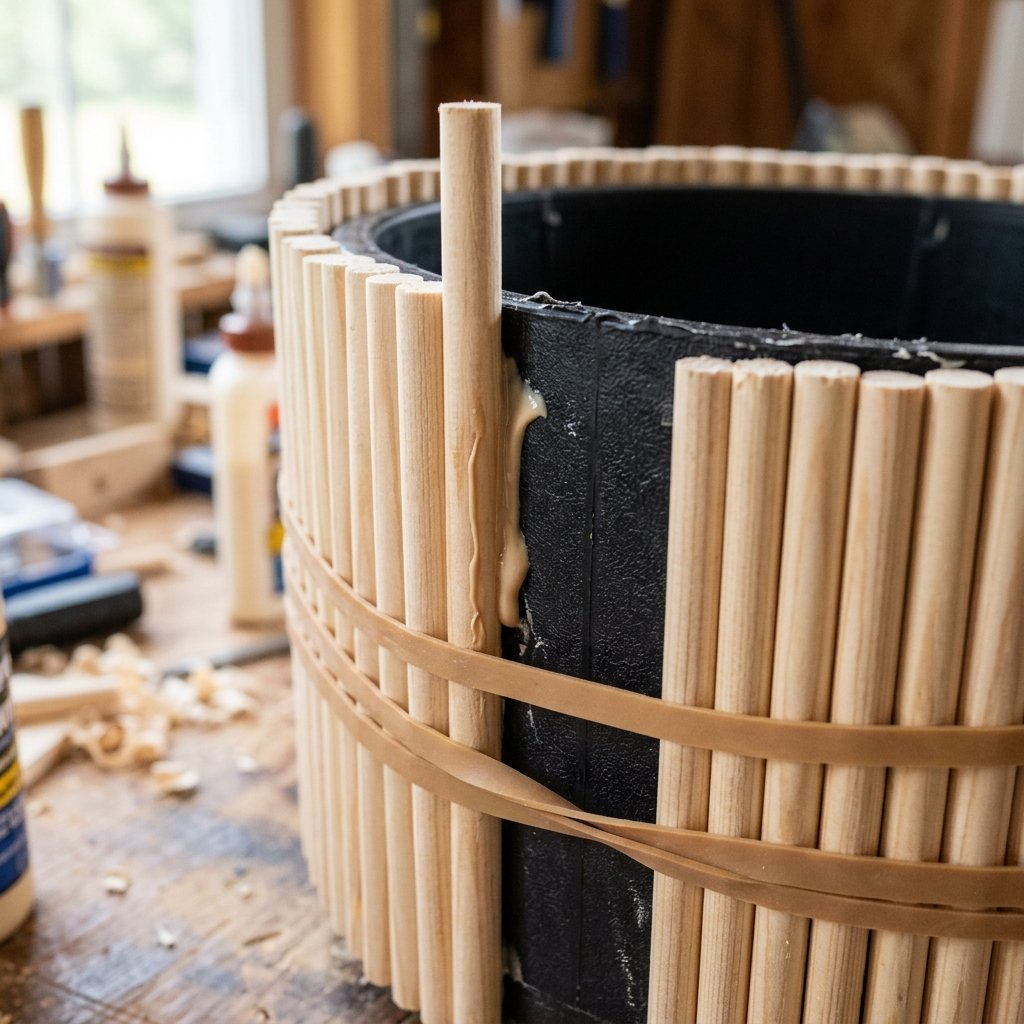
This is the phase where your cheap plastic bin begins its transformation into a designer fluted planter. Patience is your best friend here. While hot glue is fast, it can peel off smooth plastic when exposed to temperature changes. For a truly rugged, long-lasting hold, a dab of construction adhesive paired with hot glue is the ultimate pro-crafter secret.
The Dual-Glue Technique
Apply a thin bead of construction adhesive along the back of a dowel, but leave a small gap at the top and bottom. Place a tiny dot of hot glue in those gaps. The hot glue provides an instant, temporary hold (acting like a clamp), while the construction adhesive cures over 24 hours for a permanent, unbreakable bond.
Application Steps
- Start at the Seam: Find the mold seam on your plastic bin and use it as your starting line to ensure your first dowel is perfectly vertical.
- Press and Hold: Press the first dowel firmly against the plastic. Ensure it is perfectly flush with the bottom so your planter will sit flat on the floor.
- Work in Small Sections: Continue gluing the dowels side-by-side, tightly packed together. There should be no plastic visible between them.
- The Rubber Band Trick: Once you have completed a quarter of the bin, wrap two large rubber bands around the circumference (one near the top, one near the bottom). This keeps the dowels tightly pressed against the bin as the adhesive cures. Slide the rubber bands along as you add more dowels.
If you encounter a slight taper in your bin, do not panic. Simply space the dowels infinitesimally wider at the top. Once painted and textured, the eye will naturally blend the fluted lines, hiding minor imperfections.
Step 3: The Baking Soda Paint Trick for a Faux-Stone Finish
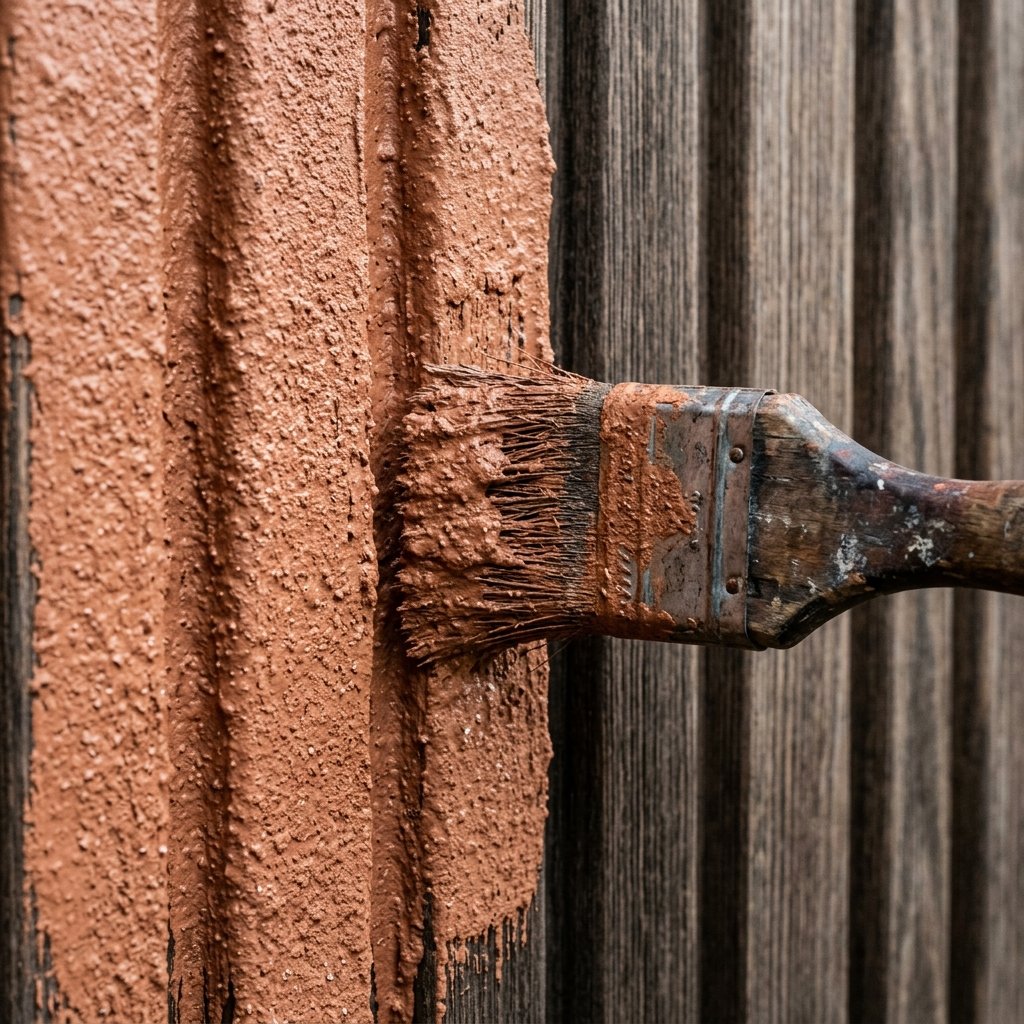
Now that your planter is fully clad in its wooden armor, it still looks like a bunch of skewers glued to a bucket. To elevate it to Pottery Barn status, we must deploy the ultimate frugal DIY weapon: the baking soda paint trick. This technique chemically thickens standard acrylic or latex paint, creating a gritty, chalky, porous texture that perfectly mimics expensive ceramic, concrete, or raw terracotta.
Mixing the Faux-Stone Paint
You do not need expensive specialty texture paints. You can raid your kitchen pantry and use standard baking soda.
| Desired Finish | Paint Type | Baking Soda Ratio |
|---|---|---|
| Smooth Matte Ceramic | Acrylic or Chalk Paint | 1 cup paint : 1 tbsp baking soda |
| Aged Terracotta | Warm Rust Latex Paint | 1 cup paint : 2 tbsp baking soda |
| Rough Concrete / Stone | Charcoal Grey Paint | 1 cup paint : 1/4 cup baking soda |
Painting Technique
- Mix Thoroughly: Stir the baking soda into your paint until it reaches a thick, frosting-like consistency. It will begin to puff up slightly—this is normal!
- The First Coat: Use a cheap bristle brush (not a foam brush) to push the thick paint into the deep grooves between the dowels. Do not worry about brush strokes; the texture is the goal here. Let it dry for 1 hour.
- The Stippling Coat: For the second coat, load your brush with the textured paint and ‘stipple’ it—dab it vertically against the dowels rather than brushing side-to-side. This creates a beautifully rugged, pitted texture that looks exactly like cast stone.
- Add Depth (Optional): For a truly masculine-elegant look, take a slightly darker shade of your base color, thin it with water, and brush it lightly over the dried texture. Wipe it back immediately with a rag. This ‘antiquing glaze’ settles into the grooves, emphasizing the fluted shadows.
Step 4: Sealing, Drainage, and Styling Your Rugged Masterpiece
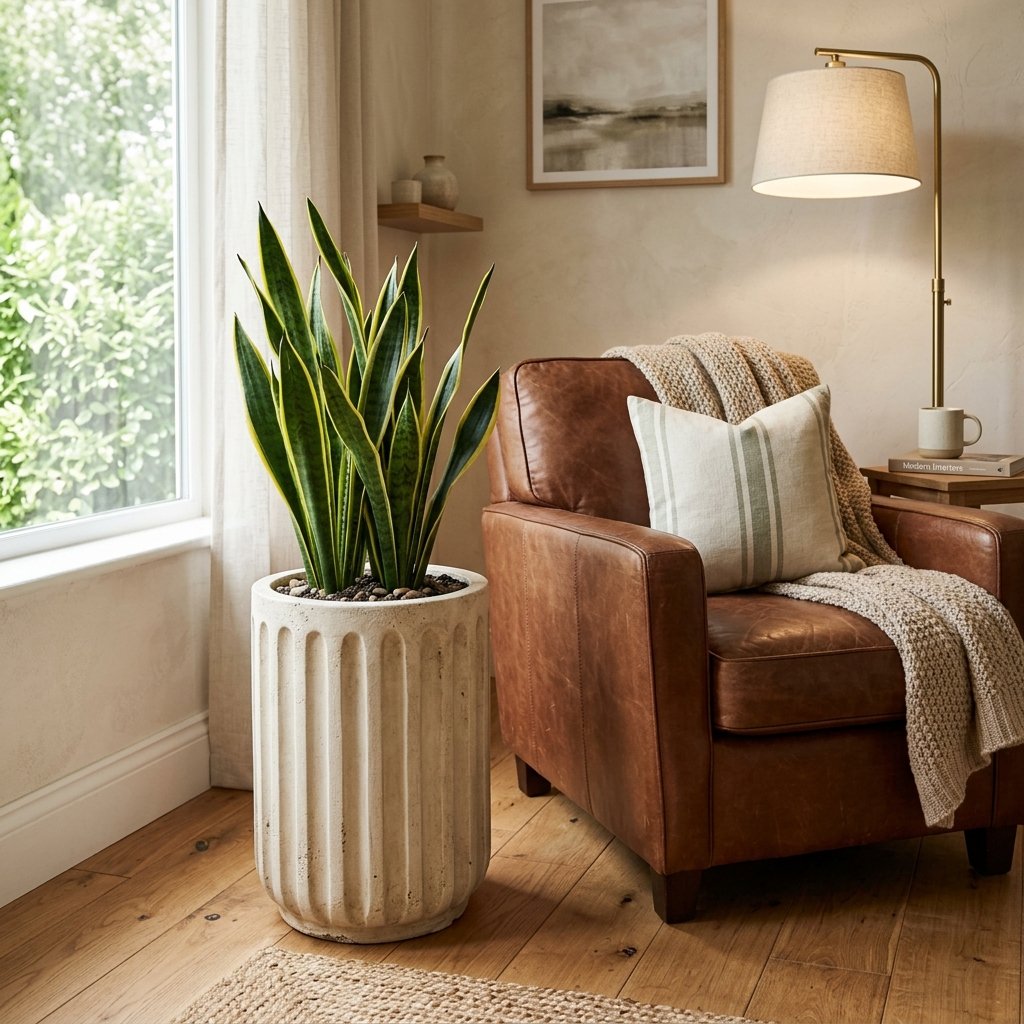
You have successfully upcycled trash into treasure, but a true craftsman knows that functionality is just as important as aesthetics. If you plan to put a real plant in this vessel, you must address drainage and moisture protection.
Waterproofing and Drainage
- Drill Drainage Holes: Flip your cured, painted planter upside down. Using a standard power drill and a 1/4 inch bit, drill 3 to 4 holes directly through the plastic bottom. Because you used a flexible plastic bin, it will not crack like ceramic would.
- Seal the Exterior: Wood and water are natural enemies. To protect your fluted details from rotting when you water your plants, spray the entire exterior with two coats of clear, matte polyurethane sealer. The matte finish preserves the realistic stone look while providing a waterproof barrier.
Styling Your Frugal Find
This designer fluted planter is incredibly versatile and fits seamlessly into various home aesthetics:
- Mid-Century Modern: Paint it a stark matte white and place a vibrant, dark-green Snake Plant inside. Elevate it on a cheap wooden plant stand.
- Industrial & Rugged: Opt for a dark charcoal or faux-concrete finish. Fill it with a structural ZZ plant and top the soil with black river rocks.
- Boho Chic: Use the textured terracotta recipe. Add a trailing Pothos plant that spills elegantly over the textured edges.
By taking the time to properly seal and style your piece, nobody will ever guess its humble dollar store origins. You have created a durable, functional piece of art that looks like a million bucks but leaves your wallet completely intact.
Conclusion
The Joy of Frugal Craftsmanship
There is a profound, almost rugged satisfaction in looking at a high-end catalog, scoffing at a $150 price tag, and saying, ‘I can build that for five bucks.’ This designer fluted planter hack is proof that with a little bit of creativity, some basic dollar store supplies, and the magic of baking soda paint, you can entirely transform your living space on a dime.
You have learned how to look past the cheap plastic exterior of dollar store bins, how to utilize construction adhesive for a permanent hold, and how to mix custom faux-stone textures right in your kitchen. These are foundational upcycling skills that you can carry forward into countless other frugal DIY projects.
So, the next time you need a thoughtful, handmade gift for a friend, or you want to elevate your front porch decor without breaking the bank, remember this tutorial. Grab your skewers, mix up that texture paint, and keep crafting beautifully budget-savvy masterpieces. We cannot wait to see how your trash-to-treasure planters turn out!

Makenzie is the founder and lead writer at MoneyHackTips.com — a personal finance blog dedicated to delivering street-smart financial wisdom for real people on real budgets. With 300+ published articles covering everything from debt management to investing fundamentals, Makenzie’s mission is to make every dollar work harder. When not writing about money hacks, Makenzie is testing frugal living strategies, optimizing side hustles, and helping readers build financial freedom from scratch.