
Let us face the frugal truth: shopping for Father’s Day can feel like navigating a maze of overpriced novelties and generic gadgets that end up collecting dust in the garage. How many novelty ties, golf ball paperweights, or ‘World’s Best Dad’ mugs can one man realistically own? If you are a crafty gift-giver, a handy parent, or a budget-savvy DIYer looking to make a genuinely profound impact this year, it is time to step away from the retail endcaps and step into the workshop. We are going to build the ultimate, rugged, and masculine-elegant gift: a Bespoke DIY Wooden Grill Caddy.
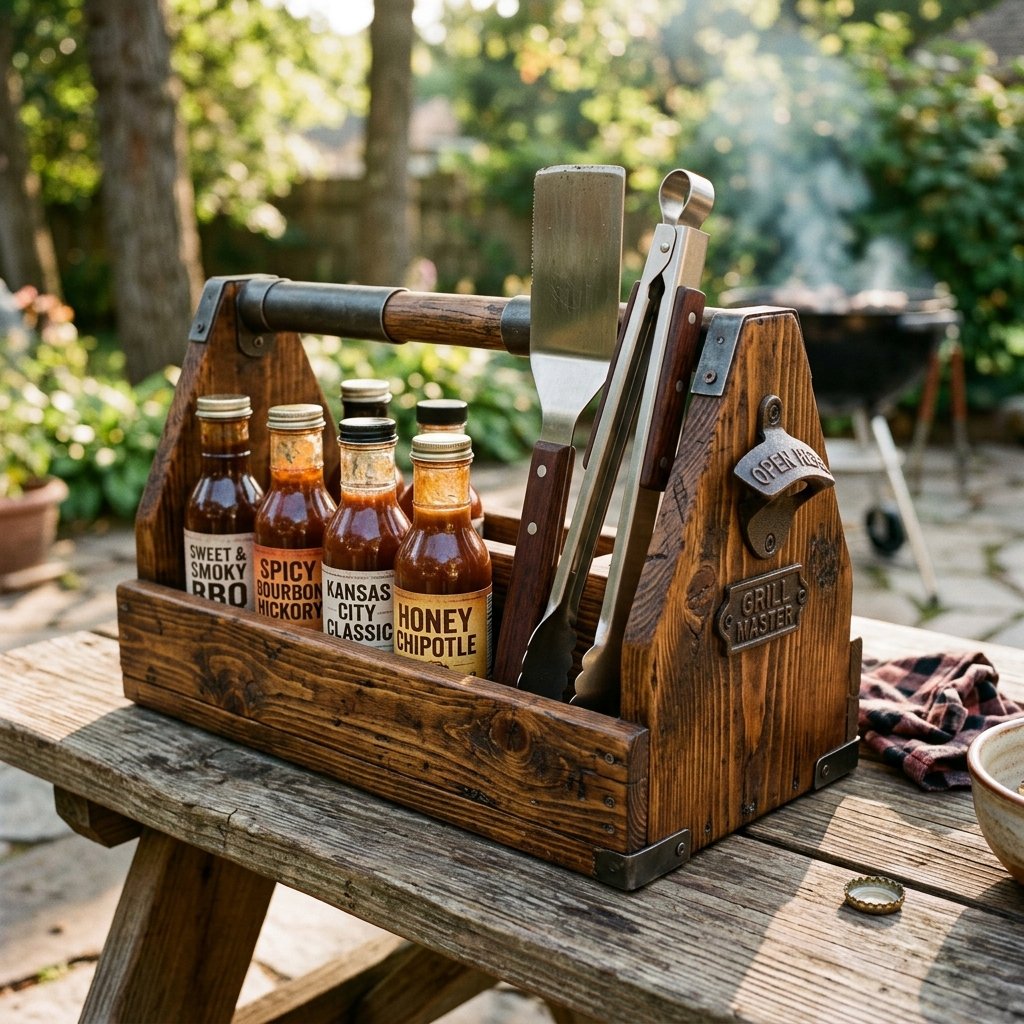
This is not just a wooden box; it is a highly functional, customized barbecue command center. A well-designed grill caddy holds his favorite sauces, essential tools, a roll of paper towels, and even features a built-in bottle opener for that ice-cold weekend beverage. Best of all? You can craft this heirloom-quality piece for under $15 using scrap wood, upcycled materials, and a little bit of elbow grease. By combining professional crafting techniques with resourceful upcycling, you will present him with a high-end, boutique-worthy item that screams thoughtfulness and practicality. Grab your safety glasses and let us dive into this crafty-expert masterclass!
Sourcing Your Lumber & Gathering Tools (The Frugal Way)
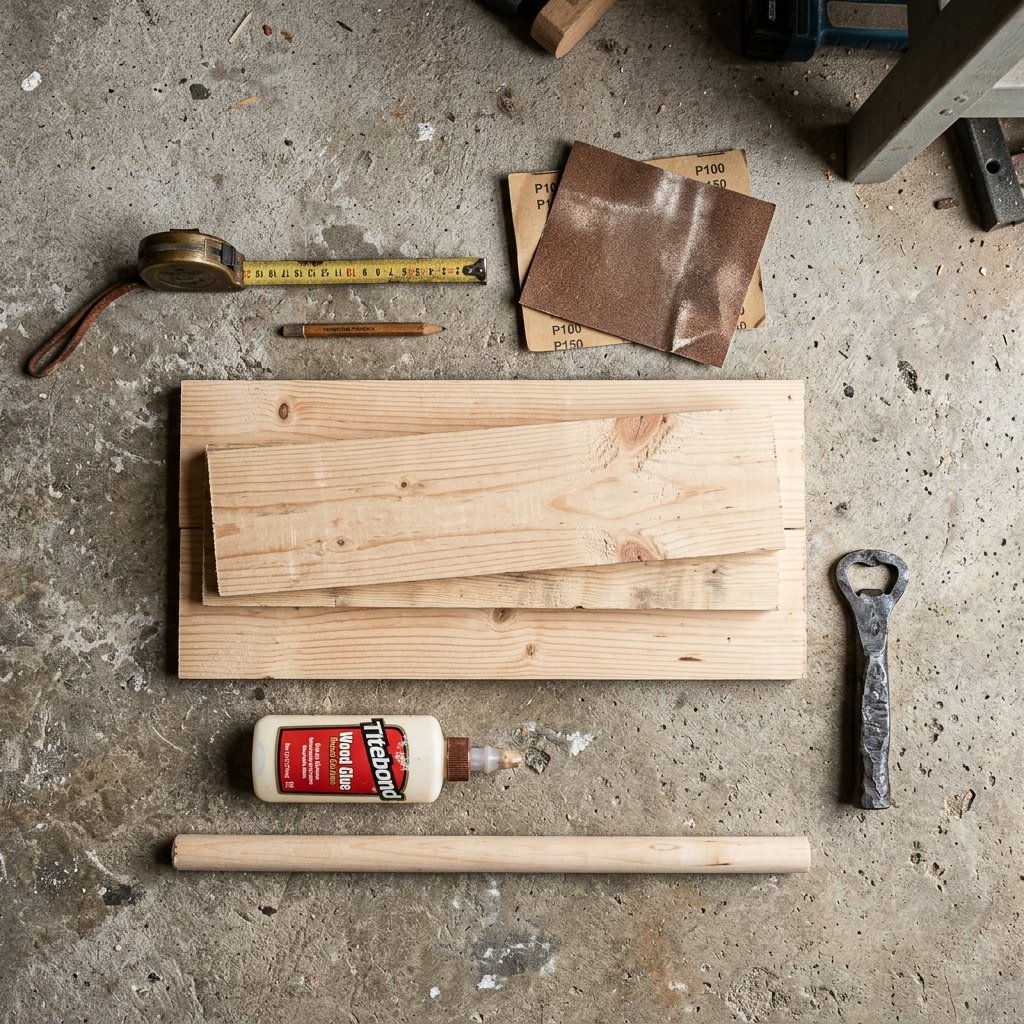
The foundation of any great masculine-elegant DIY project is the raw material. While you could easily drive to your local big-box hardware store and purchase premium oak or cedar, the resourceful upcycler knows that beauty often lies in reclaimed materials. For this grill caddy, standard 1×6 pine boards or reclaimed pallet wood are your best friends. Pallet wood adds an instant rustic, rugged charm that men love, and it is entirely 100% free if you know where to look.
Safety First (The Pallet Rule): If you are upcycling pallets, always check the stamp on the side of the wood. Look for ‘HT’ which stands for Heat Treated. Never use pallets stamped with ‘MB’ (Methyl Bromide), as they have been treated with toxic chemicals that you do not want anywhere near food or your tools!
If you prefer the clean lines of new lumber, a single 8-foot 1×6 pine board costs around $6 to $8 and provides more than enough material for this entire build. Let us break down the budget and see how our zero-budget DIY approach stacks up against high-end retail equivalents.
| Material / Tool Needed | Store-Bought Caddy Cost | DIY Budget-Savvy Cost |
|---|---|---|
| Wood (1×6 Pine or Pallet) | $25.00 (Built-in cost) | $0.00 – $8.00 |
| Wooden Dowel (Handle) | $5.00 | $1.50 (or upcycled broom handle) |
| Cast Iron Bottle Opener | $10.00 | $2.50 (Dollar Tree or Thrift) |
| Wood Glue & Screws | N/A | $1.00 (from your stash) |
| Stain & Polyurethane | N/A | $2.00 (using leftover workshop supplies) |
| Total Estimated Cost | $40.00 – $75.00+ | $7.00 – $15.00 |
Alongside your wood, you will need a few basic tools: a saw (a hand saw works perfectly if you don’t have a miter saw), a hammer or drill, sandpaper (80, 120, and 220 grit), wood glue, and some 1.25-inch brad nails or wood screws. Do not let a lack of power tools stop you; this project is entirely achievable with basic hand tools and a resourceful spirit.
The Master Cut List & Prepping the Wood
Precision is the hallmark of a master crafter. To ensure your grill caddy goes together seamlessly, we need to make our cuts accurately. The beauty of this design is its simplicity; it relies on straight cuts that anyone can master. Here is your fail-proof master cut list based on a standard 1×6 board (which actually measures 0.75 inches by 5.5 inches).
| Caddy Component | Dimensions (Length) | Quantity Needed |
|---|---|---|
| Base / Bottom Board | 12 inches | 1 |
| Side Panels (Long sides) | 12 inches | 2 |
| End Pieces (Tall sides for handle) | 10 inches | 2 |
| Handle (Wooden Dowel 1-inch thick) | 13.5 inches | 1 |
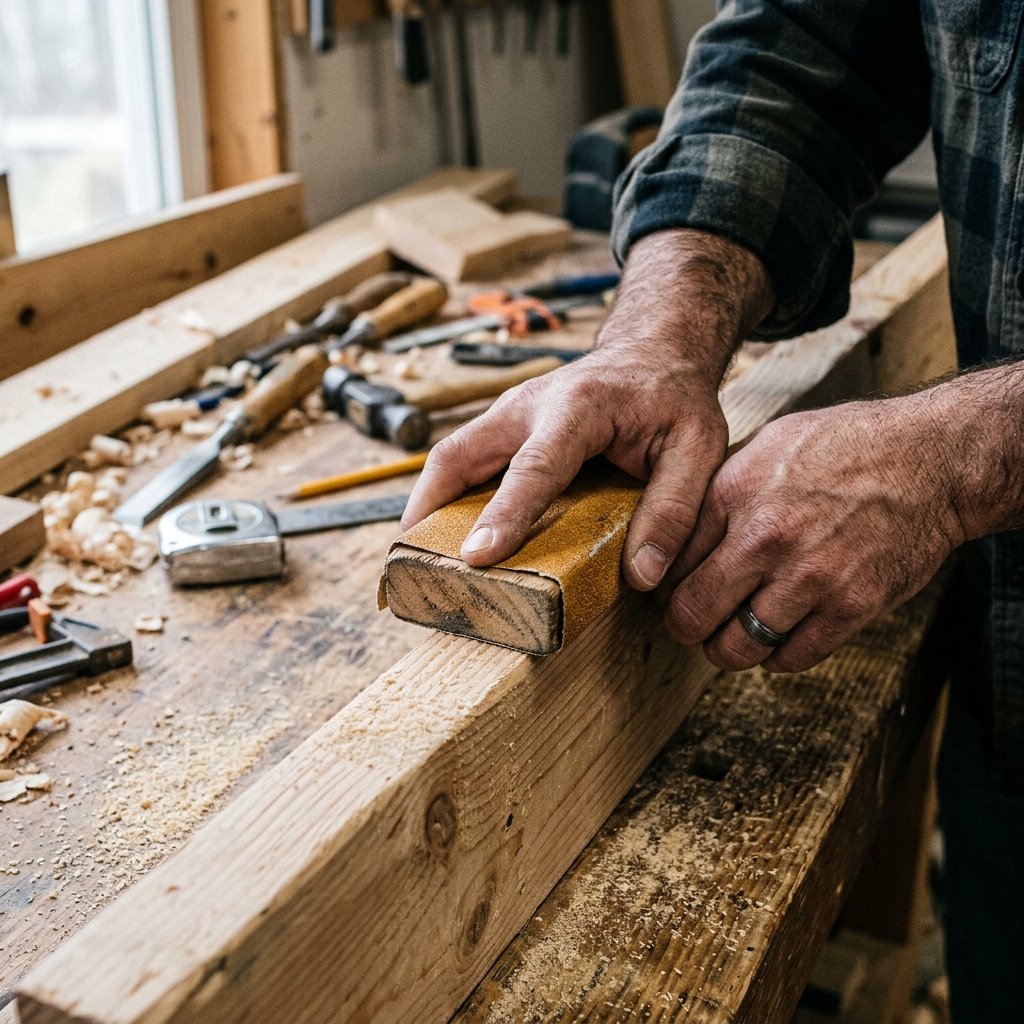
Once your pieces are cut, it is time for the most crucial step in achieving that high-end, boutique finish: sanding. Frugal DIYers know that sanding is where the magic happens. It turns cheap pine into a smooth, professional surface. Start with 80-grit sandpaper to knock down any rough edges or splinters from your cuts. Move to 120-grit to smooth the surface, and finish with 220-grit for a buttery-soft texture that will accept stain beautifully.
Creating the Handle Holes
Before assembly, you must drill the holes for your handle in the two tall end pieces. Measure exactly 1 inch down from the top center of each end piece. Using a 1-inch spade bit or Forstner bit, drill a hole completely through the wood. Crafty Expert Tip: Place a scrap piece of wood directly underneath the board you are drilling into. This prevents the back of the wood from splintering when the drill bit punches through, ensuring a clean, masculine-elegant look.
Assembly & Rugged Joinery Techniques
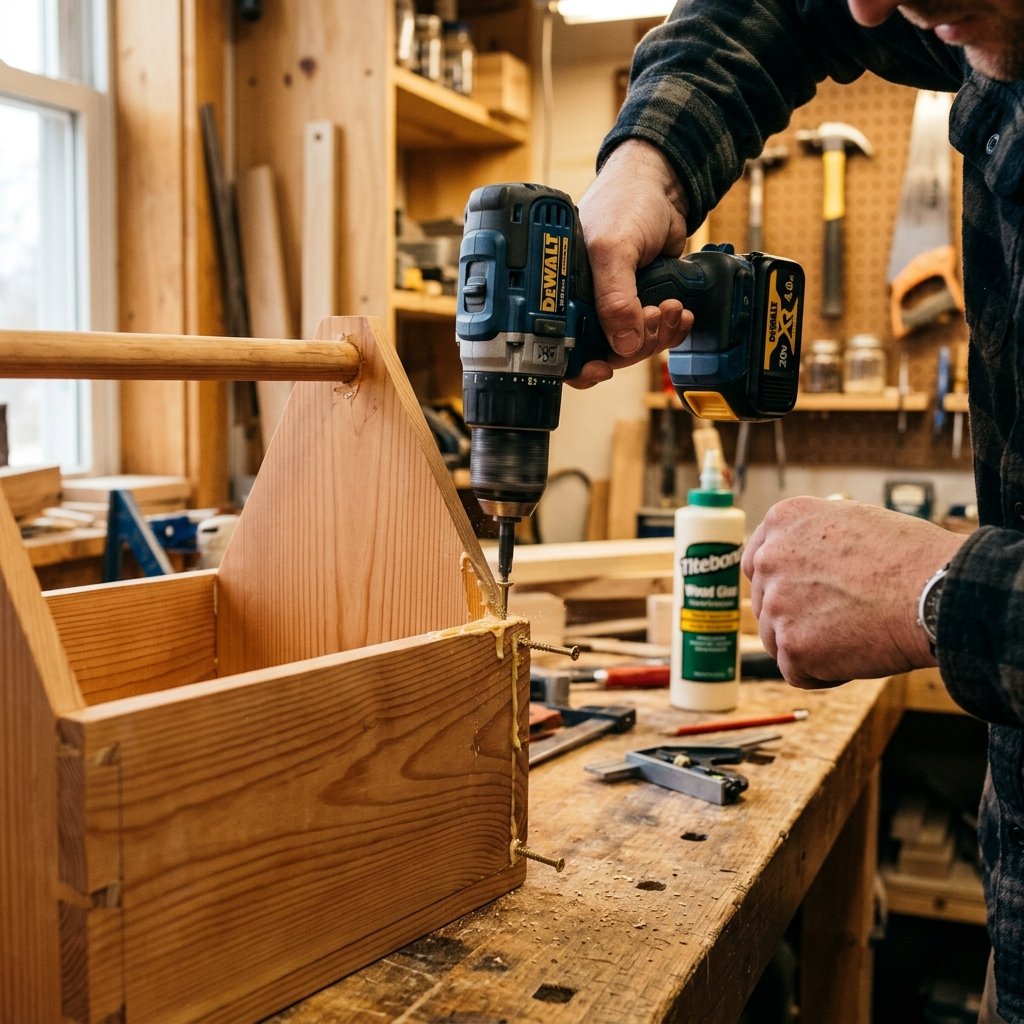
Now comes the exciting part: bringing your raw materials to life. Assembly requires a methodical approach to ensure the caddy can hold the weight of heavy glass BBQ sauce bottles and metal tools without falling apart. We will use a combination of wood glue and mechanical fasteners (screws or nails) for maximum durability.
The Crafter’s Joinery Mantra: Wood glue is stronger than the wood itself, but only if the wood is clamped or fastened tightly while it dries. Never skip the glue!
- Attach the Sides to the Base: Run a bead of high-quality wood glue along the long edges of your 12-inch base piece. Press the two 12-inch side panels against the base. Secure them using 1.25-inch wood screws. Important: Always drill pilot holes first! Pine is notorious for splitting, and a pilot hole ensures your wood remains perfectly intact.
- Insert the Handle: Slide your 13.5-inch wooden dowel through the holes in your two 10-inch end pieces. It should be a snug fit. Add a dab of wood glue inside the holes before sliding the dowel in to lock it permanently in place.
- Attach the Ends: Apply wood glue to the remaining exposed edges of the base and side panels. Press the end pieces (with the handle attached) onto the main body of the caddy. Secure with pilot holes and screws along the bottom and sides.
Wipe away any excess glue immediately with a damp cloth. Dried glue will not accept wood stain, and leaving it will result in ugly, splotchy marks on your otherwise pristine, rugged masterpiece. Allow the assembly to dry for at least 2 hours before moving on to the finishing stage.
Staining, Sealing, & The Masculine-Elegant Finish

A raw pine box looks like a middle school shop class project. A richly stained, perfectly sealed caddy looks like a $100 artisanal gift from a high-end men’s boutique. The finish is what elevates this project from basic to bespoke. For a truly masculine-elegant aesthetic, opt for deep, rich stain colors like Dark Walnut, Jacobean, or Espresso.
The Staining Process
- Pre-Stain Conditioner: Pine wood absorbs stain unevenly, which can lead to a blotchy finish. Frugal hack: If you do not want to buy commercial pre-stain conditioner, you can lightly mist the wood with water using a spray bottle to raise the grain, sand it lightly once dry, and then apply your stain. This helps even out the absorption!
- Applying the Stain: Put on some disposable gloves. Using a clean rag (cut up an old cotton t-shirt for a zero-budget applicator), wipe the stain onto the wood in the direction of the grain. Let it sit for 5 to 10 minutes depending on how dark you want it, then wipe off all excess stain with a clean rag.
- Drying Time: Allow the stain to dry completely for 24 hours in a well-ventilated area.
Sealing for the Elements
Since this caddy will be living outdoors, sitting next to hot grills, and potentially getting splattered with sticky BBQ sauce, a protective topcoat is non-negotiable. Apply two coats of exterior-grade polyurethane (matte or satin finish to maintain that rugged look). Sand very lightly with 220-grit paper between coats. This ensures the caddy is water-resistant, wipeable, and ready for years of heavy-duty fatherly use.
Bespoke Customizations: Bottle Openers & Leather Straps
You have built a beautiful box, but now it is time to turn it into a tactical, highly functional piece of grilling gear. Customization is where your crafty-expert skills truly shine, allowing you to tailor the gift specifically to his habits and tastes.
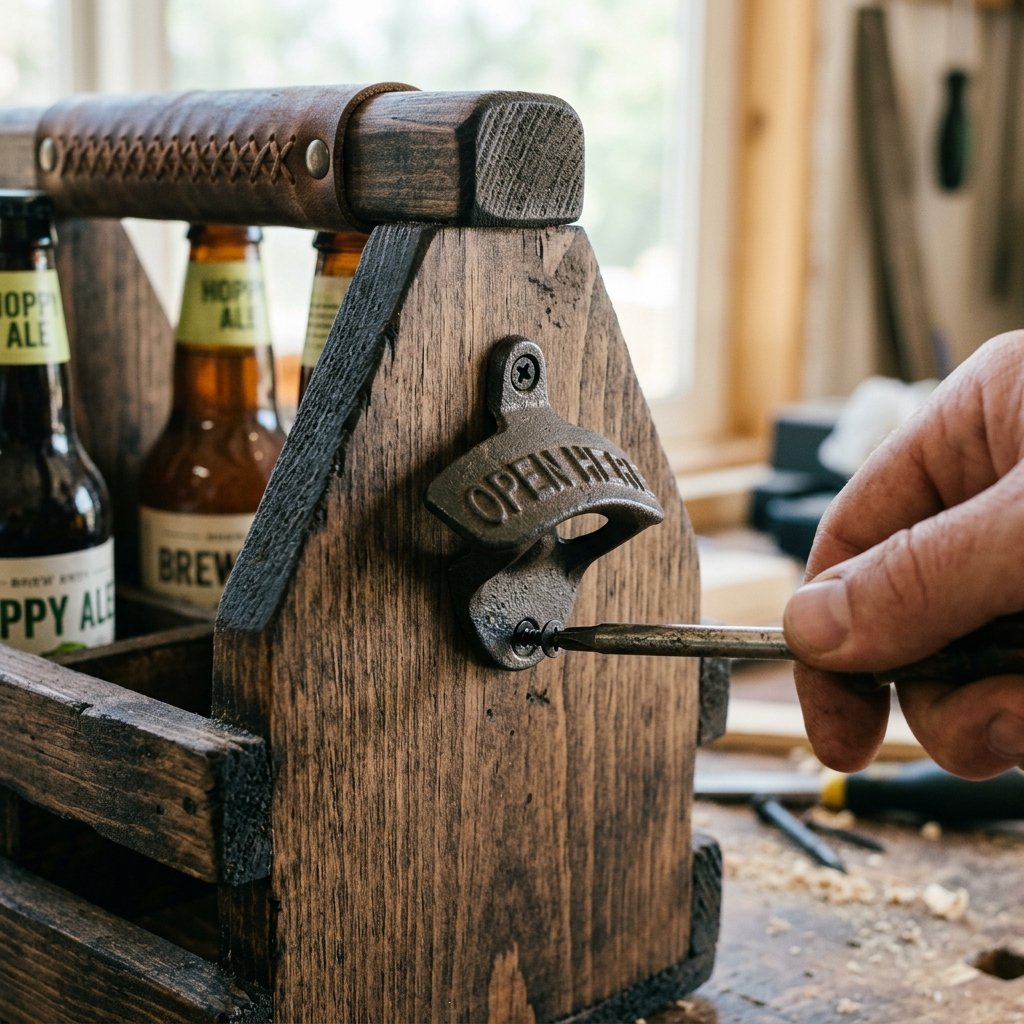
- The Built-In Bottle Opener: This is a mandatory addition for any grill caddy. You can source cast-iron, vintage-style bottle openers from the Dollar Tree or hardware stores for under $3.00. Mount it on one of the tall end panels using short wood screws. Place it high enough so that when a bottle is opened, the cap can fall into a small galvanized bucket (or a DIY tin can) mounted just below it.
- Leather Handle Wraps: Elevate the wooden dowel handle by wrapping it in leather. Budget-Savvy Hack: Do not buy expensive leather craft strips. Go to a thrift store and buy a worn, genuine leather men’s belt for $1.00. Cut the belt into strips and wrap it tightly around the center of the dowel, securing the ends with brass upholstery tacks or heavy-duty hot glue. It adds an incredibly sophisticated, rugged grip.
- Paper Towel Holder Hack: Grilling is messy. Add a heavy-duty bungee cord or a secondary, removable dowel to the back of the caddy specifically designed to hold a roll of paper towels. He will thank you every time he deals with sticky ribs.
- Personalization: Use a wood-burning tool to burn his initials, ‘Dad’s BBQ’, or his favorite sports team logo into the side panel before sealing. If you do not have a wood burner, a custom stencil and some black acrylic paint work beautifully to create a branded crate look.
Stocking the Caddy: DIY Rubs & Ultimate Presentation

A grill caddy is only as good as the arsenal it carries. Presenting him with an empty box, no matter how beautifully crafted, misses the mark. To make this the ultimate Father’s Day gift, you must stock it. While you could buy expensive artisan rubs, a resourceful crafter knows that making your own spice blends is cheaper, healthier, and far more impressive.
Fill the caddy with a new pair of heavy-duty tongs, a basting brush, and a few glass mason jars filled with your own homemade signature BBQ rubs. Here is a foolproof, incredibly flavorful ‘Smoky Bourbon BBQ Rub’ recipe that costs pennies to make but tastes like a million bucks.
| Ingredient | Measurement | Flavor Profile Contribution |
|---|---|---|
| Dark Brown Sugar | 1/2 Cup | Caramelization and sweet crust |
| Smoked Paprika | 1/4 Cup | Deep, authentic wood-smoke flavor |
| Coarse Kosher Salt | 2 Tablespoons | Essential seasoning and moisture retention |
| Coarse Black Pepper | 2 Tablespoons | Rugged, spicy bark formation |
| Garlic & Onion Powder | 1 Tablespoon each | Savory aromatic depth |
| Cayenne Pepper | 1 Teaspoon | A subtle, lingering kick of heat |
Mix these ingredients thoroughly in a bowl, breaking up any clumps of brown sugar. Funnel the mixture into clean, upcycled glass jars (old jam jars work perfectly once the labels are scrubbed off). Create a custom kraft paper label that says ‘Dad’s Signature Smoke Rub’ and tie it around the jar with some rustic jute twine.
Arrange the jars, a bottle of his favorite store-bought BBQ sauce, the tools, and a freshly folded checkered towel inside the caddy. The visual impact of this fully stocked, handcrafted wooden masterpiece will absolutely blow him away. It is practical, deeply personal, and incredibly budget-savvy.
Conclusion
There you have it, fellow frugal crafters and handy upcyclers! By utilizing a few basic tools, some inexpensive or reclaimed wood, and a heavy dose of creative resourcefulness, you have bypassed the commercialized Father’s Day trap. You have built a rugged, masculine-elegant DIY Wooden Grill Caddy that proves the best gifts are made in the workshop, not bought in a store.
This project is the perfect weekend endeavor. It teaches fundamental woodworking skills, encourages budget-savvy material sourcing, and results in a highly functional item that will become a staple at every family barbecue for years to come. When he carries this bespoke caddy out to the patio, complete with custom leather grips, a built-in bottle opener, and your homemade signature spice rubs, he will be reminded of the thought, time, and love you poured into it. So roll up your sleeves, fire up the saw, and give him the ultimate gift he will actually use. Happy crafting, and Happy Father’s Day!

Makenzie is the founder and lead writer at MoneyHackTips.com — a personal finance blog dedicated to delivering street-smart financial wisdom for real people on real budgets. With 300+ published articles covering everything from debt management to investing fundamentals, Makenzie’s mission is to make every dollar work harder. When not writing about money hacks, Makenzie is testing frugal living strategies, optimizing side hustles, and helping readers build financial freedom from scratch.