
The Myth of Expensive Leathercraft
There is an undeniable, rugged romance to a handcrafted leather wallet. It smells of adventure, ages with character, and carries a quiet, masculine elegance that synthetic materials simply cannot replicate. But if you have ever looked into traditional leathercraft, you were likely met with a staggering barrier to entry. Professional leatherworkers use diamond chisels, edge skivers, burnishing machines, and specialized mallets that can easily run you upwards of $300 before you have even purchased a single square inch of leather.
As frugal DIYers, handy upcyclers, and crafty gift-givers, we refuse to let a high price tag stand in the way of a thoughtful, heirloom-quality project. What if I told you that you could bypass the expensive specialty tools and craft a stunning, luxury-grade leather cardholder in just 30 minutes? By utilizing clever household items, basic geometry, and a little bit of elbow grease, you can create a bespoke gift that looks like it came straight out of a high-end boutique.
Whether you are a budget-savvy partner looking for the perfect Father’s Day or anniversary gift, or a resourceful maker wanting to dip your toes into leatherworking without emptying your real wallet, this guide is your ultimate blueprint. We are going to strip leathercraft down to its rugged, practical roots. Grab a cup of coffee (or a glass of whiskey), roll up your sleeves, and let’s turn scraps into absolute treasure.
The Frugal Artisan’s Toolkit & Materials Budget
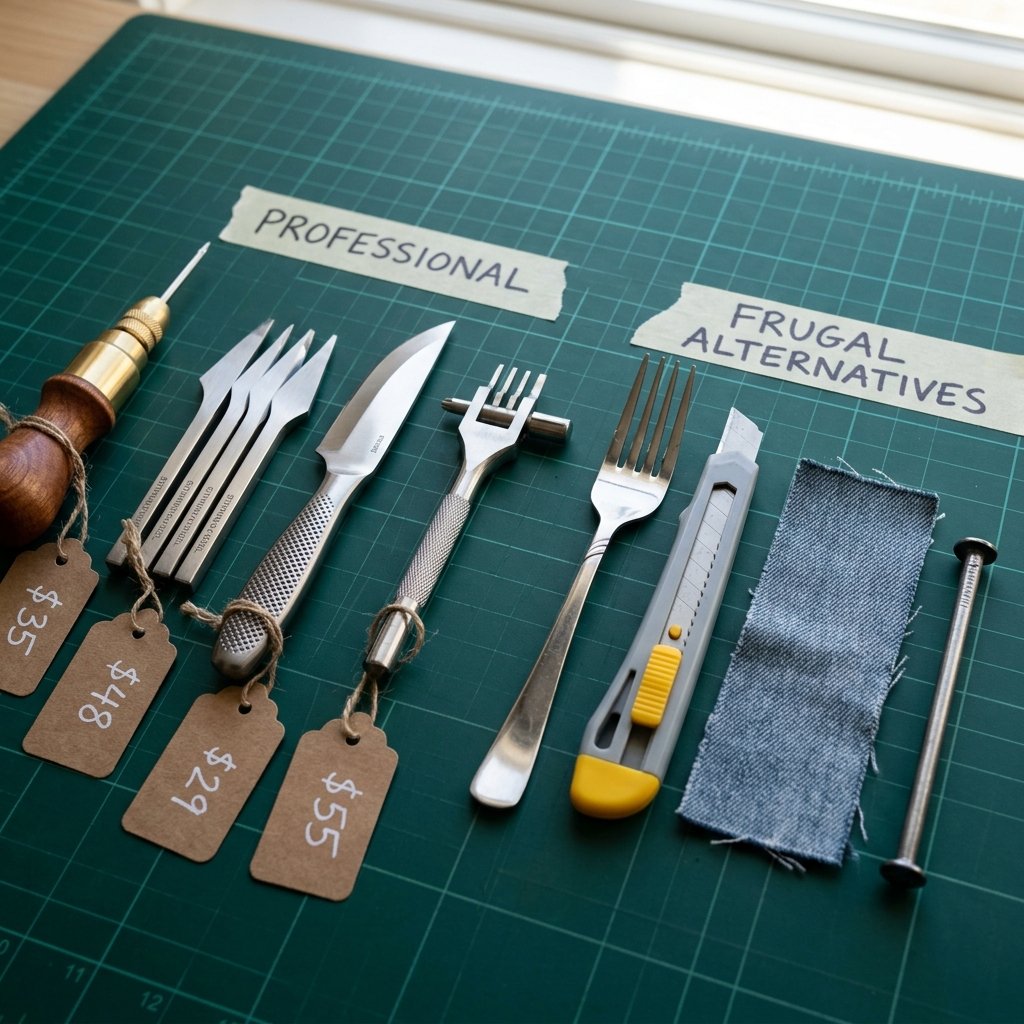
The secret to our 30-minute luxury wallet lies in creative substitution. Professional tools are designed for mass production and ultimate convenience, but for a one-off bespoke gift, your kitchen drawer and basic toolbox hold everything you need. We are swapping out a $25 stitching chisel for a standard dinner fork, and a $15 wood slicker for a scrap of old denim. The results? Completely indistinguishable to the untrained eye.
Household Hacks for High-End Results
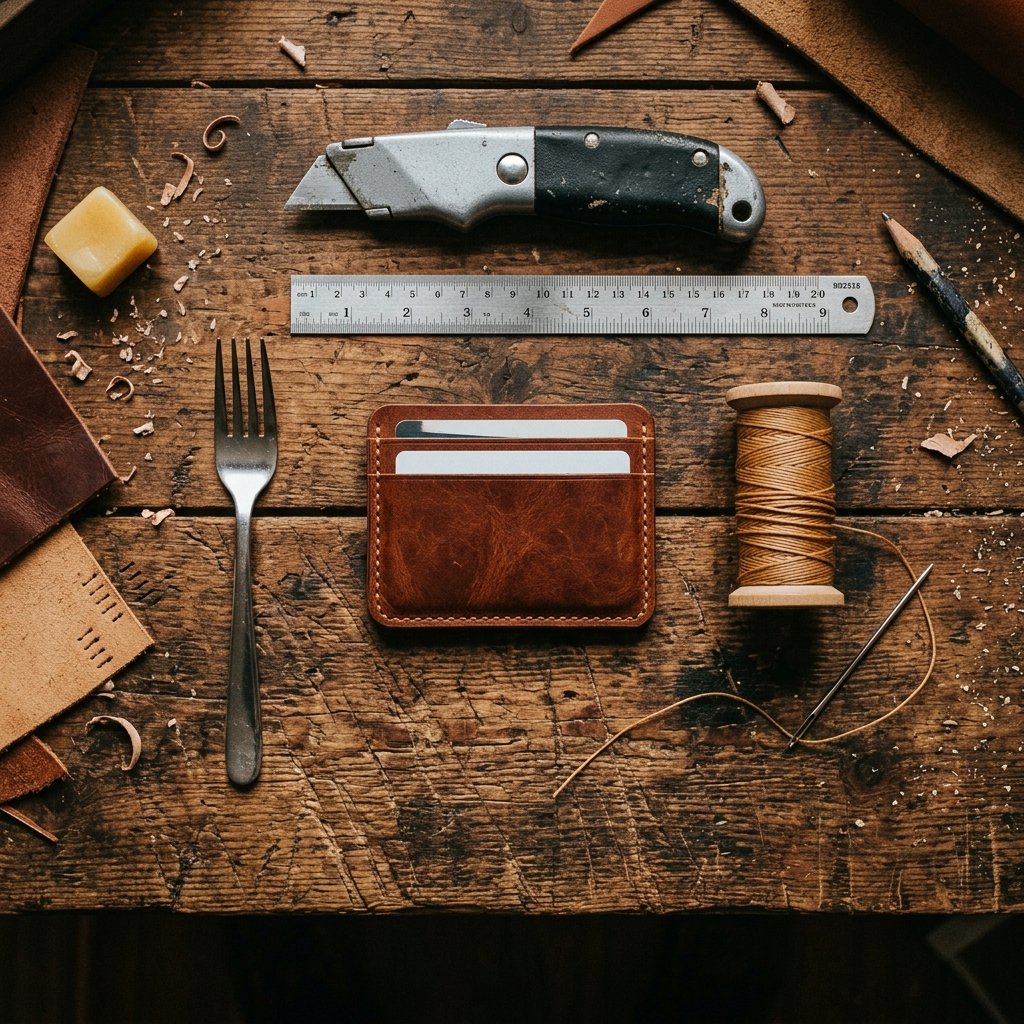
- The Cutting Tool: A standard heavy-duty utility knife (box cutter) with a fresh, sharp blade. Do not use scissors; they will crush the leather edges.
- The Straight Edge: A metal ruler or a framing square. Plastic rulers will get shaved down by the utility knife.
- The Hole Marker: A stainless steel kitchen fork with four tines. This is our genius hack for perfectly spaced stitching holes!
- The Hole Punch: A simple hammer and a thin nail (or a basic awl if you happen to own one).
- The Needles: Two heavy-duty hand-sewing needles (tapestry needles or thick darning needles work perfectly).
- The Thread: Waxed thread is essential for durability. You can buy a small spool for under $4, or wax heavy-duty upholstery thread yourself using a standard beeswax candle.
- The Edge Burnisher: A scrap of heavy canvas or old denim jeans and a little bit of tap water.
Cost Comparison: Store-Bought vs. Zero-Budget DIY
Let us look at the dramatic savings when you apply a little resourceful creativity to your gifting strategy.
| Wallet Component / Tool | High-End Store Bought / Pro Tools | Our Frugal DIY Alternative & Cost |
|---|---|---|
| The Leather Material | $40 (Premium Cut) | $0 – $5 (Upcycled Thrift Store Jacket/Scrap) |
| Stitching Chisels | $25 – $50 | $0 (Kitchen Fork & Nail) |
| Edge Burnisher | $15 (Wood Slicker) | $0 (Scrap Denim & Water) |
| Waxed Thread & Needles | $10 (Specialty Kit) | $4 (Basic Craft Store Spool) |
| Cutting Tools | $30 (Rotary Cutter & Mat) | $0 (Household Utility Knife & Cardboard) |
| Total Estimated Cost | $120 – $150+ | $4 – $9 Maximum |
Resourceful Frugal Mantra: Do not pay for the tool if you only need the technique. A sharp blade and a steady hand are worth more than a catalog of expensive gadgets.
Sourcing Luxury Leather on a Dime
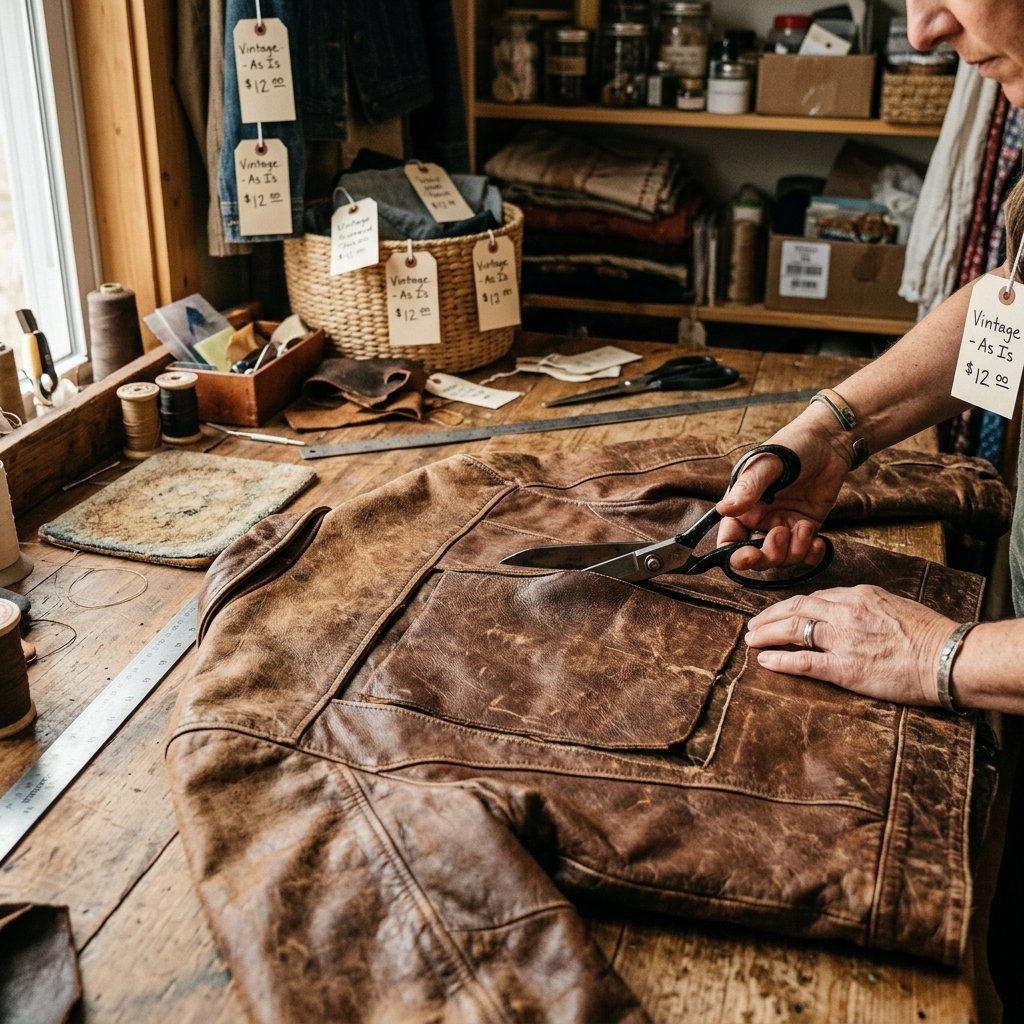
You cannot make a luxury wallet out of cheap, flimsy faux leather. To achieve that rugged, masculine elegance, you need real, full-grain or top-grain leather. But buying premium leather hides from a supplier can cost upwards of $100. As crafty upcyclers, we know exactly how to bypass this.
The Thrift Store Goldmine
Your local thrift store is a treasure trove of high-quality leather just waiting to be harvested. Look for old, oversized leather jackets, distressed leather tote bags, or even damaged leather boots. A single $10 leather jacket with a broken zipper can yield enough material for 15 to 20 wallets! When hunting for upcyclable leather, keep these tips in mind:
- Check the Thickness: For a wallet, you want leather that is stiff enough to hold its shape but thin enough to fold. Aim for a thickness of about 3 to 4 ounces (roughly 1.2mm to 1.6mm thick).
- The Scratch Test: Run your fingernail lightly across the surface. If it leaves a slight, rugged mark that rubs out with the oils from your thumb, you have found beautiful, oil-tanned leather that will age perfectly.
- Avoid “Genuine Leather”: Despite the name, “genuine leather” is often the lowest grade of leather, made from reconstituted scraps glued together. Look for tags that say “Full Grain” or simply trust your hands—it should feel rich, supple, and strong.
Buying Scrap Bags
If thrifting isn’t your style, head to a local craft store or an online marketplace and search for “leather scrap bags.” Artisans and factories sell off their offcuts by the pound. For around $8 to $12, you can get a massive bag of high-quality vegetable-tanned or chrome-tanned leather scraps. Because our minimalist wallet pattern requires very little material, these offcuts are absolutely perfect.
Preparing Upcycled Leather
If you are using leather from an old garment, you need to clean and prep it. Wipe it down with a damp cloth and a tiny drop of dish soap to remove years of grime. Once dry, massage a small amount of olive oil or coconut oil into the leather to restore its moisture and bring back that deep, rich color. This simple step instantly elevates trash to treasure.
Drafting & Cutting the 30-Minute Minimalist Pattern
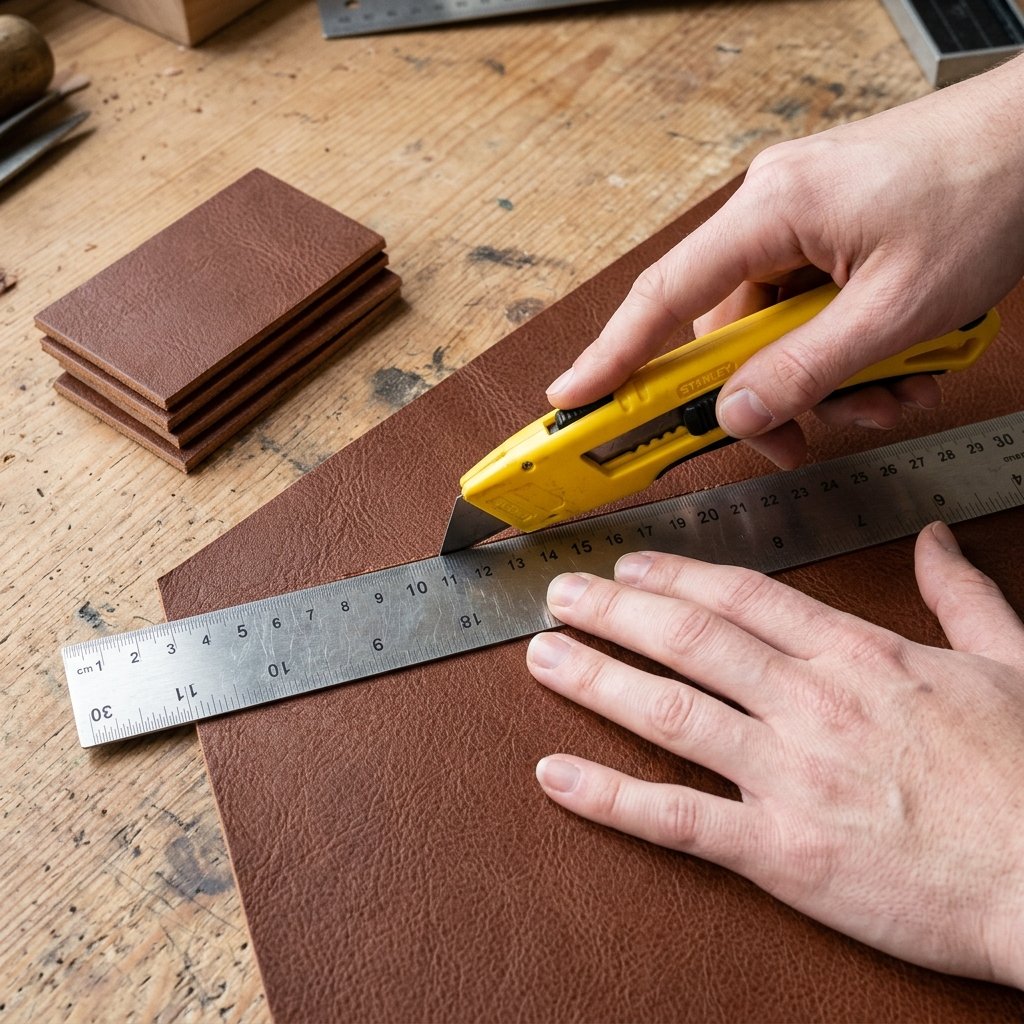
The key to completing this project in under 30 minutes is utilizing a brilliant, minimalist design. We are going to craft a sleek, three-pocket cardholder. It is rugged, practical, and fits perfectly in a front pocket—exactly what modern men prefer over bulky, traditional bi-folds.
The Dimensions & Pattern
Our wallet consists of just three simple rectangular pieces of leather. You do not need to print a complex pattern; you just need your metal ruler and a utility knife. Here are the exact measurements you need to cut:
- The Back Panel (Piece A): 4 inches tall by 2.75 inches wide.
- The Middle Pocket (Piece B): 3.25 inches tall by 2.75 inches wide.
- The Front Pocket (Piece C): 2.5 inches tall by 2.75 inches wide.
Step-by-Step Precision Cutting
- Create a Cardboard Template: If you are nervous about cutting directly into your leather, measure and cut these three rectangles out of a cereal box first. This allows you to test the fit with a standard credit card.
- Trace with a Scratch Awl (or Nail): Lay your template (or ruler) flat on the suede side (the fuzzy back side) of your leather. Instead of using a pen, which can leave ugly ink marks, use a nail or the tip of an awl to gently scratch the outline into the leather.
- The Multi-Pass Cutting Technique: Place your metal ruler along the scratched line. Press down firmly so the ruler does not slip. Take your utility knife and make a light, gentle score along the edge. Do not try to cut all the way through on the first pass! Make three or four smooth, consecutive passes until the blade glides through to your cutting mat. This guarantees a flawlessly straight, professional edge.
- Stack and Check: Stack Piece C on top of Piece B, and place both on top of Piece A. Align the bottom edges and the sides perfectly. If any edges are slightly overhanging, use your utility knife to carefully trim them flush.
Safety Note: A dull blade is far more dangerous than a sharp one because it requires you to use excessive force. Always snap off the end of your utility blade or insert a fresh one before starting a leathercraft project. Keep your non-cutting hand firmly planted behind the ruler’s edge.
The Kitchen Fork Hack & The Faux-Diamond Stitch
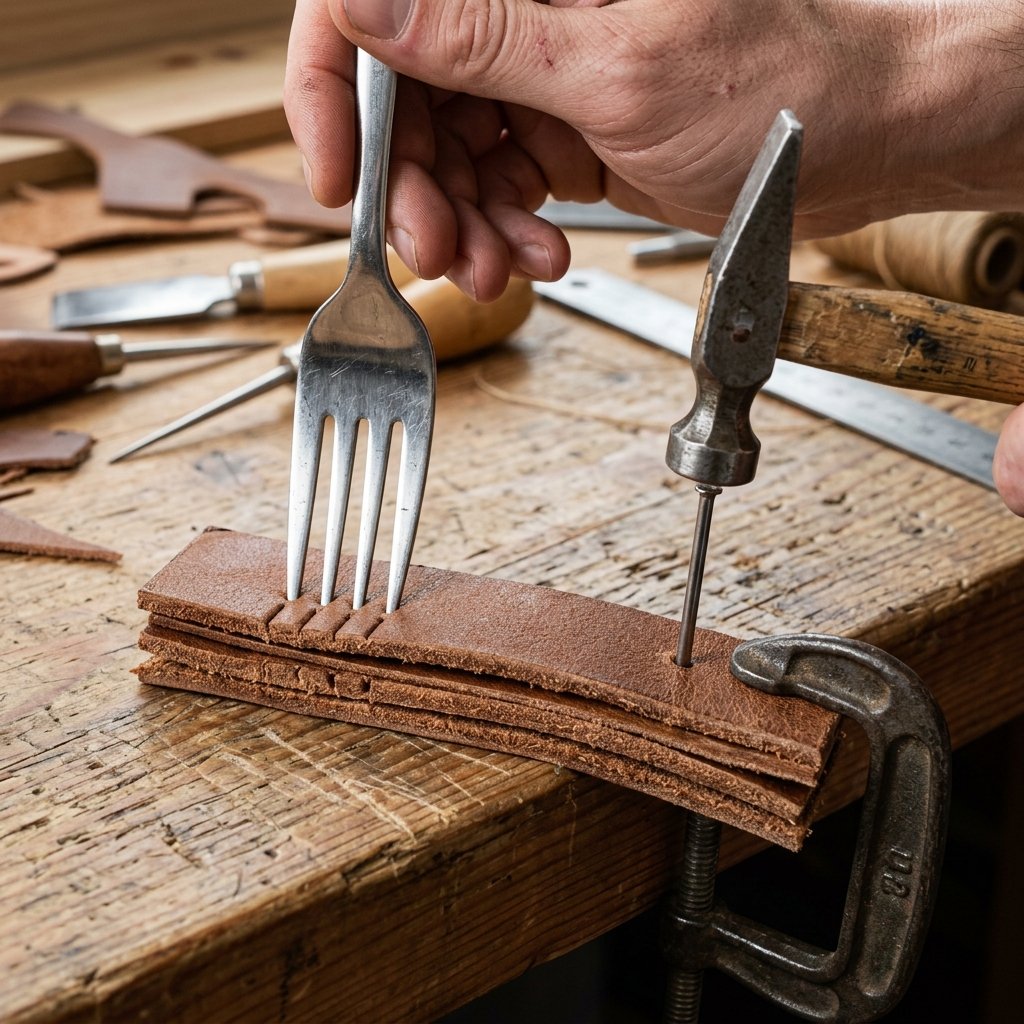
This is where the magic happens. The defining feature of a luxury leather wallet is the beautiful, evenly spaced, slightly slanted stitching. Professional leatherworkers use diamond chisels hit with a mallet to punch these holes. We are going to achieve the exact same look using a kitchen fork and a nail.
Marking the Stitch Line
First, we need a straight line to follow so our stitches don’t wander. Take a pair of compass dividers (or just your ruler and a nail) and lightly scratch a border exactly 1/8 inch (3mm) in from the left, bottom, and right edges of your stacked leather pieces. Do not mark the top edges, as those are the pocket openings!
The Fork Punching Technique
- Align the Fork: Take a standard stainless steel dinner fork. Place the first tine on the top-left corner of your scratched border line. Press down firmly to leave four distinct indentations in the leather.
- Walk the Fork: Lift the fork, and place the first tine into the very last indentation you just made. Press down again. Repeat this process all the way down the left side, across the bottom, and up the right side. You now have perfectly spaced, equidistant marks!
- Punch the Holes: Place your leather stack on a piece of scrap wood. Take your thin nail (or awl) and place the tip into the first fork indentation. Tap the nail with a hammer until it pierces cleanly through all three layers of leather. Pull the nail out and repeat for every single mark. It takes about 5 minutes, and the result is a flawless stitching track.
Hand-Sewing the Saddle Stitch
Forget the sewing machine; genuine leather goods are hand-sewn using a “saddle stitch.” Unlike a machine lock-stitch, if one thread breaks in a saddle stitch, the rest of the wallet will not unravel. It is the hallmark of rugged durability.
- Thread the Needles: Cut a piece of waxed thread that is roughly four times the length of your entire stitching line. Thread a needle onto each end of the thread.
- The First Stitch: Push one needle through the first hole at the top left. Pull the thread through until you have an equal amount of thread on both sides of the wallet.
- The Figure-Eight Motion: Take the front needle and push it through the second hole. Take the back needle and push it through that exact same second hole, coming toward the front. Pull both threads tight simultaneously.
- Repeat and Lock: Continue this alternating pattern all the way around the wallet. When you reach the final hole at the top right, stitch backward by two holes to lock the thread in place. Snip the threads close to the leather, and carefully melt the tiny frayed ends with a lighter to seal them permanently.
Burnishing: The Zero-Dollar Edge Finishing Secret
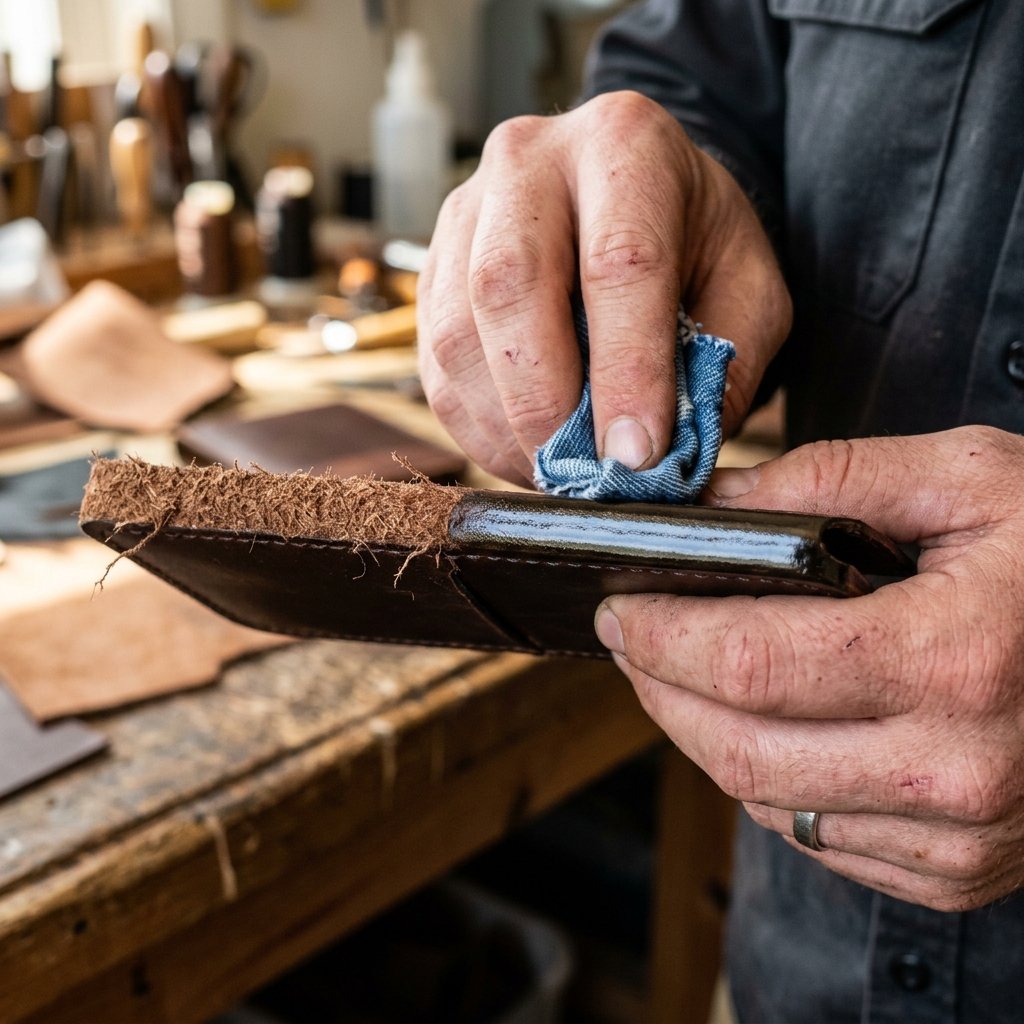
If you stop after stitching, you have a functional wallet. But if you want a luxury wallet, you must finish the edges. Raw cut leather edges look fuzzy and unfinished. High-end makers use a technique called “burnishing” to fuse the leather fibers together, creating a smooth, glossy, hardened edge that looks incredibly sleek.
Professional burnishing requires specialized gum tragacanth and wooden slicking tools. As frugal crafters, we are going to use the friction method with items you already have in your closet.
The Denim & Water Burnishing Method
- Sand the Edges Flush: If your three layers of leather aren’t perfectly flush after stitching, take a piece of fine-grit sandpaper (around 220 grit) and gently sand the edges until they feel like one solid piece.
- Dampen the Edge: Dip your finger in a cup of plain tap water and lightly run it along the edge of the leather. You want it damp, not soaking wet.
- The Friction Technique: Take a small scrap of heavy denim (from old jeans) or thick canvas. Wrap it tightly around your index finger. Vigorously rub the damp leather edge back and forth. Apply firm pressure and move quickly.
- Watch the Magic Happen: The friction creates heat, which draws the natural oils out of the leather and fuses the fibers together. Within 30 to 60 seconds of vigorous rubbing, you will see the dull, fuzzy edge transform into a dark, smooth, glossy finish.
- Seal the Deal (Optional): If you have a plain beeswax candle or some lip balm (check that it is mostly natural wax), rub a tiny amount onto the newly burnished edge and give it one more quick rub with the denim. This seals the edge against moisture and adds a professional shine.
Crafty Expert Tip: Burnishing works brilliantly on vegetable-tanned leather. If you upcycled an old chrome-tanned leather jacket (which is softer and doesn’t burnish as easily), you can achieve a finished look by carefully painting the raw edges with a tiny brush and some acrylic craft paint mixed with a drop of fabric medium!
Personalization, Conditioning & The Final Presentation
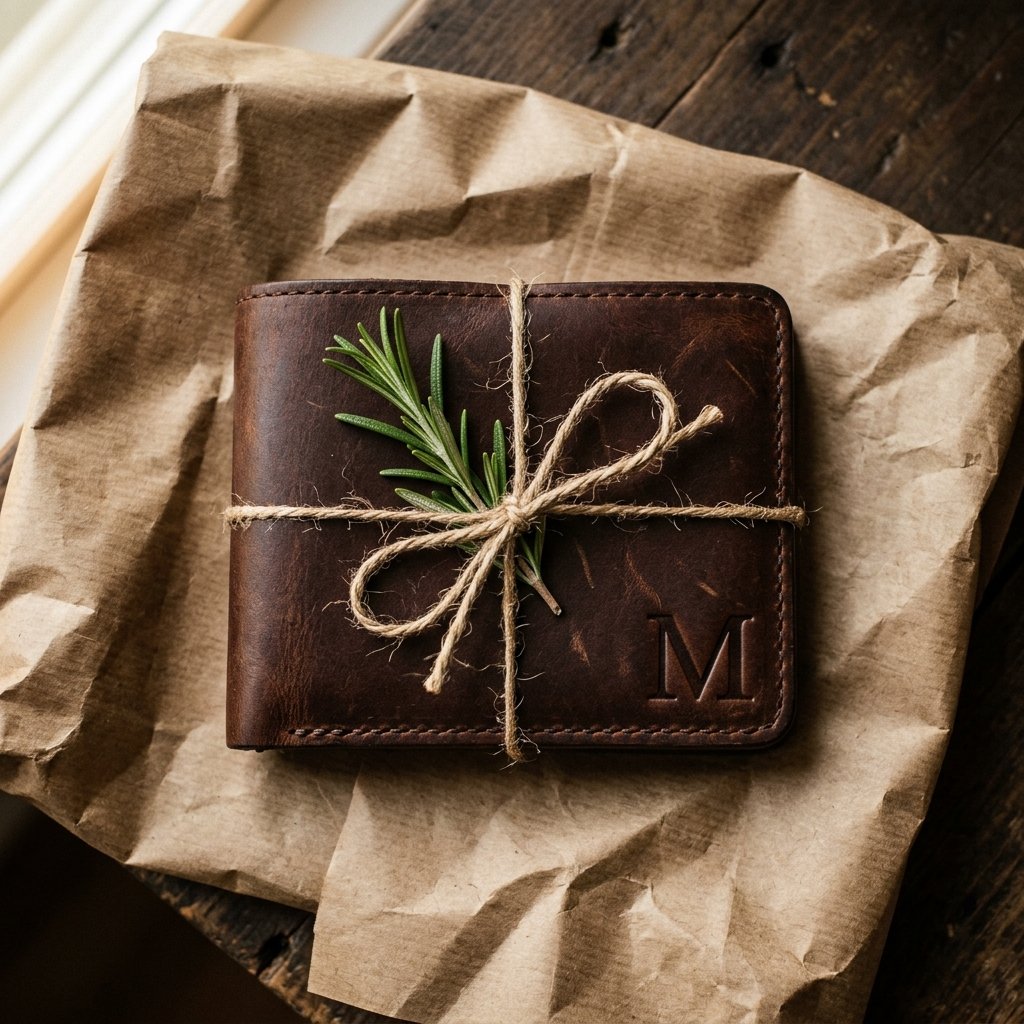
You have just built a rugged, masculine, minimalist leather wallet in under 30 minutes for pennies on the dollar. To truly elevate this from a “craft project” to a “thoughtful, high-end gift,” we need to add the final finishing touches. Presentation and care are what separate amateur hour from artisan quality.
Budget-Friendly Monogramming
Custom monogramming usually requires expensive brass heat stamps. Instead, try the “Wet Molding” trick. Dampen a small area on the front pocket of the wallet with a sponge. Take a metal letter punch (often found in cheap crafting kits or hardware stores for under $5) and strike it firmly with a hammer. The damp leather will permanently take the impression of the letter, giving you a deeply embossed, custom initial that looks incredibly sophisticated.
Conditioning the Leather
Upcycled leather has lived a past life and might be thirsty. Even new scrap leather benefits from a good conditioning. You do not need expensive mink oil. Head to your kitchen pantry!
- The Frugal Conditioner Recipe: Mix 1 part olive oil with 1 part melted beeswax (or just use straight coconut oil if you are in a pinch).
- Application: Rub a pea-sized amount into the leather using a soft cloth. Massage it in circular motions. The leather will instantly darken slightly, absorbing the nutrients, and will take on a rich, buttery, expensive sheen. Let it dry for 10 minutes, then buff off any excess with a clean rag.
The Frugal Gift Presentation
Do not hand over a luxury item in a plastic bag. To complete the masculine-elegant aesthetic, wrap the wallet in a piece of brown kraft paper or a page from an old vintage book. Tie it securely with a piece of leftover waxed stitching thread or rustic twine. You can even tuck a sprig of fresh rosemary or a dried leaf under the twine for a rugged, earthy touch.
| DIY Step | Time Investment | Value Added to Gift |
|---|---|---|
| Cutting the Pattern | 10 Minutes | Creates the sleek, minimalist structure. |
| Fork Marking & Hole Punching | 5 Minutes | Ensures professional, even stitching lines. |
| Hand-Sewing (Saddle Stitch) | 10 Minutes | Provides indestructible, heirloom durability. |
| Burnishing & Conditioning | 5 Minutes | Transforms raw scraps into a luxury, $100+ look. |
| Total Project Time | 30 Minutes | Priceless Thoughtfulness |
Conclusion
From Scraps to Heirloom: The Frugal Crafter’s Triumph
And there you have it—a rugged, masculine, minimalist leather wallet crafted with your own two hands in just 30 minutes. By rejecting the notion that you need hundreds of dollars in specialty tools, and instead leaning on resourceful, clever household hacks like the kitchen fork and the denim burnisher, you have created something truly extraordinary.
This isn’t just a lesson in frugal DIY; it is a testament to the power of upcycling and thoughtful crafting. You have taken discarded scraps or an old thrifted jacket and breathed new life into it, transforming it into an heirloom-quality piece that will age beautifully in the pocket of someone you care about. Every time they pull it out to pay for a coffee, they will feel the sturdy saddle stitch, admire the burnished edges, and remember the ingenuity and love that went into making it.
So clear off that workbench, raid your kitchen drawers, and start slicing into that upcycled leather. The world of luxury leathercraft is officially yours to conquer—on a zero-dollar budget. Happy crafting, and keep making treasure out of trash!

Makenzie is the founder and lead writer at MoneyHackTips.com — a personal finance blog dedicated to delivering street-smart financial wisdom for real people on real budgets. With 300+ published articles covering everything from debt management to investing fundamentals, Makenzie’s mission is to make every dollar work harder. When not writing about money hacks, Makenzie is testing frugal living strategies, optimizing side hustles, and helping readers build financial freedom from scratch.