We have all been there. You spend your hard-earned money on a flashy, battery-operated, plastic extravaganza for your child’s birthday. You spend two hours assembling it, finally present it to them, and what happens? They toss the toy aside and spend the next three days playing inside the cardboard box it came in. It is the ultimate parenting irony. But as a frugal DIYer and resourceful upcycler, I say: let us lean into it! Why fight the undeniable magic of a good old-fashioned cardboard box?
Today, I am going to show you how to take that oversized delivery box taking up space in your garage and turn it into an epic, custom-built kids’ playhouse. And I am not just talking about cutting a sloppy hole in the side and calling it a day. We are going to engineer a structurally sound, aesthetically pleasing, rugged little fort that will keep your kids occupied for 5 hours straight. Best of all? This project is 100% free if you use materials you already have lying around the house.
Get ready to channel your inner architect and crafty-expert. With a little elbow grease, some heavy-duty tape, and a dash of imagination, you are about to win Parent of the Year on a zero-dollar budget.
The Blueprint: Gathering Your Upcycling Arsenal
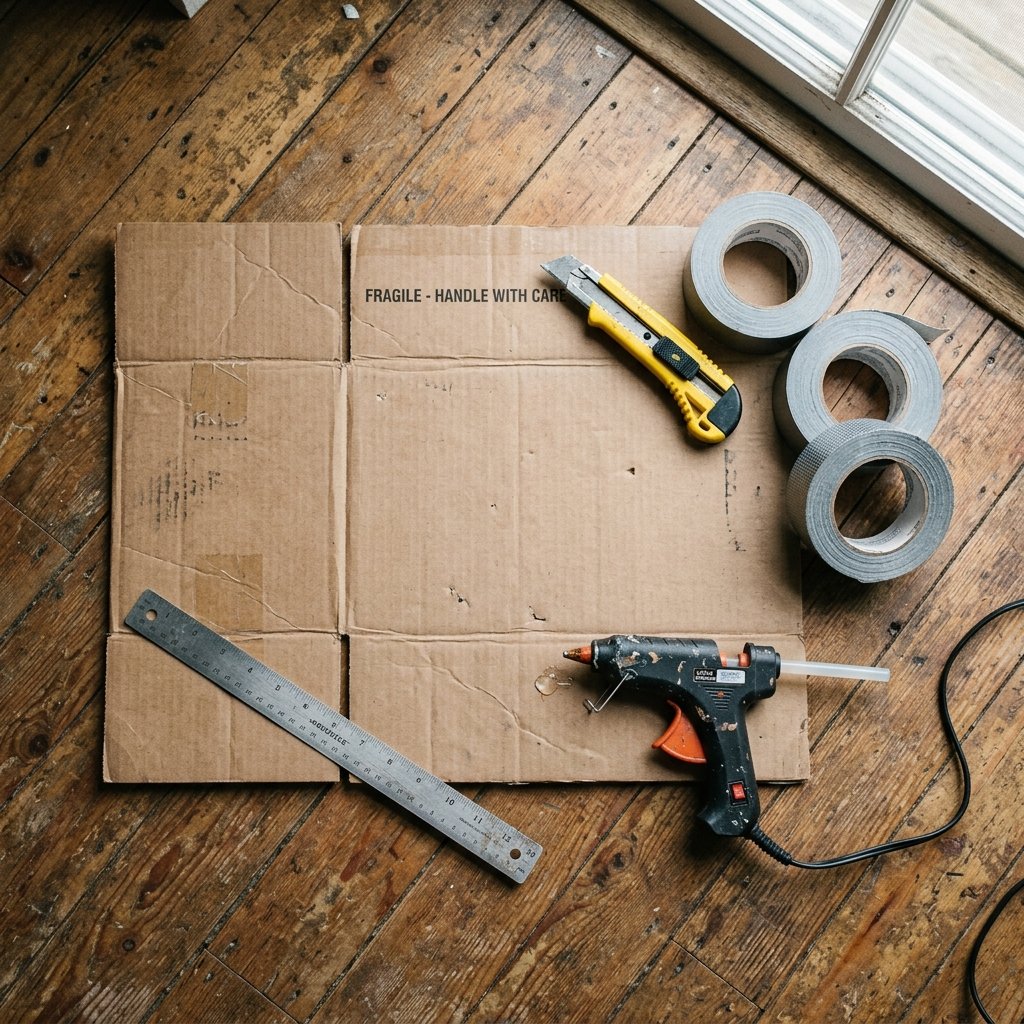
Every great build starts with a solid foundation and the right tools. As handy parents, we know that preparation is half the battle. You do not need a fancy workshop to pull this off, but you do need to raid your junk drawer and garage to assemble your upcycling arsenal.
The Ideal Cardboard Canvas
Not all boxes are created equal. For a truly epic playhouse, you want a box that offers enough square footage for your child to sit, pivot, and bring in a few stuffed animal roommates. Wardrobe boxes from your last move, refrigerator boxes, or those massive oversized delivery boxes are your prime real estate. If you only have smaller boxes, do not panic! You can easily frankenstein them together using our tape-and-brace method.
Essential Tools of the Trade
- A Heavy-Duty Box Cutter: Scissors will just crush the corrugated cardboard. You need a fresh, sharp blade for clean, professional cuts.
- Industrial Tape: Duct tape, wide packing tape, or reinforced gummed paper tape. This is the mortar to your cardboard bricks.
- A Straight Edge: A metal ruler or even a spare piece of wood to guide your cuts and create crisp folds.
- Hot Glue Gun: Optional, but fantastic for attaching accessories like cardboard awnings or window boxes.
- Decorating Supplies: Leftover interior wall paint, thick markers, or Dollar Tree contact paper.
The Budget Breakdown
Let us look at the cold, hard numbers. Building a playhouse from scratch is not just a creative outlet; it is a massive win for your wallet.
| Project Element | Store-Bought Plastic Playhouse | Zero-Budget DIY Cardboard Fort |
|---|---|---|
| Base Material | $150 – $300+ | $0 (Upcycled delivery box) |
| Tools & Fasteners | Included (but often flimsy) | $0 – $5 (Tape, hot glue, box cutter) |
| Customization | None (Factory molded) | Unlimited (Paint, markers, fabric scraps) |
| Environmental Impact | Heavy plastic waste | 100% Eco-Friendly & Recyclable |
| Total Estimated Cost | $150 – $300+ | $0 – $5 |
Prepping the Foundation: Structural Integrity for Rowdy Toddlers

Kids do not just sit in playhouses; they lean, they tackle, and they crash. If you simply stand a box upright, it will collapse within the first twenty minutes of roughhousing. We need to reinforce the load-bearing walls and ensure this cardboard cabin can withstand a toddler tornado.
The Double-Tape Method
Start by flipping your box upside down. Fold the bottom flaps in and secure them using the double-tape method. Run a strip of heavy-duty tape along the seam, and then run two perpendicular strips across the middle to prevent sagging. This creates a solid, rigid floor. If you are using a box that is open at the bottom, use scrap cardboard to create a base frame, taping it securely to the inner walls.
Creating an A-Frame Roof
To give your playhouse that classic, masculine-elegant architectural look, do not just tape the top flaps flat. Instead, fold the two shorter top flaps upward to form triangles. Take the two longer flaps and tape them together at the peak to create a pitched A-frame roof. If the flaps do not quite meet, bridge the gap with a spare piece of cardboard.
Frugal Pro-Tip: To reinforce the corners—the weakest point of any box—cut long, 2-inch wide strips of scrap cardboard. Fold them in half lengthwise to create a V-shape, and hot glue them into the interior corners of your playhouse. These act like DIY wooden studs and add massive structural integrity!
Architectural Marvels: Cutting Doors, Windows, and Skylights
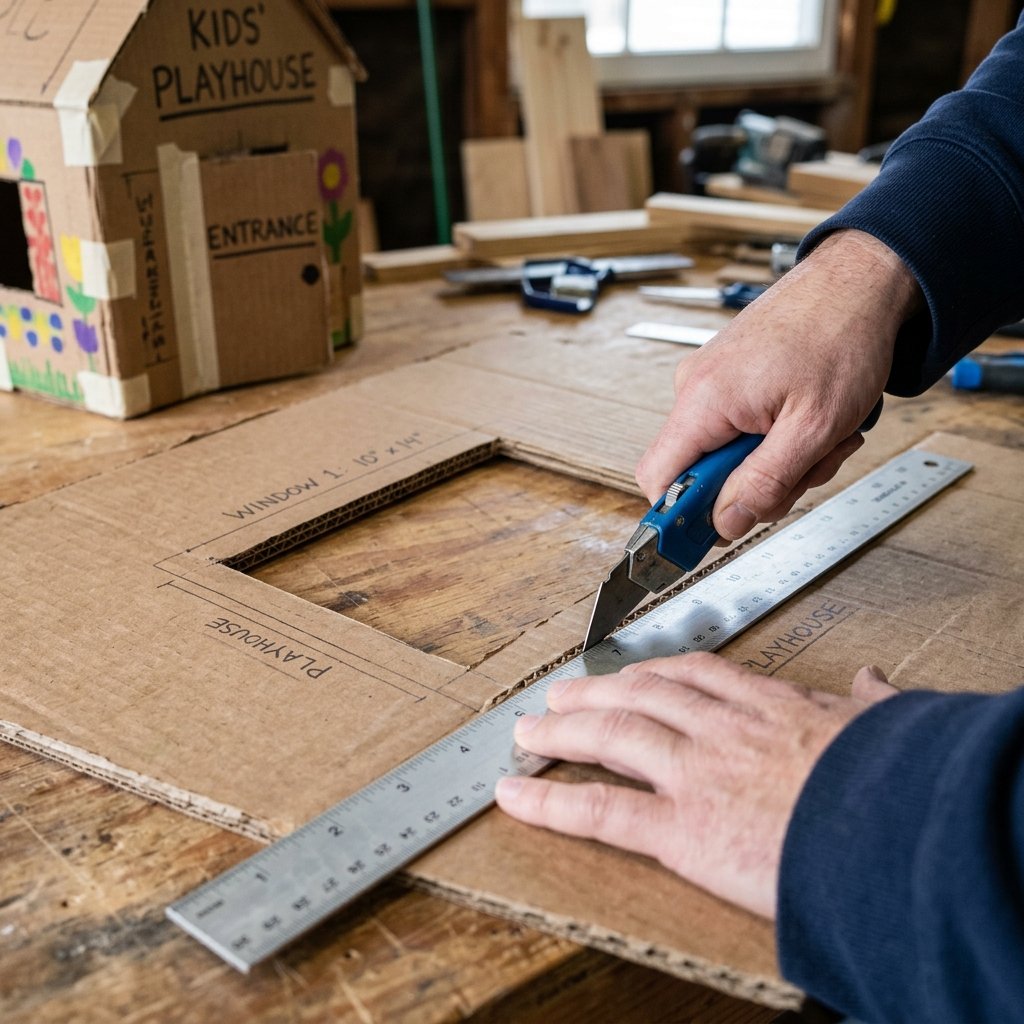
Now comes the fun part: turning a dark, enclosed cube into a breezy, inviting home. Proper ventilation is key, not just for airflow, but so you can keep an eye on the little ones while they play.
The Safety Briefing
Safety First, Handy Parents: Always use a sharp, fresh blade in your box cutter. A dull blade requires more force, which leads to slipping. Keep your non-cutting hand well behind the blade path, and never let the little ones assist with the cutting phase. Save their energy for the painting!
The Perfect Front Door
We want a door that actually swings open and closed, not just a gaping hole. Here is the secret tailor-style trick for cardboard:
- Use your straight edge to draw a large rectangle for the door, leaving the bottom edge attached to the floor.
- Cut completely through the cardboard on the top and the right side of the rectangle.
- For the left side (the hinge), do NOT cut all the way through. Instead, lightly score the surface of the cardboard with your blade.
- Gently push the door inward along the scored line. You now have a perfectly functioning, swinging front door!
Cross-Breeze Windows and Skylights
A good playhouse needs natural light. Cut out two square windows on opposite sides of the box to create a cross-breeze. To make it look high-end, leave a cross-shaped strip of cardboard in the center of the window to mimic windowpanes. For an epic touch, cut a small rectangular skylight into one side of your A-frame roof. This allows light to pour in and makes the interior feel much larger.
The Custom Paint Job: From Trash to Prime Real Estate
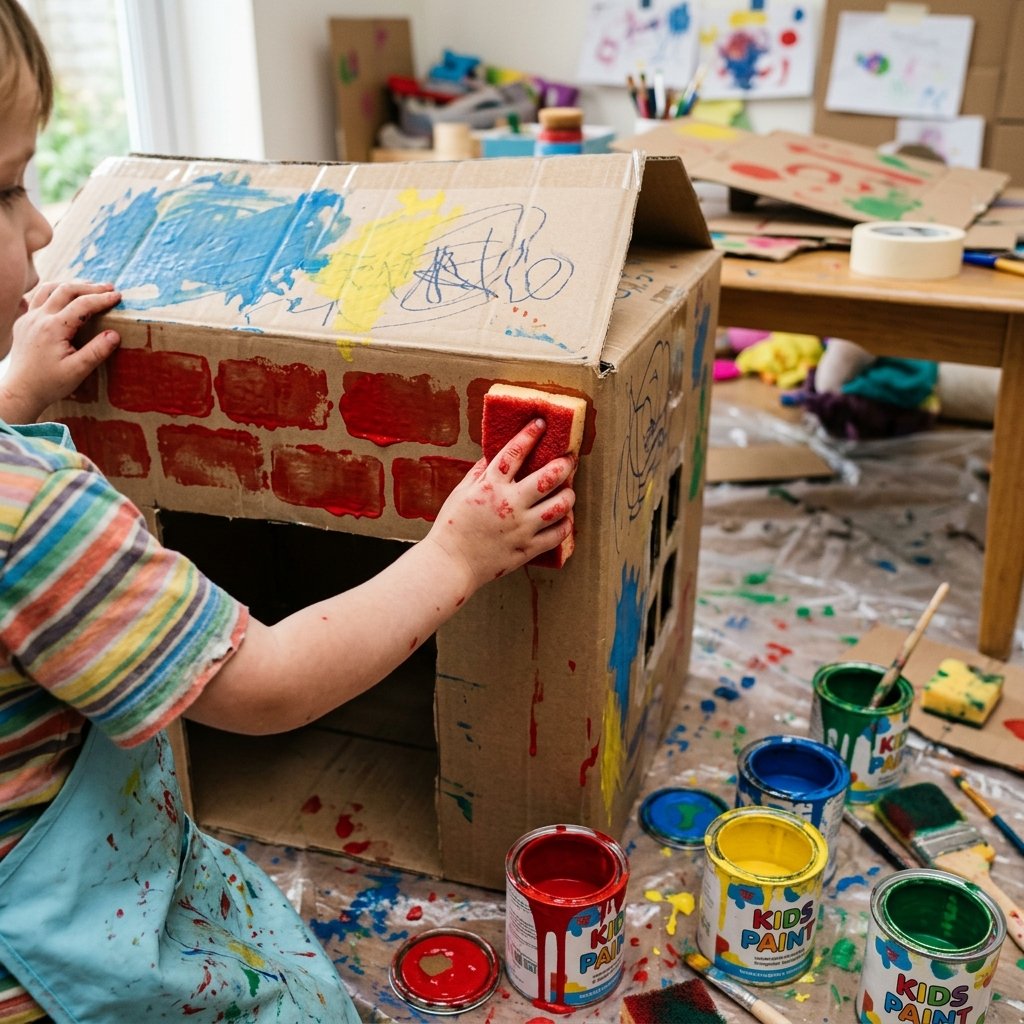
Your structure is built. Now it is time to elevate it from a brown delivery box to a piece of bespoke, budget-savvy real estate. This is where you can let the kids get involved and unleash their creativity.
Zero-Dollar Paint Hacks
Do not go buy expensive craft paint. Head to your basement or garage and check your stash of leftover interior house paint. Latex wall paint works beautifully on cardboard. It seals the paper, adds a layer of rigidity, and gives the playhouse a premium, matte finish. Pour a little paint into a plastic container, hand your kids some old brushes, and let them go to town on the exterior walls.
The Faux Brick and Shingle Technique
If you want to tap into your inner Dollar Tree interior designer, try adding texture. Grab a cheap kitchen sponge, dip it into some red or brown paint, and stamp it along the bottom half of the playhouse to create a faux brick foundation. For the roof, use a thick black marker to draw overlapping scallops, mimicking the look of architectural shingles. It takes 15 minutes but makes the playhouse look incredibly detailed.
Sensory Add-Ons
For younger toddlers, glue different textures to the outside walls. Scraps of felt, a piece of leftover carpet, or smooth jar lids can turn the walls into a tactile sensory board. It is a brilliant way to upcycle household trash into educational gold.
Next-Level Upgrades: Mailboxes, Chimneys, and Fairy Lights
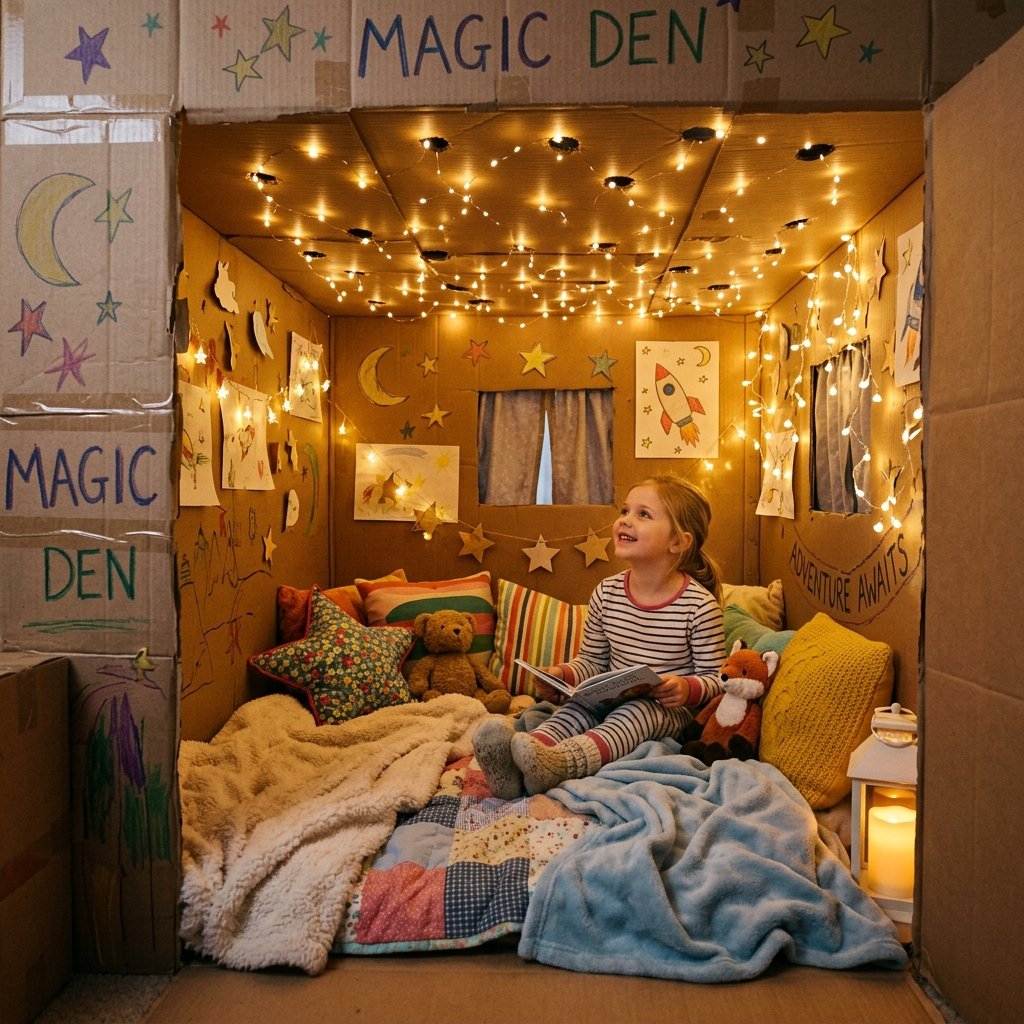
What kept my kids playing inside for 5 hours straight? It was not just the box itself; it was the immersive, interactive details. By adding a few clever, upcycled accessories, you transform a simple craft into an epic, imaginative world.
The Working Mailbox
Take an empty tissue box or a small shoe box. Cut a slit in the top for letters and tape it securely to the outside of the playhouse, right next to the front door. Give your kids some scrap paper and crayons, and they will spend hours writing and delivering mail to each other.
The Drive-Thru Window
If your kids love playing restaurant, cut a wide, horizontal window on one side of the box. Tape a sturdy piece of cardboard horizontally right below the window to act as a serving counter. Prop it up with a diagonal cardboard brace underneath. Now they have a fully functioning drive-thru or cafe counter!
Battery-Powered Porch Lights
This is the ultimate showstopper. Take a cheap string of battery-operated LED fairy lights (the kind you can get at the Dollar Tree for $1.25). Poke small holes through the ceiling of the playhouse and push the little LED bulbs through from the outside. Tape the battery pack securely to the exterior roof. When you turn them on, the inside of the playhouse lights up like a magical, starry night. Throw a cozy blanket and some pillows inside, and you have created the ultimate frugal sanctuary.
Conclusion
Turning a delivery box into an epic kids playhouse is the ultimate testament to frugal, resourceful parenting. You do not need to spend hundreds of dollars on plastic toys that will eventually end up in a landfill. With a little imagination, some basic tools, and a weekend afternoon, you can build a custom, eco-friendly fortress that your kids will absolutely cherish.
This project is about more than just saving money; it is about teaching our children that creativity is limitless and that the best toys are often the ones we build with our own two hands. So, the next time a massive package arrives on your porch, do not rush to break the box down for recycling. Grab your box cutter, rally the kids, and start building your next masterpiece!

Makenzie is the founder and lead writer at MoneyHackTips.com — a personal finance blog dedicated to delivering street-smart financial wisdom for real people on real budgets. With 300+ published articles covering everything from debt management to investing fundamentals, Makenzie’s mission is to make every dollar work harder. When not writing about money hacks, Makenzie is testing frugal living strategies, optimizing side hustles, and helping readers build financial freedom from scratch.