
The Ultimate Thoughtful, Rugged Gift on a Dime
Frugal DIYers and crafty gift-givers, we have all faced the ultimate holiday or birthday challenge: finding a meaningful, practical gift for the guy who claims he already has everything. You want to give him something rugged, elegant, and useful, but dropping a small fortune on a boutique artisan kitchen tool just does not fit the budget-savvy lifestyle. Enter the ultimate trash-to-treasure, high-end dupe: the custom DIY wood-burned cutting board. This is not just a craft; it is a functional piece of culinary art. Whether he is a backyard grill master, a weekend whiskey-and-charcuterie aficionado, or a home chef, a personalized cutting board is something he will actually use every single day.
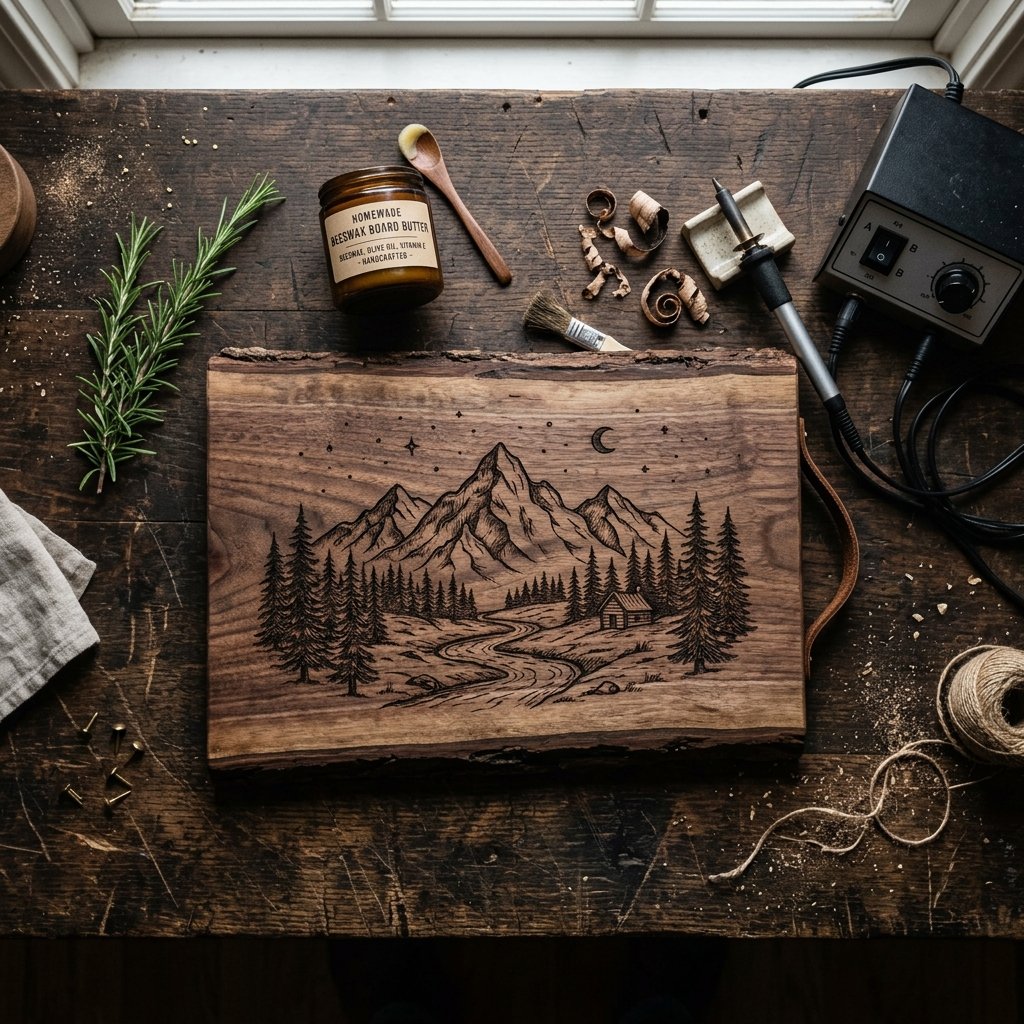
Wood burning, also known as pyrography, might sound intimidating, but it is one of the most resourceful and inexpensive hobbies you can pick up. With a basic starter tool and a little patience, you can take a blank thrifted board or an affordable raw wood slab and transform it into a Pottery Barn-level masterpiece for a fraction of the cost. In this masterclass, we are going to walk through the entire process. From selecting the perfect food-safe wood to transferring a masculine design, mastering the burn, and whipping up a zero-budget beeswax board butter to seal the deal, you will become a crafty-expert in no time. Roll up your sleeves, plug in that burning tool, and let us create a stunning, masculine-elegant gift that will take pride of place on his kitchen counter.
The Anatomy of a Perfect Masculine Cutting Board: Choosing Your Wood
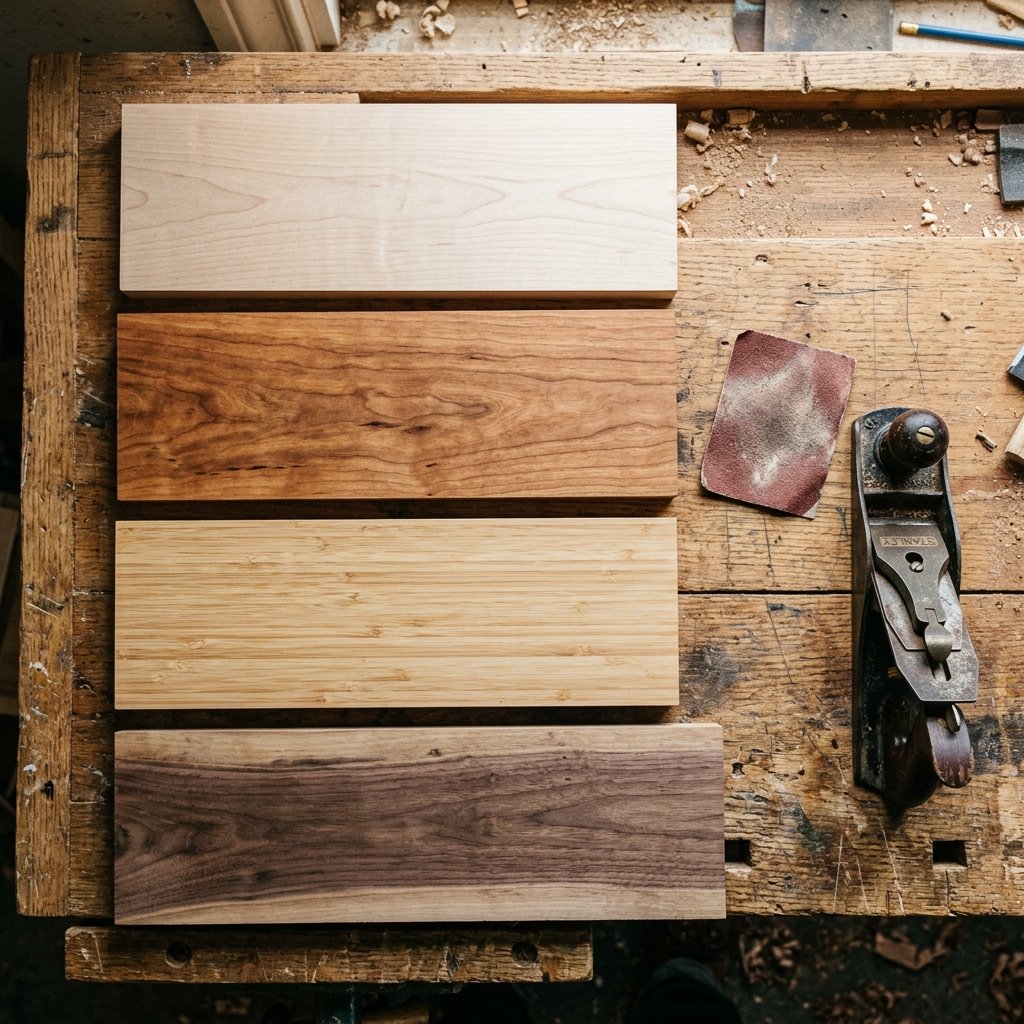
Before you ever plug in a hot tool, you need the right canvas. The secret to a high-end, durable cutting board lies entirely in the wood selection. As a frugal upcycler, your first instinct might be to grab any scrap wood you have lying around the garage, but when it comes to food preparation, safety and durability are paramount. You are looking for closed-grain hardwoods. Softwoods like pine or cedar might be cheap and easy to burn, but they are disastrous for cutting boards. They dent easily, absorb meat juices like a sponge, and often contain toxic saps or resins that will ruin the flavor of a good steak.
Thrifting vs. Buying Blank Boards
If you are a true budget-savvy crafter, start by scouring local thrift stores, estate sales, or clearance aisles at discount home goods stores. You can often find thick, high-quality maple or bamboo boards for under $5. If the surface is scratched, do not panic! A quick session with an orbital sander will reveal fresh, beautiful, virgin wood ready for your design. If you prefer to buy new, craft stores often sell raw basswood or acacia blanks. Just ensure they are untreated and not chemically stained.
The Wood Selection Matrix
To help you make the most resourceful choice, here is a breakdown of the best woods for both food safety and pyrography.
| Wood Type | Cost Profile | Burnability | Durability & Food Safety |
|---|---|---|---|
| Maple | $15 – $25 (New) | Excellent (Smooth grain) | Top Tier (Highly durable, closed grain) |
| Bamboo | $5 – $10 (Thrifted) | Moderate (Uneven grain) | Great (Eco-friendly, tough) |
| Cherry | $20 – $35 (New) | Very Good (Rich color) | Excellent (Ages beautifully) |
| Acacia | $10 – $20 (Discount) | Good (High contrast) | Great (Water resistant, rugged) |
| Pine/Cedar | $0 – $5 (Scrap) | Poor (Sap bubbles) | DO NOT USE (Toxic sap, too soft) |
Frugal Guru Tip: If you find a gorgeous thrifted board but you are unsure of its history, sand it down past the original finish using 80-grit, then 120-grit, and finally 220-grit sandpaper. This guarantees you are working on a clean, food-safe surface and removes any old, rancid oils.
Gathering Your Arsenal: Budget-Savvy Pyrography Tools
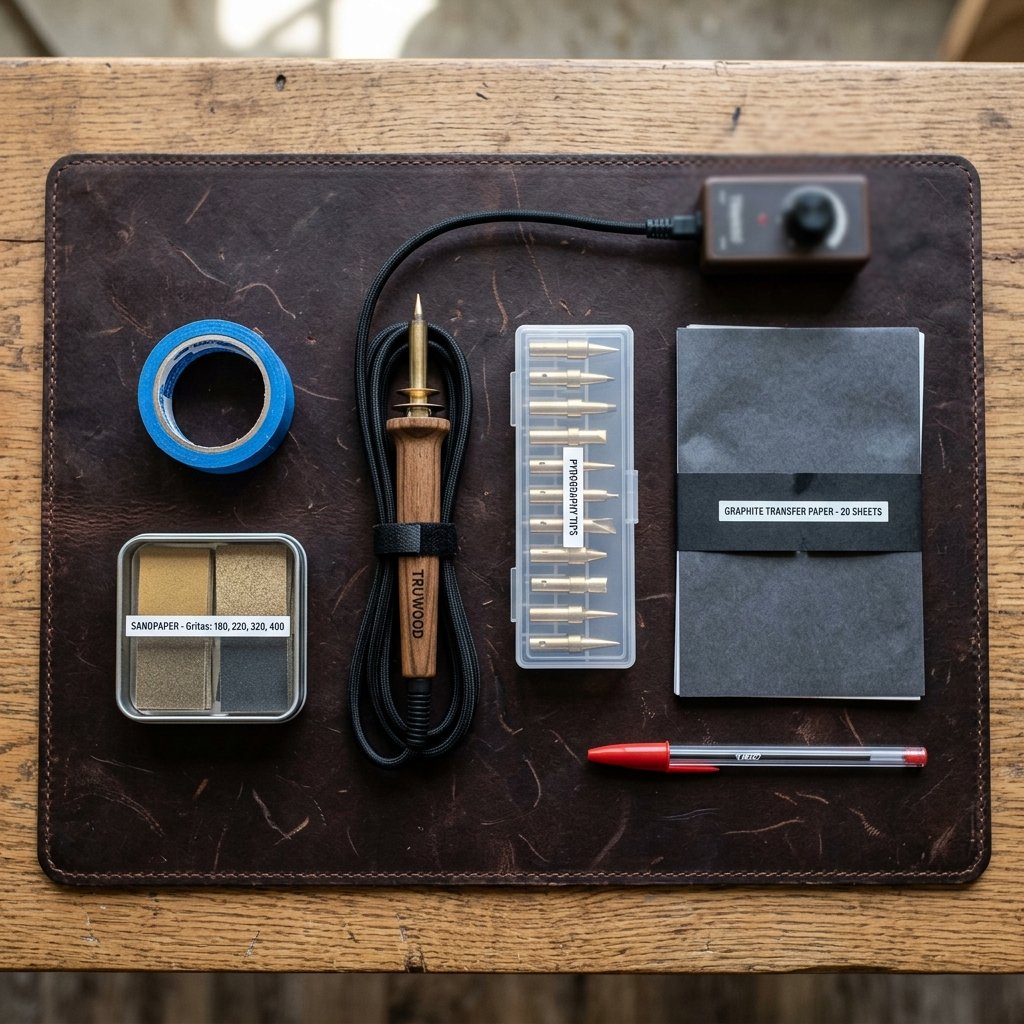
You do not need a professional-grade, temperature-controlled wire-nib burner that costs hundreds of dollars to create a masterpiece. A basic solid-point wood burning kit from your local craft store or online retailer will do the job perfectly for a beginner, usually setting you back only $15 to $25. These kits often come with interchangeable brass tips, which are fantastic for creating different textures, shading, and line weights.
Essential Materials List
- Wood Burning Tool: A basic 15-30 watt solid-point burner with a universal tip and a shading tip.
- Graphite Transfer Paper: Essential for tracing your design cleanly onto the wood. Do not use standard carbon paper, as it smudges and is incredibly difficult to sand off.
- A Red Pen: For tracing your design over the graphite paper. The red ink lets you see exactly which lines you have already traced.
- Sandpaper: A variety pack including 120, 220, and 400 grit for prepping and finishing.
- Food-Grade Mineral Oil & Beeswax: For our homemade, budget-friendly board butter (recipe in Section 5).
- Painter’s Tape: To secure your design while tracing.
Cost Comparison: Store-Bought Custom vs. DIY
Let us look at the incredible savings you achieve by rolling up your sleeves and doing this yourself. Custom laser-engraved or hand-burned boards on artisan websites carry a hefty markup.
| Item / Service | Store-Bought / Custom Order | Zero-Budget / Frugal DIY |
|---|---|---|
| High-Quality Hardwood Board | $60 – $120 | $5 – $15 (Thrifted/Discounted) |
| Custom Engraving/Burning | $40 – $80 | $0 (Your time and creativity) |
| Artisan Conditioning Wax | $15 – $25 | $3 – $5 (Homemade batch) |
| Total Estimated Cost | $115 – $225 | $8 – $20 |
By choosing the DIY route, you are not only saving upwards of $100 to $200, but you are also infusing the gift with personal time, effort, and masculine elegance that money simply cannot buy.
Designing for the Rugged Aesthetic: Transferring Your Art
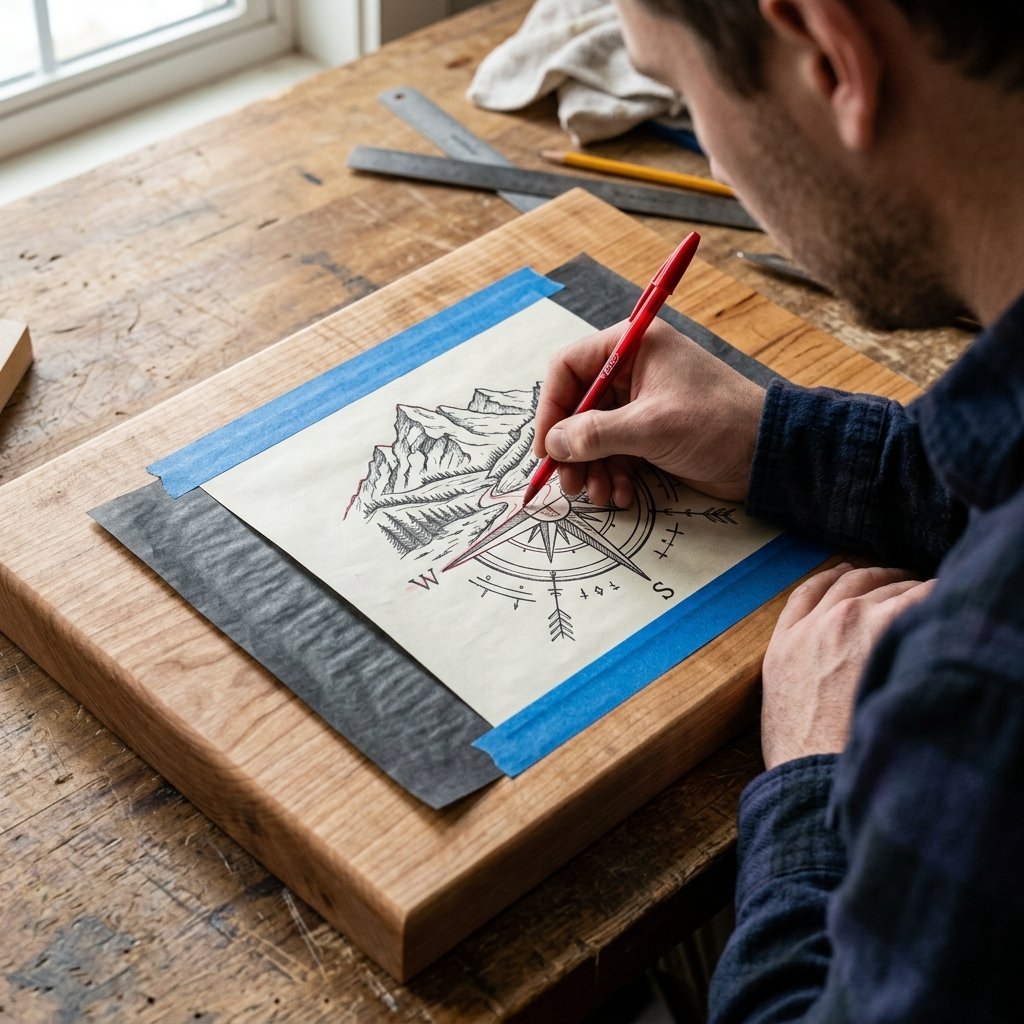
The key to a gift he will actually use every day is ensuring the design matches his personality. Avoid overly delicate or fussy patterns. Instead, lean into rugged, masculine, or highly personal aesthetics. Think about his hobbies: does he love camping? A minimalist mountain range or topographical map is perfect. Is he the undisputed king of the barbecue? A bold, vintage-style grill master logo with his last name and established date will make him feel like a pro. Geometric patterns, bold monograms, or even the coordinates of a special location (like where you met or his favorite fishing spot) add an incredible touch of thoughtful sophistication.
The Flawless Transfer Method
Unless you are a freehand artist, transferring your design accurately is the most crucial step for a professional-looking result. Here is the foolproof, crafty-expert method for getting your design onto the wood without smudges.
- Print Your Design: Measure your cutting board and print your chosen design on standard printer paper to the exact scale you want. Remember to place the design in a corner or along the edge if you want the center to remain clear for heavy chopping.
- Tape It Down: Place a sheet of graphite transfer paper (dark side down) onto the sanded wood. Place your printed design on top. Secure the top edge tightly with painter’s tape to create a hinge.
- Trace with Pressure: Using a red ballpoint pen, firmly trace over the outlines of your design. The red ink allows you to easily see where you have been.
- Check Your Work: Lift the paper hinge occasionally to ensure the graphite is transferring clearly. If it is too faint, press harder.
- Remove and Review: Once fully traced, remove the paper. You should have a crisp, pencil-like outline on your board, ready for the burner.
Frugal Guru Mantra: Let the graphite do the work, not your eraser. Never use an eraser on raw wood to fix a graphite mistake; it will push the dark dust deep into the wood grain, muddying your final finish. Instead, use a small piece of 220-grit sandpaper to gently buff away any tracing errors.
The Art of the Burn: Pyrography Techniques & Safety
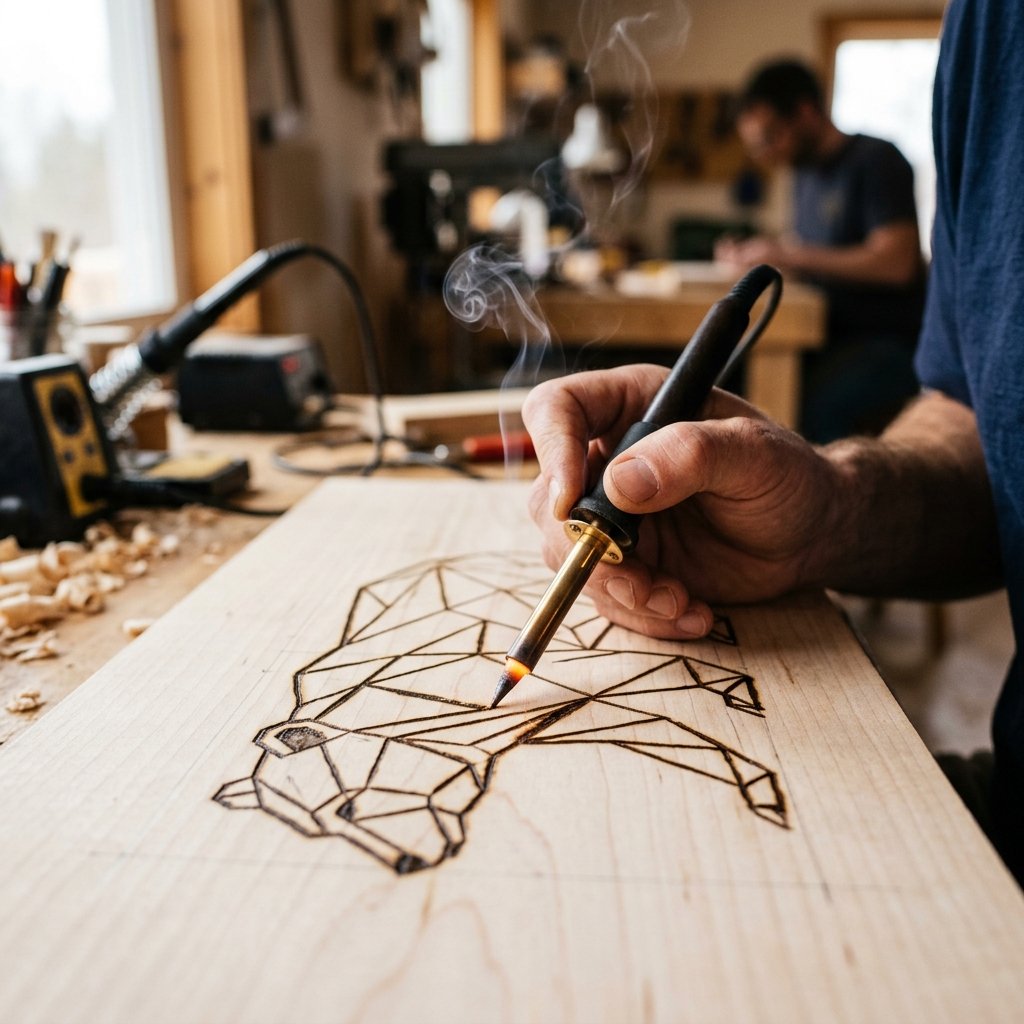
Now comes the magic: turning that graphite sketch into a permanent, rustic work of art. Wood burning requires patience, a steady hand, and a respect for the tool. Your burner will reach temperatures exceeding 750 degrees Fahrenheit, so safety and focus are your best friends here. Find a comfortable, well-lit workspace, put on your favorite podcast, and let us get burning.
Crucial Safety Briefing
Safety First: Always work in a well-ventilated area, preferably with a small fan blowing the smoke away from your face. Never burn MDF, plywood, or wood that has been treated with chemical stains or varnishes, as they release highly toxic fumes. Stick to raw, natural hardwoods. Keep a ceramic mug nearby to rest your hot tool in if it does not come with a stand.
Mastering the Burn: Step-by-Step
- Warm Up the Tool: Attach your universal or fine-point tip before plugging the tool in. Let it heat up for at least 5 to 10 minutes. Test the heat on a scrap piece of wood (or the back of the board) to gauge how fast it burns.
- Outline First: Start by tracing the outer edges of your design. Hold the tool lightly, like a pencil, but do not press down hard. The heat does the work, not your muscles. Pull the pen toward you rather than pushing it away; this prevents the tip from catching in the wood grain.
- Navigate the Grain: Hardwoods have varying densities due to their grain patterns. You will notice the pen moves quickly over the soft parts of the grain but slows down on the darker, harder lines. Adjust your speed accordingly to maintain an even burn line.
- Shading and Depth: Once the outline is complete, unplug the tool, let it cool completely, and swap to a shading tip (usually a flat, leaf-shaped tip). Plug it back in and use a light, sweeping circular motion to add depth and shadows to your design. This is what elevates the board from a simple craft to a masculine-elegant showpiece.
- Stippling for Texture: For a rugged, textured look (great for tree bark or rustic fonts), use the pointed tip to create clusters of tiny dots. The closer the dots, the darker the shadow.
Troubleshooting Common Issues
If you find your pen is leaving dark, blobby burn marks at the start of every line, you are pausing too long before moving. Keep the pen in constant motion. If the lines are too light, slow down your stroke rather than pressing harder. Pressing hard will only bend your brass tips and gouge the wood.
Sanding, Polishing, and The Food-Safe Seal: The Master Finish
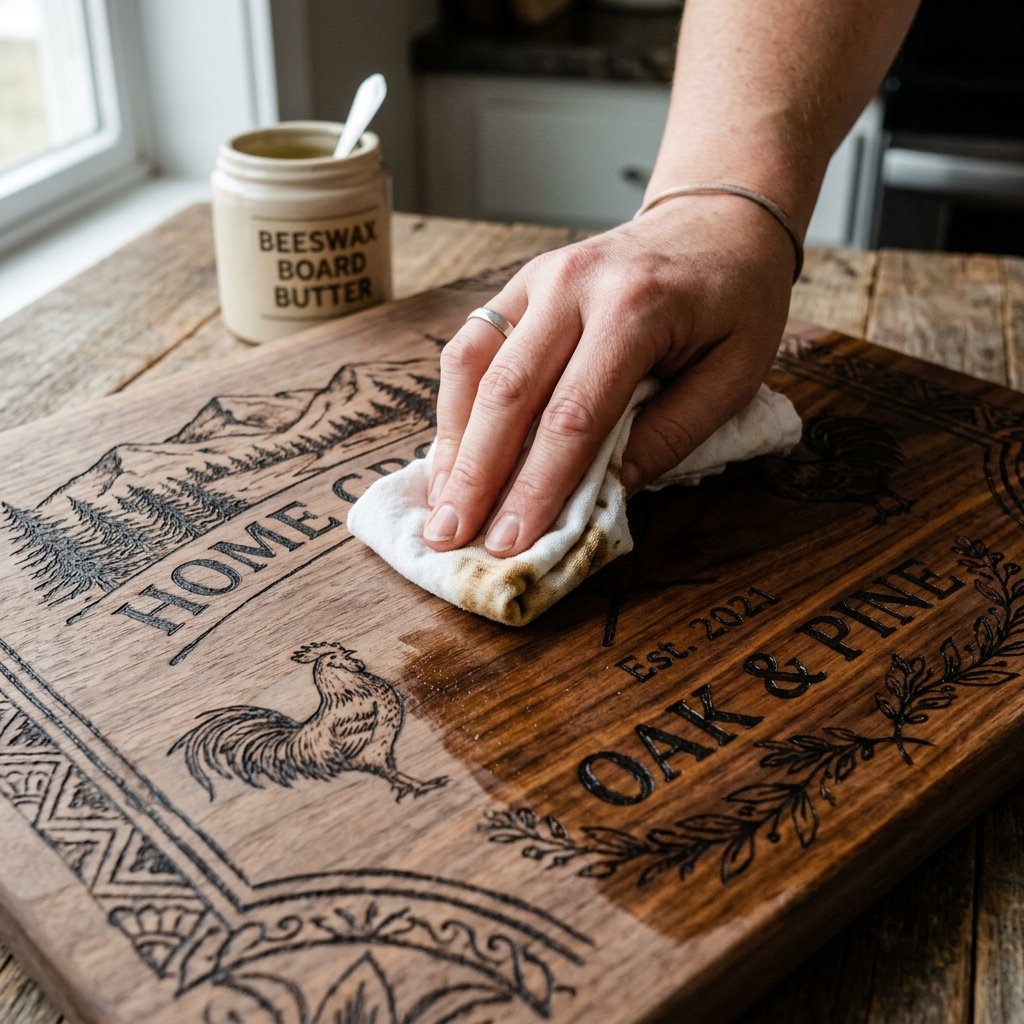
You have finished the burn, and it looks incredible. But the job is not done yet. During the burning process, resin and carbon build up on the surface, and the heat can cause the wood grain to raise slightly. To achieve that buttery-smooth, high-end finish that screams luxury, you must sand and seal the board properly.
The Final Sanding
Take a piece of 400-grit (very fine) sandpaper and gently buff the entire surface of the board, including over your burned design. This removes any sticky carbon residue, erases leftover graphite lines, and leaves the wood feeling like glass. Wipe the board down with a barely damp, clean lint-free cloth to remove all sawdust.
Crafting Your Own DIY Board Butter
Store-bought cutting board conditioners can cost upwards of $20 for a tiny tin. As a frugal DIYer, you can make a superior, 100% food-safe board butter in your kitchen for pennies. This rugged, hydrating wax will protect the wood from moisture, prevent cracking, and make your wood-burned design pop with rich, dark contrast.
| Ingredient | Measurement | Purpose in the Formula |
|---|---|---|
| Food-Grade Mineral Oil | 4 Parts (e.g., 4 oz) | Penetrates deep into the wood fibers to hydrate and prevent cracking. |
| Natural Beeswax Pastilles | 1 Part (e.g., 1 oz) | Creates a protective, water-resistant surface barrier and a soft sheen. |
The Melting Process: Create a makeshift double boiler by placing a glass mason jar into a pot with a few inches of simmering water. Add your mineral oil and beeswax to the jar. Stir gently with a wooden skewer until the beeswax is completely melted (about 10 minutes). Carefully remove the jar and let it cool. It will solidify into a soft, luxurious salve.
Applying the Finish
Scoop up a generous dollop of your homemade board butter with a clean rag and massage it into the cutting board using circular motions. The wood will immediately drink it in, and you will see the grain come alive, shifting from dull and dry to rich and vibrant. Coat the front, back, and sides. Let it sit for 20 minutes, then use a clean microfiber cloth to buff away any excess wax. The result is a masculine, protected, and stunningly professional finish.
Care, Maintenance, and Presentation: Giving the Gift

You have poured your heart, time, and budget-savvy skills into creating this rugged masterpiece. To ensure he actually uses it every day for years to come, you need to educate him on proper care. Wood-burned cutting boards are heirloom-quality items, but they require a little bit of respect to stay beautiful.
The Golden Rules of Wood Board Maintenance
- No Dishwashers, Ever: The heat and harsh detergents of a dishwasher will warp, crack, and destroy a wooden board in a single cycle. Hand wash only with warm water and mild dish soap.
- Do Not Soak: Never leave the board submerged in a sink full of water. Wash it quickly and dry it immediately with a towel.
- Stand to Dry: Always let the board dry standing up on its edge. If you lay it flat while wet, moisture gets trapped underneath, leading to warping or mold.
- Monthly Hydration: Gift him the leftover jar of your DIY Board Butter! Tell him to reapply a coat whenever the wood starts looking dry or pale (usually once a month with heavy use).
Elevating the Presentation
To truly knock this gift out of the park, think about the presentation. You do not want to just hand him a bare board. Tie a piece of rustic jute twine around the handle or the center of the board. Tuck a sprig of fresh rosemary or thyme under the string for a culinary touch. For an ultimate, resourceful gift basket, pair the cutting board with a homemade dry BBQ rub in a thrifted mason jar, or a high-quality (but budget-friendly) chef’s knife. You have just created a curated, artisanal gift experience that looks like it cost $150+, all while staying firmly within your frugal budget.
Conclusion
From Raw Wood to Rugged Masterpiece
And there you have it, frugal crafters! With a little bit of heat, some inexpensive hardwood, and a resourceful DIY spirit, you have transformed basic materials into a stunning, personalized wood-burned cutting board. This is the epitome of a thoughtful gift: it is deeply personal, highly practical, and carries the rugged, masculine elegance that makes it a perfect addition to his daily routine. Whether he uses it to slice up a perfectly smoked brisket or just to chop vegetables for Sunday dinner, every time he pulls this board out, he will be reminded of the time and love you put into it. So grab your burner, trust your creativity, and start crafting. The perfect budget-savvy gift is literally at your fingertips!

Makenzie is the founder and lead writer at MoneyHackTips.com — a personal finance blog dedicated to delivering street-smart financial wisdom for real people on real budgets. With 300+ published articles covering everything from debt management to investing fundamentals, Makenzie’s mission is to make every dollar work harder. When not writing about money hacks, Makenzie is testing frugal living strategies, optimizing side hustles, and helping readers build financial freedom from scratch.