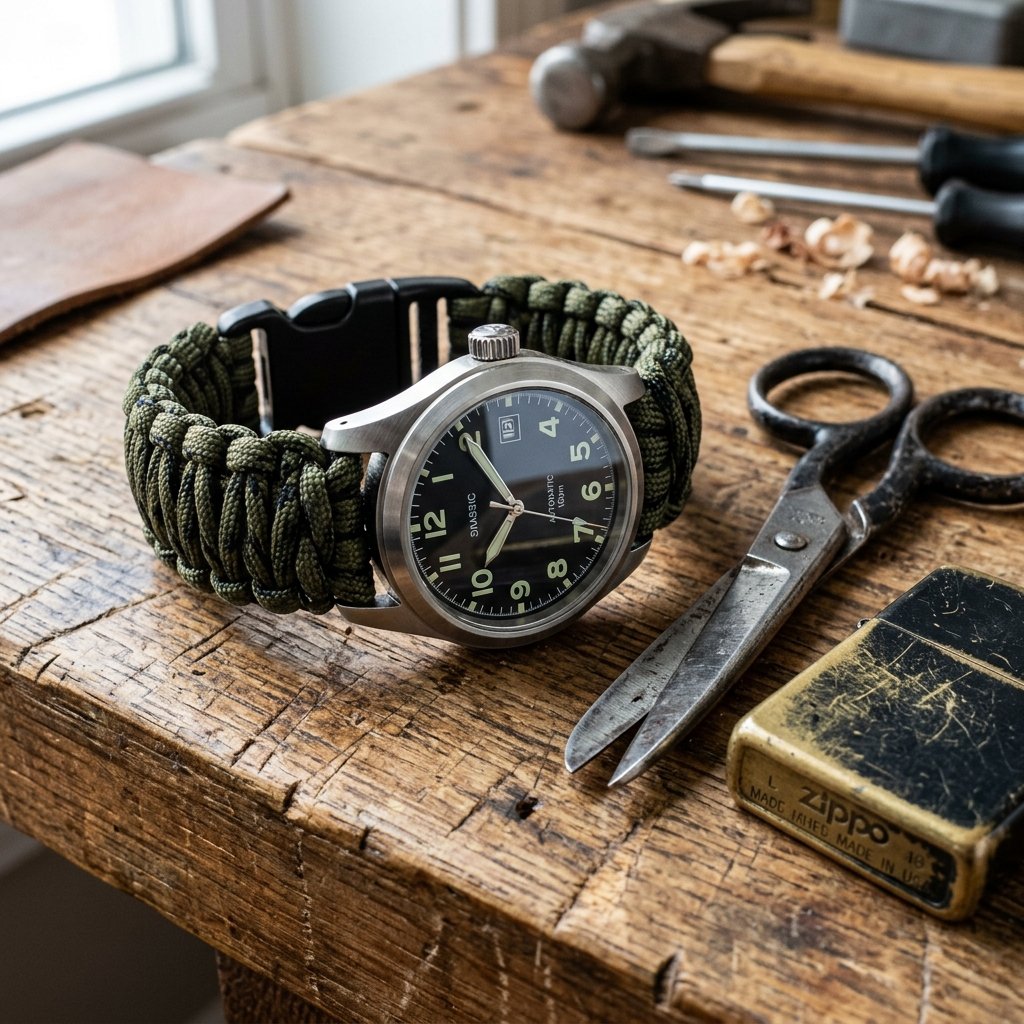

Why settle for a flimsy, mass-produced watch strap when you can forge a piece of gear that is as tough as it is trendy? If you have ever browsed high-end tactical shops, you have likely seen those rugged paracord watch bands retailing for $40 to $60. Today, we are going to debunk the myth that quality gear requires a heavy investment. As a resourceful DIYer, you can craft a custom-fitted, survival-ready watch band for less than the price of a cup of coffee. Paracord, or 550 cord, was originally used in the suspension lines of parachutes during World War II. It is lightweight, incredibly strong (rated to hold 550 pounds), and looks undeniably sharp on the wrist. Whether you are upcycling an old thrift store watch or upgrading your daily driver, this project is the ultimate marriage of form and function. Get ready to master the Cobra Weave and create a piece of masculine elegance that is built to last a lifetime.
The Budget Breakdown: Professional Gear on a Dime
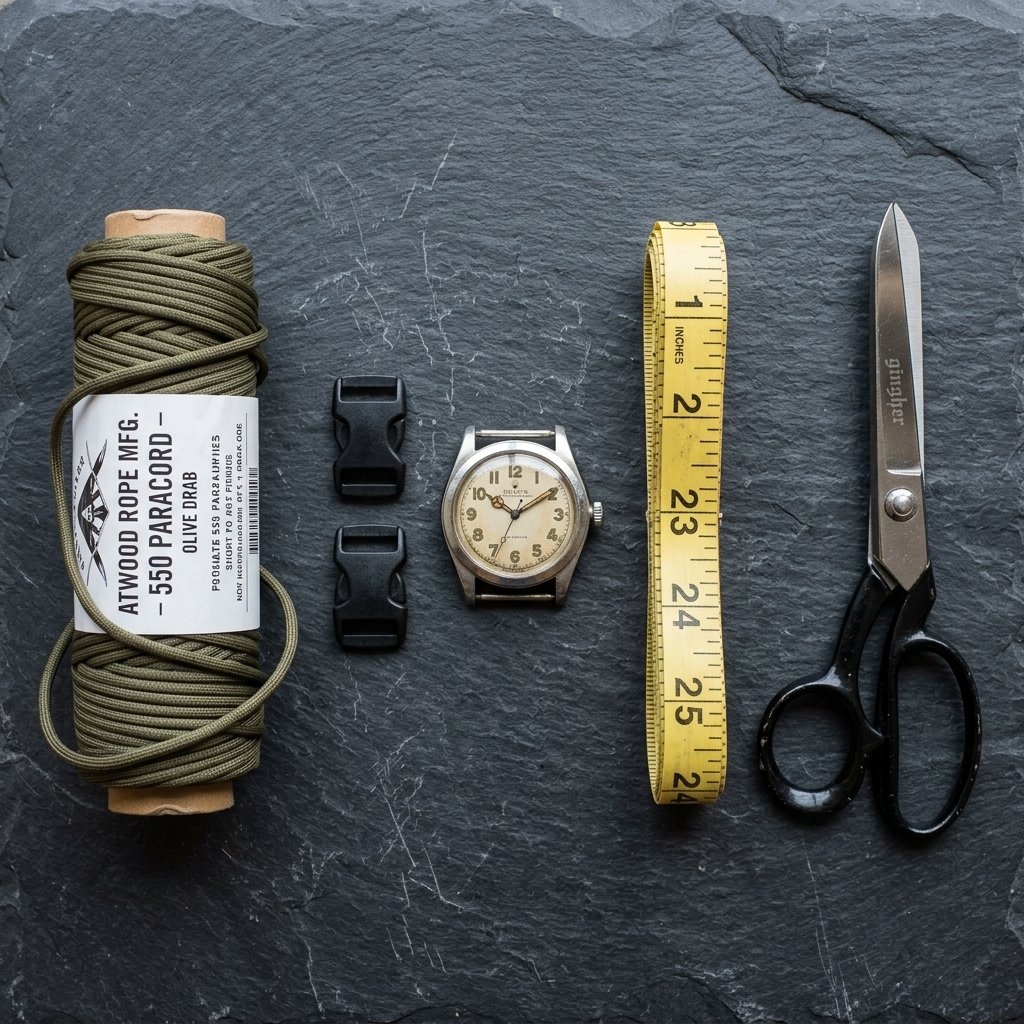
Before we dive into the weaving, let’s look at the financial logic of this project. A single 100-foot spool of 550 paracord costs roughly $8.00 and can yield about 10 to 12 watch bands. When you factor in the cost of plastic buckles or metal shackles, your total investment per band is remarkably low. This makes it an ideal project for crafting thoughtful, high-quality gifts for Father’s Day, birthdays, or for your fellow outdoorsmen.
| Material Item | Bulk Cost | Cost Per Band |
|---|---|---|
| 550 Paracord (100ft) | $8.00 | $0.80 |
| Side-Release Buckles (Pack of 20) | $6.00 | $0.30 |
| Upcycled Watch Face | $2.00 (Thrifted) | $2.00 |
| Total Investment | – | $3.10 |
Compare that $3.10 to the $50.00 you might pay at a tactical boutique. By doing it yourself, you are saving over 90% while ensuring a custom fit that no store-bought band can match.
Pre-Flight Prep: Measuring for a Perfect Custom Fit
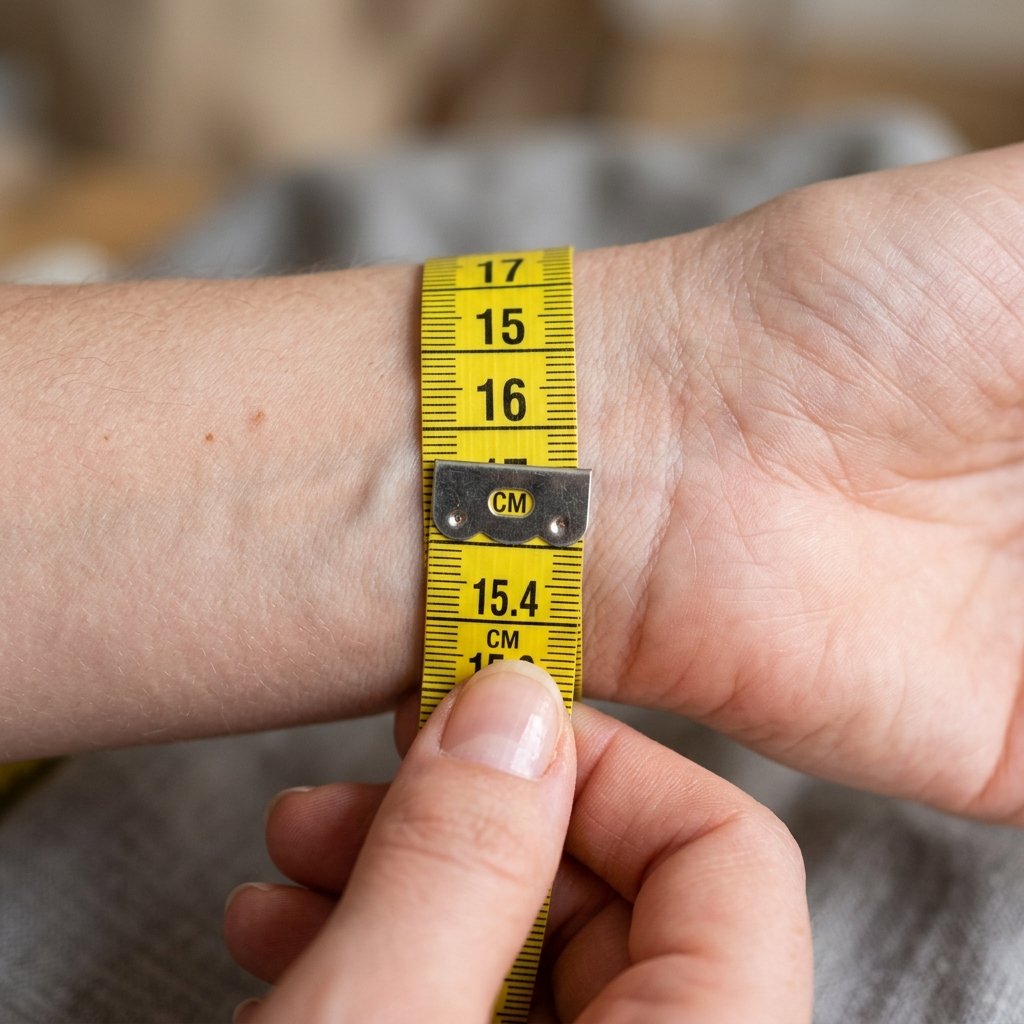
The most common mistake beginners make is guessing the length. Since paracord is thick, the weave will take up a significant amount of space on the inside of the band. To ensure your watch doesn’t cut off your circulation or slide down your arm, follow this precise measuring formula. You will need approximately 1 foot of cord for every 1 inch of wrist circumference, plus an extra foot for the core and finishing.
The Golden Ratio of Paracord: Measure twice, cut once, and always add 12 inches of ‘insurance’ cord to avoid running short during the final tuck.
To measure your wrist, wrap a piece of string around your arm where you normally wear your watch. Mark the point where it overlaps, then measure that string against a ruler. If your wrist is 7.5 inches, you should start with at least 8.5 to 9 feet of paracord to be safe. Remember, you can always trim excess, but you cannot add cord once you have started weaving.
The Master Weave: Step-by-Step Cobra Stitch Tutorial
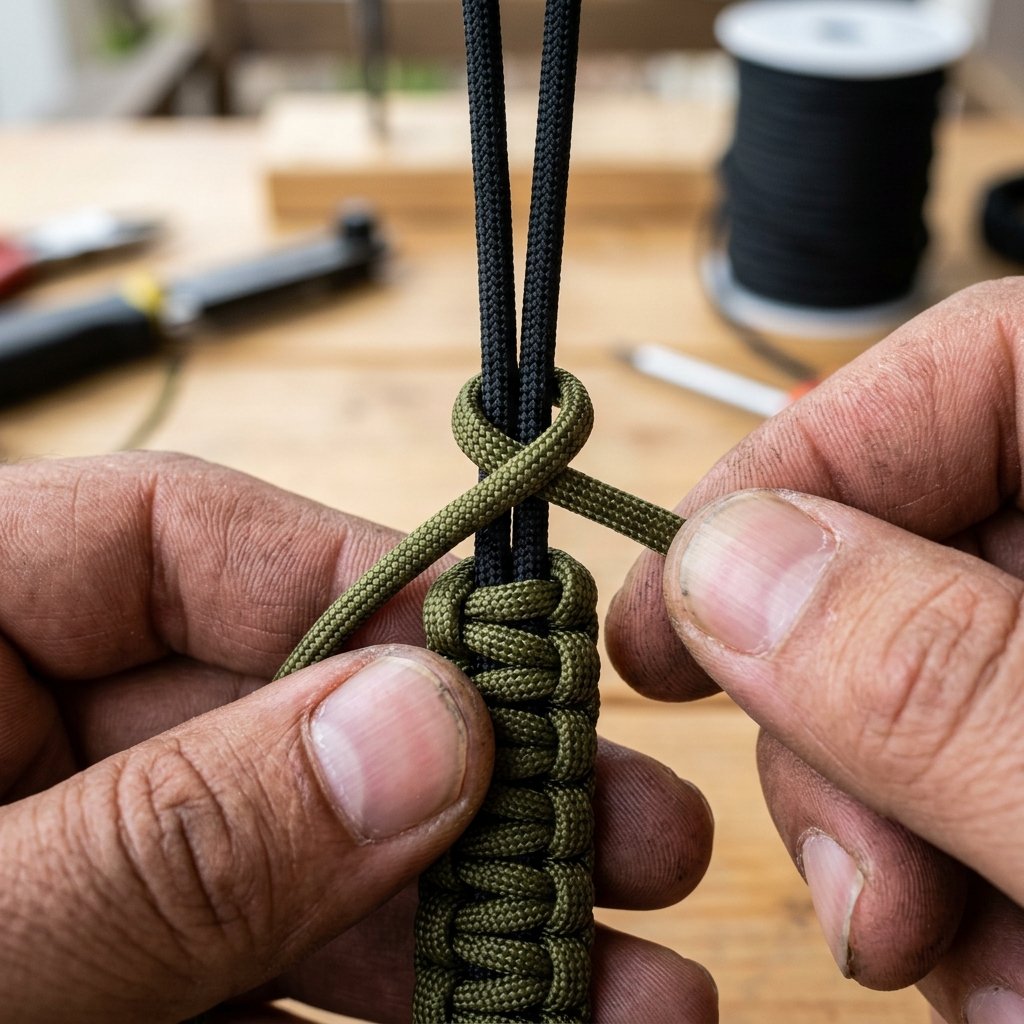
The Cobra Weave (also known as the Solomon Bar) is the gold standard for watch bands because it is flat, comfortable, and incredibly durable. Follow these steps to secure your watch face and begin the weave:
- Attach the Buckle: Fold your cord in half. Thread the looped end through the first buckle piece, then pull the loose ends through the loop to create a girth hitch.
- Set the Length: Thread the loose ends through the watch lugs (the pins on the watch face) and then through the second buckle piece. Adjust the distance between the two buckle ends to match your wrist measurement plus 1/4 inch for the thickness of the weave.
- The First Knot: Take the left cord and pass it under the center core cords. Take the right cord, place it under the left cord, over the center cords, and through the loop created by the left cord.
- The Alternating Pattern: Tighten the knot. Now, repeat the process starting with the right side. Take the right cord under the center, and the left cord under the right, over the center, and through the loop.
- Consistency is Key: Continue alternating sides. Always start the next knot with the cord that is pointing toward the back of the band. Keep your tension 100% consistent to ensure a professional, symmetrical look.
The Pro-Level Finish: Melt, Smush, and Secure
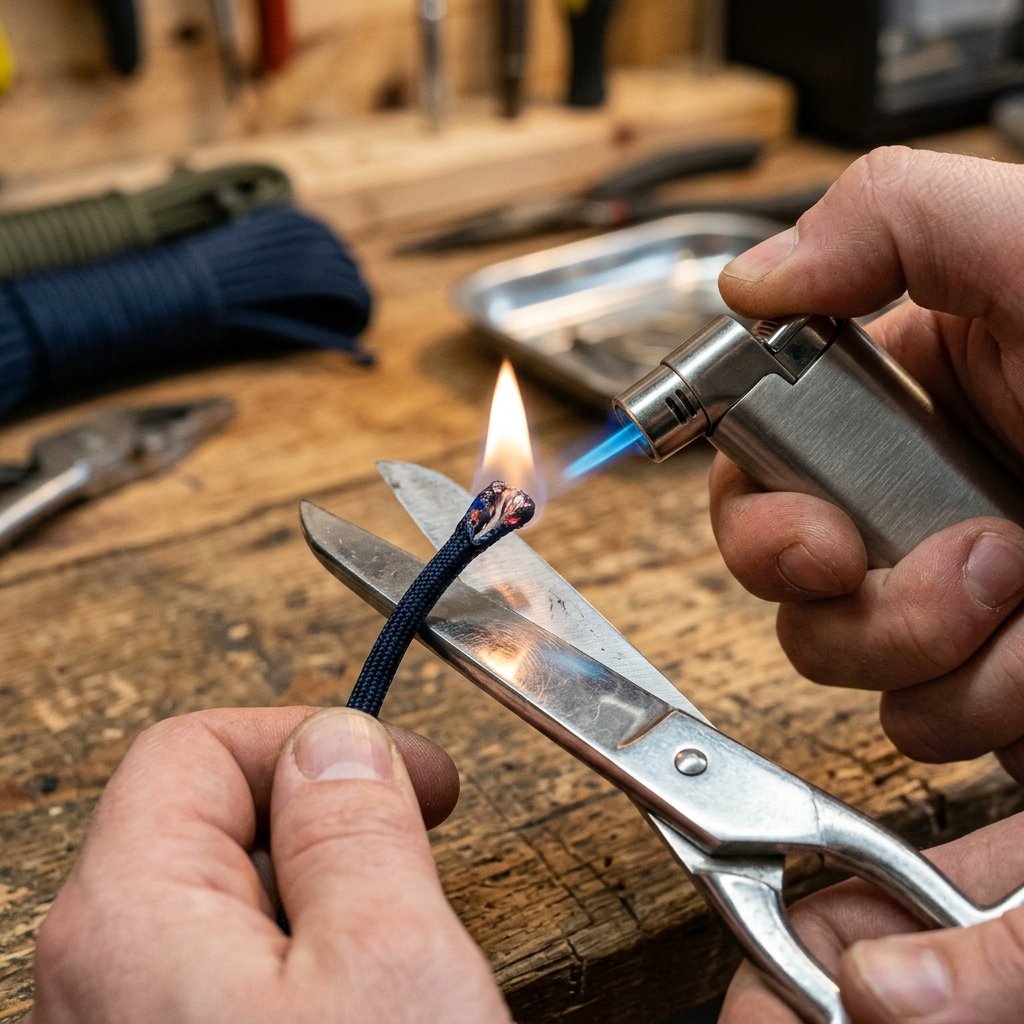
Once you reach the second buckle and there is no more room to weave, it is time to secure the ends. This is where a ‘good’ DIY project becomes a ‘great’ one. You don’t want bulky knots or scratchy ends rubbing against your skin.
The Melt-and-Smush Mantra: Heat the tip until it glows, press it flat, and watch it hold. A clean finish is the mark of a master craftsman.
Cut the remaining cord ends to about 1/8th of an inch from the band. Using a lighter, carefully melt the frayed ends until they form a small, molten bead. Quickly press the flat side of your scissors or a metal lighter casing against the molten cord to ‘smush’ it flat against the weave. This creates a permanent plastic weld that will not come undone even under heavy stress. Safety Note: Be careful not to touch the molten cord with your bare fingers, as it behaves like hot wax and can cause burns.
Customization: Beyond the Basic Black
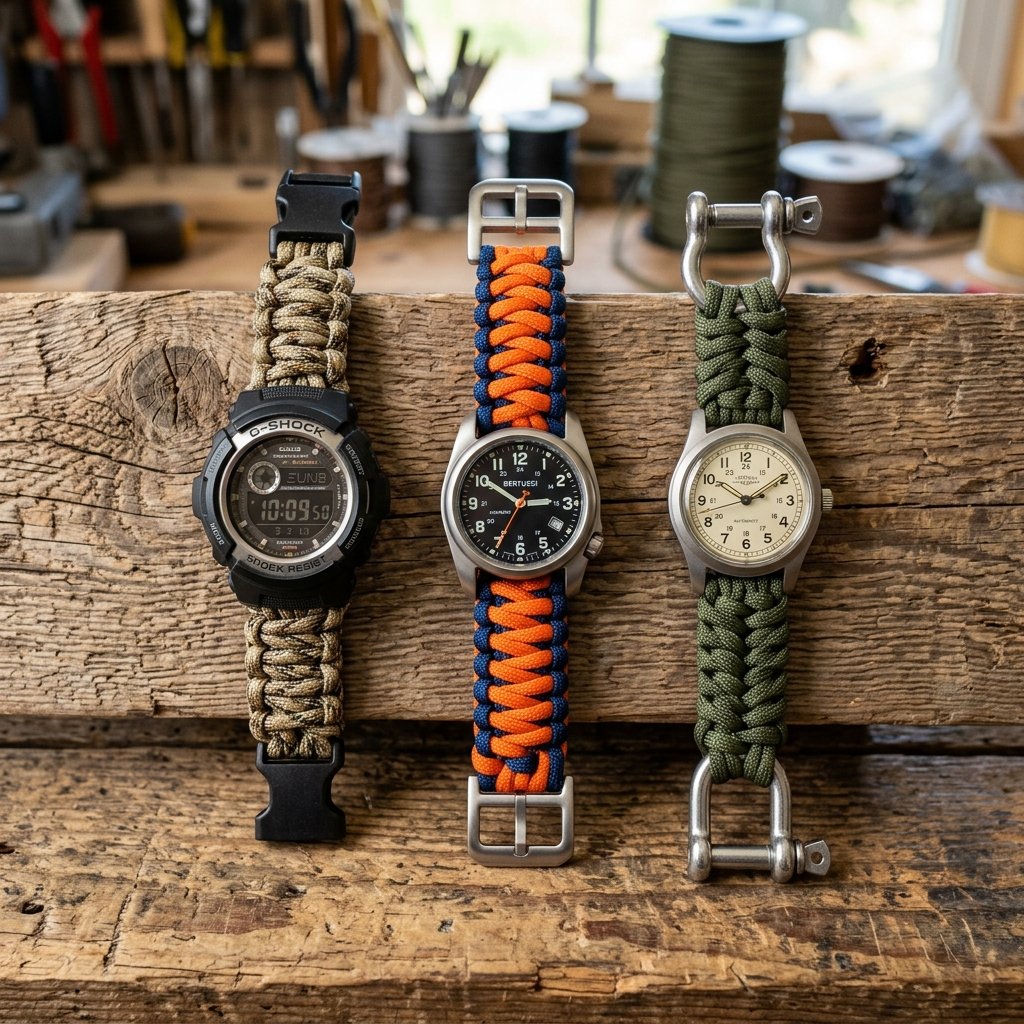
Now that you have mastered the basics, it is time to get creative. The beauty of the DIY approach is the ability to customize your gear to your specific style or environment. You can use two different colors of cord to create a ‘King Cobra’ weave, which is wider and even more rugged. You can also integrate ‘Survival Cord’ which contains internal strands of fishing line, tinder, and copper wire.
- The Two-Tone Look: Fuse two different colored cords together at the start to create a high-contrast pattern.
- The Compass Addition: Slide a small button compass onto the center cords before you start weaving for a truly tactical survival watch.
- The Metal Shackle: Replace the plastic buckle with a stainless steel ‘D-shackle’ for a heavy-duty, masculine aesthetic that looks like professional climbing gear.
Maintenance is simple: if your band gets dirty from a hike or a day in the garage, simply toss it in the wash with your jeans or scrub it with a bit of dish soap and an old toothbrush. Paracord is rot-resistant and won’t shrink, so your custom fit is locked in for good.
Conclusion
Congratulations! You have just successfully turned a few dollars’ worth of cord into a high-performance, trendy accessory that rivals professional tactical gear. This project is more than just a way to save money; it is a testament to the power of being resourceful and crafty. You now have a watch band that is custom-fitted to your wrist, built to survive the toughest conditions, and stylish enough for a night out. Don’t stop here—try different weave patterns, experiment with color combinations, or start a small side-hustle selling these at local craft fairs. The skills you’ve learned today are the foundation of the ‘trash-to-treasure’ philosophy. Wear your new creation with pride, knowing you built it better, tougher, and cheaper than anything you could find on a store shelf. Happy crafting!

Makenzie is the founder and lead writer at MoneyHackTips.com — a personal finance blog dedicated to delivering street-smart financial wisdom for real people on real budgets. With 300+ published articles covering everything from debt management to investing fundamentals, Makenzie’s mission is to make every dollar work harder. When not writing about money hacks, Makenzie is testing frugal living strategies, optimizing side hustles, and helping readers build financial freedom from scratch.