

The Rugged Elegance of Industrial DIY
In a world of mass-produced plastic, there is something profoundly satisfying about the weight and texture of raw concrete. For the man who appreciates functional design, minimalist aesthetics, and rugged durability, a concrete phone stand is the ultimate desk accessory. As a frugal DIYer, you know that the best gifts aren’t bought in a showroom—they are forged in the workshop (or the kitchen counter). This project isn’t just about utility; it’s about taking a humble building material and elevating it into a piece of art that looks like it belongs in a high-end boutique for $60 or more. But here is our little secret: we are going to make it for less than the price of a cup of coffee. By upcycling household containers and using basic hardware store supplies, we will create a heavy-duty, sleek gift that is as practical as it is handsome.
The Blueprint: Materials and Budget Breakdown
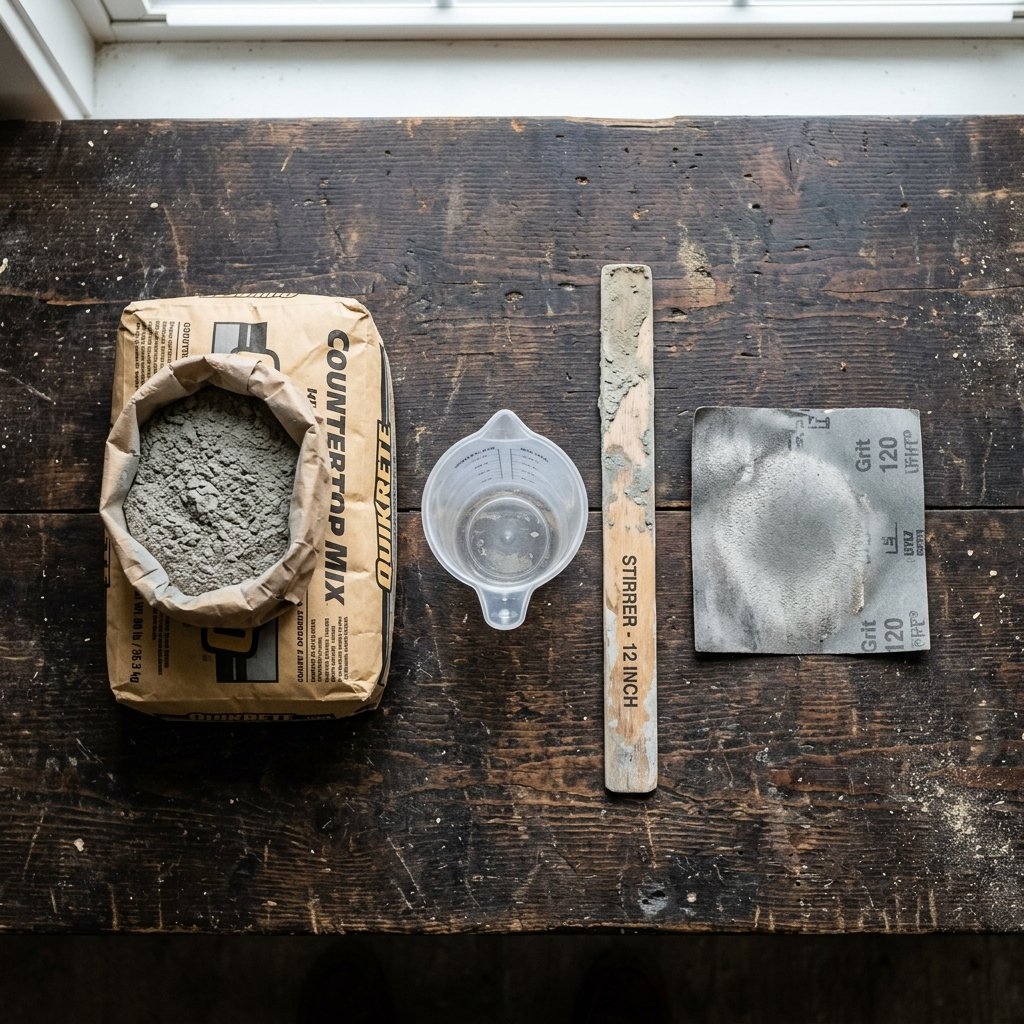
Before we get our hands dirty, we need to gather our supplies. The beauty of concrete work is its low barrier to entry. Most of what you need is likely sitting in your recycling bin or garage. Unlike woodworking, which requires expensive saws, concrete crafting relies on clever mold-making and patience.
Essential Supplies List
- Concrete Mix: Quikrete Countertop Mix or standard Sand Mix (sifted to remove large pebbles).
- The Mold: A clean milk carton, a plastic juice container, or a small cardboard jewelry box.
- The Slot Maker: A scrap piece of wood or thick acrylic (the thickness of the phone + 2mm).
- Release Agent: Cooking spray or vegetable oil.
- Sandpaper: 80-grit for shaping and 400-grit for a buttery-smooth finish.
- Mixing Tools: A plastic bucket and a sturdy paint stirrer.
| Item | Retail Equivalent Cost | DIY Budget Cost |
|---|---|---|
| High-End Concrete Stand | $45.00 – $85.00 | $0.50 (per unit) |
| Raw Materials (Bag of Concrete) | N/A | $6.00 (makes 20+ stands) |
| Mold Materials | N/A | $0.00 (Recycled) |
| Total Investment | $65.00 Avg. | ~$3.00 – $5.00 Total |
The Frugal Guru’s Mantra: Why buy a luxury item when you can buy the ingredients to make twenty of them for a fraction of the cost?
Engineering the Perfect Mold: Trash to Treasure
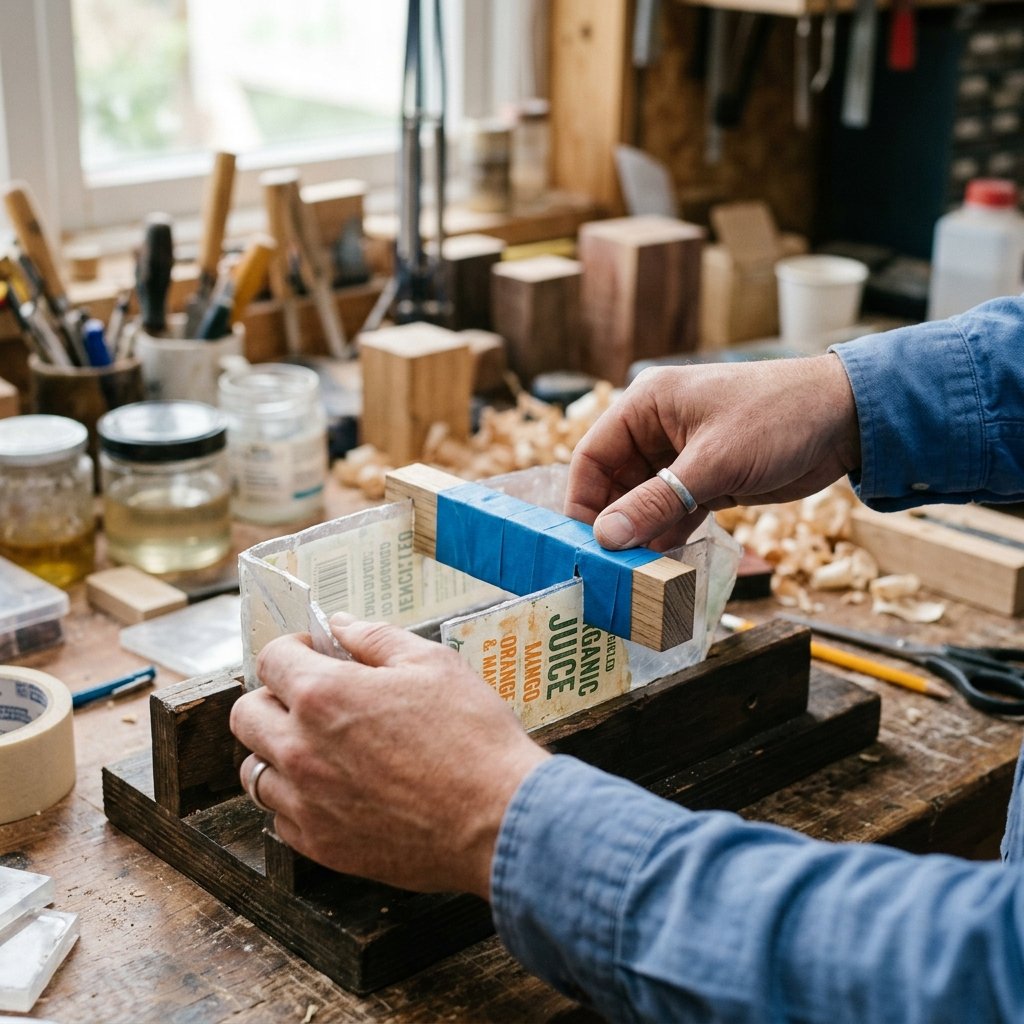
Selecting Your Shape
The secret to a professional-looking concrete piece is the interior surface of the mold. If you use a container with a glossy interior (like a milk carton), your concrete will come out with a smooth, almost polished finish. If you use a matte cardboard box, the finish will be more industrial and porous. For a minimalist gift, look for rectangular or square containers that offer clean lines.
Creating the Phone Slot
This is the most critical step. You must create a ‘negative space’ where the phone will sit. I recommend using a piece of scrap wood or a stack of cardboard wrapped tightly in packing tape. The tape ensures the concrete won’t stick to the spacer. Ensure this spacer is at least 1 inch deep to keep the phone secure.
- Step 1: Clean and dry your chosen plastic container.
- Step 2: Cut the container to the desired height (usually 3-4 inches).
- Step 3: Lightly coat the inside with a release agent (cooking spray) to ensure the concrete pops out easily.
- Step 4: Secure your ‘slot maker’ to the top of the mold using painter’s tape so it hangs down into the area where the concrete will be poured.
The Secret Mix: Achieving That Boutique Finish

The Perfect Consistency
Mixing concrete is more like baking than construction. You want a consistency that is thick enough to hold its shape but fluid enough to fill the corners of the mold without large air pockets. Aim for the texture of thick peanut butter or Greek yogurt.
Mixing Steps
- Sift the Dry Mix: If you are using standard concrete, use a kitchen strainer (not one you plan to use for food again!) to remove large rocks. This ensures a refined, high-end look.
- Add Water Slowly: Start with a small amount of water and stir constantly. It is much easier to add water than to fix a soup-like mixture.
- The 2-Minute Rule: Stir vigorously for at least 2 minutes to ensure all chemical reactions are activated.
Safety Note: Concrete is alkaline and can dry out your skin. Always wear gloves and a dust mask when handling dry mix to prevent irritation.
The Pour and the ‘Vibration’ Technique
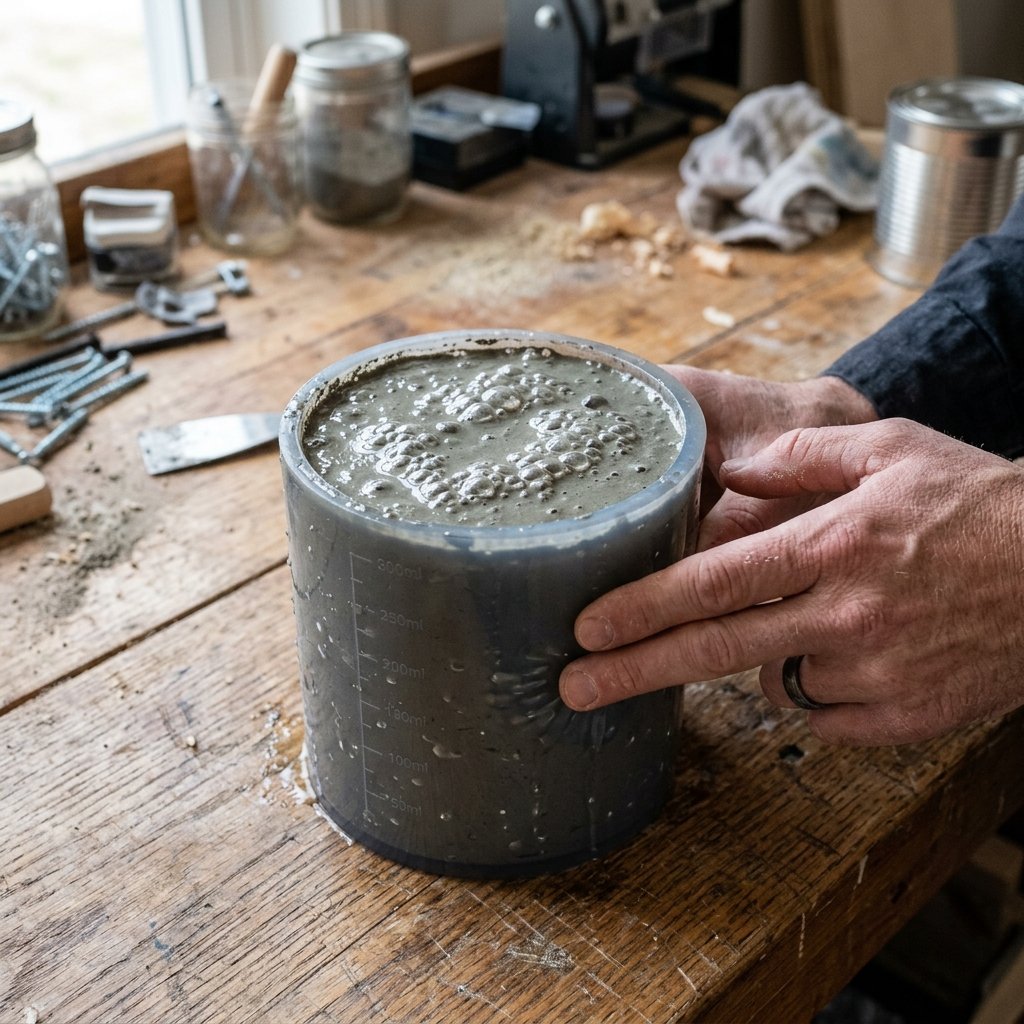
Eliminating the Bubbles
Once your mix is ready, pour it slowly into your prepared mold. To achieve that flawless, bubble-free surface seen in designer stores, you must vibrate the mold. This coaxes the air bubbles to the surface.
The Technique
- Fill the mold halfway and tap the sides rapidly with a screwdriver or your knuckles for 30 seconds.
- Fill the rest of the mold and repeat the tapping.
- If you have a power sander, turn it on and hold the base against the side of the table where the mold is sitting. The high-frequency vibrations will make the air bubbles rise like carbonation in a soda.
Let the stand cure for at least 24 to 48 hours. Resisting the urge to unmold too early is the hardest part, but patience is what prevents cracks and crumbled edges.
Refining the Aesthetic: Sanding and Sealing
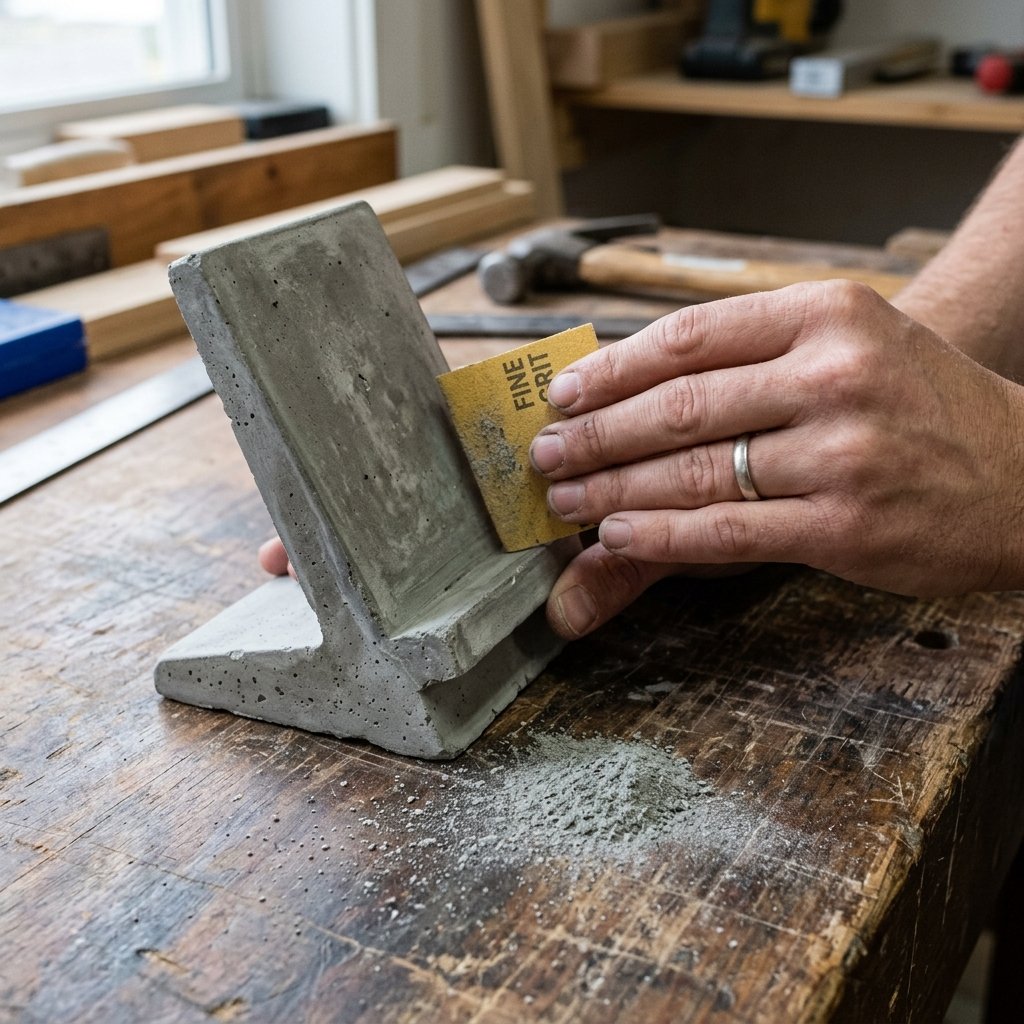
From Raw to Refined
When you peel away the plastic mold, the concrete might look a bit dull or have sharp edges. This is where the magic of sanding happens. Sanding transforms the piece from a ‘construction project’ into a ‘luxury gift.’
The Sanding Process
- Wet Sanding: Use a bit of water and your 80-grit sandpaper to knock down sharp corners and level the base.
- Smoothing: Move to 220-grit and finally 400-grit for a silky, stone-like feel.
- The Bottom: Ensure the bottom is perfectly flat so the stand doesn’t wobble on a desk.
Adding the Masculine Finish
To protect the concrete from oils and water, apply a thin coat of beeswax or a matte concrete sealer. This darkens the gray slightly, giving it a rich, sophisticated depth. Finally, glue a piece of cork or felt to the bottom to protect the recipient’s furniture.
| Finishing Option | Visual Effect | Best For |
|---|---|---|
| Raw/Unsealed | Light Gray, Chalky | Ultra-Minimalist/Industrial |
| Beeswax Polish | Satin Sheen, Darker Gray | Classic Masculine-Elegant |
| High-Gloss Sealer | Wet Look, Reflective | Modern/Tech Aesthetic |
Conclusion
The Ultimate Handmade Statement
There you have it—a rugged, heavy-duty, and undeniably stylish phone stand that costs less than a dollar in materials but carries the weight of a truly thoughtful gift. This project proves that with a little resourcefulness and a few recycled containers, you can create high-end decor that rivals any big-box retailer. Whether it’s for a Father’s Day surprise, a groomsman gift, or a desk upgrade for yourself, this concrete stand is a testament to the power of frugal creativity. Now, go forth and pour! Your workshop (and your wallet) will thank you.

Makenzie is the founder and lead writer at MoneyHackTips.com — a personal finance blog dedicated to delivering street-smart financial wisdom for real people on real budgets. With 300+ published articles covering everything from debt management to investing fundamentals, Makenzie’s mission is to make every dollar work harder. When not writing about money hacks, Makenzie is testing frugal living strategies, optimizing side hustles, and helping readers build financial freedom from scratch.