
The Brotherhood of the Bottle: Why Handmade Wins Every Time
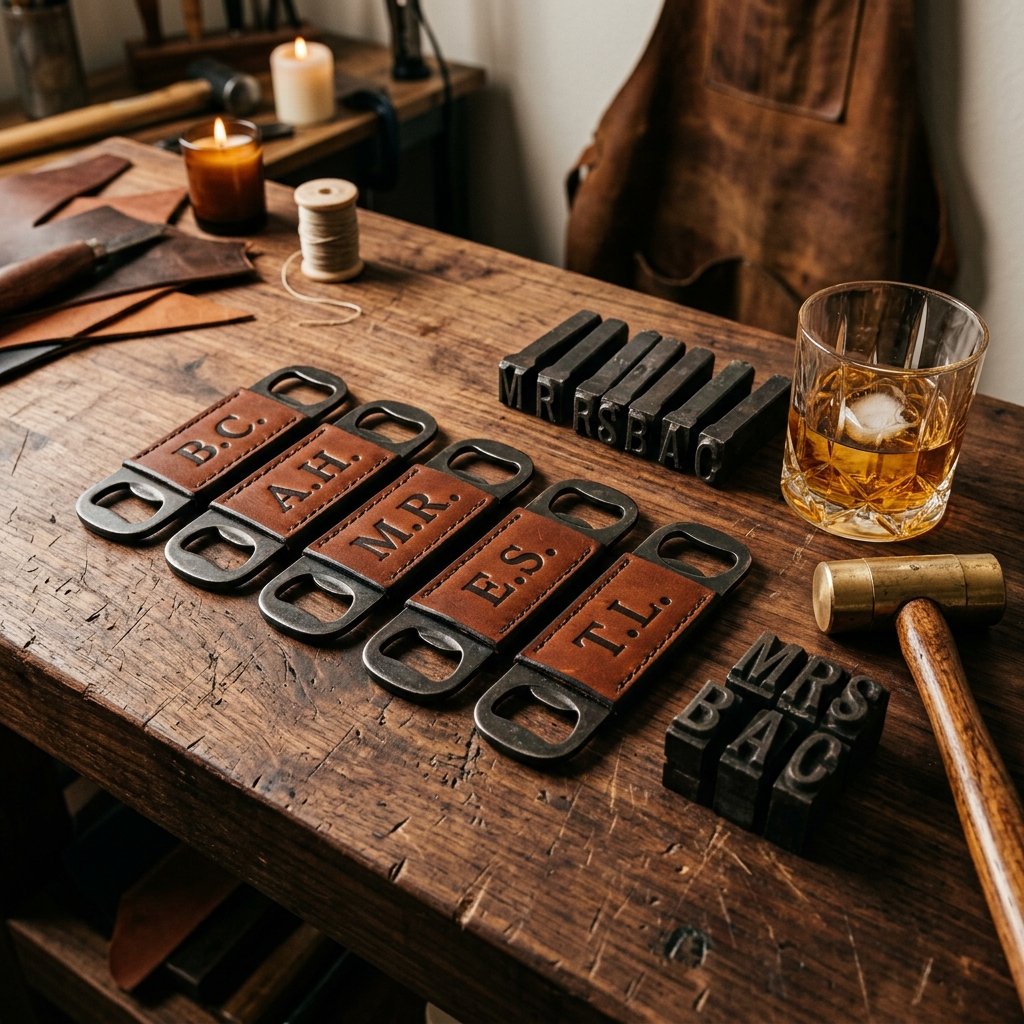
Let’s be honest: being a groomsman is a job. It’s an honor, sure, but it involves renting suits, planning bachelor parties, and standing through hours of photos. When it comes time to thank your crew, you want something that says rugged, practical, and sophisticated without draining your honeymoon fund. Enter the Hand-Stamped Leather Bottle Opener. It is the ultimate ‘Trash-to-Treasure’ project that combines the raw appeal of heavy-duty steel with the timeless elegance of genuine leather. In this guide, we aren’t just making gifts; we are crafting heirlooms. We will take basic hardware and leather scraps and turn them into something that looks like it belongs in a high-end boutique for $45, but we’re going to do it for less than $5 a piece. Whether you are a frugal DIYer or a groom looking to add a personal touch, this project is your ticket to being the MVP of the wedding party.
The Material Hunt: Sourcing Leather and Steel for Pennies

The secret to a budget-savvy DIY is knowing where to look for your raw materials. You don’t need a whole cowhide to make a few bottle openers. In fact, using upcycled leather often gives the gift more character and a ‘broken-in’ feel that new leather lacks.
Finding Your Leather Scraps
- Thrift Store Belts: Look for 100% genuine leather belts. Avoid the ‘bonded leather’ or ‘man-made materials’—they won’t take a stamp. A single wide belt for $2 can yield 4 to 6 bottle opener wraps.
- Upholstery Remnants: Check with local furniture repair shops. They often have ‘scrap bins’ of thick, vegetable-tanned leather that they might give you for free or a few dollars.
- eBay/Etsy Scrap Bags: Search for ‘Veg-Tan Leather Scraps.’ You need something at least 5-6 oz weight (about 2-2.5mm thick) to ensure the stamping is deep and permanent.
Sourcing the Hardware
You want heavy-duty stainless steel or zinc alloy blanks. Buying these in bulk is the only way to go. A pack of 10 blanks on Amazon or specialized craft sites usually brings the cost down to about $1.50 per opener.
| Material Item | Source Strategy | Estimated Cost Per Unit |
|---|---|---|
| Stainless Steel Opener Blank | Bulk Pack (10+) | $1.50 |
| Leather Wrap (3″ x 4″) | Upcycled Belt / Scraps | $0.75 |
| Rapid Rivets (Brass/Steel) | Bulk Hardware Pack | $0.25 |
| Leather Conditioner | Pantry (Olive Oil/Beeswax) | $0.05 |
| Total Cost | DIY Savvy | $2.55 |
The Toolkit: Mastering the Art of the Hand Stamp
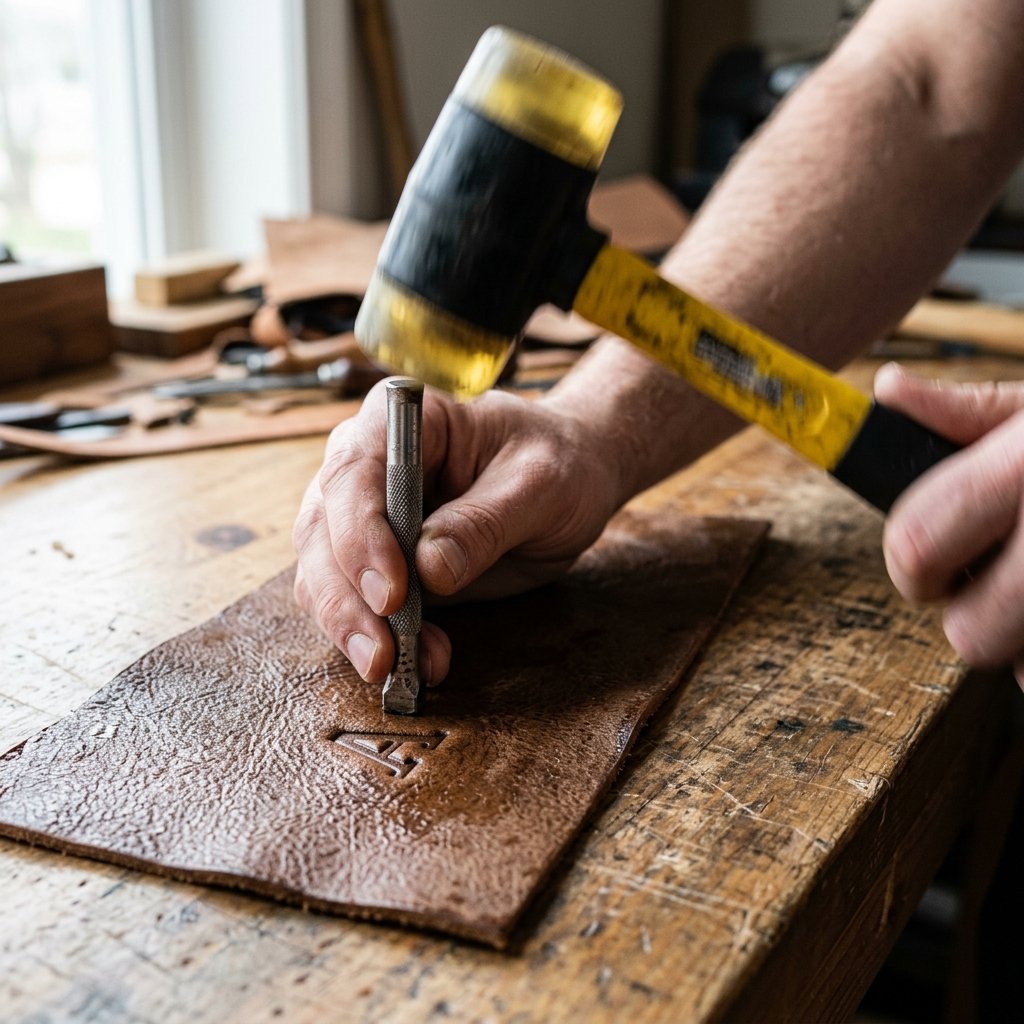
Stamping leather is a tactile, satisfying process, but it requires the right tools to get that ‘masculine-elegant’ look. You don’t need a professional workshop, but a few specific items are non-negotiable for a clean finish.
The Essential Tool List
- Metal Letter Stamp Set: A 1/4 inch (6mm) set is the standard for initials. You can find these at harbor freight or craft stores for around $10.
- Mallet: Never use a metal hammer on your stamps! It will mushroom the heads. Use a poly, rawhide, or wooden mallet.
- Sturdy Surface: A granite scrap or a heavy anvil is best. If you don’t have one, a sturdy concrete floor works better than a bouncy wooden table.
- Leather Hole Punch: A rotary punch or a drive punch to create the holes for your rivets.
Frugal Pro Tip: If you don’t want to buy a granite stamping block, go to a local kitchen countertop installer and ask for a ‘sink cutout’ scrap. They usually throw them away, and it provides the perfect dead-blow surface for stamping for $0.
Step-by-Step: Crafting the Perfect Groomsman Opener
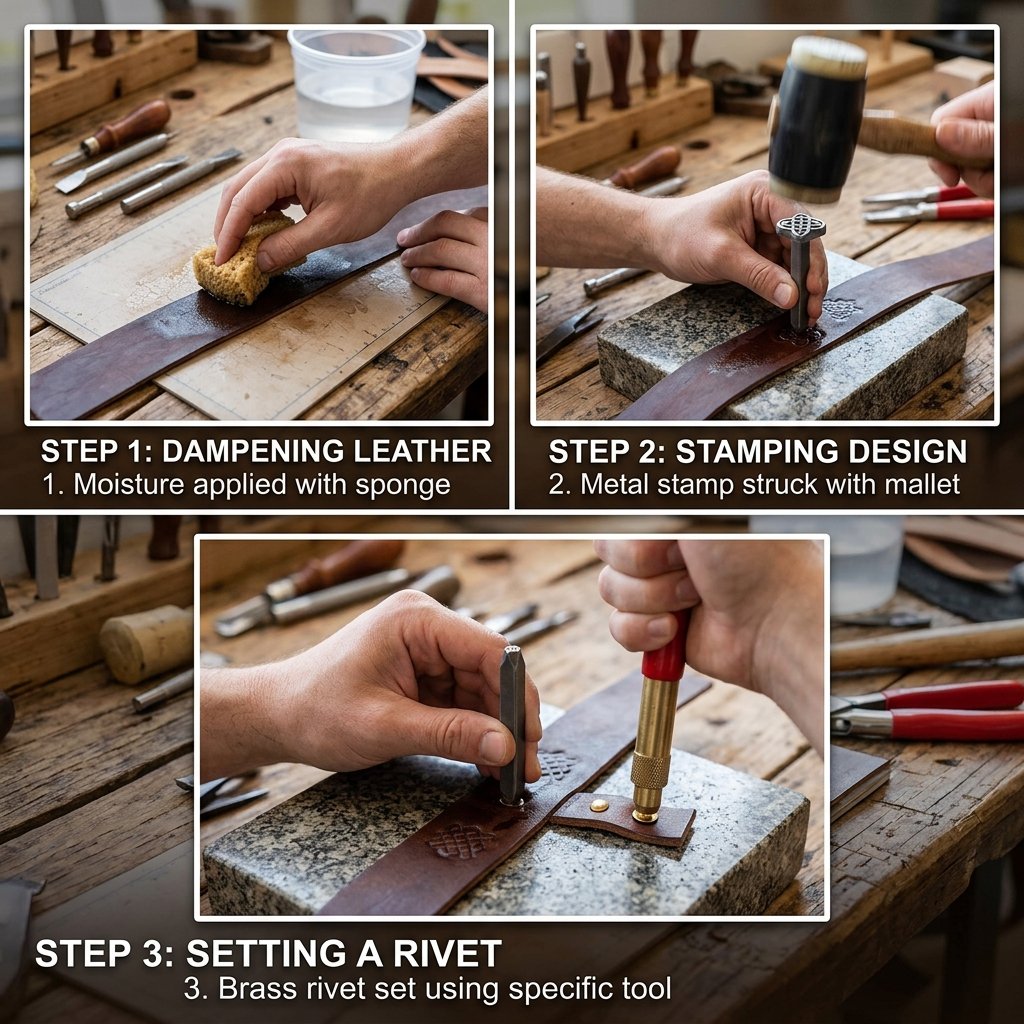
Follow these steps with precision. The difference between a ‘homemade’ look and a ‘hand-crafted’ look is in the details.
- Measure and Cut: Cut your leather to fit the handle of your bottle opener blank. Typically, this is a rectangle roughly 3 inches by 4 inches, depending on whether you want a single-sided or wrap-around grip.
- Casing the Leather: This is the secret step. Lightly dampen the leather with a sponge. You don’t want it soaking; you want it to return to its natural color but feel cool to the touch. This softens the fibers so they ‘take’ the stamp deeply.
- The Stamping: Tape your leather down to your granite block so it doesn’t slide. Align your stamps. Strike once, firmly. Double-striking often causes ‘ghosting’ (a blurred double-image).
- Punching Rivet Holes: Align the leather on the metal blank. Mark where the holes need to go through both the leather and the pre-drilled holes in the metal. Use your leather punch to create clean 1/8″ holes.
- Setting the Rivets: Insert the rivet through the leather and metal. Place the cap on. Use your rivet setter and mallet to lock it in place. It should be tight enough that the leather doesn’t wiggle.
The Stamping Mantra: Measure twice, tape once, strike hard, and never look back. Consistency is more important than perfection!
The Finishing Touches: Burnishing and Conditioning
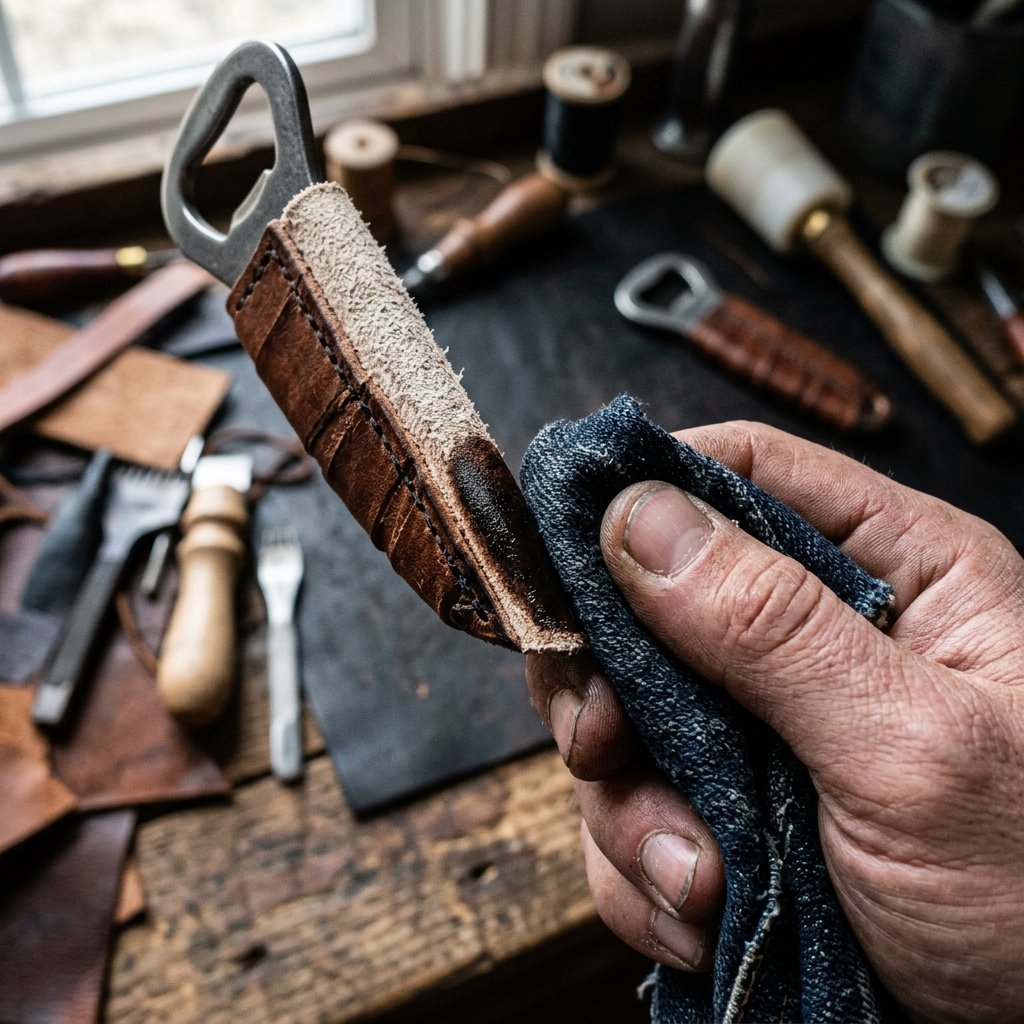
Raw leather edges look unfinished. To get that high-end ‘Pottery Barn’ aesthetic, we need to burnish the edges. This process uses friction to singe and smooth the fibers into a glossy, hard edge.
How to Burnish on a Budget
You don’t need expensive edge creams. Use a little bit of water or even saliva (an old-school saddlemaker’s trick) and a smooth wooden dowel or an old denim scrap. Rub the edge of the leather vigorously until it turns dark and shiny. This seals the leather and prevents fraying over time.
Conditioning for Longevity
Your groomsmen will be using these at BBQs, tailgates, and camping trips. They need protection. Apply a coat of mink oil, neatsfoot oil, or a DIY beeswax blend. This will darken the leather slightly, highlighting the grain and making your stamped initials pop with a rich, dark contrast.
| Finish Type | Effect | Dry Time |
|---|---|---|
| Beeswax Polish | Water-resistant & Matte | 30 Minutes |
| Mink Oil | Deep Softening & Darkening | 2 Hours |
| Neatsfoot Oil | Traditional Rugged Patina | 24 Hours |
Packaging & Presentation: Looking Like a Million Bucks
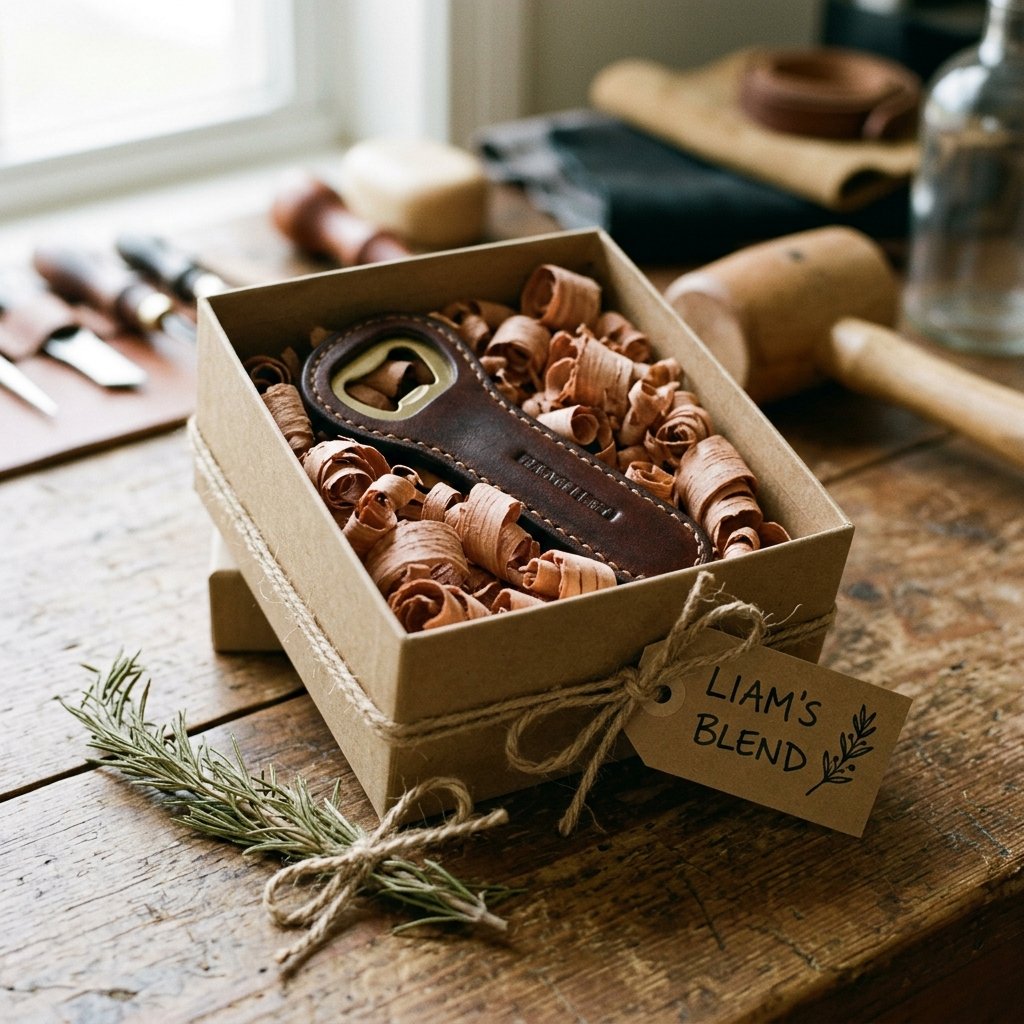
Presentation is 50% of the gift. A loose bottle opener is a tool; a packaged bottle opener is an experience. Since we saved so much on the build, we can afford to spend $1 on classy packaging.
The ‘Rugged Gentleman’ Box
- Kraft Paper Boxes: Buy a pack of small cardboard jewelry boxes. Line them with a bit of wood shavings (grab some from your woodshop or a pet store) or black tissue paper.
- Custom Tags: Use a piece of cardstock to write a personal note. ‘To [Name], for all the cold ones we’ve shared and the ones yet to come.’
- The Wax Seal: To truly elevate the gift, use a wax seal on a piece of twine wrapped around the box. It adds a level of ‘Old World’ sophistication that suggests the gift is highly valuable.
By using these simple materials, you transform a $2.50 project into a gift that feels like it cost $50 at a boutique haberdashery.
Conclusion
The Mark of a Great Gift
Building these hand-stamped leather bottle openers is more than just a budget-saving exercise; it’s a way to give your groomsmen a piece of your time and effort. In a world of plastic and disposable goods, a gift made of steel, leather, and sweat stands out. You’ve successfully navigated the ‘Trash-to-Treasure’ path, turning simple scraps into a rugged, masculine accessory that will only look better with age. Every time your friends crack open a cold one, they’ll see their initials and remember the big day. That is the power of a crafty, resourceful, and budget-savvy approach to gifting. Now, go forth, start stamping, and cheers to a wedding day that’s as stylish as it is affordable!

Makenzie is the founder and lead writer at MoneyHackTips.com — a personal finance blog dedicated to delivering street-smart financial wisdom for real people on real budgets. With 300+ published articles covering everything from debt management to investing fundamentals, Makenzie’s mission is to make every dollar work harder. When not writing about money hacks, Makenzie is testing frugal living strategies, optimizing side hustles, and helping readers build financial freedom from scratch.