
When the crisp air of autumn begins to roll in, there is nothing quite like retreating to your porch with a stout drink or a warm coffee to watch the leaves turn. However, that rugged charm quickly fades when the temperature drops below 50 degrees and you find yourself shivering. As a resourceful DIYer, you do not need to drop $200 on a propane patio heater that guzzles fuel and clutters your space. Instead, we are looking to the ancient wisdom of thermal mass combined with the modern affordability of the Dollar Tree.
This project is the ultimate marriage of masculine-elegant design and practical engineering. By nesting terracotta pots and using a central steel conductor, we create a “thermal battery” that captures the heat of simple tea lights and radiates it outward for hours. It is clever, it is budget-savvy, and it looks like a high-end industrial accent piece once finished. Let’s roll up our sleeves and build a heat source that costs less than a fancy latte but performs like a champion all season long.
The Physics of the Thermal Battery: Why Terracotta Works
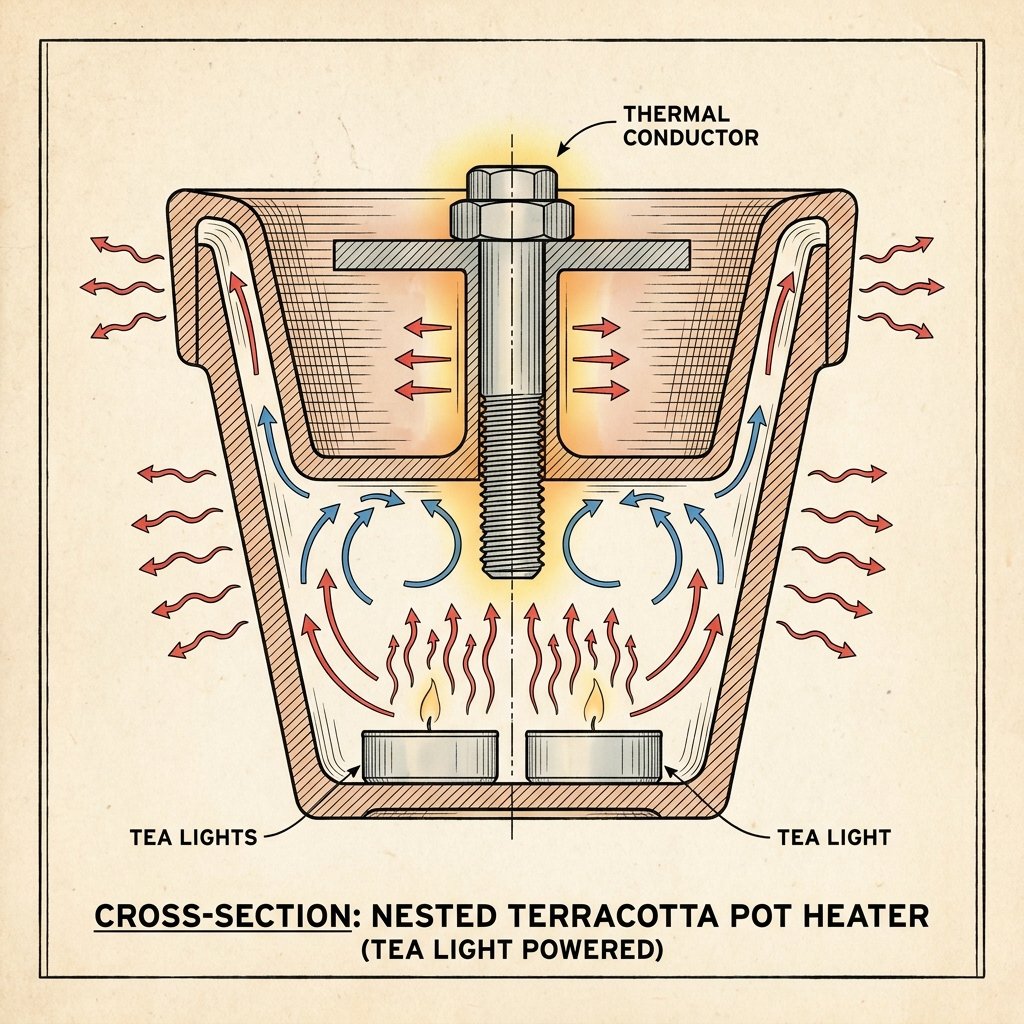
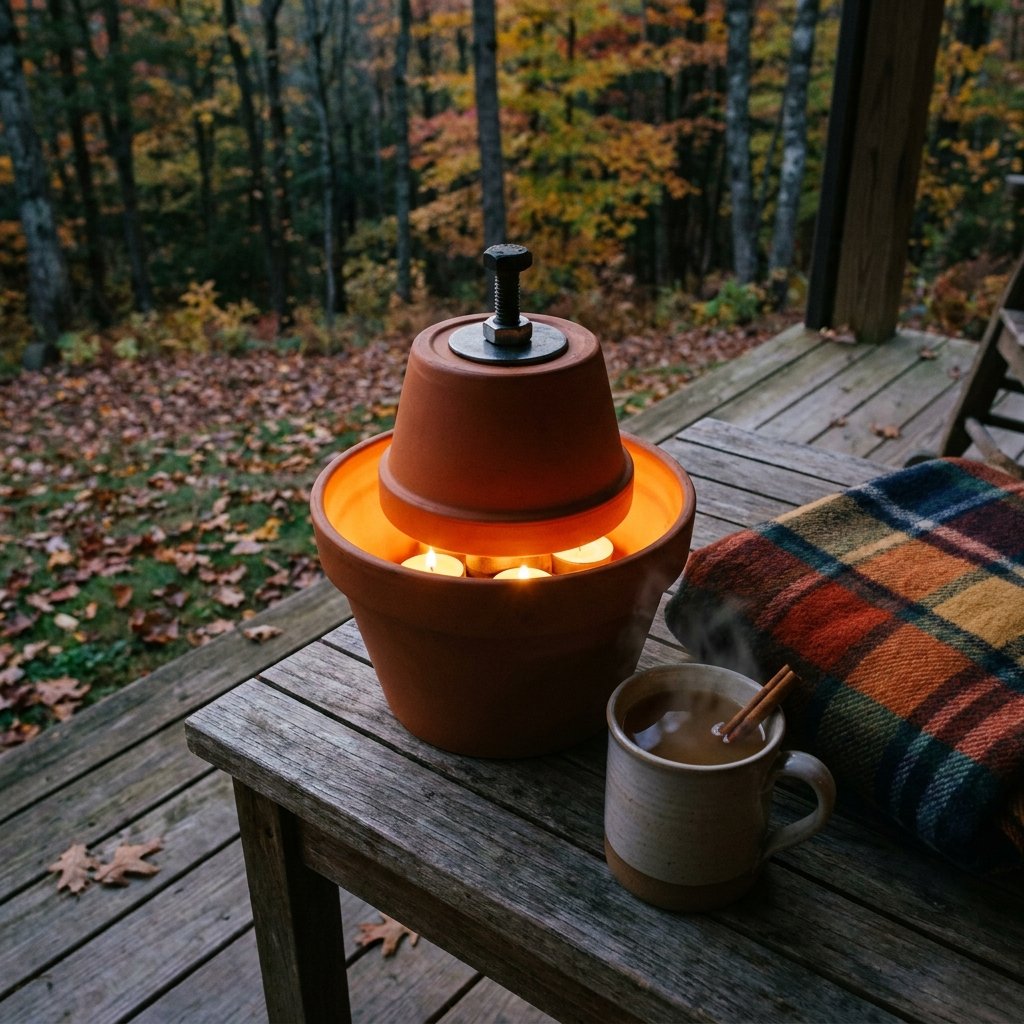
Before we dive into the assembly, it is essential to understand why this hack is more than just a craft project—it is a lesson in thermodynamics. Terracotta is a porous, clay-based ceramic that is an exceptional conductor of heat. When you nest a smaller pot inside a larger one, you create an air pocket. The candle flame heats the air and the inner pot, which then transfers that energy to the outer pot through both radiation and convection.
- Convection: The air trapped between the pots stays hot, preventing the heat from escaping instantly into the atmosphere.
- Thermal Mass: The clay absorbs the heat and holds it, continuing to radiate warmth even after the candles are extinguished.
- The Steel Rod: Using a metal bolt to connect the pots acts as a heat sink, drawing the flame’s energy directly into the ceramic walls.
By utilizing these principles, we can turn a few $1.25 items into a functional heater that can raise the immediate ambient temperature around your seating area by 5 to 10 degrees.
The $10 Shopping List: Navigating the Dollar Tree Aisles
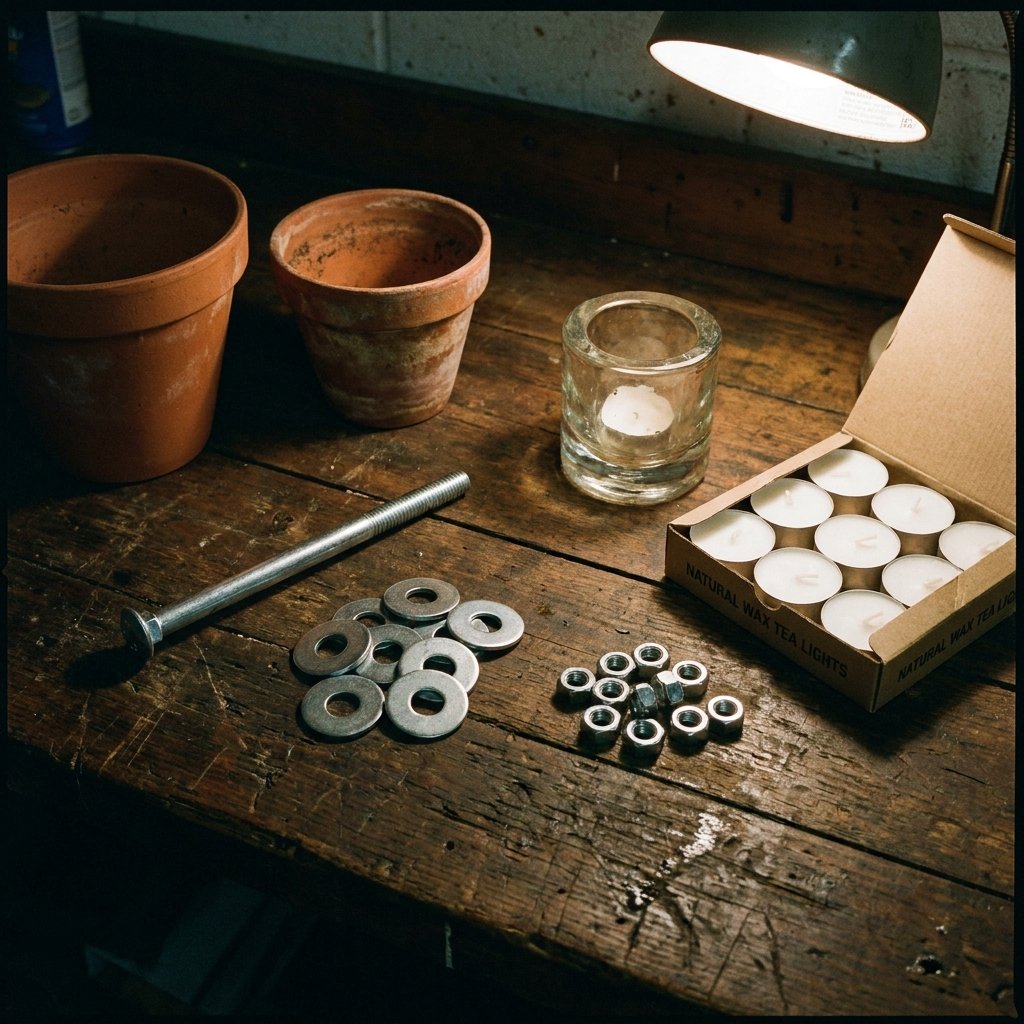
To build a heater that is both rugged and reliable, we need specific components. The beauty of this project is that almost everything can be sourced from the Dollar Tree or your local hardware store’s clearance bin. We are aiming for a total build cost of approximately $10.
| Item | Source | Estimated Cost |
|---|---|---|
| 8-inch Terracotta Pot | Dollar Tree | $1.25 |
| 6-inch Terracotta Pot | Dollar Tree | $1.25 |
| Steel Bolt (6-inch), Washers & Nuts | Hardware Store | $3.50 |
| Glass Pillar Candle Holder | Dollar Tree | $1.25 |
| Pack of Tea Lights (12ct) | Dollar Tree | $1.25 |
| High-Heat Spray Paint (Optional) | Home Center | $1.50 (Pro-rated) |
Resourceful Pro Tip: Look for pots that are free of cracks or deep chips. Even a small hairline fracture can expand when the clay gets hot, potentially causing the pot to split during use.
Precision Assembly: Building the Core Heating Element
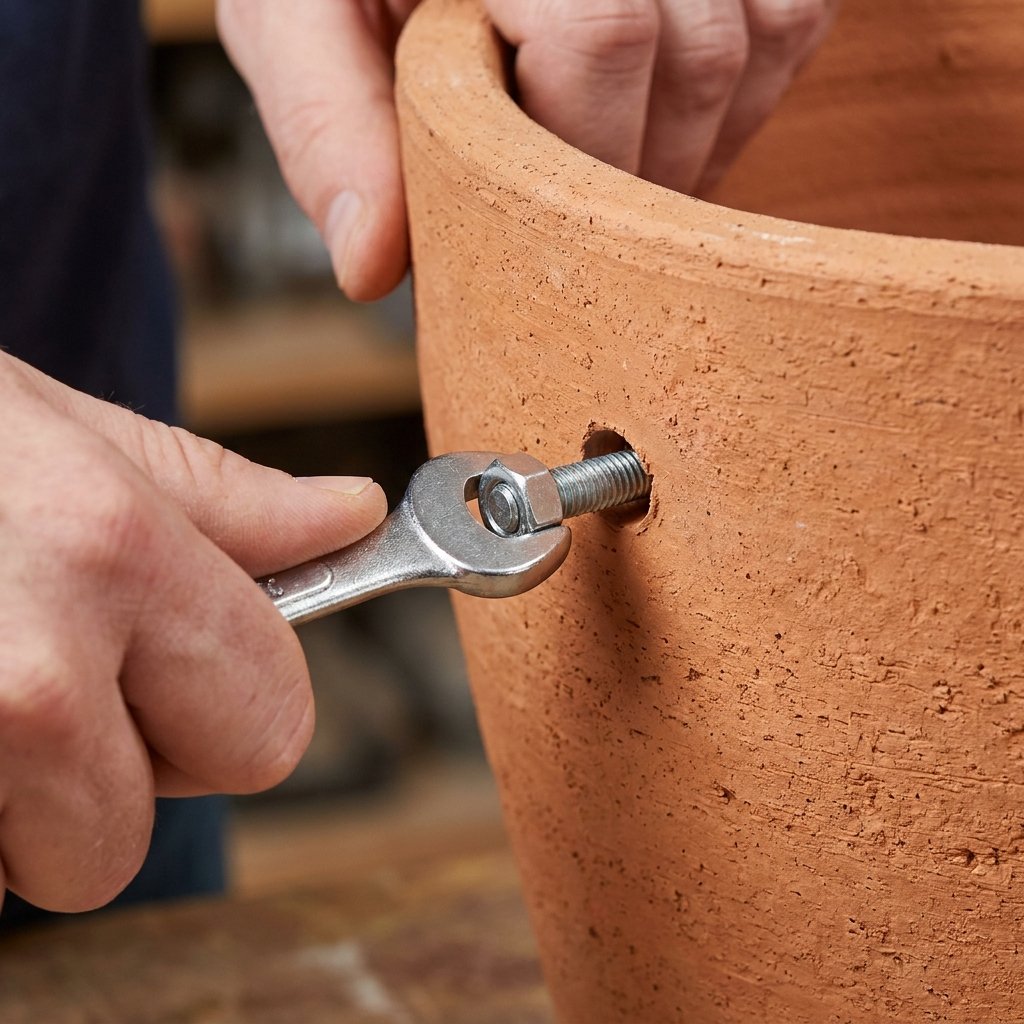
The assembly process requires a steady hand and about 20 minutes of your time. We are going to create a central column that holds our nested pots together while allowing for maximum heat transfer.
- Prep the Pots: Ensure both pots are clean and dry. If you choose to paint them for a more “Pottery Barn” look, use only high-heat engine paint or stove paint. Regular acrylic will peel or emit fumes when heated.
- The Bolt Foundation: Slide a large washer onto your 6-inch bolt. Insert the bolt through the drainage hole of the 8-inch (larger) pot from the inside out.
- The Spacer: On the outside of the pot, secure the bolt with a nut. Tighten it with a wrench so the bolt stands perfectly straight.
- Nesting the Inner Pot: Place the 6-inch (smaller) pot inside the larger one, threading the bolt through its drainage hole. Use additional nuts and washers to create a 1-inch gap between the bottoms of the two pots. This gap is crucial for airflow.
- Securing the Top: Add a final washer and nut to the very top of the bolt (which is now protruding from the bottom of the nested assembly). This bolt will act as your primary heat conductor.
Once assembled, the entire unit will be inverted and placed over your candle source.
Rugged Aesthetics: Styling Your Heater for a Masculine-Elegant Porch
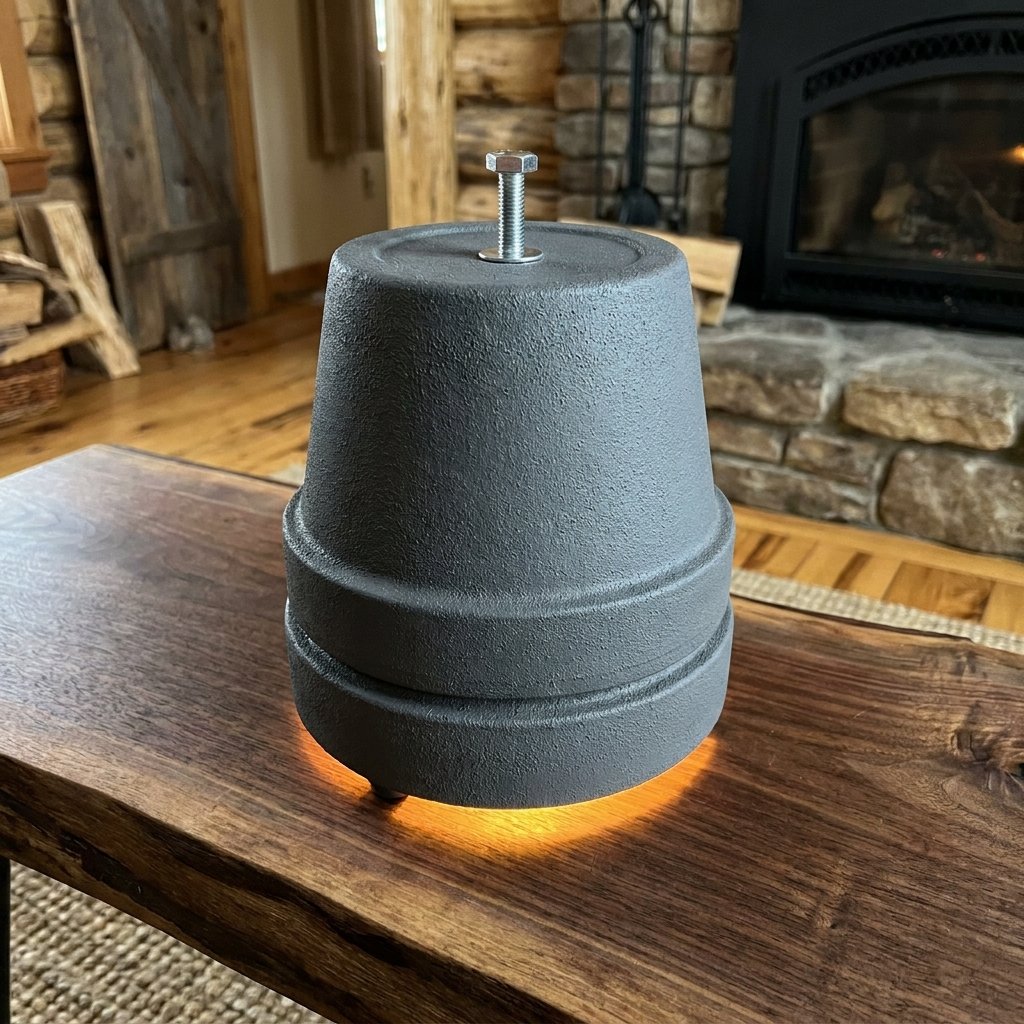
A raw terracotta pot looks fine for a garden, but for a sophisticated porch, we want something with more “heirloom” character. You can achieve a high-end, rugged look with minimal effort. Consider a Faux-Stone Finish or a Matte Charcoal aesthetic.
- The Baking Soda Trick: Mix black acrylic paint with 2 tablespoons of baking soda. This creates a thick, textured paste that looks like forged iron or heavy stone when applied to the pots.
- Copper Accents: Use a metallic copper leaf or paint on the rim of the outer pot. As the heater warms up, the copper will catch the flickering light of the candles beautifully.
- The Base: Instead of a plain saucer, place your heater on a scrap piece of reclaimed wood or a slate tile to protect your table surface and add to the masculine-elegant vibe.
By taking these extra steps, you transform a $1.25 pot into a piece of decor that guests will assume cost $50 or more at a boutique home store.
Efficiency and Economics: Why This Beats Electric Space Heaters

Let’s talk numbers. Running a standard 1500W electric space heater on your porch can be incredibly wasteful, as the heat dissipates into the open air almost instantly. It can also add significantly to your monthly utility bill.
| Feature | Electric Space Heater | DIY Terracotta Heater |
|---|---|---|
| Upfront Cost | $40 – $150 | $8 – $12 |
| Operating Cost | $0.20 – $0.50/hour | $0.05/hour (Tea lights) |
| Portability | Requires Outlet | 100% Cordless |
| Ambiance | Industrial Noise/Orange Coil | Silent/Flickering Glow |
While the terracotta heater won’t heat an entire 20×20 deck, it is the perfect personal heater. Place it on the coffee table between two chairs, and it provides a steady, radiant warmth that keeps your hands and core comfortable while you enjoy the outdoors.
The Safety Protocol: Burning Bright Without the Risk
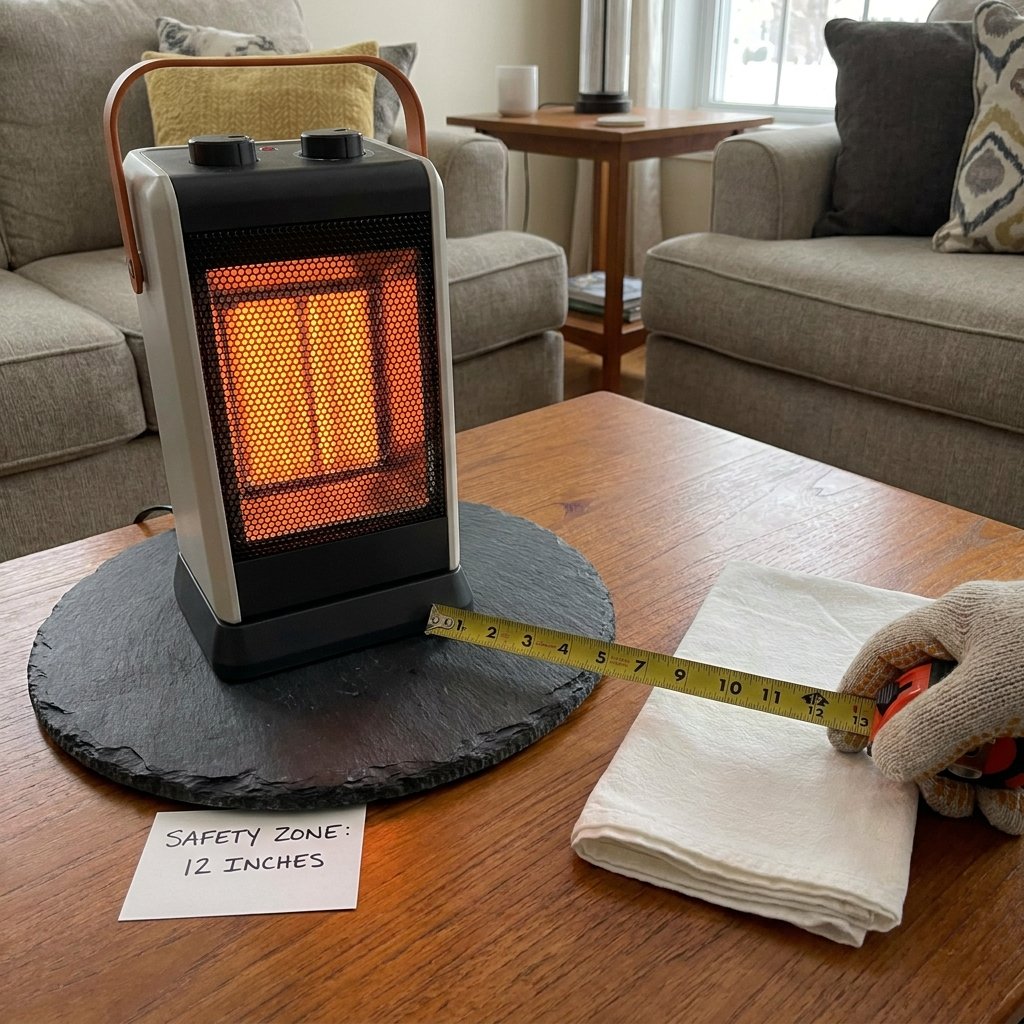
As with any project involving an open flame and high temperatures, safety is paramount. This is a “fire-and-forget” project only if you follow the rules of engagement.
Safety Mantra: “Never leave a lit heater unattended, and never place it on a flammable surface without a heat-resistant base.”
- Surface Protection: The bottom of the candle holder can get extremely hot. Always use a ceramic saucer, a slate tile, or a thick glass base.
- Airflow: Ensure the heater is elevated slightly (using small stones or the pot’s feet) to allow oxygen to reach the tea lights. Without oxygen, the candles will soot and extinguish.
- Child & Pet Safety: The exterior of the pots will reach temperatures that can cause burns. Keep the heater in the center of the table, out of reach of curious hands or wagging tails.
- Candle Quality: Use high-quality soy or beeswax tea lights to minimize soot and ensure a clean, long-lasting burn of 4 to 6 hours.
Conclusion
Building your own terracotta pot heater is more than just a way to save a few bucks—it is about being a steward of your environment and your budget. It is a clever, crafty solution for the handy parent or the frugal DIYer who refuses to let a little autumn chill drive them indoors. With just $10 and a bit of ingenuity, you have created a functional piece of porch technology that is as ruggedly handsome as it is efficient. So, light those candles, pour a drink, and enjoy the crisp night air in total comfort. You’ve earned it.

Makenzie is the founder and lead writer at MoneyHackTips.com — a personal finance blog dedicated to delivering street-smart financial wisdom for real people on real budgets. With 300+ published articles covering everything from debt management to investing fundamentals, Makenzie’s mission is to make every dollar work harder. When not writing about money hacks, Makenzie is testing frugal living strategies, optimizing side hustles, and helping readers build financial freedom from scratch.