
Escape to the Spa Every Morning Without Leaving Your Home
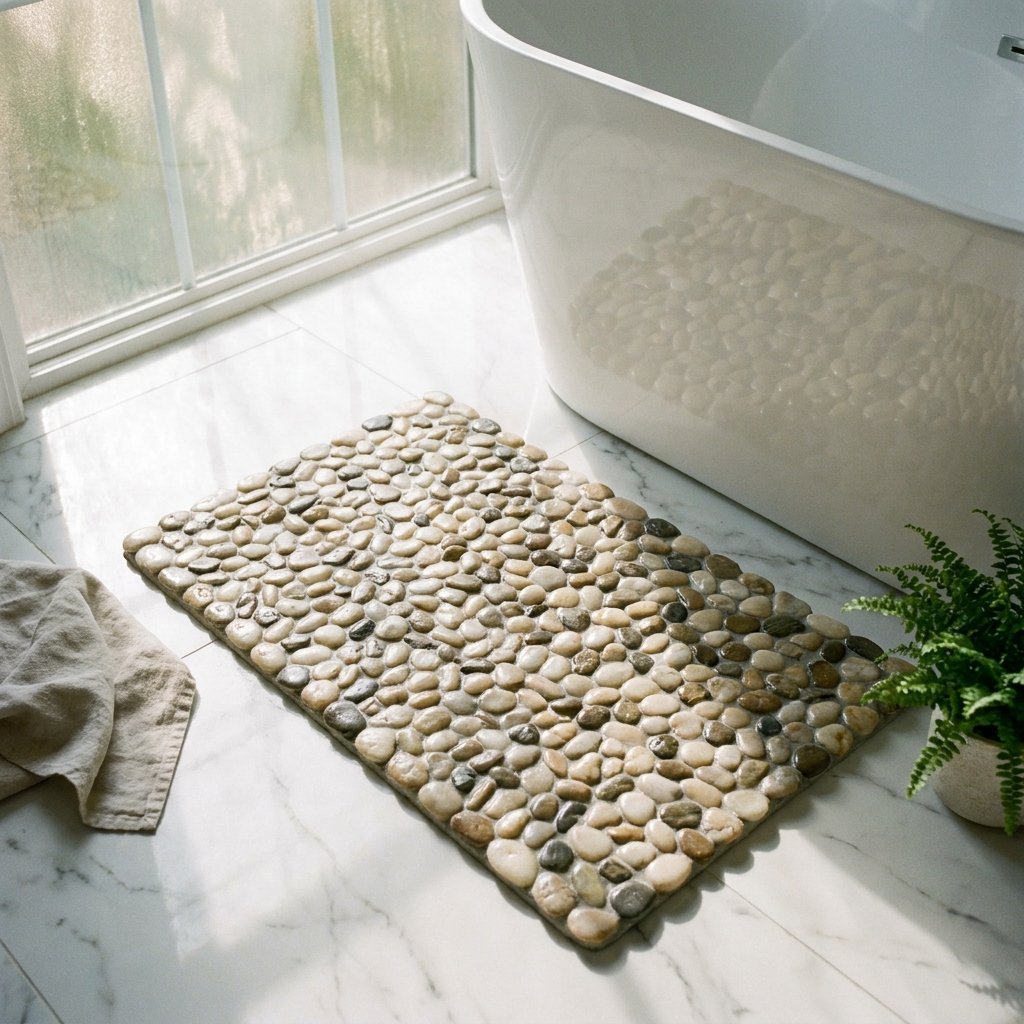
We have all seen them in those high-end interior design magazines or luxury boutique hotels: the stunning, organic-looking pebble bath mats that promise a reflexology-inspired massage for your feet while adding an element of rugged elegance to the bathroom. Usually, these designer pieces come with a price tag that would make any budget-conscious DIYer wince—often retailing between $50 and $120. But what if I told you that you could achieve that exact same ‘Zen’ aesthetic for less than the cost of a fancy latte? Using nothing but a few bags of river stones and a clever base from the Dollar Tree, we are going to build a high-end home accessory that looks like it belongs in a $5,000 bathroom renovation. This project isn’t just about saving money; it is about the satisfaction of crafting something functional, durable, and undeniably beautiful with your own two hands. Whether you are a frugal crafter looking to spruce up a rental or a handy parent wanting to add a touch of nature to the family home, this guide will walk you through every step of the process with a focus on durability and style.
The Anatomy of an Affordable Oasis: Selecting Your Materials
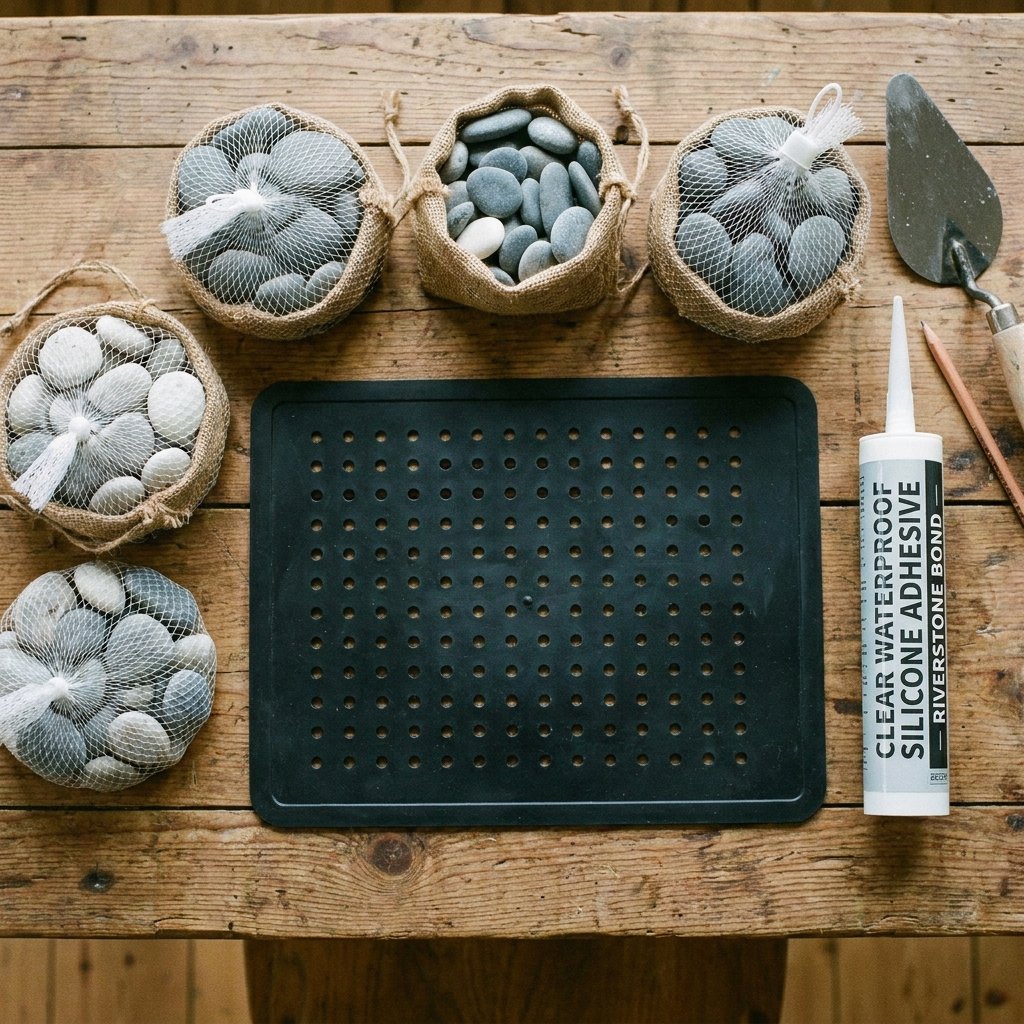
The Foundation of Your Craft
The secret to a successful DIY project lies in the selection of materials. You want items that are inexpensive but don’t look ‘cheap’ once assembled. For this project, we are heading to the Dollar Tree (or your local equivalent) to source our primary components. The star of the show is the River Stone. Most dollar stores carry bags of polished or natural river rocks in the floral or garden section. You will also need a sturdy base that can handle moisture and provide a non-slip surface.
| Material | Quantity | Estimated Cost |
|---|---|---|
| Dollar Tree River Stones (Bags) | 5-8 Bags | $6.25 – $10.00 |
| Rubber/Silicone Mesh Bath Mat | 1 Mat | $1.25 |
| Waterproof Silicone Sealant or E6000 | 1-2 Tubes | $5.00 – $10.00 |
| Total Estimated Cost | – | $12.50 – $21.25 |
When choosing your stones, look for bags that contain relatively flat pebbles. Rounder stones are harder to glue down and can be uncomfortable to stand on for long periods. A mix of greys, tans, and whites creates a sophisticated, natural look, while all-black stones offer a modern, masculine-elegant vibe. For the base, a perforated rubber mat is superior to a solid one because it allows water to drain through the gaps, preventing mold and mildew buildup under your pebbles.
Prepping for Success: Sorting Stones and Surface Prep
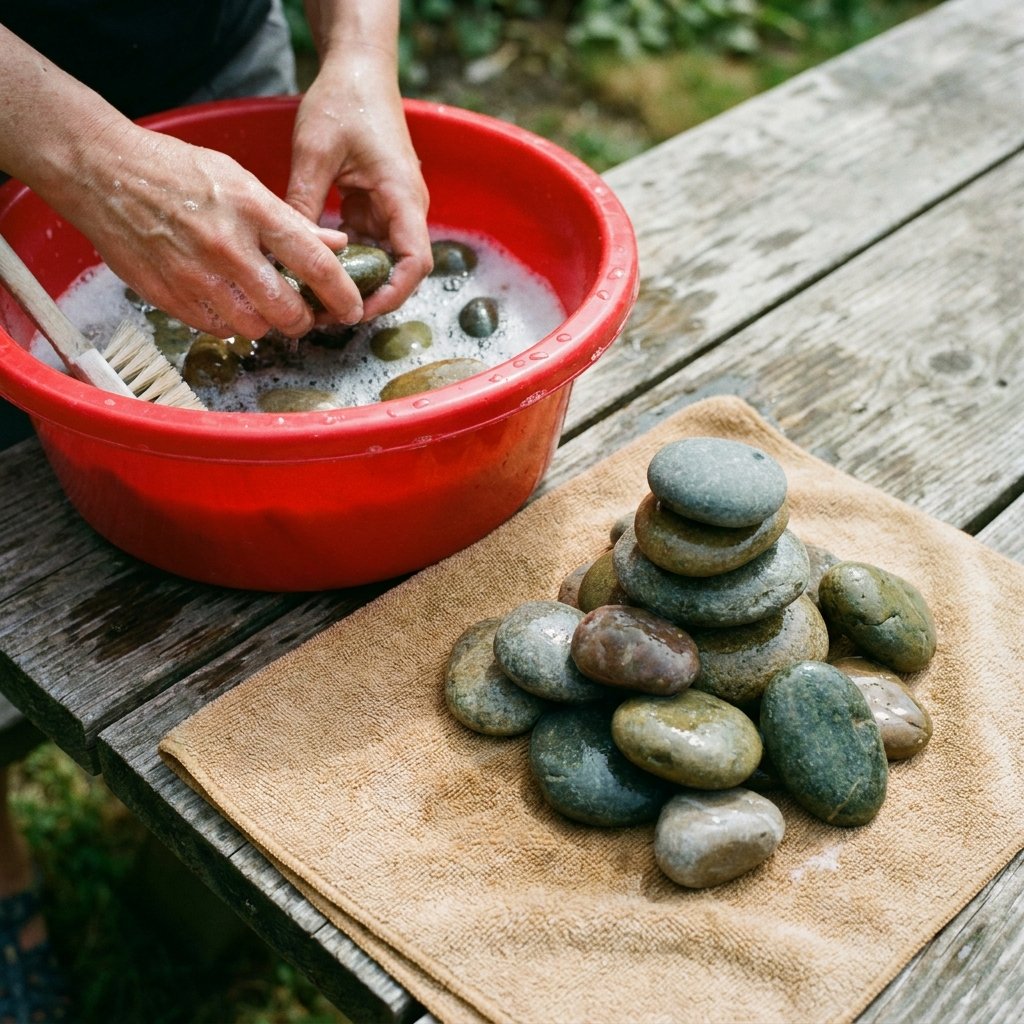
Cleanliness is Next to Godliness (and Better Adhesion)
Before you even open a tube of glue, you must prepare your materials. River stones from the store are often coated in a fine layer of dust or a waxy residue used to make them shine in the packaging. If you skip the cleaning step, your adhesive will bond to the dust rather than the stone, leading to pebbles popping off within a week. Empty your bags of stones into a large bucket of warm, soapy water. Use a scrub brush to agitate them, then rinse thoroughly and spread them out on a towel to dry completely. Pro Tip: Let them dry in the sun for 30 minutes to ensure all moisture has evaporated from the porous surfaces.
The Dry Run Strategy
Once your stones are clean and dry, lay out your rubber mat on a flat work surface. I highly recommend doing a ‘dry fit’ of your stones before applying any glue. This is where your inner puzzle-master comes out. Start placing the largest, flattest stones first, then fill in the gaps with smaller pebbles.
Focus on creating a tight ‘jigsaw’ pattern. The closer the stones are to each other, the more high-end the finished mat will look. Avoid leaving large gaps of rubber showing through.
The Bonding Phase: Mastering the Waterproof Adhesive Technique
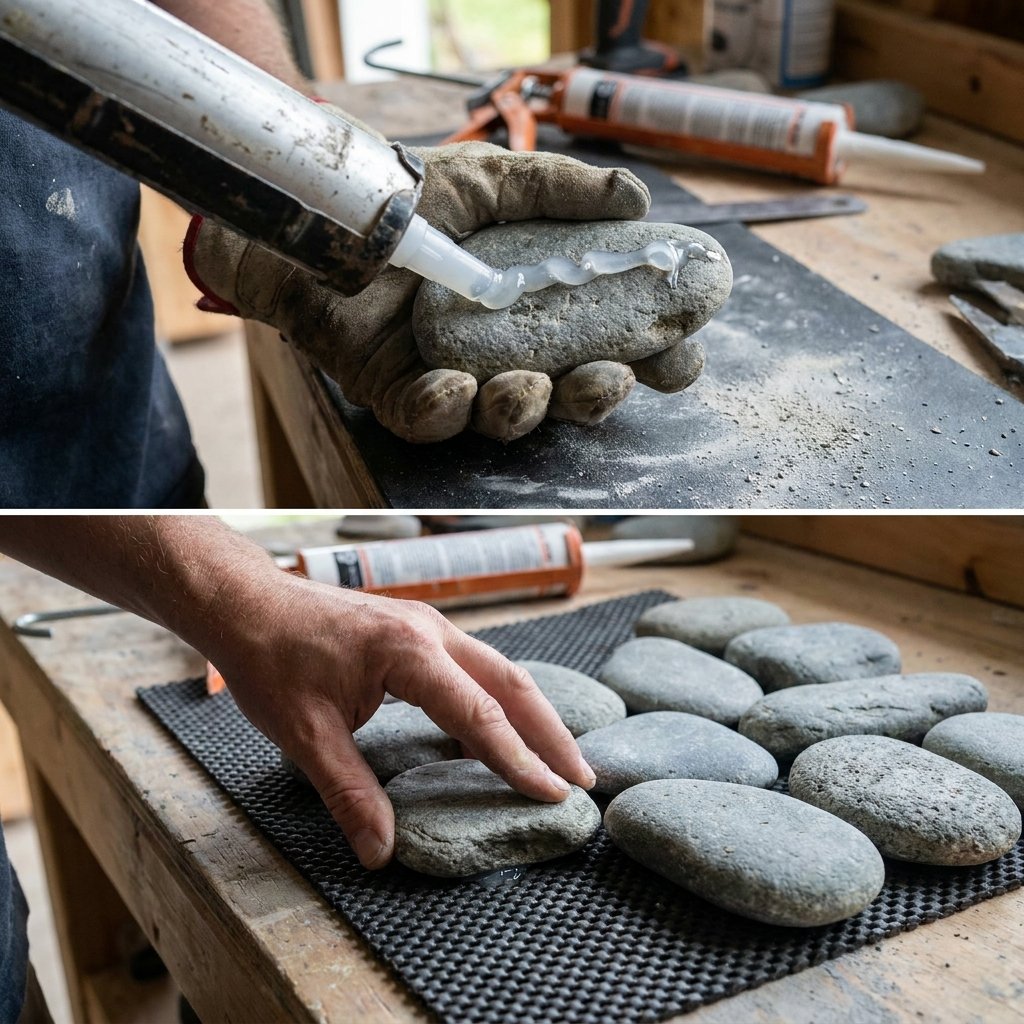
Choosing the Right Grip
In a high-moisture environment like a bathroom, your choice of glue is the difference between a masterpiece and a mess. You need a 100% waterproof adhesive that remains flexible once cured. Clear silicone sealant (the kind used for bathtubs) is an excellent choice because it handles temperature changes and water exposure perfectly. Alternatively, E6000 Craft Adhesive is a favorite among DIYers for its incredible ‘grab’ and durability.
Safety Note: Always work in a well-ventilated area when using strong adhesives like E6000 or silicone. The fumes can be potent. If you feel lightheaded, step outside for some fresh air immediately.
The Application Process
- Apply a pea-sized dollop of adhesive to the flattest side of a stone.
- Press the stone firmly onto the mat, wiggling it slightly to ensure the glue seeps into the mesh or onto the rubber surface.
- Work in small sections, roughly 4×4 inches at a time, to prevent the glue from skinning over before you can place the stones.
- Pay extra attention to the edges. Use your most uniform stones along the perimeter to create a clean, intentional border.
If glue oozes up between the stones, don’t worry! As long as it is clear, it will look like natural wetness or grout once dry. However, try to keep the top surface of the stones clean for the best tactile experience.
Puzzle Master Secrets: Creating a Seamless, Natural Layout
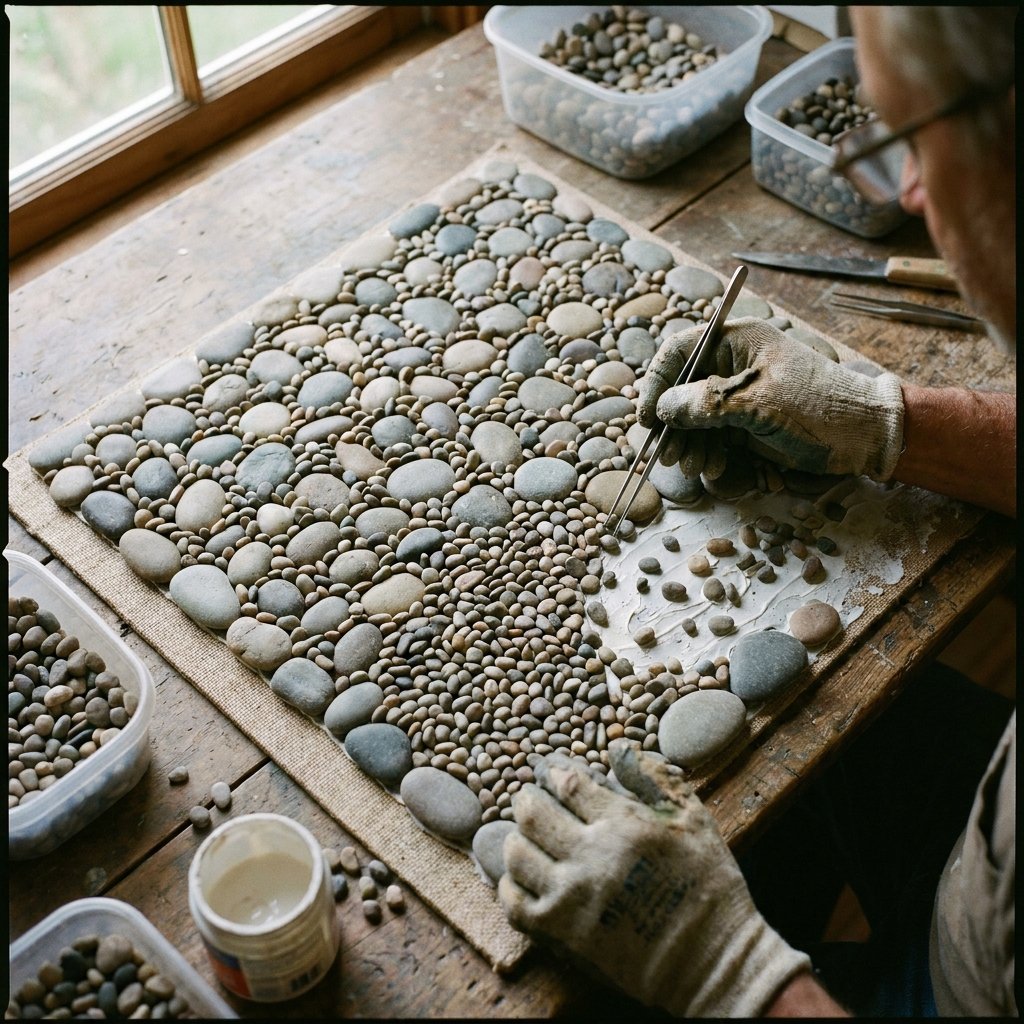
The Art of the Organic Flow
To achieve that true ‘luxury spa’ look, you want to avoid straight lines or obvious patterns. Nature doesn’t work in grids, and neither should your mat. Mix different sizes and subtle color variations throughout the layout. If you find a stone that is particularly beautiful—perhaps one with a unique vein of quartz or a perfectly smooth oval shape—place it in a ‘hero’ position where it will be seen.
Filling the Voids
As you progress, you will inevitably find small ‘holes’ where a standard stone won’t fit. Keep a pile of ‘micro-pebbles’ (the tiny ones found at the bottom of the bag) specifically for these moments. Dab a tiny bit of glue into the gap and drop a micro-pebble in. This ‘gap-filling’ technique is what separates a budget DIY from a professional-grade decor piece. It provides a solid, continuous surface for your feet and increases the overall structural integrity of the mat.
| Layout Style | Visual Impact | Difficulty Level |
|---|---|---|
| Monochromatic (All Grey) | Modern & Minimalist | Easy |
| Gradient (Dark to Light) | Artistic & Custom | Advanced |
| Random Mix (Natural) | Rustic & Authentic | Medium |
The Finishing Touches: Curing, Testing, and Longevity
Patience is a Virtue
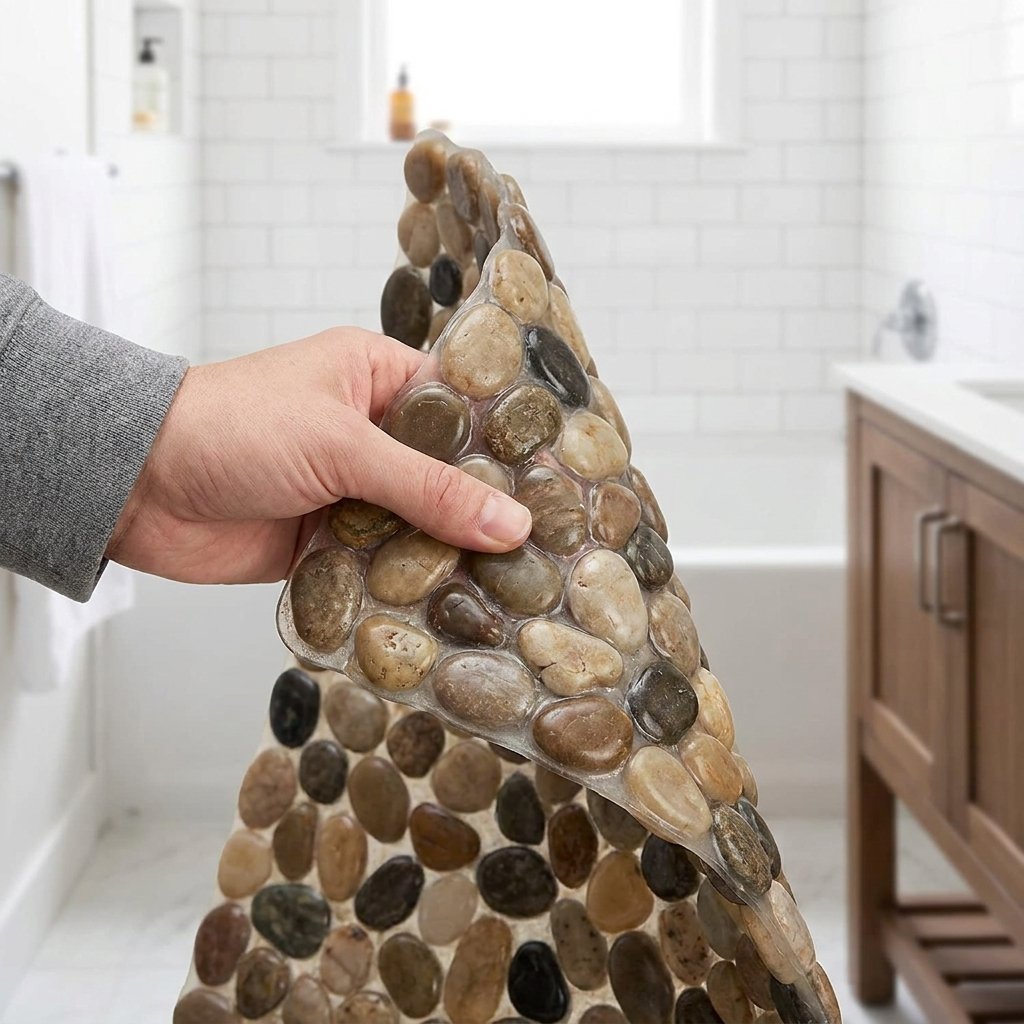
Once the last stone is placed, the hardest part begins: waiting. Most waterproof adhesives require a full 24 to 48 hours to cure completely. Do not be tempted to move the mat or test it with your feet too early. Moving it before the bond is set can cause stones to shift or slide, ruining your hard work. Place the mat in a dry, low-traffic area (like a garage or a spare room) and let the chemistry do its job.
The Stress Test
After 48 hours, perform a ‘flick test.’ Gently run your hand over the surface and try to wiggle individual stones. If any feel loose, simply apply a bit more adhesive and let it cure for another day. Once everything is rock-solid (pun intended), give the mat a final wipe-down with a damp cloth to remove any stray glue strings or fingerprints.
Maintenance for a Lifetime
- Cleaning: Rinse the mat weekly with warm water. For a deeper clean, use a mild soap and a soft brush.
- Air Dry: Occasionally hang the mat or prop it up to let the underside dry completely, especially if your bathroom has poor ventilation.
- Repairs: Keep a small bag of leftover stones and your glue tube. If a stone ever pops off due to heavy use, you can fix it in under 2 minutes.
Expanding the Aesthetic: Matching Accessories on a Budget
The Full Spa Suite
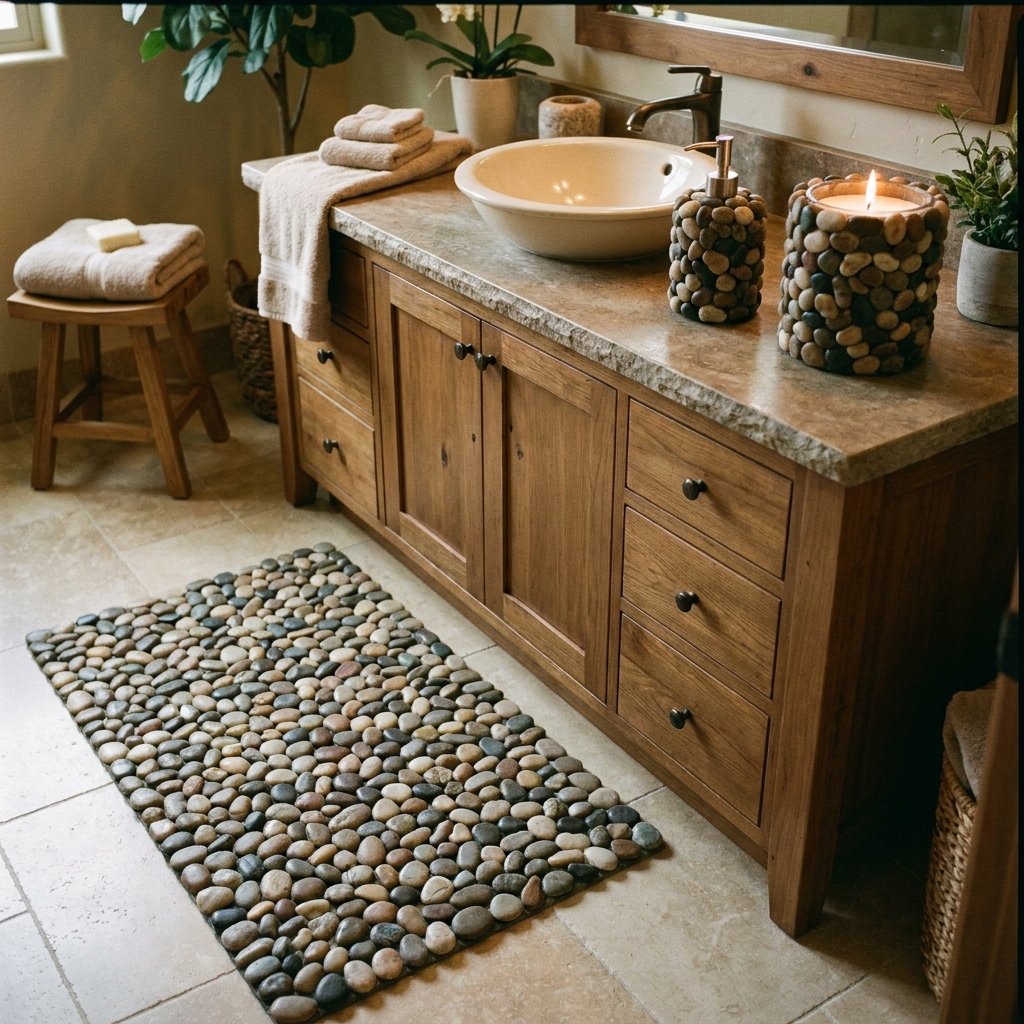
Now that you have mastered the pebble mat, why stop there? You likely have half a bag of stones and some glue left over. You can use these remnants to create a cohesive ‘nature-inspired’ theme throughout your bathroom. Consider gluing stones around the base of a plain glass soap dispenser or creating a matching ‘trinket tray’ using a Dollar Tree plastic tray as a base. This creates a high-end, curated look that suggests you spent hundreds on a matching set from a luxury home store.
By using the same stones across different items, you create visual harmony. This is a classic designer trick that makes even the most frugal spaces feel intentional and expensive. You’ve now turned a $20 investment into a bathroom makeover that adds real value and daily joy to your home routine. Stand tall on your new mat—you earned it!
Conclusion
Step Into Your New Reality
Creating a DIY Dollar Tree Pebble Bath Mat is more than just a craft project; it is a testament to the power of resourceful creativity. For about $15 and a few hours of your time, you have successfully replicated a luxury item that typically costs five times as much. You have added texture, nature, and a bit of rugged elegance to your daily routine. This project proves that you don’t need a massive bank account to live in a beautiful, spa-like environment—you just need a clever eye, a bit of patience, and the willingness to get your hands a little sticky. So, go ahead, kick off your shoes, and enjoy the feeling of those smooth stones beneath your feet. You’ve mastered the art of the ‘Trash-to-Treasure’ lifestyle, and your bathroom has never looked better!

Makenzie is the founder and lead writer at MoneyHackTips.com — a personal finance blog dedicated to delivering street-smart financial wisdom for real people on real budgets. With 300+ published articles covering everything from debt management to investing fundamentals, Makenzie’s mission is to make every dollar work harder. When not writing about money hacks, Makenzie is testing frugal living strategies, optimizing side hustles, and helping readers build financial freedom from scratch.