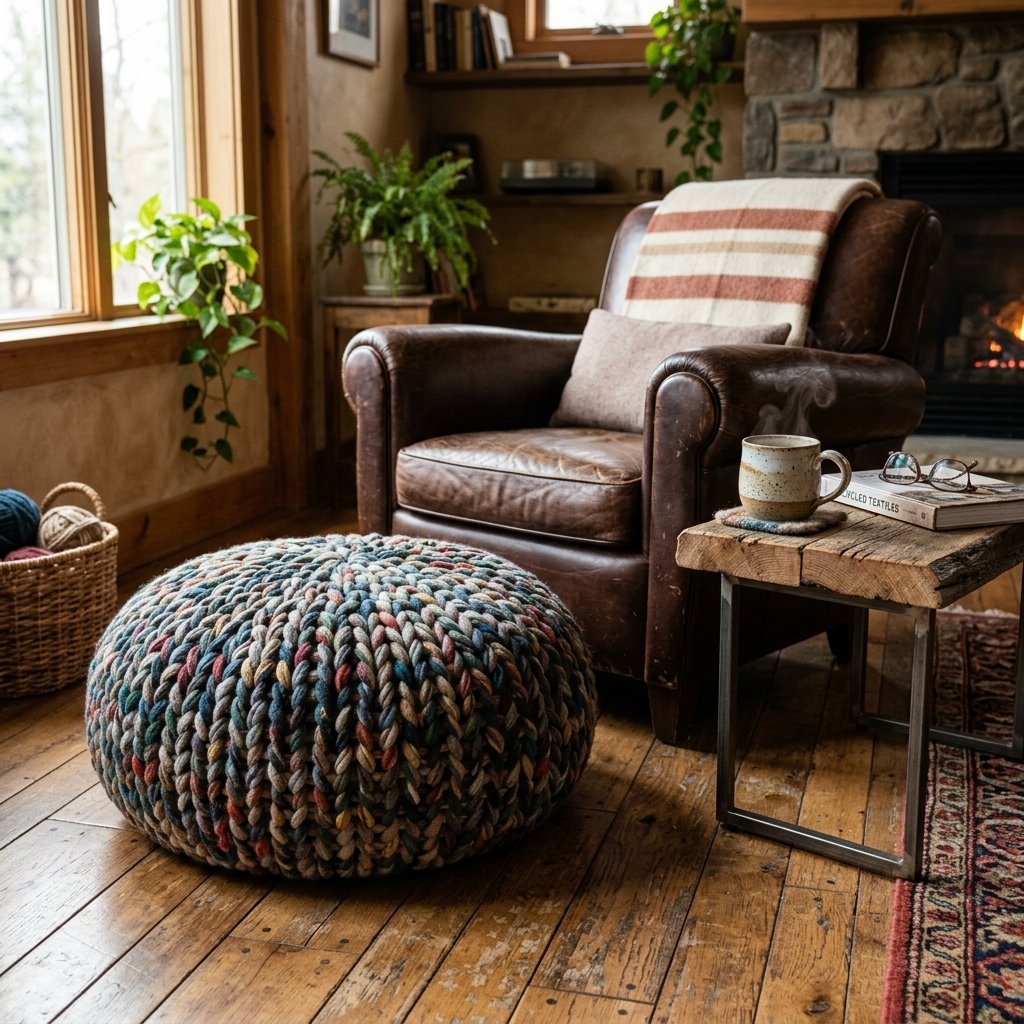

Let us talk about a truth that every savvy homeowner and frugal DIYer eventually realizes: home decor pricing is entirely out of control. If you have recently walked into a high-end boutique or scrolled through premium home styling websites, you have likely seen those gorgeous, chunky-knit round floor poufs. They look incredible. They add a rugged, textured, and inviting element to any living space. They are perfect for extra seating, resting your feet after a long day in the workshop, or giving the kids a comfortable spot for movie night. But then you look at the price tag. You are suddenly staring at a number ranging from $80 to a staggering $250 for what is essentially a bag of fabric scraps wrapped in a knitted shell. That is not just a markup; that is a challenge to our resourcefulness.
As handy upcyclers, crafty parents, and budget-savvy makers, we do not surrender to exorbitant retail prices. We look at our resources. We look at that garbage bag full of old, stained, stretched-out, or torn t-shirts sitting in the back of the closet, destined for the landfill. And we see raw material. We see potential. We see the ultimate zero-waste, high-end hack. Today, we are going to dive deep into the masterful art of transforming your discarded wardrobe into a heavy-duty, meticulously crafted DIY T-Shirt Yarn Round Floor Pillow. This is not just a flimsy craft project; this is a tactical approach to home decor. We are going to engineer a piece of furniture that is durable, washable, environmentally responsible, and visually striking.
By manufacturing our own continuous t-shirt yarn (affectionately known as tarn in the upcycling community), we bypass the craft store entirely. We are taking control of the materials, the construction, and the final aesthetic. Whether you are aiming for a masculine, monochromatic charcoal gray pouf to complement your leather sofa, or a vibrant, multi-colored masterpiece for a child’s playroom, this guide will walk you through every single step. We will cover the mechanics of cutting the perfect continuous strand, the heavy-duty techniques required to crochet or weave the shell, and the zero-budget secrets to stuffing your pillow so it never loses its shape. Grab your fabric shears, roll up your sleeves, and let us build the ultimate living room game changer.
The Anatomy of a High-End Floor Pouf (And Why Store-Bought is a Scam)

Before we make our first cut, we need to understand the architecture of what we are building. Why do those store-bought floor pillows cost so much, and why do they often fail after just a few months of use? The secret lies in the materials and the manufacturing process. Most commercial floor poufs are mass-produced using cheap, synthetic acrylic yarns that pill, fray, and attract pet hair like a magnet. Worse still, they are typically stuffed with low-grade polystyrene beads (bean bag filler) that compress over time. Within six months, your $150 investment looks like a deflated pancake.
When we take the DIY route, we are upgrading every single component of the build. T-shirt yarn is made from cotton jersey knit. It is naturally heavy, incredibly durable, slightly stretchy, and fully machine washable. It possesses a rugged, substantial weight that synthetic yarns simply cannot replicate. Furthermore, by stuffing our floor pillow with upcycled textiles—which we will discuss in detail later—we are giving it a solid, dense core that provides real ergonomic support. Let us break down the economics of this project to truly appreciate the magnitude of our savings.
| Component | Store-Bought Pouf (Average Cost) | Our Rugged DIY Upcycled Method |
|---|---|---|
| Outer Shell Material | $40 – $80 (Synthetic Acrylic) | $0 (Upcycled Old T-Shirts) |
| Inner Stuffing | $20 – $50 (Cheap Foam Beads) | $0 (Scrap Fabric/Old Towels) |
| Labor & Brand Markup | $50 – $120+ | $0 (Your Own Crafty Expertise) |
| Total Estimated Cost | $110 – $250+ | 100% Free (Just Time & Effort) |
The frugal maker’s mantra: Never pay for what you can create from what you already own. Every old t-shirt is a spool of premium yarn waiting to be unspooled.
Understanding this breakdown empowers you. You are not just making a craft; you are actively reclaiming value from items that society deems worthless. This shift in perspective is the hallmark of a true master upcycler. You are building heirloom-quality, functional art for pennies on the dollar.
Sourcing Your Arsenal: The Scavenger’s Guide to Free Fabric

The foundation of our heavy-duty floor pillow is, of course, the t-shirts. To create a substantial floor pillow (measuring approximately 24 inches in diameter and 12 inches high), you are going to need a significant amount of yarn. We are talking about 15 to 25 large or extra-large t-shirts. If you do not have that many shirts ready for the rag pile, do not panic. The resourceful DIYer knows exactly where to hunt for high-quality, low-cost materials.
Your Own Home First
Start with a ruthless closet audit. Look for shirts with unremovable grease stains, torn armpits, or stretched-out collars. Graphic tees work, but keep in mind that the printed graphics will create slightly stiffer, textured sections in your yarn. Seamless tubular t-shirts (shirts without side seams) are the absolute holy grail for this project, as they yield the smoothest, most continuous yarn.
The Thrift Store Outlet Bins
If your personal supply is lacking, head to your local thrift store outlet (often called the bins). These locations sell clothing by the pound, not by the item. You can often score heavy-duty cotton t-shirts for less than $1.50 per pound. When hunting, focus on the largest sizes available—XXL and XXXL men’s shirts provide massive yields. Look for 100% cotton or high-cotton blends. Avoid shirts with too much spandex, as they will stretch too thin and lose their structural integrity when crocheted into a rug or pillow.
The Community Network
Never underestimate the power of simply asking. Put out a call on your local neighborhood social media groups or message your friends and family. Let them know you are collecting old, unwearable t-shirts for a zero-waste upcycling project. People are usually thrilled to offload their textile clutter to someone who will actually use it, rather than throwing it in the trash.
| T-Shirt Size | Approximate Yarn Yield (Yards) | Best Used For |
|---|---|---|
| Small / Medium | 15 – 20 yards | Color accents, small stripes |
| Large / XL | 25 – 35 yards | Main body construction |
| XXL / XXXL | 40+ yards | The holy grail for large projects |
The Master Tailor’s Secret: Cutting Continuous T-Shirt Yarn
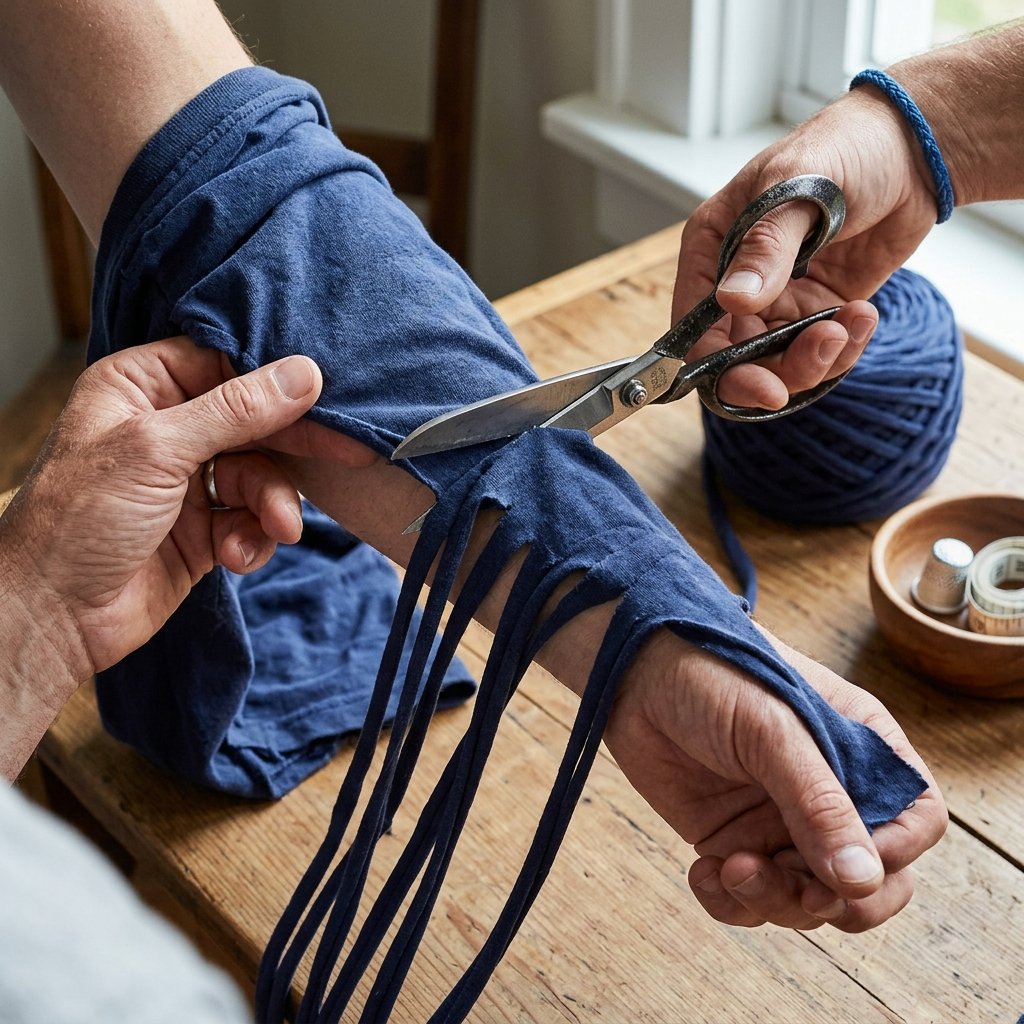
This is where the magic happens. Turning a t-shirt into a single, unbroken strand of yarn is a clever, geometry-defying trick that separates the amateurs from the crafty experts. We are not just cutting random strips and tying them together in messy knots. We are utilizing a continuous spiral cut that maximizes yield and creates a seamless, professional-grade yarn.
Step-by-Step Continuous Yarn Processing
- The Prep: Lay your t-shirt completely flat on a large cutting mat or clean floor. Smooth out all the wrinkles. Ensure the front and back hems line up perfectly.
- The Amputation: Using your heavy-duty fabric shears, cut straight across the t-shirt, just below the armpits. Discard the top half (save the sleeves for cleaning rags or smaller projects). You are now left with a tube of fabric. Cut off the bottom hem as well, as the thick stitching will not stretch properly.
- The Fold: Turn the tube so the side seams are on the left and right. Take the bottom edge and fold it up towards the top edge, but stop about 1 inch short of the top edge. You should have a folded section at the bottom, and a single-layer strip visible at the top.
- The Slices: Starting from the folded bottom edge, cut vertical strips about 1 to 1.5 inches wide, cutting upwards through the folded layers. Crucial step: Cut past the fold, but stop cutting before you reach the very top edge of the shirt. Leave that top 1-inch margin intact. Repeat this across the entire width of the shirt. You will end up with something that looks like a hula skirt attached to an uncut waistband.
- The Unveiling: Open up the uncut top margin. You will see a solid strip of fabric connecting all the loops you just cut. Slip your arm through the tube to hold it taut.
- The Diagonal Cut: This is the secret. Do not cut straight across. Start at the edge and cut diagonally from the first slit on the bottom to the second slit on the top. This diagonal cut is what turns the separate loops into one continuous, spiraling strand. Continue cutting diagonally across the entire margin.
- The Stretch: Once you have your massive pile of fabric strips, it is time to turn it into yarn. Take the strand in your hands and pull it firmly. The raw edges of the jersey knit will naturally roll inward upon themselves, hiding the cut edges and creating a smooth, tubular yarn. Roll it into a tight ball as you go.
Safety Note: When pulling the fabric to curl the edges, be mindful of your shoulders and wrists. Pull in short, controlled bursts. Repetitive strain is the enemy of the frugal crafter. Take breaks and stretch your hands.
Heavy-Duty Construction: Crocheting Your Rugged Floor Pillow
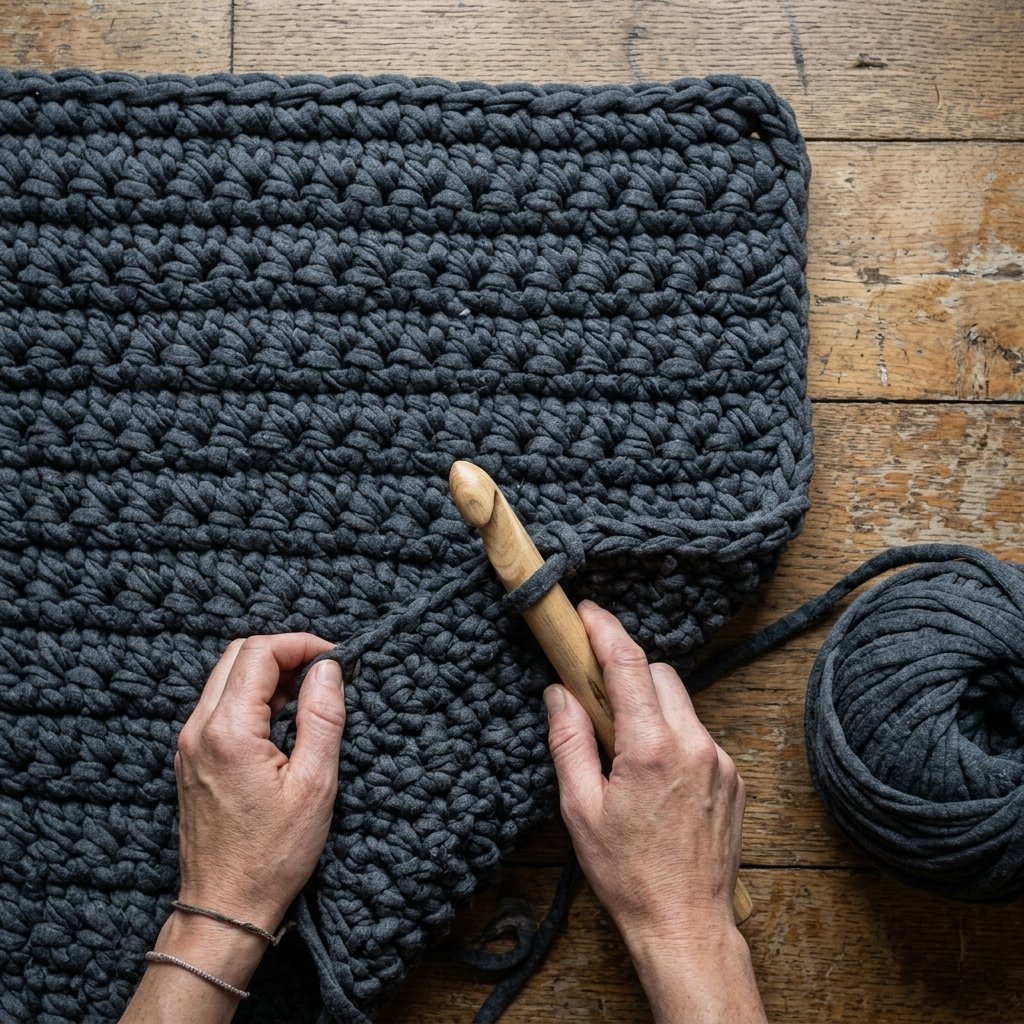
Now that you have your arsenal of t-shirt yarn balls, it is time to build the structure. For a project of this magnitude, we need heavy-duty tools. You will need a massive crochet hook—typically a size 15mm to 25mm (often labeled as size P, Q, or U). If you do not want to buy a giant hook, you can carve one out of a thick wooden dowel, or simply use your fingers and hands for hand-crocheting.
We will be working in a continuous round, creating a dense, bulletproof fabric that can withstand kids jumping on it, dogs sleeping on it, and years of heavy use. The stitch we will use is the simple Single Crochet (SC), but because the yarn is so thick, it will look incredibly complex and textured.
The Base: The Magic Ring
To ensure there is no hole at the bottom of your pillow, we start with a Magic Ring. This technique allows you to pull the center completely tight.
- Create a loop with your yarn, leaving a 6-inch tail. Insert your giant hook, pull up a loop, and chain 1 to secure it.
- Work 6 Single Crochets (SC) directly into the center of the magic ring.
- Grab the tail and pull it with all your might. The stitches will cinch together into a tight, perfect circle.
Building the Diameter (The Increases)
To make the circle lay flat and grow outward, we must increase our stitches methodically. We will work in continuous spirals, so grab a safety pin or a scrap piece of contrasting yarn to mark the start of each round.
- Round 2: Place 2 SC in every stitch around. (Total: 12 stitches)
- Round 3: *1 SC in the first stitch, 2 SC in the next stitch.* Repeat this pattern around. (Total: 18 stitches)
- Round 4: *1 SC in the next 2 stitches, 2 SC in the next.* Repeat around. (Total: 24 stitches)
- Rounds 5 to X: Continue this mathematical progression. Add one more regular SC between the increases on every subsequent round. Keep going until your flat circle reaches your desired diameter (usually about 24 inches across).
Building the Walls
Once your base is wide enough, it is time to build the vertical walls of the pouf. This is the easiest part. Simply stop increasing. Work 1 SC into every single stitch around. After one or two rounds, you will see the edges start to curl upward, forming a basket shape. Continue working straight up until the walls are about 10 to 12 inches high. You are essentially building a massive, heavy-duty fabric bucket.
Stuffing the Beast: Zero-Waste Fillers That Won’t Go Flat
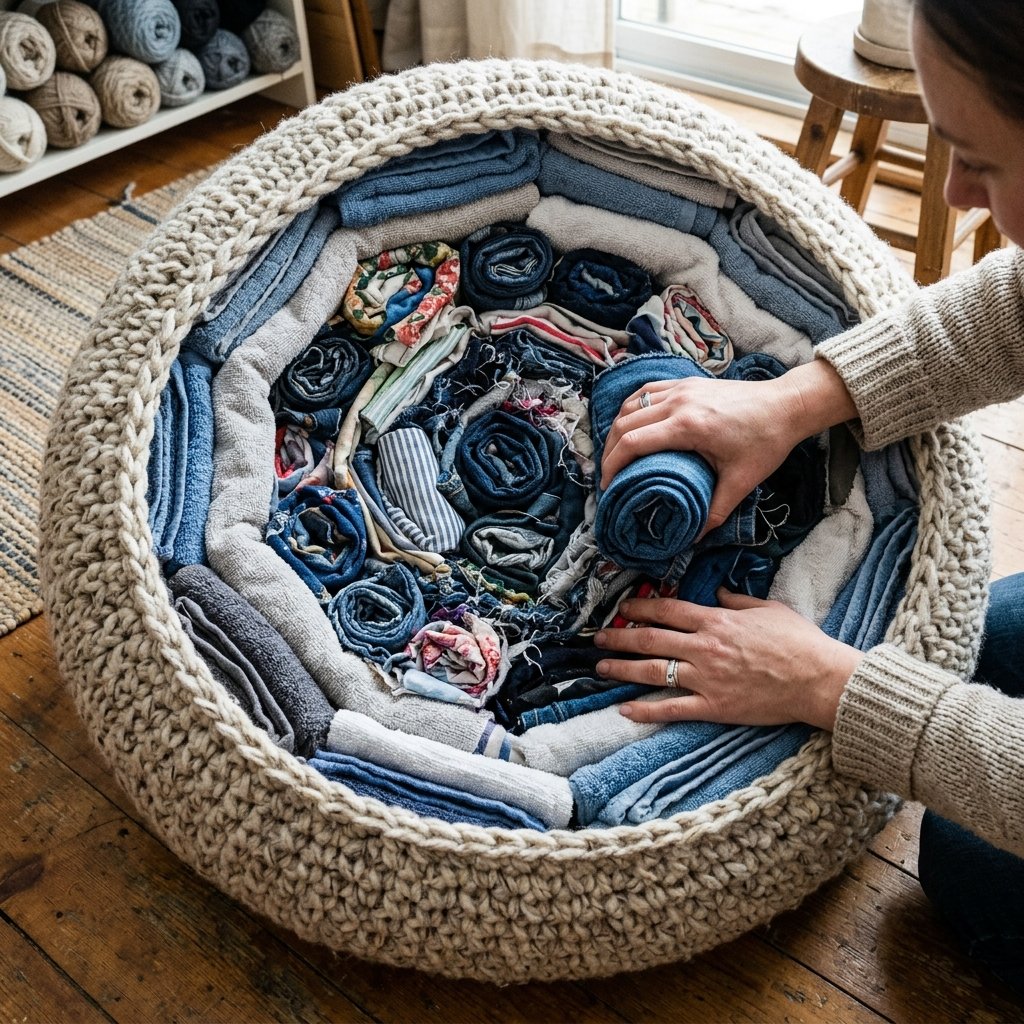
Here is where amateur DIYers make a critical and expensive mistake: they go to the craft store and spend $40 on bags of polyester fiberfill. Do not do this. Polyfill is lightweight, terrible for the environment, and worst of all, it compresses rapidly under body weight. Within weeks, your robust floor pillow will look like a sad, deflated balloon.
A true heavy-duty floor pillow requires mass. It requires density. We are going to stuff this beast using the ultimate zero-waste, zero-budget method: textile scrap packing. This technique not only saves you a fortune but also diverts pounds of unwearable textiles from the local landfill.
The Core Strategy: Layering for Comfort and Structure
Stuffing a floor pillow with old clothes can make it lumpy if you just shove them in randomly. We need to engineer the interior for maximum ergonomic comfort.
| Filler Material Type | Best Placement Inside Pillow | Density & Support Level |
|---|---|---|
| Old Denim Jeans / Heavy Canvas | The absolute center core | Maximum rigidity, prevents sagging |
| Shredded T-Shirts / Small Scraps | Middle layer, filling gaps | Medium density, adds weight |
| Old Towels / Fleece Blankets | Folded neatly against the outer walls | High comfort, smooths out lumps |
| Old Pillows / Cushion Foam | The very top layer (seating surface) | Softest, provides immediate comfort |
The Packing Process
- The Smooth Outer Shell: Take your old, clean fleece blankets or large bath towels. Fold them neatly and line the inside walls of your crocheted bucket. This creates a smooth barrier so you will not feel individual lumps from the inner core.
- The Heavy Core: Roll up your heaviest, most unwearable items—like old jeans with blown-out knees, stained sweatshirts, or heavy curtains—into tight bundles. Pack them tightly into the center bottom of the pillow. This gives the pouf a low center of gravity so it will not tip over.
- The Gap Fillers: Take all the tiny scraps leftover from making your t-shirt yarn (the hems, the necklines, the sleeves) and shove them firmly into any gaps between your heavy core and the towel lining. Pack it down brutally. You want zero empty air pockets.
- The Comfort Top: For the top layer where you will actually sit, use the softest materials you have. An old, flattened bed pillow folded in half works perfectly here. It provides a plush seating surface while the dense core below provides the structural support.
Pro-Tip for Handy Parents: If you have old stuffed animals that your kids have outgrown but refuse to throw away, hide them inside the core of the floor pillow. It acts as a secret time capsule and excellent free stuffing!
Closing the Hatch: Decreasing and Finishing Touches
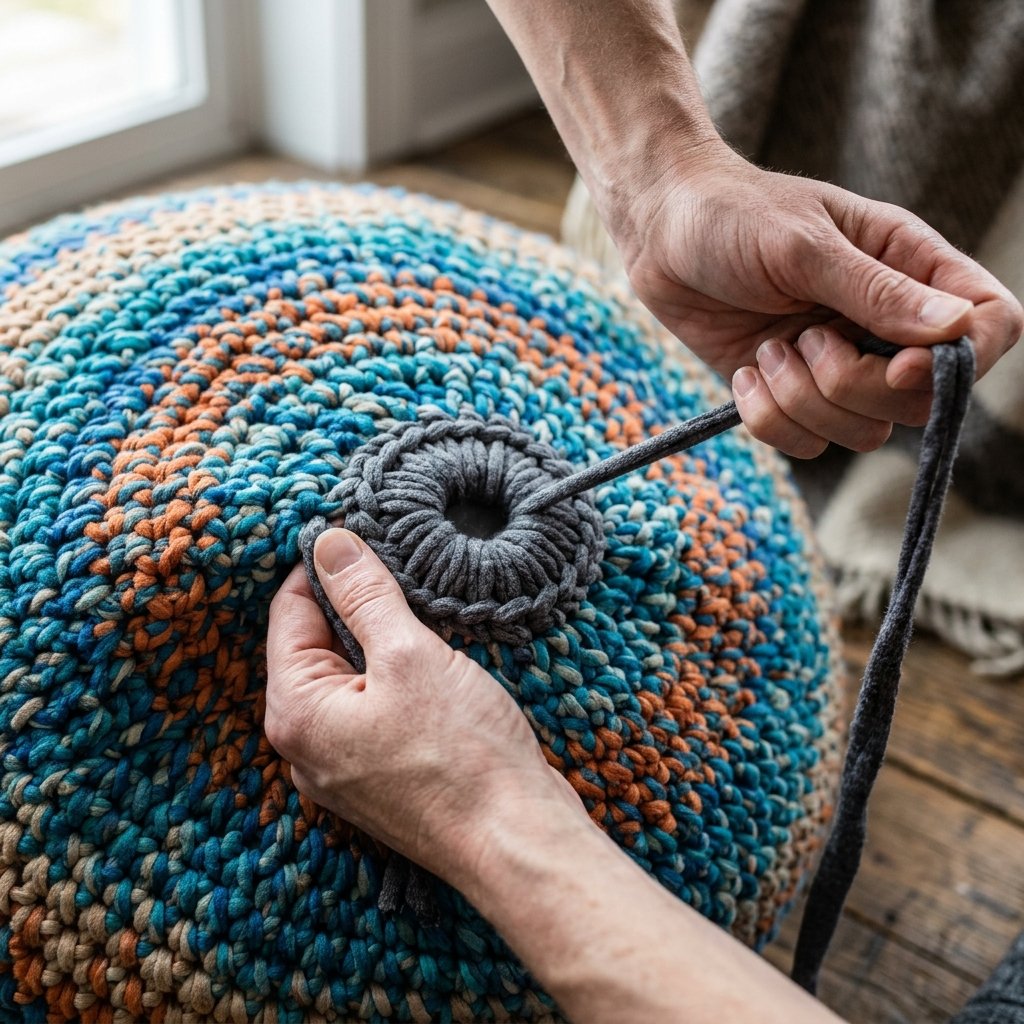
With your floor pillow packed to maximum density, it is time to seal it up. This part requires a bit of elbow grease, as you will be wrestling with a heavy, stuffed object while trying to crochet.
The Decrease Rounds
We need to reverse the mathematical formula we used to build the base. We will use the Single Crochet Decrease (SC2TOG – Single Crochet Two Together) to pull the top edges inward.
- Round 1 of Decreasing: Figure out how many stitches were between your increases on your final base round (for example, let’s say it was 8 stitches). You will work 1 SC in the next 8 stitches, then SC2TOG (decrease). Repeat this around.
- Round 2: 1 SC in the next 7 stitches, then SC2TOG. Repeat around.
- Continuing: Keep decreasing by one regular stitch each round. The opening will rapidly shrink. As the hole gets smaller, you may need to shove in a few more handfuls of small fabric scraps to ensure the top dome is completely firm and tight.
- The Final Closure: When you are down to about 6 to 12 stitches, cut your t-shirt yarn, leaving a 24-inch tail. Thread this tail onto a massive yarn needle (or use a bent piece of wire if you don’t have a needle large enough). Weave the tail in and out of the front loops of the remaining stitches. Pull the tail violently tight, exactly like a drawstring bag, to snap the hole completely shut.
- Securing the Knot: Tie a heavy-duty surgeon’s knot, bury the tail deep inside the stuffing of the pillow using your hook, and cut the excess.
Stand back and admire your work. You have just engineered a piece of premium, high-end furniture out of literal garbage. The weight of it should be substantial—often weighing between 10 to 20 pounds. It is rugged, it is beautiful, and it is built to survive the apocalypse.
Tactical Maintenance: Cleaning and Mending Your Upcycled Masterpiece

One of the greatest advantages of using heavy-duty cotton t-shirt yarn is its resilience. Unlike cheap synthetic poufs that require specialized dry cleaning, your upcycled floor pillow is designed for the messy reality of real life. However, because we stuffed it with 15 pounds of dense textiles, you cannot simply throw the entire massive object into your washing machine. That would destroy your washer’s drum and the pillow would take three weeks to dry. We need a tactical approach to maintenance.
Spot Cleaning Like a Pro
For 90% of spills, spot cleaning is your first line of defense. Because the t-shirt yarn is thick and tightly stitched, liquids take a moment to seep in. If you spill coffee or drop food on it, act fast. Mix a solution of 1 part white vinegar, 1 part water, and a drop of blue Dawn dish soap. Use an old, clean toothbrush or a stiff-bristled scrub brush to work the solution into the stained yarn. Wipe away the excess with a damp microfiber cloth. The cotton will release the stain easily.
The Deep Clean (The Removable Cover Hack)
If you anticipate your floor pillow getting heavily soiled (perhaps it lives in a dog-heavy environment or a toddler playroom), you should alter the final closing step. Instead of permanently crocheting the top shut, you can crochet a separate flat circular lid. Attach this lid to the main body using heavy-duty wooden toggle buttons or by lacing a long strand of t-shirt yarn through the edges like a corset. When it is time for a deep clean, simply unlace the top, pull out the inner stuffing (which you can keep contained in an old mesh laundry bag or a zippered pillowcase), and wash the entire crocheted outer shell in your washing machine on a heavy-duty cold cycle. Air dry it in the sun to prevent any shrinking.
Invisible Mending for Snags
Over the years, a rogue pet claw or a sharp boot zipper might snag a loop of your yarn. Do not cut the snag! Cutting it will cause the stitch to unravel. Instead, take a smaller crochet hook or a latch hook tool, push it from the inside of the pillow to the outside right where the snag is, grab the loose loop, and pull it completely inside the pillow. The snag disappears instantly, and the structural integrity remains perfectly intact.
Conclusion
Creating a DIY T-Shirt Yarn Round Floor Pillow is much more than just a weekend craft project. It is a statement. It is a declaration that we refuse to overpay for flimsy, mass-produced home decor when we have the skills, the tools, and the raw materials to build something vastly superior ourselves. By taking discarded, unwearable clothing and applying clever, heavy-duty construction techniques, you have engineered a functional masterpiece. You have saved hundreds of dollars, diverted pounds of textile waste from the landfill, and added a rugged, custom-tailored piece of furniture to your living space.
Every time you rest your feet on that dense, textured surface, you will be reminded of your own resourcefulness. You know exactly what went into it—from the careful, continuous cutting of the yarn to the strategic, zero-waste stuffing of the core. So, look at your closet with new eyes. That pile of stained shirts is no longer trash; it is your next great project. Keep your shears sharp, keep your stitches tight, and continue building a home that reflects your creativity, your budget-savvy mindset, and your unbreakable DIY spirit.

Makenzie is the founder and lead writer at MoneyHackTips.com — a personal finance blog dedicated to delivering street-smart financial wisdom for real people on real budgets. With 300+ published articles covering everything from debt management to investing fundamentals, Makenzie’s mission is to make every dollar work harder. When not writing about money hacks, Makenzie is testing frugal living strategies, optimizing side hustles, and helping readers build financial freedom from scratch.