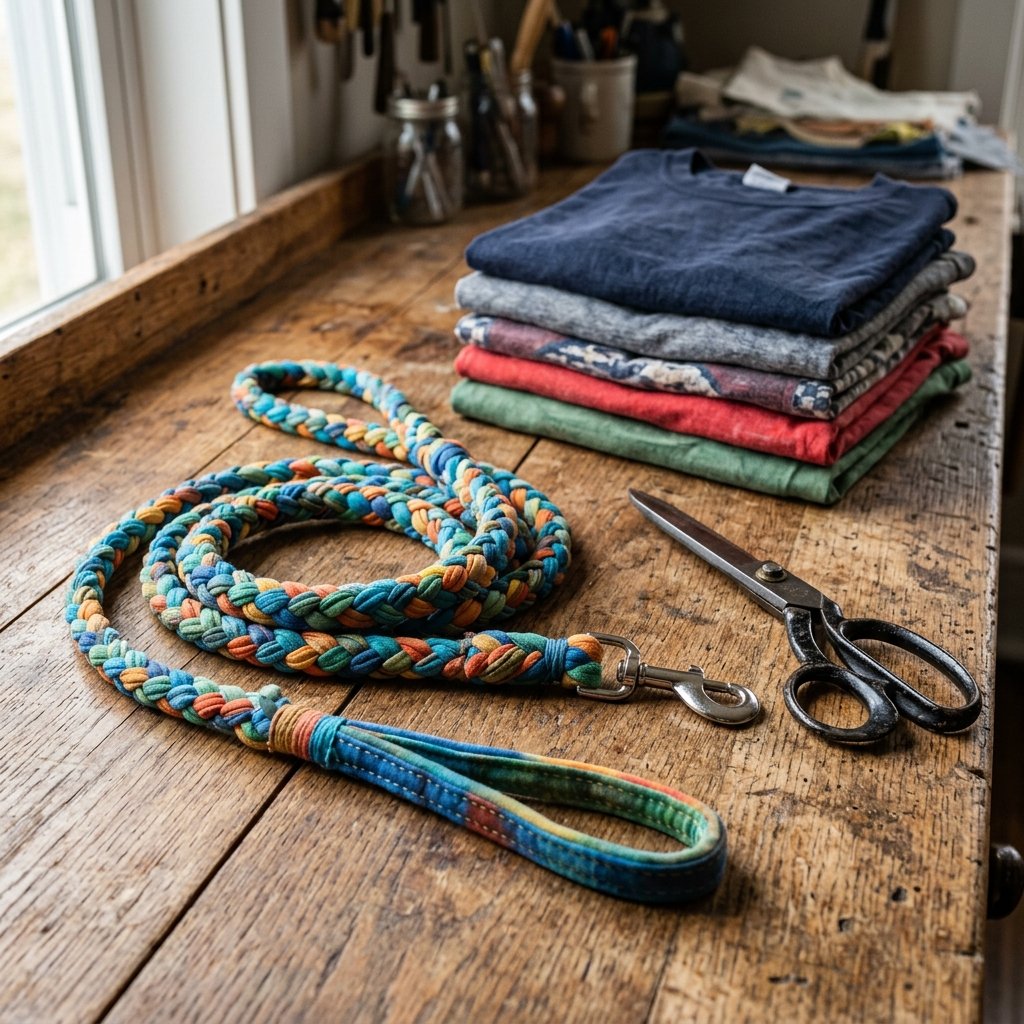

Let us face facts: outfitting your four-legged best friend can cost a small fortune. Between the high-end kibble, the vet bills, and the endless parade of chew toys that inevitably end up in shreds, being a pet parent is an investment. Walk into any big-box pet store, and you will quickly notice that a heavy-duty, aesthetically pleasing dog leash can easily set you back anywhere from $20 to upward of $50. But what if I told you that the ultimate, indestructible, shock-absorbing dog leash is currently sitting at the bottom of your laundry basket, completely free of charge?
Welcome to the magic of T-shirt yarn, affectionately known in the crafting world as ‘tarn.’ As frugal DIYers, resourceful upcyclers, and folks who appreciate a rugged, practical project, we know that true value comes from seeing the potential in what others consider trash. Old, stained, or stretched-out t-shirts are a goldmine of utility. Jersey cotton, when cut and stretched, curls in on itself to create a thick, rope-like material that boasts incredible tensile strength and a natural, comfortable elasticity. It is soft on your hands, tough against a pulling pup, and completely machine washable.
In this masterclass of budget-savvy upcycling, we are going to transform those forgotten garments into a stylish, custom-colored dog leash in just about 10 minutes. Whether you are a handy dog dad looking for a Saturday morning garage project or a crafty gift-giver whipping up a present for a new puppy owner, this tutorial is your blueprint. Grab your fabric scissors, raid your donation pile, and let us turn trash into a rugged treasure that will have every dog walker at the park asking where you bought your gear.
The Unmatched Utility of T-Shirt Yarn: Why Upcycle?

Before we start cutting, it is essential to understand why t-shirt yarn is the absolute best material for a DIY dog leash. Store-bought nylon leashes are notorious for causing rope burn if your dog suddenly lunges after a squirrel. Leather leashes are beautiful and masculine, but they require constant conditioning, perform poorly in the rain, and cost a pretty penny. T-shirt yarn, on the other hand, hits the sweet spot of rugged durability and practical comfort.
Jersey cotton is knit, not woven. This structural difference means that when you cut it into strips and pull it taut, the raw edges roll inward, creating a smooth, tubular strand that refuses to fray. When you braid multiple strands of this material together, you multiply its strength exponentially. The resulting rope has a slight, natural ‘give’ to it. This built-in shock absorber is a game-changer for your shoulders and your dog’s neck during enthusiastic walks.
The Economics of Upcycling
Let us look at the raw numbers. Upcycling is not just about keeping textiles out of the landfill (though that is a massive, noble bonus); it is about keeping hard-earned cash in your wallet. By salvaging hardware from a broken leash and utilizing shirts you already own, your out-of-pocket cost plummets to absolute zero.
| Feature / Item | Store-Bought Heavy Duty Leash | DIY T-Shirt Yarn Leash |
|---|---|---|
| Average Cost | $25.00 – $45.00 | $0.00 |
| Material | Stiff Nylon or Expensive Leather | Upcycled Soft Jersey Cotton |
| Customization | Limited to store stock | Infinite color combinations |
| Washability | Spot clean only / Degrades in wash | 100% Machine Washable |
| Comfort (Handler) | Prone to causing rope burn | Soft, ergonomic, shock-absorbing |
When you weigh the benefits, the choice is clear. You are crafting a superior product tailored precisely to your aesthetic preferences and your dog’s size, all while practicing top-tier resourcefulness.
Scavenging Your Supplies: The Zero-Budget Materials List
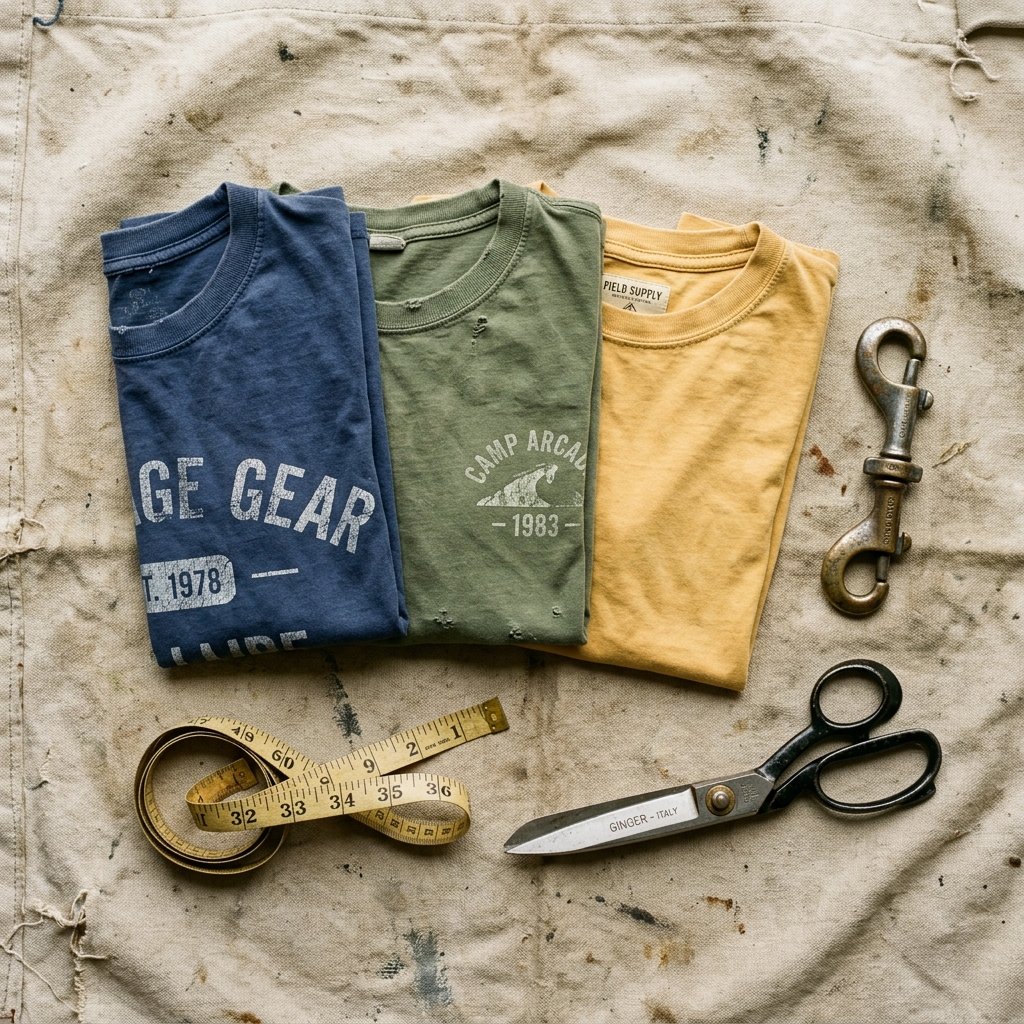
The beauty of this project lies in its simplicity. You do not need a sewing machine, complicated looms, or expensive crafting supplies. You just need a sharp eye for scavenging and a few basic tools from your utility drawer.
Selecting the Perfect T-Shirts
Not all t-shirts are created equal when it comes to making yarn. You want to look for shirts that are at least 90% to 100% cotton. Blends with too much polyester or spandex will not roll properly when stretched. The ideal candidate is a large or extra-large men’s seamless t-shirt. A seamless body (tubular knit) allows you to cut one massive, continuous spiral of yarn without any bulky seams interrupting the smooth texture. If your shirt has side seams, do not panic—it is still completely usable, you will just have a few small bumps in your finished braid, which adds to the rugged, handmade charm.
Salvaging the Hardware
Do not buy a new snap hook! The true upcycler knows that when a cheap nylon leash frays and snaps, the heavy-duty metal swivel clip at the end is usually still in perfect working condition. Cut it off the old leash and give it a quick scrub with some steel wool or a wire brush to remove any rust or grime. If you do not have an old leash, check old duffel bags, broken sports equipment, or thrift store bargain bins for heavy-duty metal hardware.
| Material / Tool | Purpose | Where to Scavenge |
|---|---|---|
| 2-3 Old T-Shirts | The body of the leash. Use contrasting colors for a striking pattern. | Your closet, donation pile, or thrift store clearance rack. |
| 1 Swivel Snap Hook | To attach the leash to your dog’s collar or harness. | Cut from an old, broken leash or a discarded heavy duffel bag. |
| Fabric Scissors | To cut the shirts cleanly without jagged edges. | Your household sewing kit or crafting toolbox. |
| Clipboard or C-Clamp | To hold the hardware steady while you braid tight and fast. | Office supplies or the garage workbench. |
Safety & Tool Note: Always use dedicated fabric scissors for cutting textiles. Using paper scissors on jersey cotton will chew up the fabric, create jagged edges, and frustrate you endlessly. Keep your tools sharp for a professional finish.
The Crafter’s Secret: Making Continuous T-Shirt Yarn
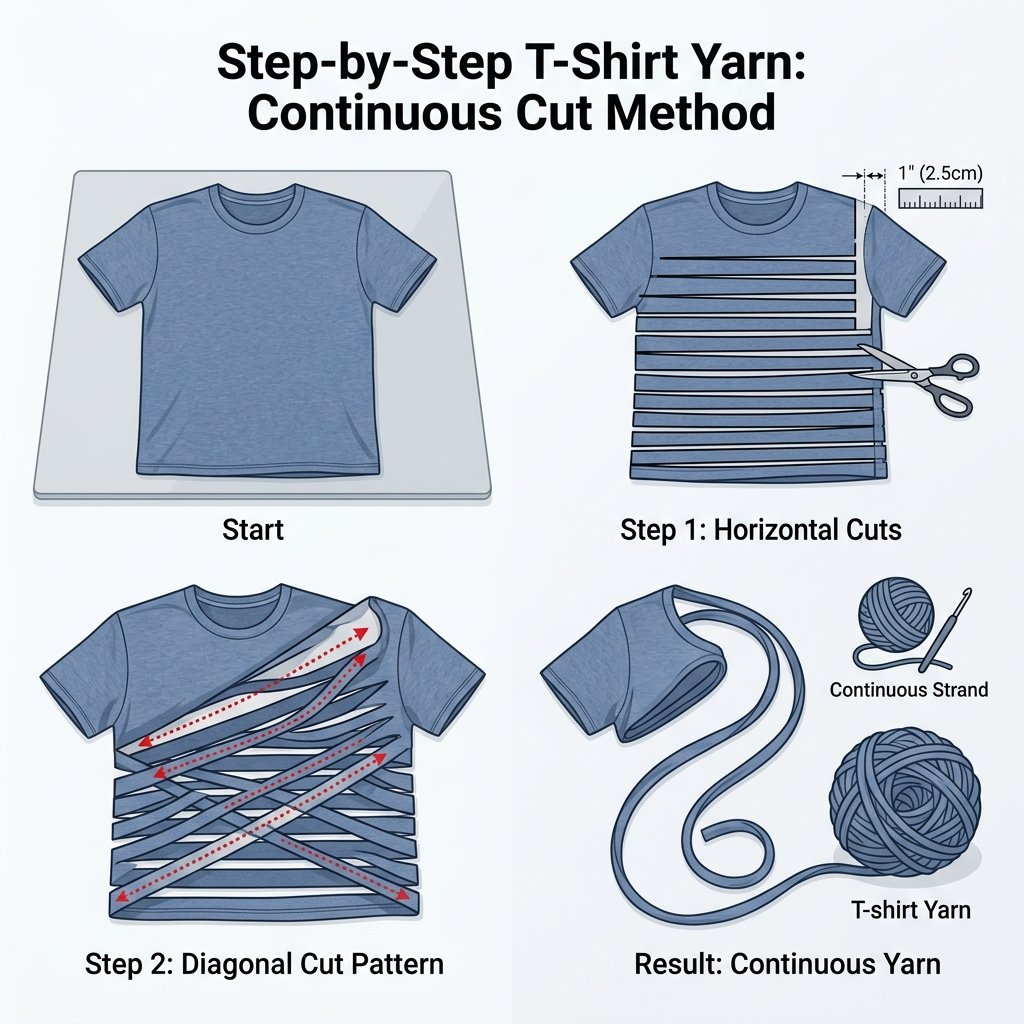
If you have never made continuous t-shirt yarn before, prepare to be amazed. This is a classic, old-school crafting hack that turns a single shirt into dozens of yards of usable cordage in just a few minutes. The trick is to cut the shirt in a way that creates one long, unbroken spiral, rather than a bunch of individual rings.
Step-by-Step Tarn Creation
- Prep the Canvas: Lay your t-shirt flat on a large table or the floor. Smooth out any major wrinkles. Using your sharp fabric scissors, cut off the bottom hem of the shirt and discard it (or save it for a rugged tie-down string in the garden). Next, cut straight across the chest, just under the armpits. You are now left with a large, double-layered tube of fabric.
- The Strategic Fold: Fold one side of the tube over toward the other side, but do not fold it all the way flush. Leave about a 1-inch to 1.5-inch gap of the bottom layer exposed at the top edge.
- The Horizontal Cuts: Starting from the bottom folded edge, cut strips about 1 to 1.5 inches wide, cutting upward toward the top edge. Stop your cut just as you pass the folded top layer, leaving that exposed 1-inch gap of the bottom layer completely uncut. You are essentially creating a grass skirt effect.
- The Diagonal Magic: Once you have cut strips all the way across the shirt, open up that uncut section. You will see a solid strip of fabric with loops hanging off it. To make a continuous strand, do not cut straight across! Instead, start at the first slit on the edge and cut diagonally to the second slit on the opposite side. Continue cutting diagonally from slit to slit. This angled cut transforms the loops into one massive, continuous piece of fabric.
- The Stretch: This is the fun part. Take your long pile of fabric stripping and pull it taut, section by section. As you stretch the jersey cotton, the raw edges will magically roll inward, hiding the cut lines and creating a smooth, sturdy cord. Roll it into a ball, and you have just created zero-budget t-shirt yarn!
Repeat this process with a second or third shirt if you want a multi-colored leash. For a standard 6-foot leash, you will need four strands of yarn, each about 9 to 10 feet long (braiding consumes length, so always start longer than your desired finished product).
The 4-Strand Round Braid: Rugged, Cylindrical, and Indestructible

While a standard 3-strand flat braid (like a traditional hair braid) is easy, it is not the best choice for a dog leash. Flat braids can be flimsy and uncomfortable to grip when a dog pulls. We are upgrading to the 4-strand round braid. This technique creates a thick, cylindrical, rope-like structure that is incredibly strong, visually stunning, and ergonomically perfect for your hand.
Setting Up the Braid
Take your four strands of t-shirt yarn (measuring about 10 feet each). Thread them all through the eye of your salvaged heavy-duty swivel snap hook. Pull them through so the hook sits exactly in the middle of the strands. You now have eight strands hanging down (each 5 feet long). To make the leash a manageable thickness, we are going to treat two strands as one, effectively braiding with four thick double-strands. Clamp the snap hook to a clipboard, or hook it over a nail on your workbench to keep the tension tight while you work.
The Braiding Technique
Arrange your four double-strands so they lay flat, side-by-side. Let us number them 1, 2, 3, and 4 from left to right.
The Braiding Mantra: “Outer right goes under two, back over one. Outer left goes under two, back over one.” Keep repeating this rhythm, and your hands will memorize the motion in no time.
- Take Strand 4 (the far right) and pass it under Strands 3 and 2.
- Now, wrap Strand 4 over Strand 2 so it rests in the middle.
- Next, take Strand 1 (the far left) and pass it under the new Strands 2 and 3.
- Wrap Strand 1 over the strand it just passed, resting it in the middle.
- Pull all strands tight to secure the top of the braid near the hardware.
- Repeat this process: Far right under two, over one. Far left under two, over one.
Keep your tension consistent. A tight braid ensures a rigid, durable leash that will not stretch out too much over time. If you are using different colors, you will quickly see a beautiful, spiraling barber-pole or diamond pattern emerge. Continue braiding until you have about 12 to 15 inches of unbraided yarn left at the bottom. This tail will be used to create the handle.
Securing the Handle: The Professional Whipping Knot

The handle is arguably the most critical part of the leash. It needs to be comfortable for you and secure enough that it will never unravel, even if your dog spots a squirrel and hits the end of the line with full force. We are going to avoid bulky, ugly overhand knots and instead use a sailor’s technique: the Whipping Knot (also known as a Hangman’s wrap or gathering knot).
Crafting the Loop
Take the bottom end of your braided leash and fold it back on itself to create a loop large enough to comfortably fit your hand (usually an opening of about 7 to 8 inches). Pinch the unbraided tail ends tightly against the main braided body of the leash.
The Whipping Wrap
- Cut a separate, extra piece of t-shirt yarn about 3 feet long. This will be your wrapping cord.
- Lay one end of the wrapping cord against the leash where the loop meets the main body, pointing the tip upward toward the handle.
- Make a large ‘U’ shape (a bight) with the wrapping cord, bringing the long end back down toward the tail of the leash.
- Pinch this ‘U’ shape against the leash. Now, take the long working end of the wrapping cord and start wrapping it tightly around the leash, the unbraided tails, and the ‘U’ shape.
- Wrap tightly and neatly, working your way upward. Make sure each wrap sits flush against the previous one. Wrap for about 2 to 3 inches to ensure maximum security.
- Once you have a solid, tight barrel of wraps, thread the working end of the cord through the top loop of the ‘U’ shape you left exposed.
- Grab the bottom tail of the wrapping cord (the part pointing down) and pull it hard. This will drag the top loop, along with the end of your wrapping cord, down underneath the tight wraps you just made, locking it invisibly in place.
- Trim any excess tails from the whipping knot and the main braid as close to the wraps as possible for a clean, professional, masculine finish.
This knot is practically indestructible. The harder the leash is pulled, the tighter the wraps grip the core strands. You now have a smooth, highly functional, and aesthetically pleasing handle.
Upgrades, Maintenance, and Customizing Your Gear
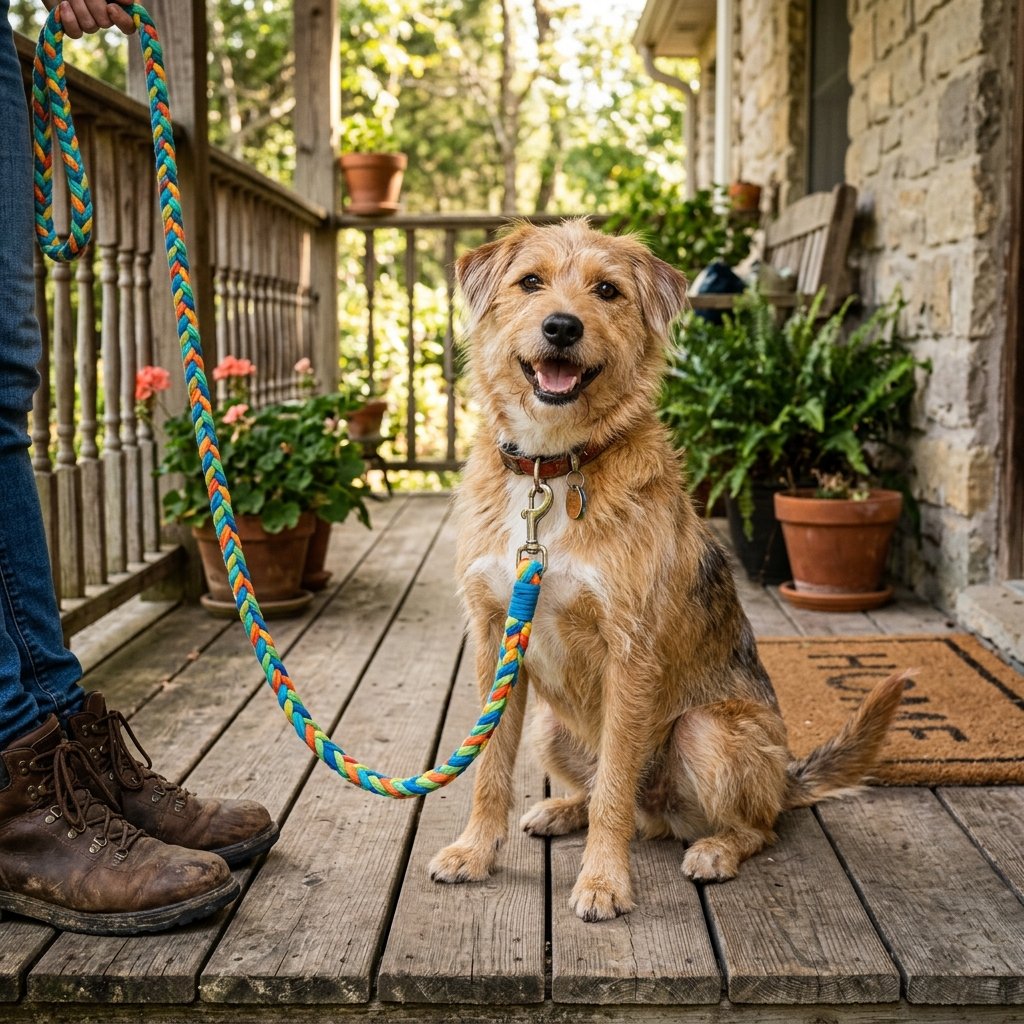
Congratulations, you have just crafted a premium piece of pet gear for absolutely zero dollars. But the resourceful journey does not have to end here. Because you are the manufacturer, you have complete control over the final product. Here are a few ways to upgrade, maintain, and customize your new DIY t-shirt yarn dog leash.
Tactical and Safety Upgrades
- Reflective Paracord Weave: If you frequently walk your dog at night or early in the morning, safety is paramount. You can easily weave a strand of high-visibility reflective paracord (550 cord) into the 4-strand braid. The paracord adds virtually no weight but provides a brilliant reflective flash when hit by car headlights.
- The Traffic Handle: For large or reactive dogs, you can easily add a second loop closer to the hardware clip using the same whipping knot technique. This ‘traffic handle’ allows you to keep your dog close and secure when crossing busy streets or navigating crowded areas.
- Natural Dyeing: If your old t-shirts are a drab, stained white, do not throw them out! Before cutting them into yarn, you can dye them using cheap, natural kitchen ingredients like coffee grounds (for a rich, rugged brown), turmeric (for a vibrant mustard yellow), or beet juice (for a deep maroon).
Care and Maintenance
One of the greatest advantages of a t-shirt yarn leash over leather or heavy nylon is its washability. Dogs love mud, puddles, and rolling in things best left unmentioned. When your custom leash gets grimy, simply toss it into a mesh laundry bag (to prevent the hardware from clanking against your washing machine drum) and wash it on a normal cold cycle with your regular detergent. Hang it over a door knob or clothesline to air dry. The jersey cotton will tighten up slightly in the wash, refreshing the elasticity and keeping the braid incredibly snug.
By mastering this simple, 10-minute upcycling project, you are not just saving money; you are reclaiming your independence from overpriced pet stores. You are turning waste into utility, practicing age-old knotting techniques, and keeping your pup looking incredibly stylish on a zero-dollar budget. So dig into that laundry basket, salvage that old hardware, and start braiding. Your dog—and your wallet—will thank you.
Conclusion
There is a profound satisfaction that comes from looking at an everyday object, recognizing its hidden potential, and transforming it with your own two hands. We live in a world that constantly pushes us to buy new, buy more, and replace rather than repair. By taking 10 minutes to craft this DIY t-shirt yarn dog leash, you are pushing back against that narrative. You have taken an old, forgotten garment destined for the landfill and a piece of salvaged hardware, and engineered a piece of pet gear that rivals the durability and aesthetics of high-end boutique brands.
This project is the epitome of the frugal, resourceful lifestyle. It proves that you do not need a massive budget to provide the best for your furry companions. The 4-strand round braid provides rugged strength, the jersey cotton offers ergonomic comfort, and the sailor’s whipping knot guarantees safety and reliability. Whether you are outfitting your own pup for a weekend hike or crafting a thoughtful, handmade gift for a friend’s new rescue dog, this leash is a testament to clever upcycling.
So, the next time you are cleaning out your closet and come across a stack of worn-out t-shirts, do not see trash—see raw materials. Keep your scissors sharp, keep your knots tight, and keep embracing the rugged, crafty, and budget-savvy spirit. Happy crafting, and enjoy the walk!

Makenzie is the founder and lead writer at MoneyHackTips.com — a personal finance blog dedicated to delivering street-smart financial wisdom for real people on real budgets. With 300+ published articles covering everything from debt management to investing fundamentals, Makenzie’s mission is to make every dollar work harder. When not writing about money hacks, Makenzie is testing frugal living strategies, optimizing side hustles, and helping readers build financial freedom from scratch.