
The Art of the Zero-Budget Kitchen Upgrade
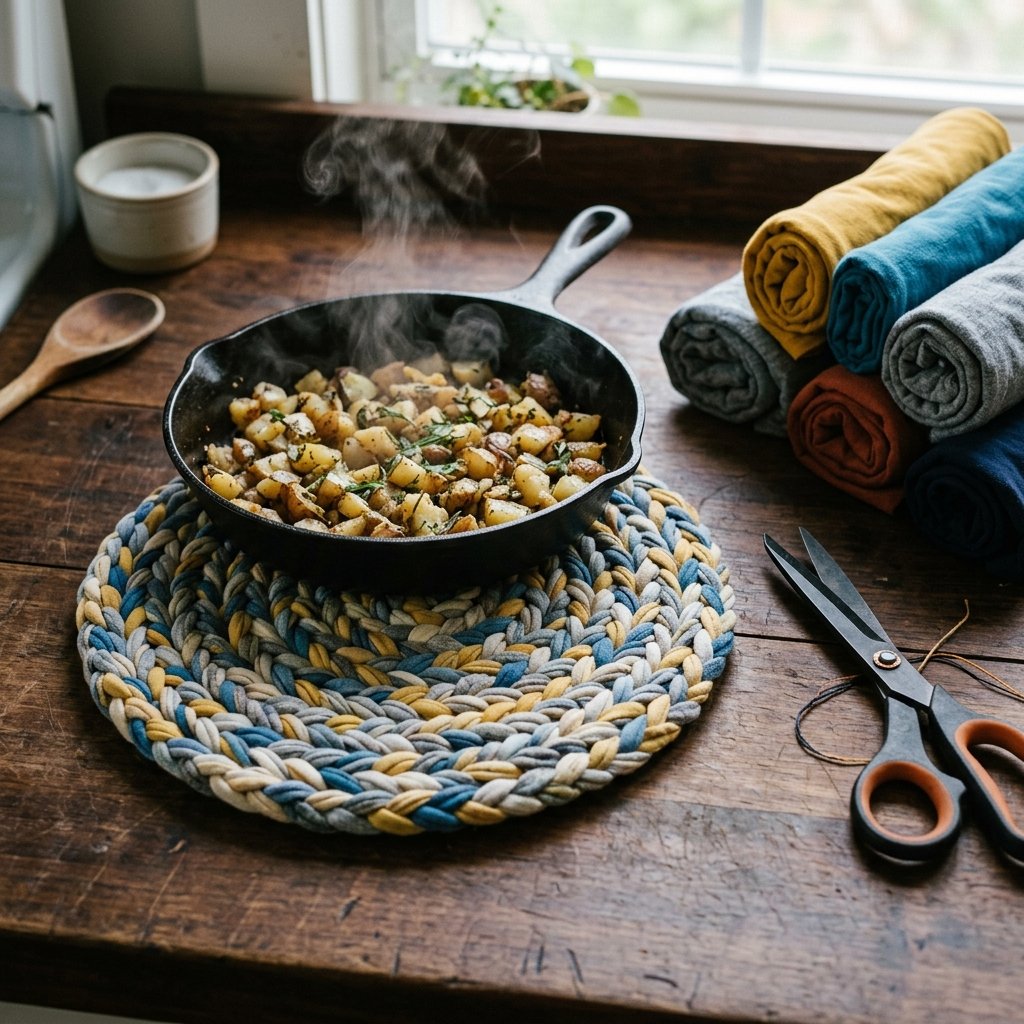
We have all been there: you have a piping hot pot of chili or a sizzling cast iron skillet, and nowhere to set it down without risking a permanent white ring on your beautiful wooden table or a scorch mark on your laminate counters. While you could head to a high-end kitchen boutique and drop $20 on a single cork or silicone mat, there is a far more resourceful, clever, and ruggedly elegant solution hiding in the back of your dresser. Those old, soft, 100% cotton t-shirts that are too stained to wear but too sentimental to toss? They are the secret ingredient to the ultimate kitchen savior.
In this guide, we are going to master the craft of T-shirt yarn (or ‘tarn’) and assemble a heavy-duty, heat-absorbent trivet that looks like it belongs in a professional chef’s rustic kitchen. This project takes exactly 10 minutes of active work, costs $0 if you have the basics on hand, and provides a sense of rugged satisfaction that only comes from turning ‘trash’ into a functional masterpiece. Let’s roll up our sleeves and save those counters.
The Raw Materials: Inventory and Cost Breakdown

Scavenging Your Supplies
The beauty of this project lies in its simplicity. You don’t need a sewing machine, a loom, or an expensive trip to the craft store. We are looking for high-quality cotton fibers. Why cotton? Because cotton is naturally heat-resistant and won’t melt under the pressure of a hot pot, unlike synthetic polyester blends.
What You Will Need
- 1 Old T-Shirt: Ideally 100% cotton, size Large or XL provides the most yarn.
- Fabric Shears: Sharp scissors make the difference between a clean braid and a frayed mess.
- Hot Glue Gun & High-Temp Glue Sticks: Or a needle and thread if you prefer a ‘no-glue’ rugged finish.
- Measuring Tape: For consistency, though ‘eyeballing it’ is perfectly acceptable for the rustic look.
| Material | Store-Bought Cost | DIY Upcycled Cost |
|---|---|---|
| Heat Resistant Trivet | $12.00 – $25.00 | $0.00 |
| T-Shirt Yarn (Spool) | $8.00 | $0.00 |
| Adhesive/Thread | $0.50 | $0.10 |
| Total | $20.50+ | $0.10 |
Safety Note: Always check the tag on your shirt. Ensure it is at least 95% cotton. Synthetic fibers like polyester or nylon can melt when they come into contact with high heat, which could ruin both your trivet and your cookware.
Mastering the Continuous Loop: Making T-Shirt Yarn
The Secret to Infinite Yarn
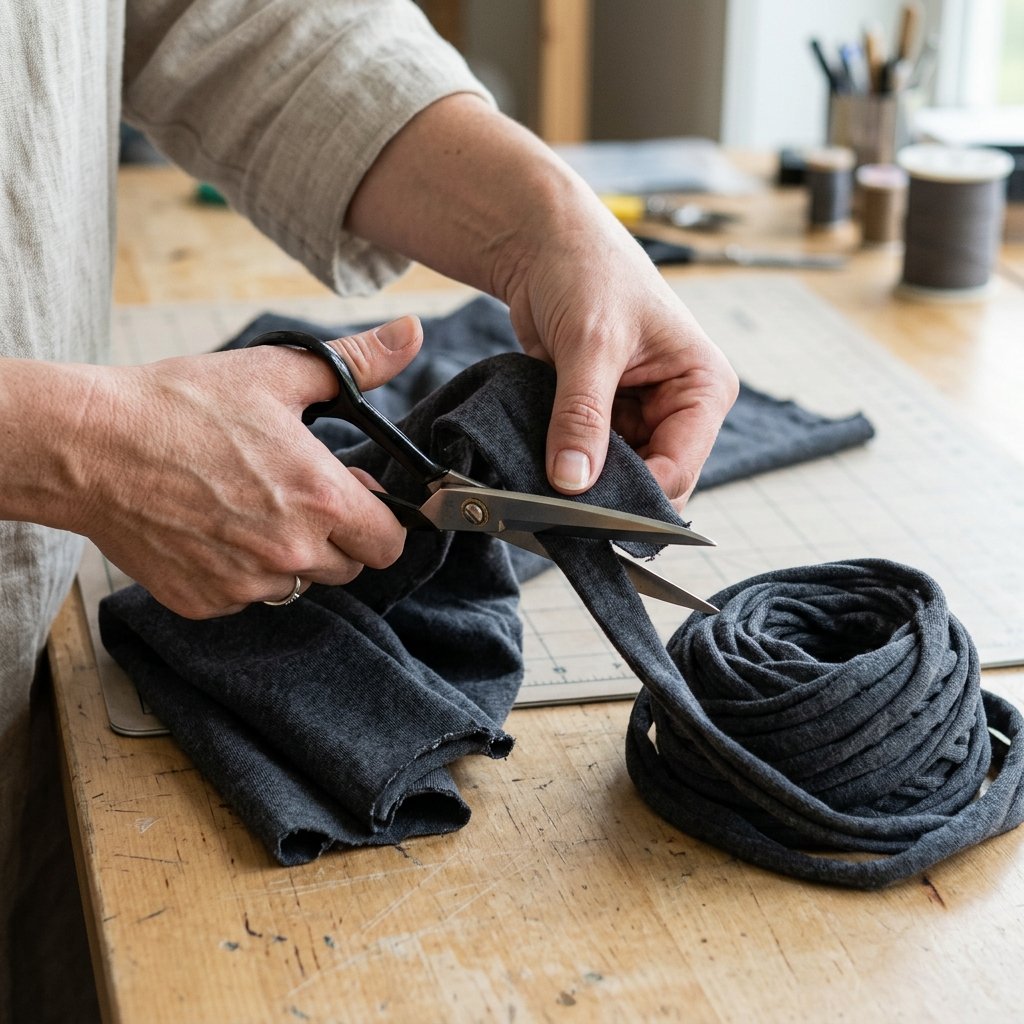
To make a seamless trivet, you need one long, continuous strand of fabric. Cutting circles or random strips will result in too many knots. We are going to use the ‘Side-to-Side’ method to create a single 20-foot strand from one shirt in under 3 minutes.
The Step-by-Step Cut
- Prep the Canvas: Lay your shirt flat on a table. Cut off the bottom hem and the top section (from the armpits up). You should be left with a rectangular tube of fabric.
- The Slotted Cut: Fold the tube in half, but leave about 1 inch of the bottom layer sticking out past the top layer.
- The Fringe: Cut strips 1 inch wide from the folded edge toward the 1-inch overhang. Stop cutting once you hit that overhang. You now have a ‘rib cage’ of fabric.
- The Diagonal Connection: Open the shirt so the uncut 1-inch strip is centered. Cut diagonally from the first slit to the second, the second to the third, and so on. This creates one long, spiraling strand.
- The Stretch: Take your long strand and pull it taut. The jersey fabric will curl inward, hiding the raw edges and creating a durable, rounded cord.
Pro Tip: The harder you pull during the ‘stretch’ phase, the thinner and tighter your yarn will become. For a chunky, rugged trivet, give it a gentle tug just to curl the edges.
The 10-Minute Braided Assembly
Building the Heat Shield
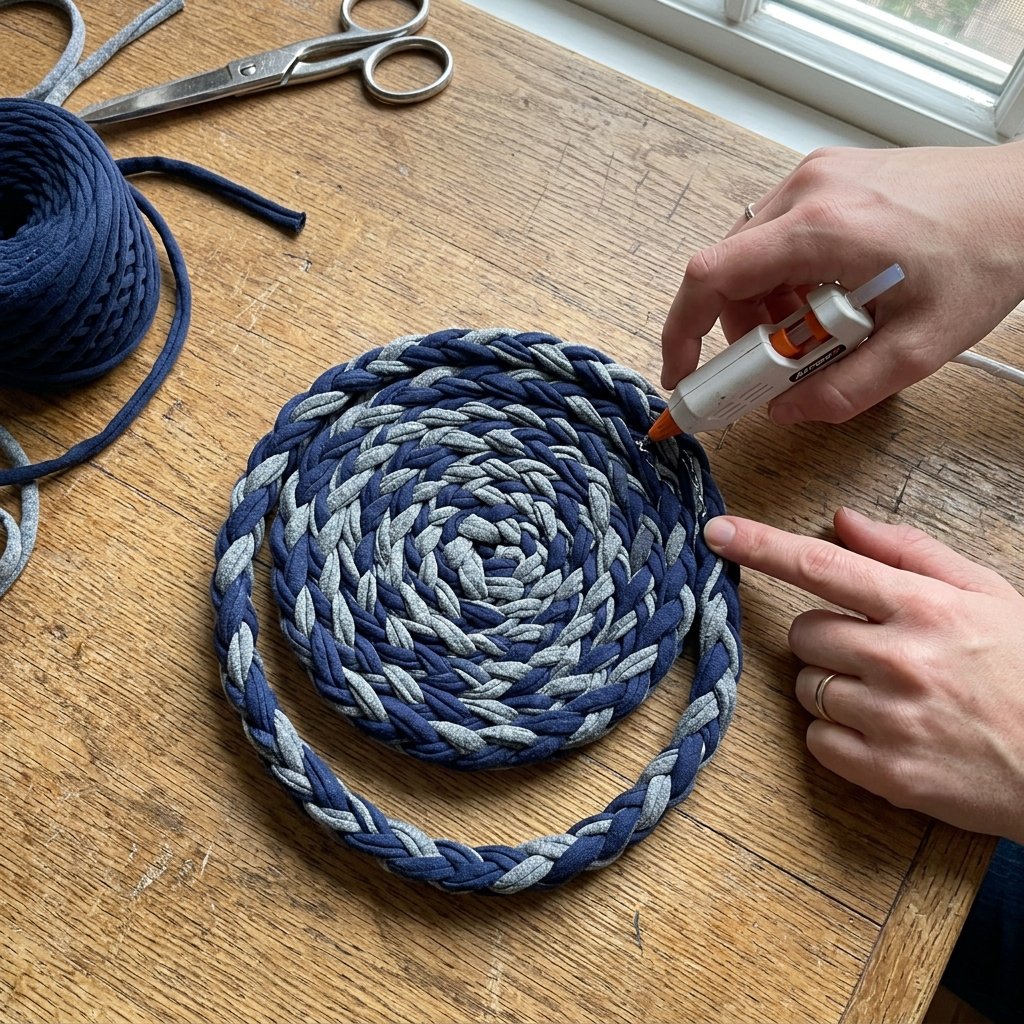
Now that you have your ‘tarn’ (T-shirt yarn), it is time to assemble the trivet. We will use a classic three-strand braid for maximum thickness and heat displacement.
Construction Steps
- The Braid: Cut three equal lengths of your T-shirt yarn (about 6 feet each). Knot them at the top or secure them with a heavy clip. Braid them tightly until you reach the end. Secure the end with a small dab of glue or a quick stitch.
- The Coil: Starting with one end of the braid, begin rolling it into a tight spiral, like a snail shell. Keep the braid flat so the trivet remains level.
- The Bond: As you coil, apply a thin bead of high-temp hot glue along the side of the braid every 2 inches. Press firmly to ensure the fibers bond.
- The Finish: When you reach the end of your braid, tuck the raw tail underneath the previous loop and glue it securely. This creates a ‘hidden seam’ that looks professional and clean.
| Trivet Size | Braid Length Needed | Estimated Time |
|---|---|---|
| Small (Coaster) | 2 Feet | 3 Minutes |
| Medium (Standard Pot) | 5-6 Feet | 10 Minutes |
| Large (Casserole) | 10-12 Feet | 18 Minutes |
Rugged Variations: The Square Weave and the Hexagon

Elevating the Aesthetic
If the spiral look is too ‘shabby-chic’ for your masculine-elegant kitchen, you can opt for a woven square design. This requires a bit more precision but results in a very sturdy, geometric trivet that looks like a high-end designer piece.
The Cardboard Loom Method
- Cut a square of cardboard 1 inch larger than your desired trivet size.
- Cut small notches every 1/2 inch along the top and bottom edges.
- String your T-shirt yarn vertically through the notches to create the ‘warp’.
- Weave a long strand of yarn horizontally (over-under-over) through the warp.
- Once finished, slide the loops off the cardboard and knot the ends for a rugged, fringed finish.
The Budget Mantra: A true craftsman doesn’t buy what they can build; they see the potential in what others discard.
Maintenance and Care: Keeping Your Trivets Fresh

Durability Meets Practicality
Because these are made from clothing, they are incredibly easy to maintain. Unlike wood or cork trivets that can crack or mold, T-shirt yarn trivets are built to last and can be refreshed in the laundry.
Care Instructions
- Machine Washable: Toss them in a mesh laundry bag and wash on a cold, gentle cycle.
- Air Dry Only: To maintain the integrity of the hot glue or the tight weave, lay them flat to dry. Do not put them in a high-heat dryer as it may soften the adhesive.
- Stain Pre-treatment: If you spill tomato sauce or grease, treat it exactly like you would a T-shirt. A dab of dish soap and a quick scrub will do the trick.
| Feature | T-Shirt Yarn Trivet | Silicone Trivet |
|---|---|---|
| Absorbency | High (Soaks up condensation) | Zero (Water pools) |
| Washability | Easy (Laundry) | Dishwasher |
| Repairability | 100% (Just re-glue/sew) | 0% (Must replace) |
| Eco-Impact | Positive (Upcycled) | Negative (New Plastic/Silicone) |
Conclusion
The Ultimate Sustainable Kitchen Essential
In just 10 minutes, you have successfully diverted textile waste from a landfill and created a functional, stylish, and ruggedly handsome tool for your kitchen. Whether you are protecting your own counters or bundling a set of three with a bottle of wine as a thoughtful, budget-savvy housewarming gift, the DIY T-shirt yarn trivet is a testament to the power of resourceful crafting.
You don’t need a massive budget to have a home that feels curated and high-end. You just need a sharp pair of scissors, a little bit of time, and the creative eye to see the treasure in the trash. Now, go grab that old favorite shirt and give it a second life on your dinner table!

Makenzie is the founder and lead writer at MoneyHackTips.com — a personal finance blog dedicated to delivering street-smart financial wisdom for real people on real budgets. With 300+ published articles covering everything from debt management to investing fundamentals, Makenzie’s mission is to make every dollar work harder. When not writing about money hacks, Makenzie is testing frugal living strategies, optimizing side hustles, and helping readers build financial freedom from scratch.