The High Cost of the ‘Pet Tax’ and the Upcycler’s Solution
Let’s talk about the ‘Pet Tax.’ You know exactly what I mean—that inexplicable 300% markup applied to anything sold in a brightly lit pet boutique. A simple nylon harness that costs pennies to manufacture is often sold for $25 to $45. As frugal DIYers, we know better. Your dog doesn’t care about a designer logo; they care about comfort, flexibility, and the scent of home. By repurposing a well-worn 100% cotton T-shirt, you aren’t just saving money; you’re creating a bespoke, breathable, and washable piece of gear that fits your dog’s unique proportions better than any mass-produced plastic strap ever could.
In this guide, we are going to strip away the complexity of traditional sewing. We’re using the ‘Tarn’ (T-shirt yarn) method—a clever, resourcefully-creative technique that relies on the natural stretch and strength of jersey knit fabric. Whether you’re a budget-savvy parent looking for a weekend project or a rugged minimalist who appreciates functional gear, this 20-minute build is your ticket to a zero-cost pet upgrade. Let’s dive into the anatomy of the perfect upcycled harness.
Budget-Savvy Mantra: ‘True luxury isn’t bought at a mall; it is crafted at a workbench with materials that others have overlooked.’
The Raw Materials: Why Your Old Shirts are Gold Mines

Before we start cutting, we need to select the right ‘donor’ fabric. Not all shirts are created equal. For a dog harness that needs to withstand pulling and outdoor elements, you want a heavyweight 100% cotton or a cotton-spandex blend. Avoid thin, ‘burn-out’ style tees or anything with side seams if possible, as these create weak points in your yarn.
Material Selection & Budget Comparison
The beauty of this project is that the materials are likely already in your rag bin. If not, a quick trip to a thrift store’s $1 bin will provide enough fabric for three or four harnesses. Compare this to the retail alternative below:
| Item | Retail Store Price | DIY Upcycle Cost |
|---|---|---|
| Nylon Dog Harness | $29.99 | $0.00 |
| Custom Fitting Fee | $15.00 | $0.00 |
| Heavy Duty Fabric | $12.00/yard | $0.00 (Old Tee) |
| Total Cost | $56.99 | $0.00 |
- The ‘Tarn’ Source: Look for XL or XXL shirts to get the longest continuous strands of yarn.
- The Shears: Use the sharpest fabric scissors you own. A clean cut ensures the fabric curls correctly into yarn.
- The Hardware: You can upcycle the D-ring from an old, frayed harness or buy a pack of stainless steel rings for under $2.
Phase 1: Engineering the T-Shirt Yarn (The ‘Tarn’ Method)
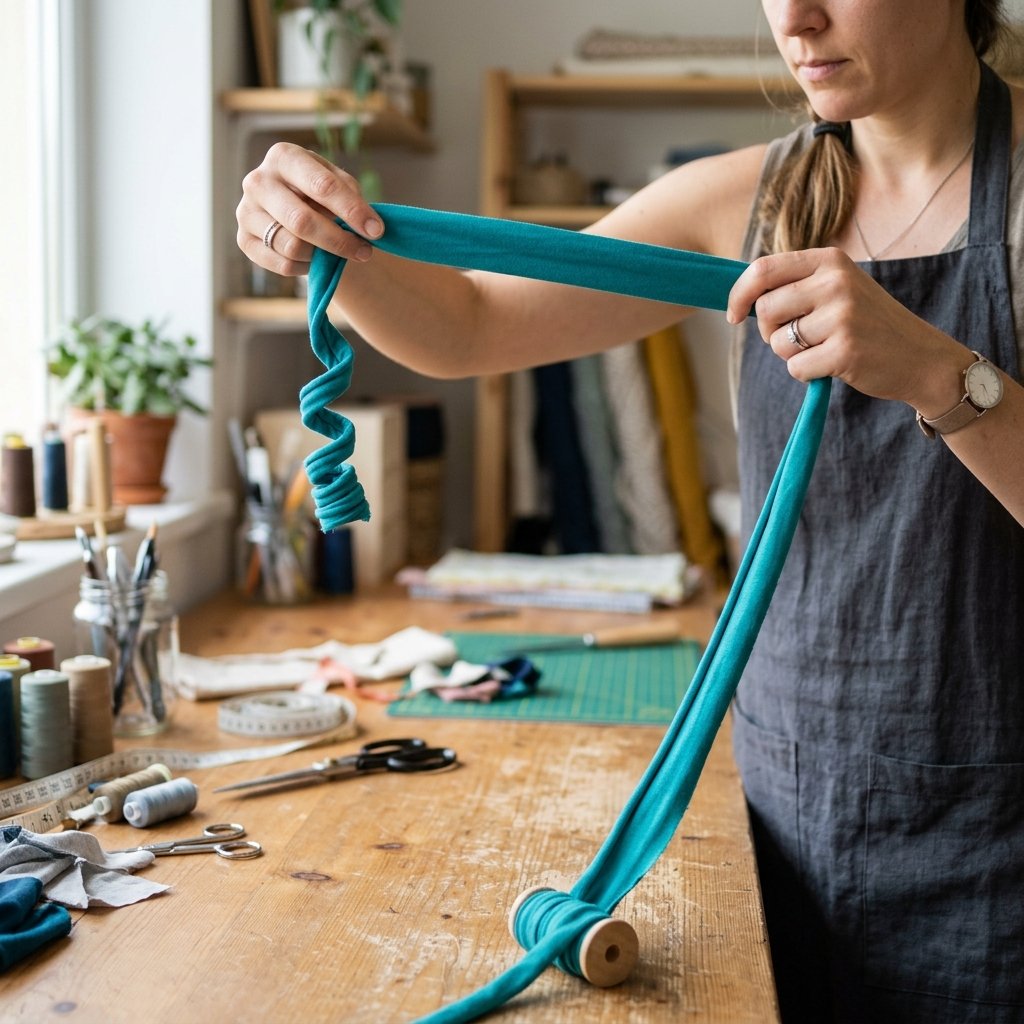
To create a harness that is both rugged and soft, we must first convert our flat fabric into a structural cord. This process is surprisingly therapeutic and takes less than 5 minutes.
The Continuous Loop Cut
- Lay the shirt flat on your workspace and cut off the bottom hem. Discard it (or save it for a smaller project).
- Cut the body of the shirt into 2-inch wide strips, but stop your cut about 1 inch before you reach the opposite side. This keeps all the strips attached to a ‘spine.’
- Open the shirt up so the uncut ‘spine’ is centered. Cut diagonally across the spine to connect the slits. This creates one long, continuous strand of fabric.
- The Magic Stretch: Hold one end of the strip and pull firmly. The jersey fabric will curl inward, hiding the raw edges and creating a durable, rounded cord known as T-shirt yarn.
Pro-Tip: ‘Pulling the yarn not only hides the raw edges but also pre-stretches the fabric, ensuring your harness won’t sag after the first walk.’
Phase 2: The ‘Tailor-Made’ Measurement Guide

A harness is only as good as its fit. Because we are using a braided T-shirt yarn method, we have the advantage of infinite adjustability. Unlike stiff nylon, this yarn will mold to your dog’s chest and shoulders.
Required Measurements for a Perfect Fit
Grab a soft measuring tape (or a piece of string and a ruler) and record the following in inches:
- The Girth: Measure the widest part of your dog’s ribcage, right behind the front legs.
- The Neck: Measure where a collar usually sits, but keep it slightly loose.
- The Chest Plate: Measure from the base of the neck to the center of the girth line between the front legs.
| Dog Size | Estimated Yarn Length Needed | Braid Thickness Recommendation |
|---|---|---|
| Small (10-20 lbs) | 15 feet | 3-Strand Simple Braid |
| Medium (25-50 lbs) | 30 feet | 6-Strand Box Braid |
| Large (55+ lbs) | 50 feet | Double 4-Strand Weave |
Phase 3: Braiding for Strength—The 20-Minute Assembly

Now we assemble. We are going to use a four-strand round braid. This technique provides the highest tensile strength and a rugged, ‘rope-like’ aesthetic that looks incredibly masculine and elegant.
Step-by-Step Assembly
- The Anchor: Loop four strands of T-shirt yarn through your stainless steel D-ring. Secure them with a ‘Cow Hitch’ knot. You now have 8 working strands.
- The Braid: Divide the strands into two groups. Cross the outermost left strand under the middle two and over the innermost right. Repeat from the right side. This creates a dense, non-slip cord.
- The Y-Shape: Braid a length equal to the ‘Chest Plate’ measurement. At this point, split the strands into two groups to create the neck loops.
- The Final Connection: Bring the neck loops back to the main ‘spine’ and secure them using a ‘Square Knot’ or a ‘Surgeon’s Knot’ for maximum security.
- The Girth Strap: Use the remaining yarn to create a simple wrap-around strap that ties at the top of the back, allowing for 100% adjustability as your dog’s weight or coat thickness changes.
Safety Note: ‘Always ensure you can fit two fingers comfortably between the harness and your dog’s skin. Test the knots under tension before your first outdoor excursion.’
Style Variations: From ‘Tactical’ to ‘Boho-Chic’

Just because it’s made from old clothes doesn’t mean it can’t look high-end. By playing with colors and knotting styles, you can mimic expensive boutique brands.
Customization Ideas
- The Tactical Look: Use charcoal grey and olive green yarn. Add a small ‘carabiner’ instead of a D-ring for a rugged, utility aesthetic.
- The Nautical Look: Use navy blue and white yarn. Finish the ends with ‘whipping twine’ (a classic sailor’s technique) to prevent fraying and add a professional touch.
- The Multi-Color Pop: Use three different shades of the same color (e.g., light blue, royal blue, and navy) for a sophisticated gradient effect.
Pro-Tip: If you have a dog that pulls, you can ‘core’ your T-shirt yarn by braiding it around a piece of $0.50 paracord. This gives you the softness of the cotton with the 550-lb break strength of nylon.
Conclusion
Walk Proud with Your Zero-Waste Masterpiece
By spending just 20 minutes and $0, you have successfully bypassed the overpriced pet industry and created a piece of gear that is functional, washable, and stylish. This T-shirt yarn harness isn’t just about saving $30; it’s about the satisfaction of looking at your dog and knowing that you provided for them with your own two hands and a bit of clever resourcefulness.
Don’t stop here! Once you master the ‘Tarn’ braid, the possibilities are endless. You can create matching leashes, chew toys, or even a comfortable bed using the same upcycling principles. Your wallet stays full, your dog stays comfortable, and the planet stays a little greener. Now, grab that old favorite shirt and get crafting—your pup is waiting for their next adventure!

Makenzie is the founder and lead writer at MoneyHackTips.com — a personal finance blog dedicated to delivering street-smart financial wisdom for real people on real budgets. With 300+ published articles covering everything from debt management to investing fundamentals, Makenzie’s mission is to make every dollar work harder. When not writing about money hacks, Makenzie is testing frugal living strategies, optimizing side hustles, and helping readers build financial freedom from scratch.