
The Delivery Box Revolution
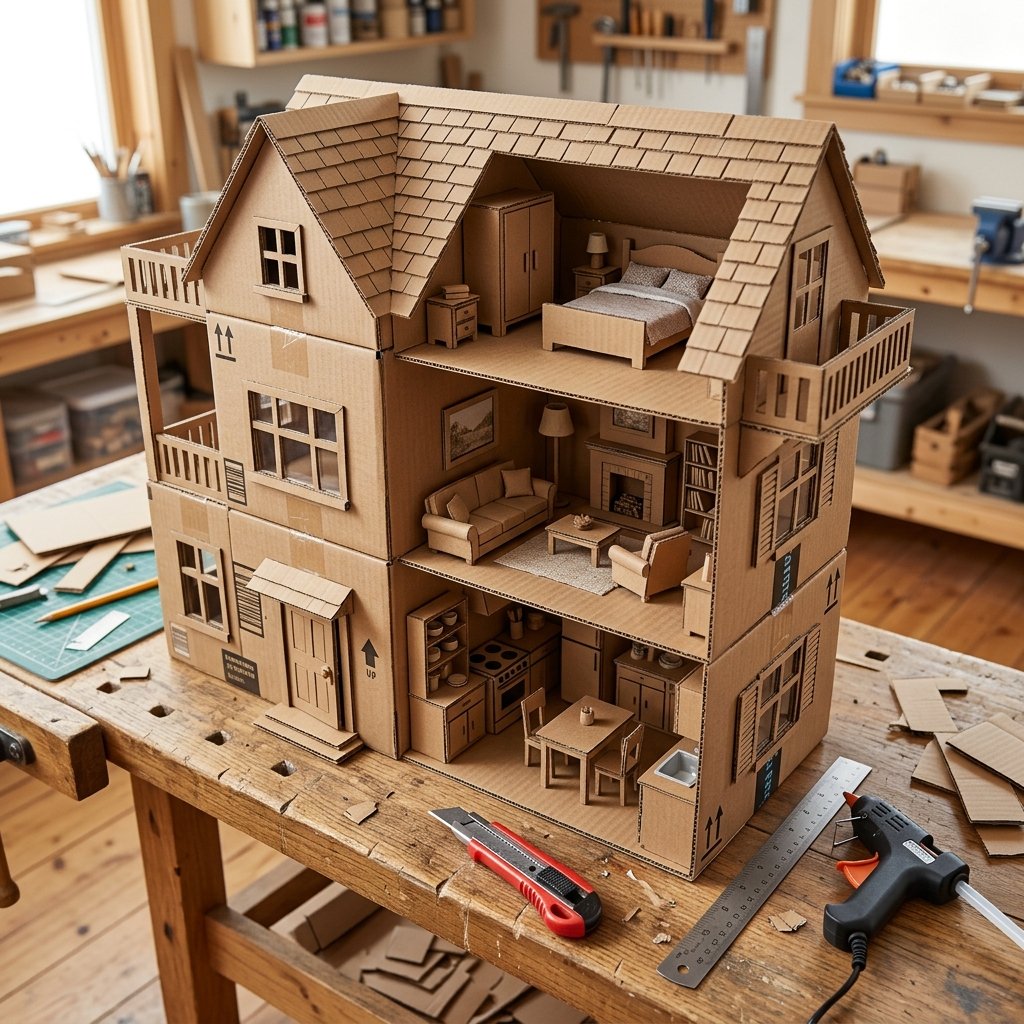
We’ve all been there: the living room is buried under a mountain of shipping boxes from your latest online haul. While most see a trip to the recycling bin, the resourceful DIYer sees the skeletal structure of a multi-story dream home. In an era where plastic dollhouses can easily retail for $150 to $300, building your own isn’t just a frugal win—it’s an act of creative engineering. This project combines the rugged practicality of structural design with the whimsical charm of miniature aesthetics. We aren’t just taping boxes together; we are architecting a durable, zero-cost heirloom that encourages hours of imaginative play. Whether you are a handy dad looking for a weekend project or a budget-savvy crafter aiming for the ultimate birthday gift, this guide will show you how to turn ‘trash’ into a magical, multi-story masterpiece.
The Architect’s Inventory: Gathering Your Free Materials
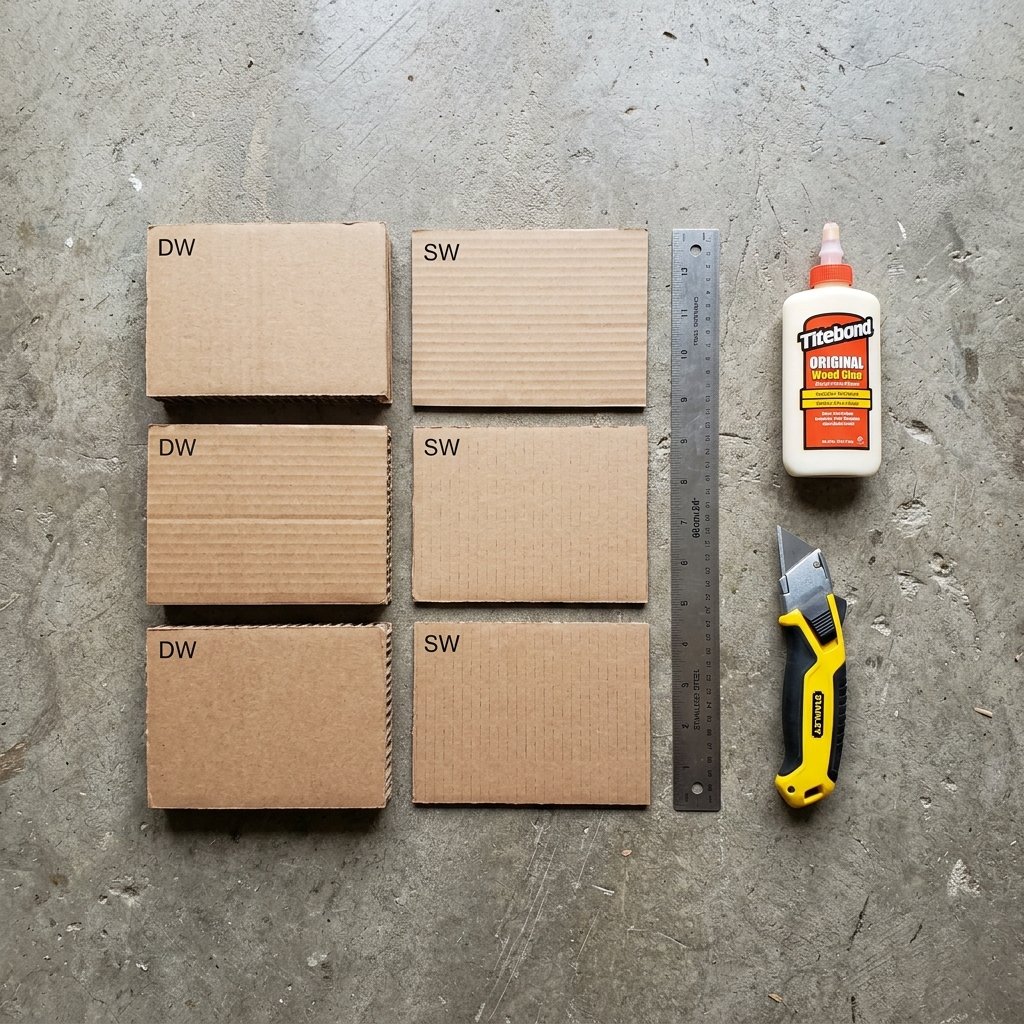
Before we make the first cut, we need to scout the right materials. Not all cardboard is created equal. For a structure that survives the ‘enthusiastic’ play of a toddler, you need double-walled corrugated cardboard for the base and primary supports. This is the stuff heavy appliances or bulk grocery orders come in. For the interior walls and shingles, thinner single-walled boxes (like those from a certain smiling tech giant) work perfectly.
The Essential Tool Kit
You don’t need a workshop full of power tools, but precision is key to that ‘masculine-elegant’ finish. Here is what you should have on your workbench:
- Heavy-duty Utility Knife: For clean, straight cuts through thick board.
- Metal Straight-Edge Ruler: Essential for architectural precision and safety.
- High-Temp Hot Glue Gun: The ‘welder’ of the cardboard world.
- Wood Glue: For long-term structural bonds that hot glue can’t match.
- Clamps or Heavy Books: To hold layers together while the wood glue cures.
| Material/Tool | Store-Bought Cost | DIY/Upcycled Cost |
|---|---|---|
| Primary Structure (Large Boxes) | $45.00 | $0.00 |
| Adhesives (Glue/Tape) | $15.00 | $3.00 |
| Decorative Elements (Paint/Scraps) | $30.00 | $0.00 |
| Total Investment | $90.00+ | $3.00 |
“The secret to a sturdy cardboard build is in the grain. Align the internal fluting vertically for walls to maximize weight-bearing capacity.”
Structural Integrity: Framing the Foundation and Floors
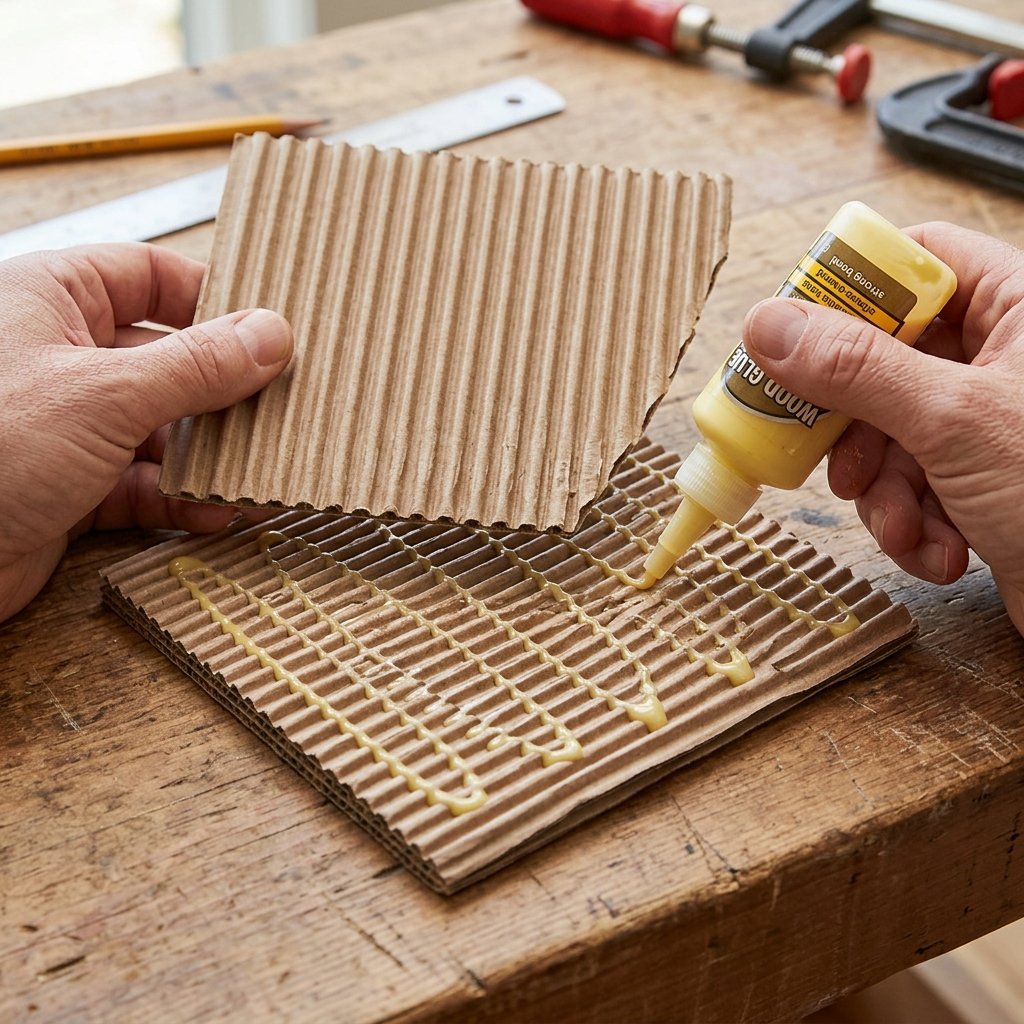
The biggest mistake in DIY dollhouses is a lack of ‘bones.’ To prevent sagging, we use a box-beam construction method. Start by selecting your largest, sturdiest box as the ground floor. If you want a wide mansion, join two boxes side-by-side using a ‘cardboard hinge’—a strip of cardboard scored down the middle and glued across the seam.
Step-by-Step Framing
- Reinforce the Base: Glue two layers of cardboard together with the grain running in opposite directions (cross-lamination). This creates a base that won’t warp.
- Vertical Support Columns: In the corners of your rooms, glue 1-inch wide strips of folded cardboard. These act as ‘studs’ to support the weight of the stories above.
- Floor Joists: Before adding the second floor, glue thin strips of cardboard standing on their edge across the ceiling of the first floor. This prevents the ‘second story’ from bowing in the middle.
- The Interlocking Tab Method: For the most secure fit, cut tabs into your walls that slot into pre-cut notches in the floor. This mechanical connection is much stronger than glue alone.
By spending 20 minutes on these structural details now, you ensure the house lasts for years rather than days. Remember, we are building for durability.
Architectural Flourishes: Windows, Stairs, and Roofing
Adding the Magic
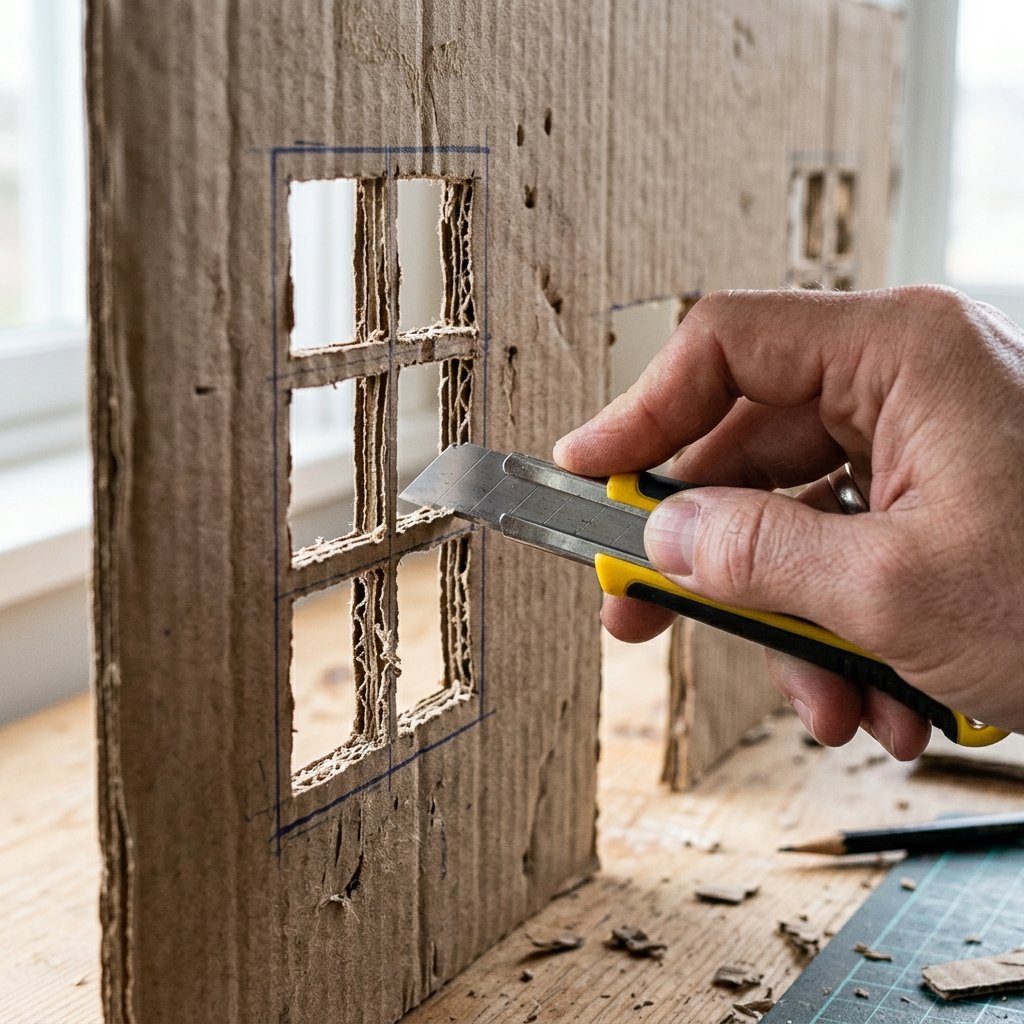
Now that the frame is solid, it’s time for the details that elevate this from a box to a home. Windows should be measured and marked with a pencil and square before cutting. For a sophisticated look, don’t just cut holes; leave ‘muntins’ (the cross-bars in windows) for a classic Georgian or Farmhouse aesthetic.
The Grand Staircase
Stairs are often the hardest part, but here is a clever hack: use the ‘accordion fold’ method. Take a long strip of cardboard, score it every 1 inch, and fold it back and forth. Glue the ‘treads’ to two diagonal side supports. It’s fast, 100% free, and looks professionally manufactured.
The Gabled Roof
A peaked roof adds height and drama. Cut two large triangles for the gables and a large rectangle for the roof deck. To create realistic shingles without spending a dime, use the flaps from your smaller boxes. Cut them into 2-inch circles or squares and overlap them starting from the bottom of the roof line moving up. This adds incredible texture and a hand-crafted artisan feel.
| Feature | Technique | Time Estimate |
|---|---|---|
| Windows | X-Acto Precision Cut | 30 mins |
| Staircase | Accordion Fold & Support | 20 mins |
| Roof Shingles | Overlapping Scraps | 45 mins |
| Balcony | Cantilevered Cardboard | 15 mins |
Interior Design on a Dime: Upcycled Furniture
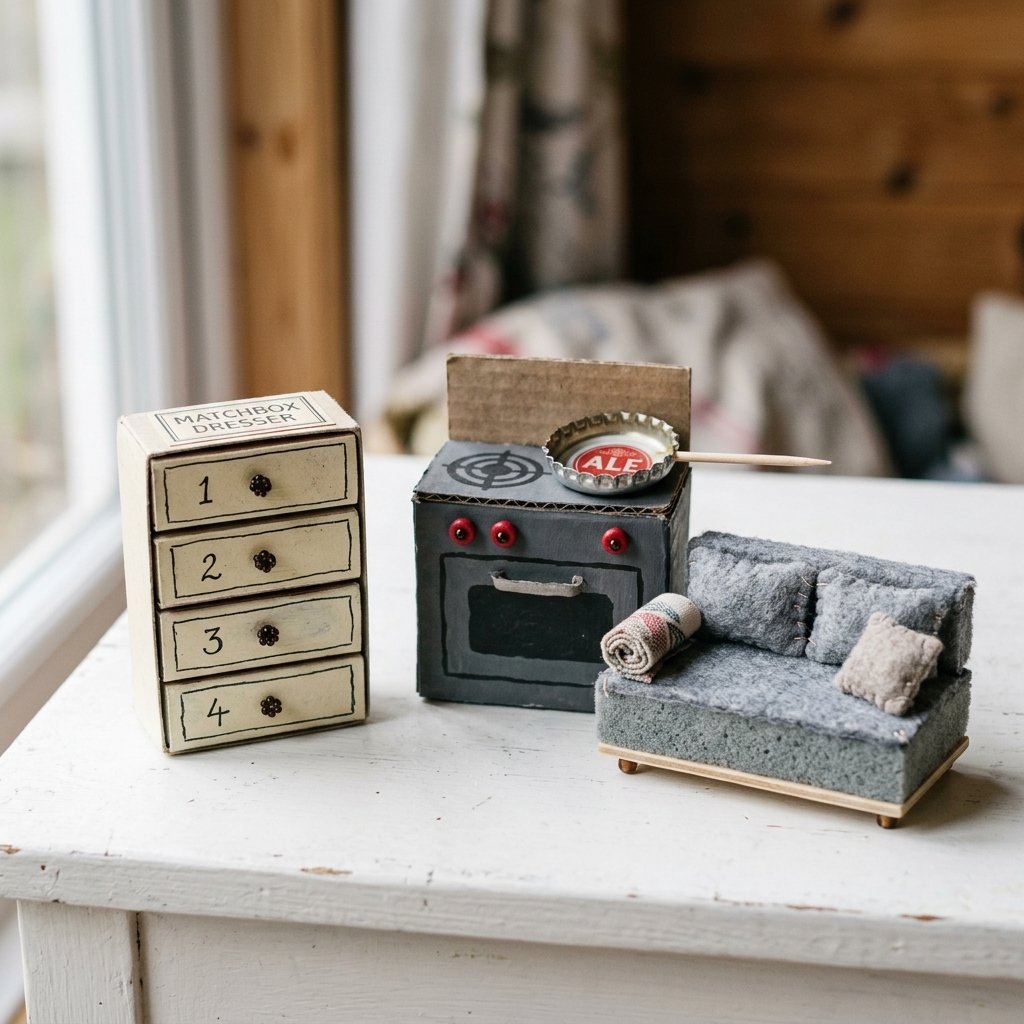
A house is just a shell until it’s furnished. This is where your inner stylist shines. Look at your recycling bin through a miniature lens. A plastic bottle cap isn’t trash; it’s a gourmet skillet. A scrap of denim from old jeans? That’s a high-end area rug.
The 3-Ingredient Furniture Recipe
- Matchboxes: Glue three together and add bead ‘knobs’ for a perfect bedroom dresser.
- Toilet Paper Rolls: Cut in half vertically and upholstered with scrap fabric to create chic mid-century modern ‘tub chairs.’
- Twigs from the Yard: Bound together with twine to create a rustic, ‘Pottery Barn’ style dining table.
For the walls, don’t buy expensive dollhouse wallpaper. Use scrapbook paper, leftover gift wrap, or even print out marble and wood-grain textures from your home computer. Apply with a thin layer of glue stick to avoid wrinkling the cardboard ‘drywall.’
“Luxury is in the details, not the price tag. A bit of twine and a coat of black paint can turn a cardboard scrap into a designer lamp.”
The Finishing Touches: Lighting and Exterior Paint
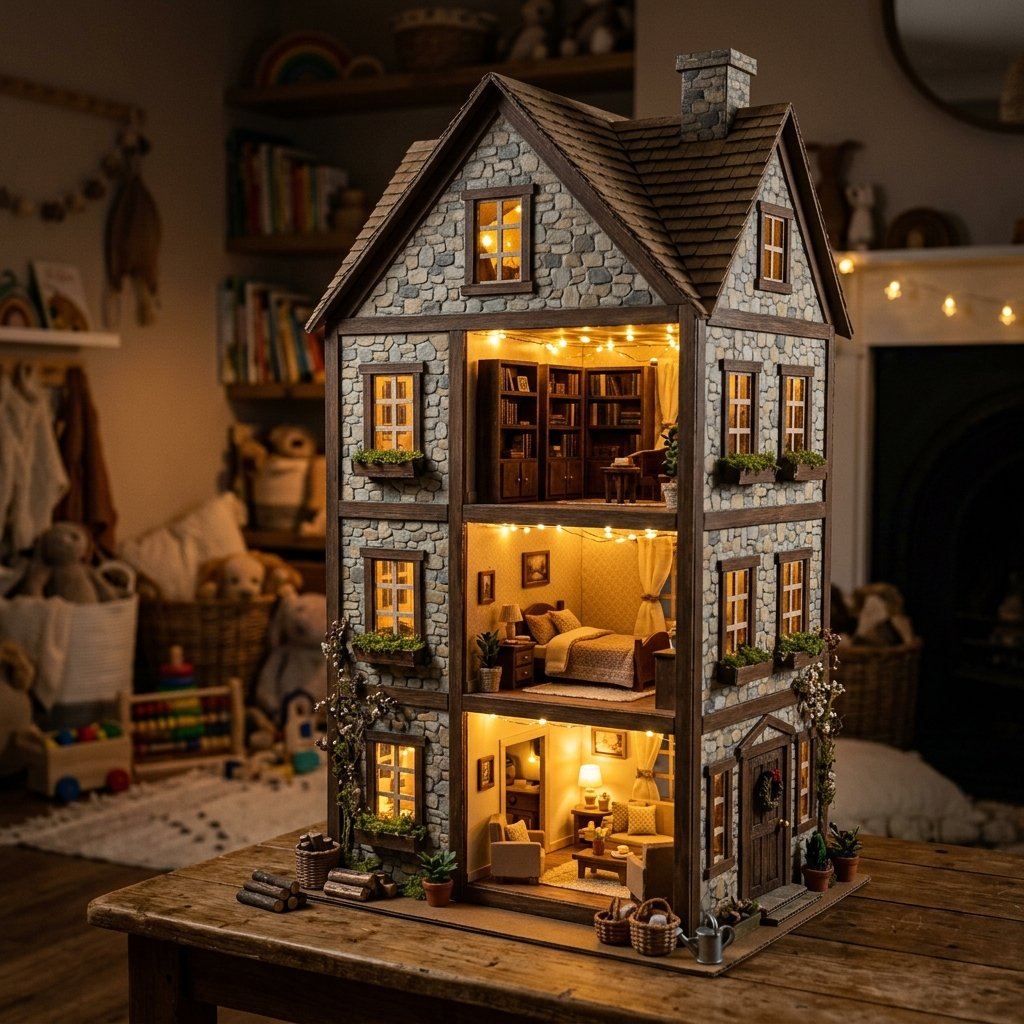
To truly bring the ‘magical’ element to life, we need to address the exterior and the ambiance. If you have a string of LED fairy lights (battery operated) left over from Christmas, you can wire the entire house. Poke small holes in the ceilings and thread the bulbs through. Hide the battery pack in a ‘chimney’ or a ‘basement’ compartment.
The ‘Faux Stone’ Paint Trick
Want a high-end exterior? Mix baking soda into standard acrylic craft paint. This creates a thick, textured paste that, when dried, looks like expensive stucco or stone. It covers the cardboard seams perfectly and adds a rugged, premium weight to the structure.
| DIY Finish | Material Used | Visual Effect |
|---|---|---|
| Stucco Walls | Paint + Baking Soda | High-end texture |
| Hardwood Floors | Brown Marker + Ruler | Polished wood grain |
| Flower Boxes | Egg Carton + Greenery | Whimsical charm |
| Lighting | LED Fairy Lights | Magical glow |
By the time you finish these steps, you will have a toy that looks like a $300 boutique find but cost you nothing more than a few sticks of hot glue and some creative grit.
Conclusion
A Legacy of Creative Play
Building a multi-story dollhouse from delivery boxes is more than just a budget-savvy hack; it’s a lesson in resourcefulness for the whole family. You’ve taken something destined for the bin and engineered a theater for the imagination. This project proves that you don’t need a massive bank account to provide ‘magical’ childhood memories—you just need a sharp blade, a bit of glue, and the vision to see the potential in the mundane. Your total savings on this project likely exceed $200, but the pride of saying ‘I built this’ is priceless. Now, grab those boxes and start architecting!

Makenzie is the founder and lead writer at MoneyHackTips.com — a personal finance blog dedicated to delivering street-smart financial wisdom for real people on real budgets. With 300+ published articles covering everything from debt management to investing fundamentals, Makenzie’s mission is to make every dollar work harder. When not writing about money hacks, Makenzie is testing frugal living strategies, optimizing side hustles, and helping readers build financial freedom from scratch.