
The Art of the Custom Rig
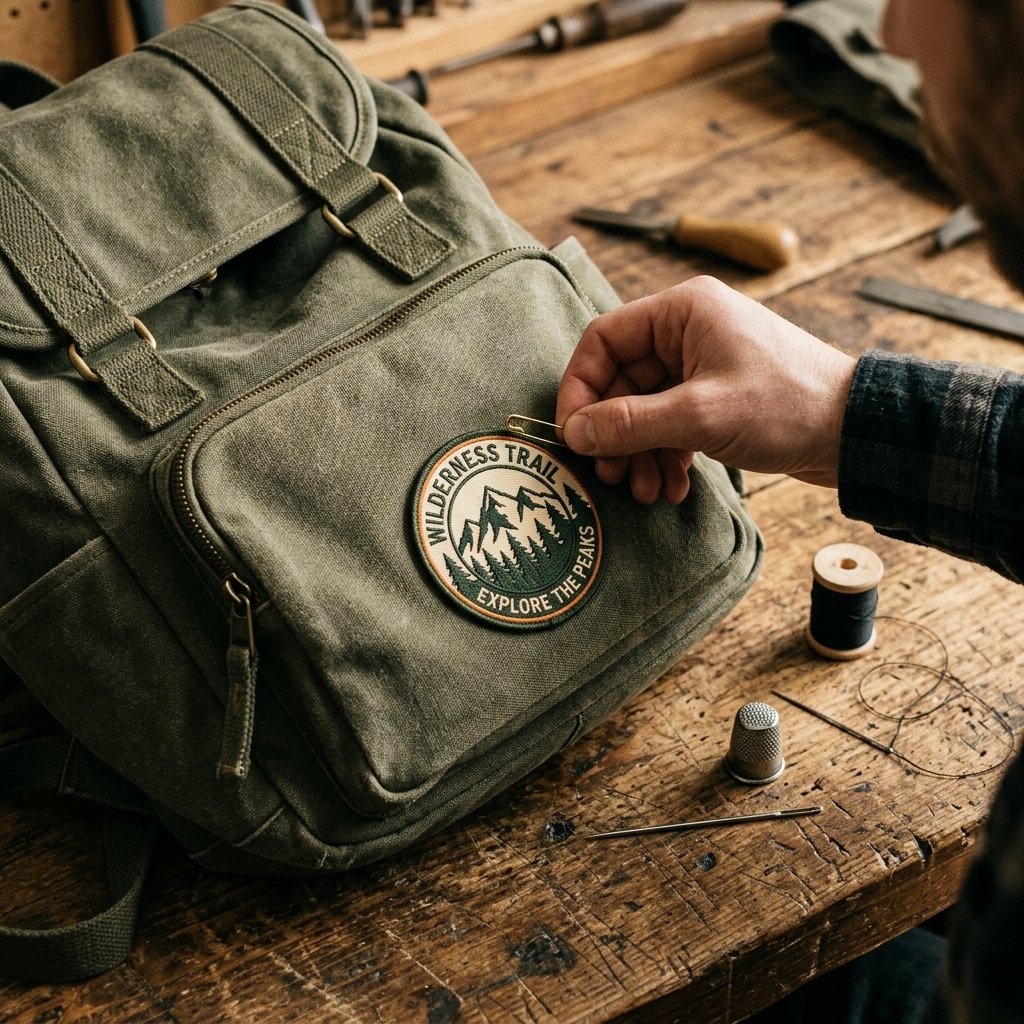
There is a certain pride that comes with gear that has a story to tell. A backpack shouldn’t just be a vessel for your daily carry; it should be a reflection of your journeys, your interests, and your resourcefulness. Whether you are a budget-savvy traveler looking to identify your bag on a crowded bus or a handy parent repairing a snagged zipper flap, knowing how to sew a patch is a fundamental skill in the upcycler’s arsenal. You don’t need an expensive sewing machine or a professional tailor to get a bulletproof finish. With just a few dollars in materials and a bit of patience, you can turn a generic store-bought bag into a bespoke piece of equipment that looks like it belongs in a high-end boutique or a rugged outdoor shop.
In this guide, we aren’t just ‘stitching’; we are engineering a permanent bond between your patch and your pack. We will cover the tools of the trade, the best stitches for durability, and the clever tricks that make the process super easy even if you have never picked up a needle in your life. Let’s dive into the world of rugged customization and save some serious cash while we’re at it.
The Gearhead’s Toolkit: Essential Supplies for Rugged Repairs
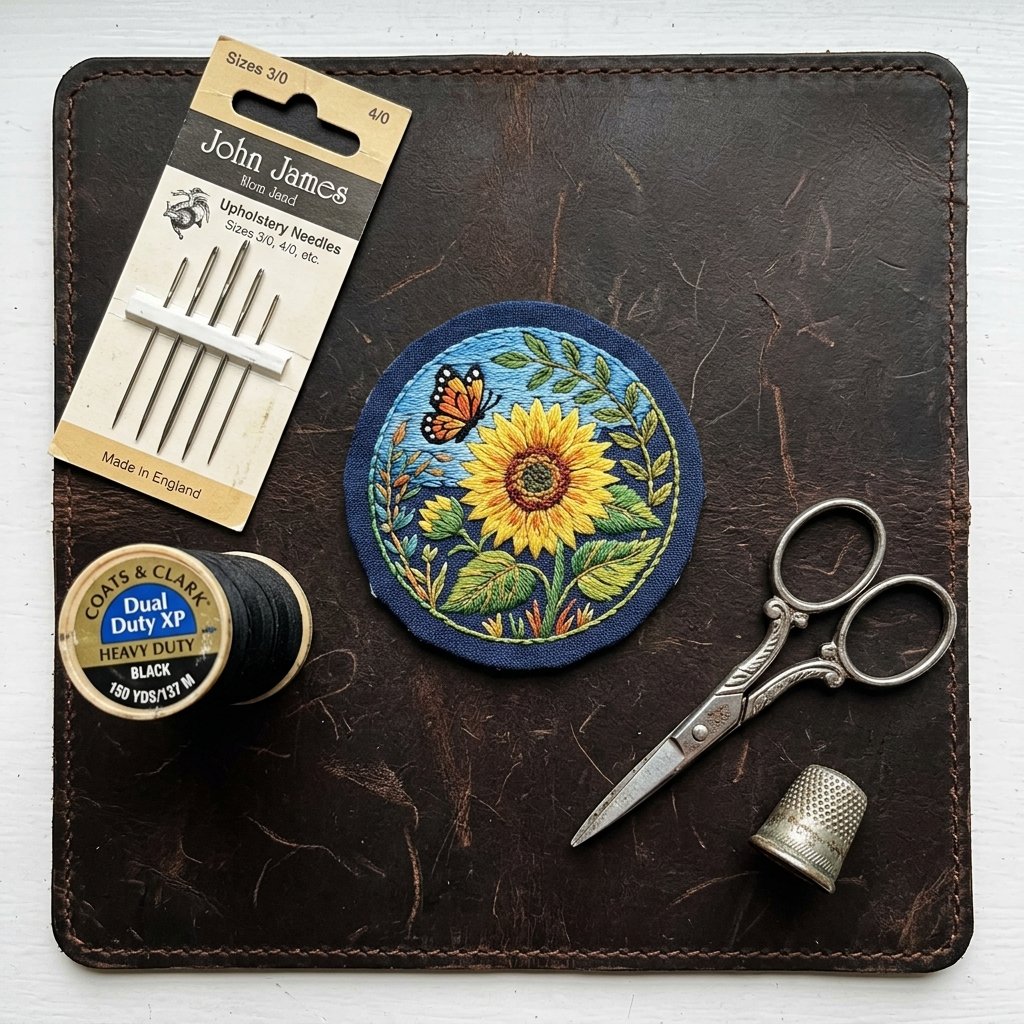
Before we make the first puncture, we need to assemble our kit. Unlike delicate garment sewing, backpack fabric—usually heavy canvas, Cordura, or thick nylon—requires tools that can handle the resistance. A standard flimsy needle from a travel kit won’t cut it here; you’ll likely bend it before the first stitch is complete. We are looking for practical, heavy-duty supplies that ensure your patch stays put through rain, wind, and heavy use.
| Tool | Purpose | Estimated Cost |
|---|---|---|
| Upholstery Needles | Heavy-duty needles that won’t bend in thick canvas. | $2.50 |
| Heavy-Duty Thread | Polyester or nylon thread for maximum tensile strength. | $1.50 |
| Metal Thimble | Protects your thumb when pushing through tough fabric layers. | $1.00 |
| Tailor’s Chalk or Pencil | Marking the exact placement so the patch isn’t crooked. | $0.50 |
| Small Snips or Scissors | For clean thread cuts. | $3.00 |
Frugal Guru Tip: If you don’t want to buy tailor’s chalk, a simple sliver of dried-up bar soap works perfectly for marking fabric and washes right off with a damp cloth!
Strategic Placement: Mapping Out Your Backpack’s New Identity
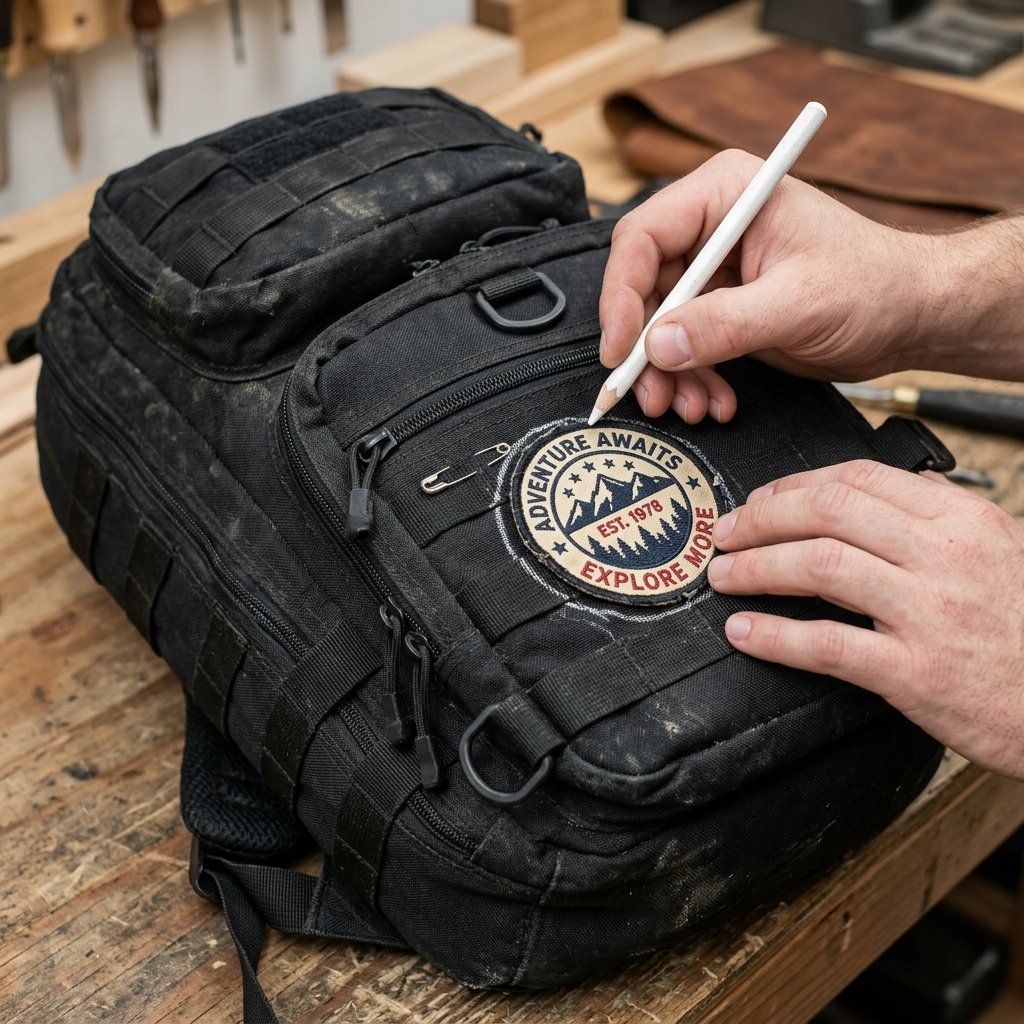
Finding the Sweet Spot
Placement is everything. A patch that is slightly off-center will haunt you every time you put your bag on. Start by stuffing your backpack with towels or clothes to mimic its natural shape when full. This prevents you from sewing a patch onto a flat surface only to find it looks distorted or ‘pulls’ when the bag is actually in use. Use your tailor’s chalk to trace the outline of the patch once you’ve found the perfect spot.
Securing the Perimeter
Do not rely on the ‘iron-on’ adhesive that comes on the back of many patches. While it’s a great temporary fix, the heat required to melt that glue can often damage synthetic backpack fabrics like nylon. Instead, use straight pins or even a small dab of a washable glue stick to hold the patch in place while you work. This ensures the patch doesn’t shift mid-stitch, which is the number one cause of ‘DIY disasters.’
The Master’s Stitch: Choosing Your Weapon
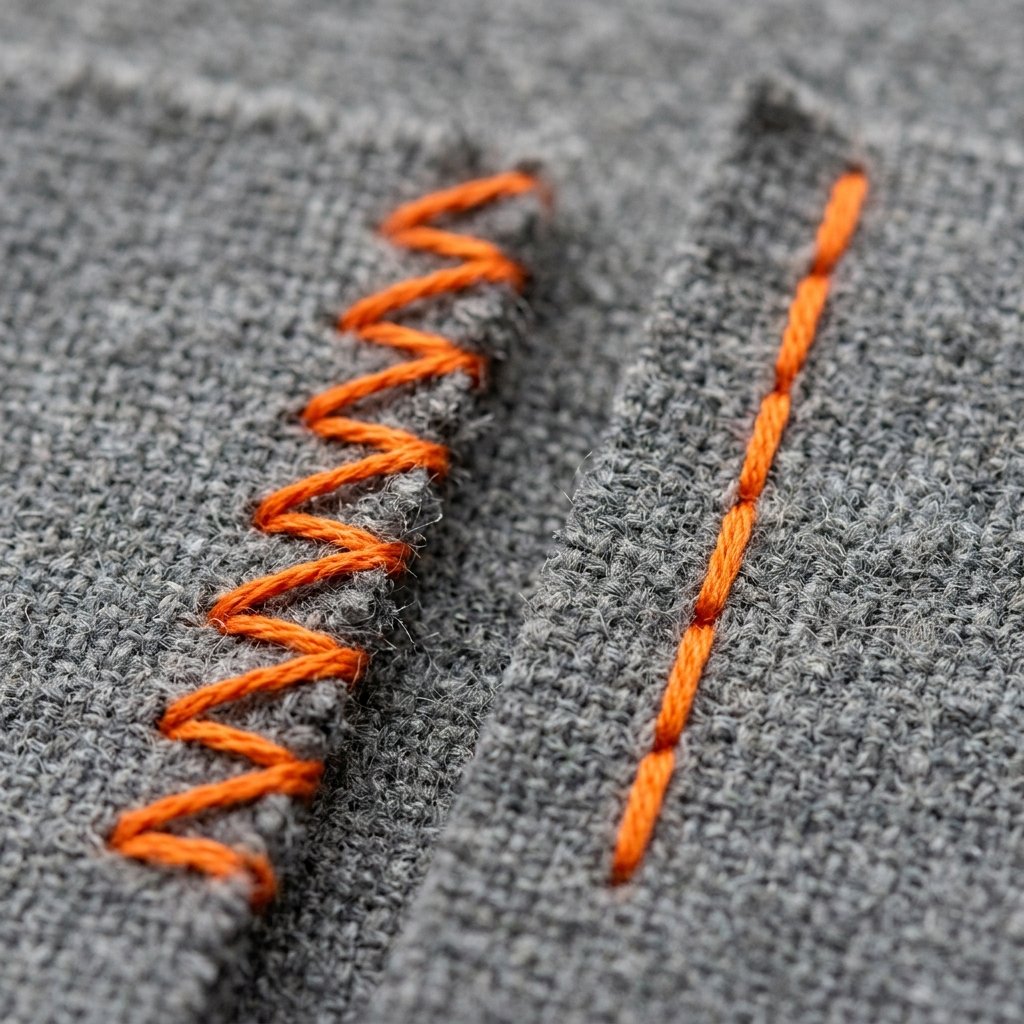
Not all stitches are created equal. For a backpack, you want a stitch that is both rugged and aesthetically pleasing. Depending on the look you want—hand-crafted and visible or professional and hidden—you have two main options. We recommend the Whipstitch for beginners because it is incredibly fast and creates a cool, rugged border.
| Stitch Type | Best For… | Durability Rating |
|---|---|---|
| Whipstitch | Embroidered borders; fast and decorative. | High |
| Backstitch | Maximum strength; looks like a machine stitch. | Extreme |
| Running Stitch | Quick repairs; not recommended for main gear. | Low |
The Whipstitch involves looping the thread over the edge of the patch and through the backpack fabric. It’s the classic ‘scout’ look. The Backstitch is stronger because each stitch overlaps the previous one, creating a continuous line of thread that is nearly impossible to rip out.
The Step-by-Step Blueprint: Hand-Sewing Like a Pro
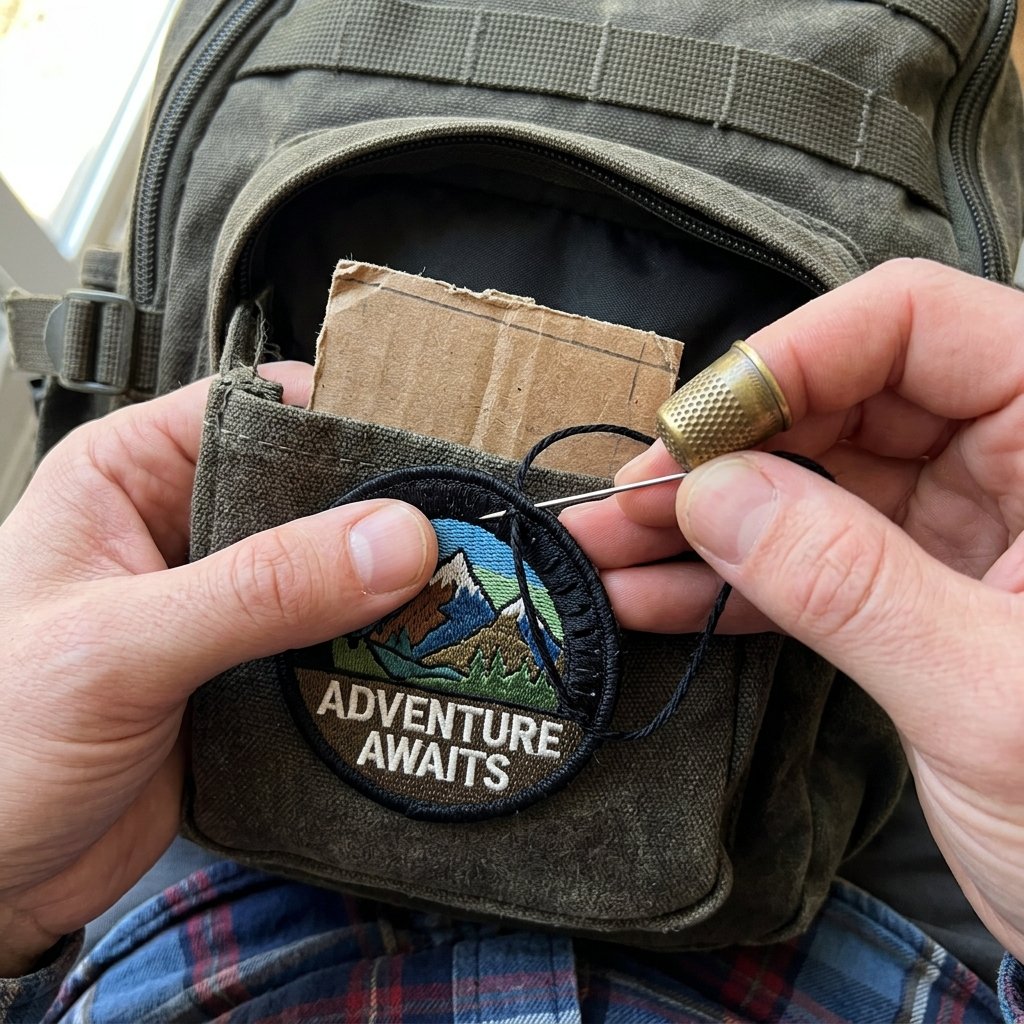
- Thread the Needle: Cut a length of heavy-duty thread about 24 inches long. Any longer and it will tangle; any shorter and you’ll be re-threading constantly. Double the thread and tie a thick knot at the end.
- The First Puncture: Start from the inside of the backpack pocket. Push the needle through the backpack fabric and up through the very edge of the patch. This hides your knot inside the bag.
- Execute the Whipstitch: Move about 1/8th of an inch forward. Push the needle down through the backpack fabric just outside the patch border, then bring it back up through the patch itself. Repeat this ‘looping’ motion around the entire perimeter.
- Maintain Tension: Keep your stitches tight but don’t pull so hard that the fabric puckers. You want the patch to lay flat against the gear.
- The Finishing Knot: Once you’ve circled the entire patch, push the needle to the inside of the bag. Create a small loop with your last stitch, pass the needle through the loop twice, and pull tight to create a surgeon’s knot.
The Golden Rule of Mending: Always check that you aren’t sewing the pocket shut! Slide a piece of cardboard inside the pocket before you start to act as a barrier.
Advanced Maneuvers: Dealing with Heavy Canvas and Tight Corners
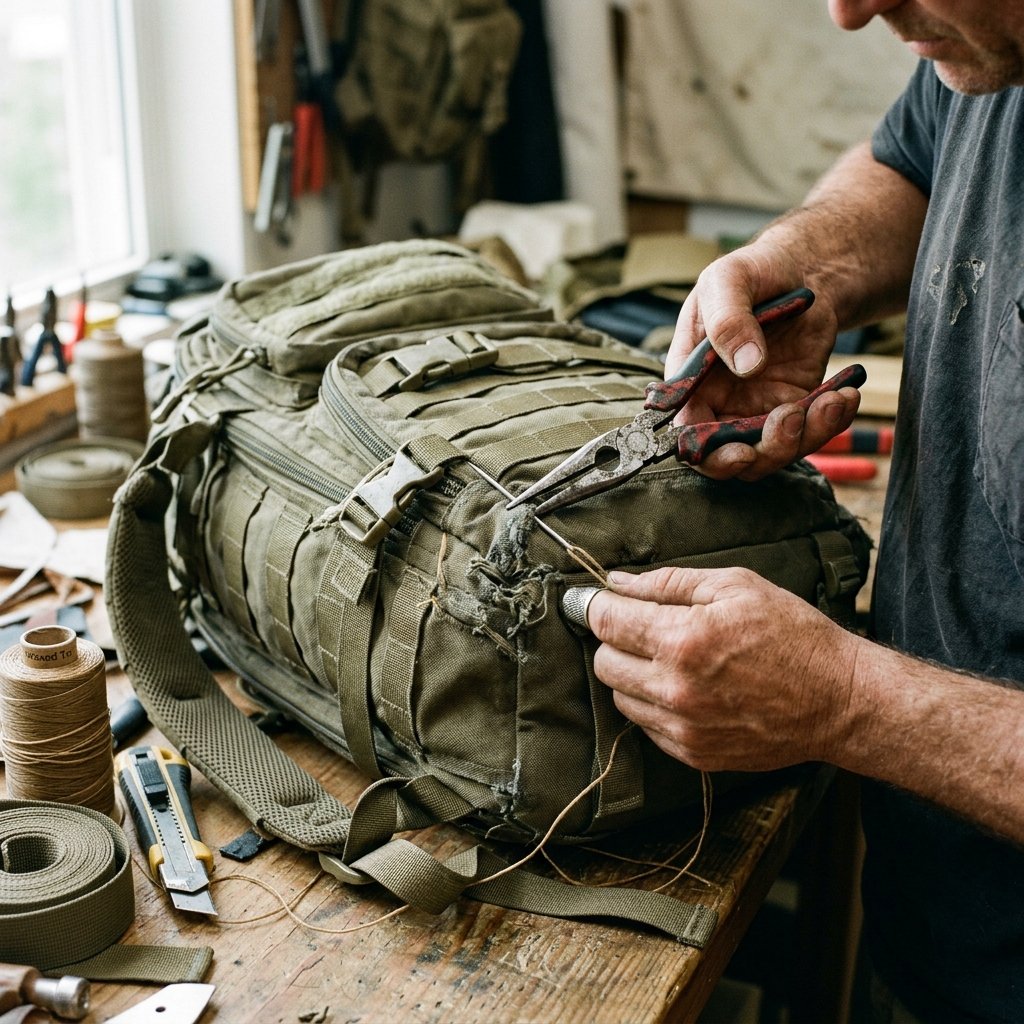
Navigating the Tough Spots
Backpacks often have thick seams or internal plastic liners that make sewing difficult. If you hit a spot where you can’t push the needle through with your fingers, use your thimble to apply pressure to the back of the needle. For extremely thick areas, you can even use a pair of small pliers to pull the needle through the other side. It’s not ‘cheating’—it’s being resourceful.
Cornering Like a Pro
When you reach a corner on a square or shield-shaped patch, perform two stitches in the exact same hole at the corner. This reinforces the point most likely to catch on a branch or a locker door, ensuring the edges never peel up. This is the difference between a 5-minute job and a lifetime repair.
The Longevity Secret: Finishing Touches for a Bulletproof Bond
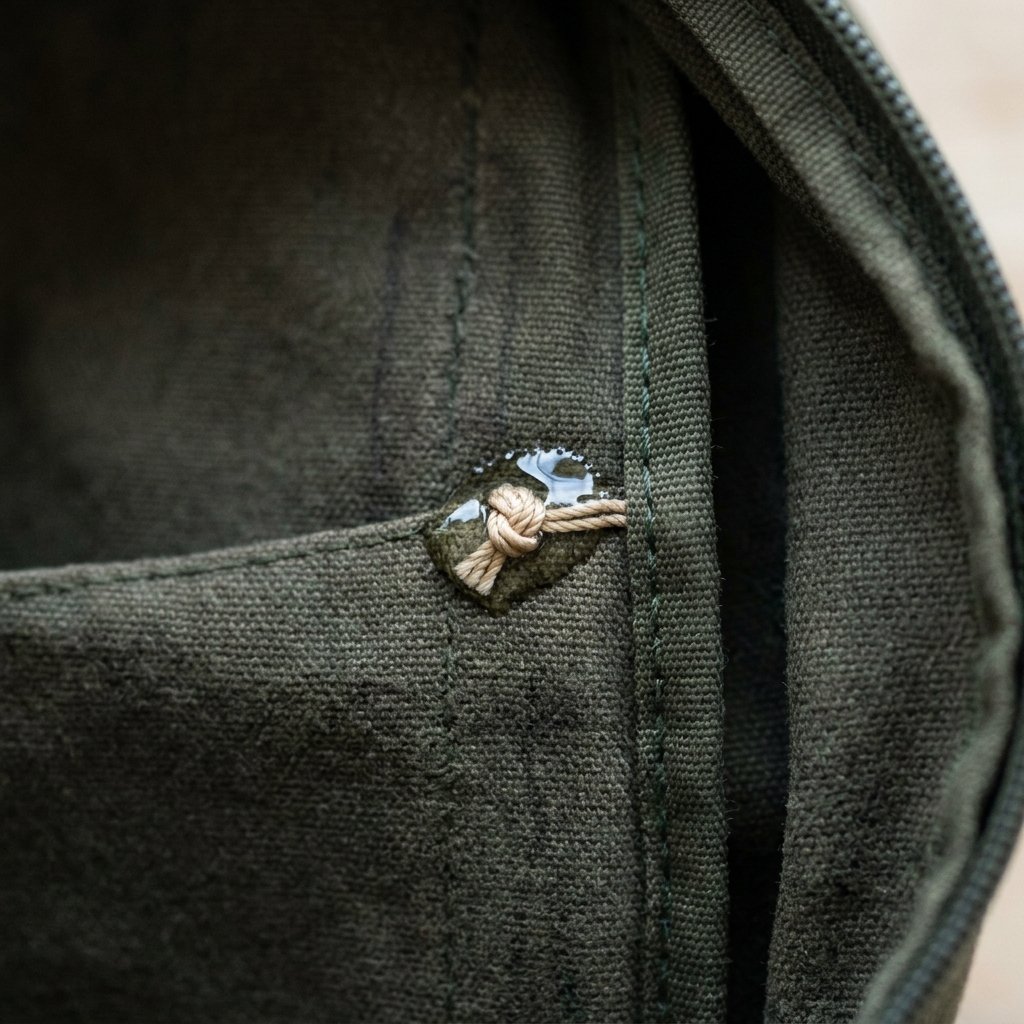
You’ve finished the stitching, but a true crafty expert knows that the job isn’t done until the threads are secured against the elements. To prevent the thread from fraying over years of use, you can apply a tiny drop of clear nail polish or fabric sealant to the knots on the inside of the bag. This ‘locks’ the thread in place.
If you are working with a nylon bag, you can very carefully use a lighter to singe the tail of your thread (if using synthetic thread) to melt it into a small plastic bead. This creates a permanent stop that won’t ever un-thread. Safety Note: Always do this away from flammable materials and keep a damp cloth nearby just in case!
Conclusion
Wear Your Story with Pride
Congratulations! You’ve just successfully customized your gear for a grand total of about $5.00 in materials—most of which you can reuse for your next ten patches. By choosing to hand-sew instead of relying on weak adhesives, you’ve ensured that your backpack is ready for whatever the trail or the city throws at it. This resourceful approach to gear maintenance doesn’t just save you money; it builds a connection between you and the items you carry every day.
Now that you’ve mastered the basic whipstitch, the world of upcycling is open to you. Use these same skills to mend a torn strap, reinforce a thinning bottom panel, or even add reflective tape to your bag for night safety. Remember: don’t replace it, improve it. Happy crafting!

Makenzie is the founder and lead writer at MoneyHackTips.com — a personal finance blog dedicated to delivering street-smart financial wisdom for real people on real budgets. With 300+ published articles covering everything from debt management to investing fundamentals, Makenzie’s mission is to make every dollar work harder. When not writing about money hacks, Makenzie is testing frugal living strategies, optimizing side hustles, and helping readers build financial freedom from scratch.