
The Great Tissue Box Massacre: A Frugal Parent’s Dilemma
If you are a parent to a baby or toddler, you have undoubtedly witnessed the sheer, unadulterated joy that comes from the ‘Great Tissue Box Massacre.’ You turn your back for exactly 45 seconds to pour a cup of coffee, and by the time you return, your living room looks like a miniature blizzard hit it. A brand new, $3.50 box of premium, lotion-infused facial tissues has been systematically, gleefully emptied onto the rug. While it is undeniably cute to watch their little hands work with such industrial efficiency, the frugal, budget-savvy parent inside you is quietly calculating the cost of this impromptu sensory activity.
Babies are natural-born engineers and explorers. When they pull tissues from a box, they aren’t trying to waste your hard-earned money; they are mastering critical developmental milestones. They are practicing their pincer grasp, learning about object permanence, and exploring the concept of cause and effect. However, you do not need to sacrifice your household budget to support their cognitive development. As crafty upcyclers and handy parents, we know that the best toys aren’t bought in high-end boutique baby stores for $35—they are built at the kitchen table using ingenuity, elbow grease, and items destined for the recycling bin.
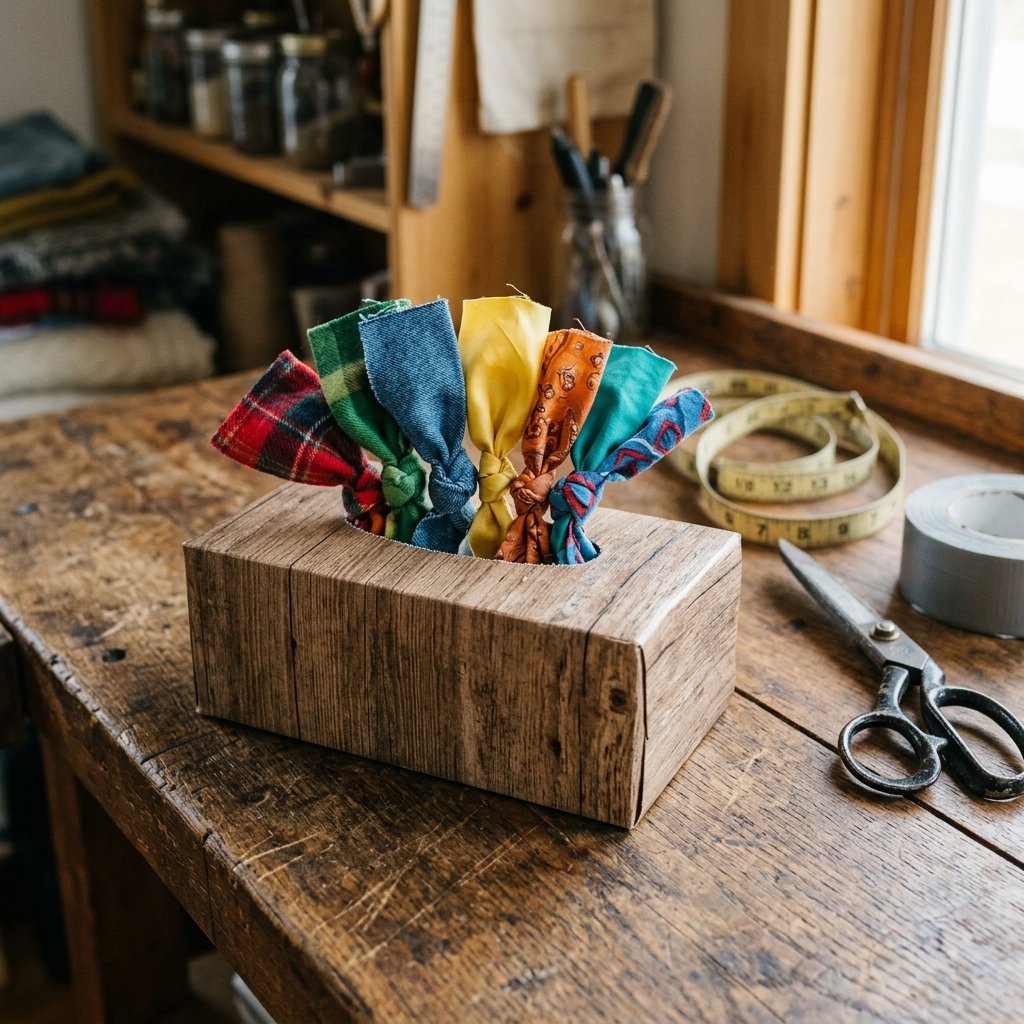
Today, we are going to dive deep into a rugged, highly practical, and incredibly clever DIY project: transforming an empty cardboard tissue box and a handful of old fabric scraps into an indestructible, endless sensory pull toy. This project is 100% free, takes less than 20 minutes to construct, and will keep your little one engaged for hours. Grab your scissors, raid your scrap fabric bin, and let’s turn household trash into a developmental treasure.
The Zero-Budget Blueprint: Materials, Tools, and the Frugal Advantage
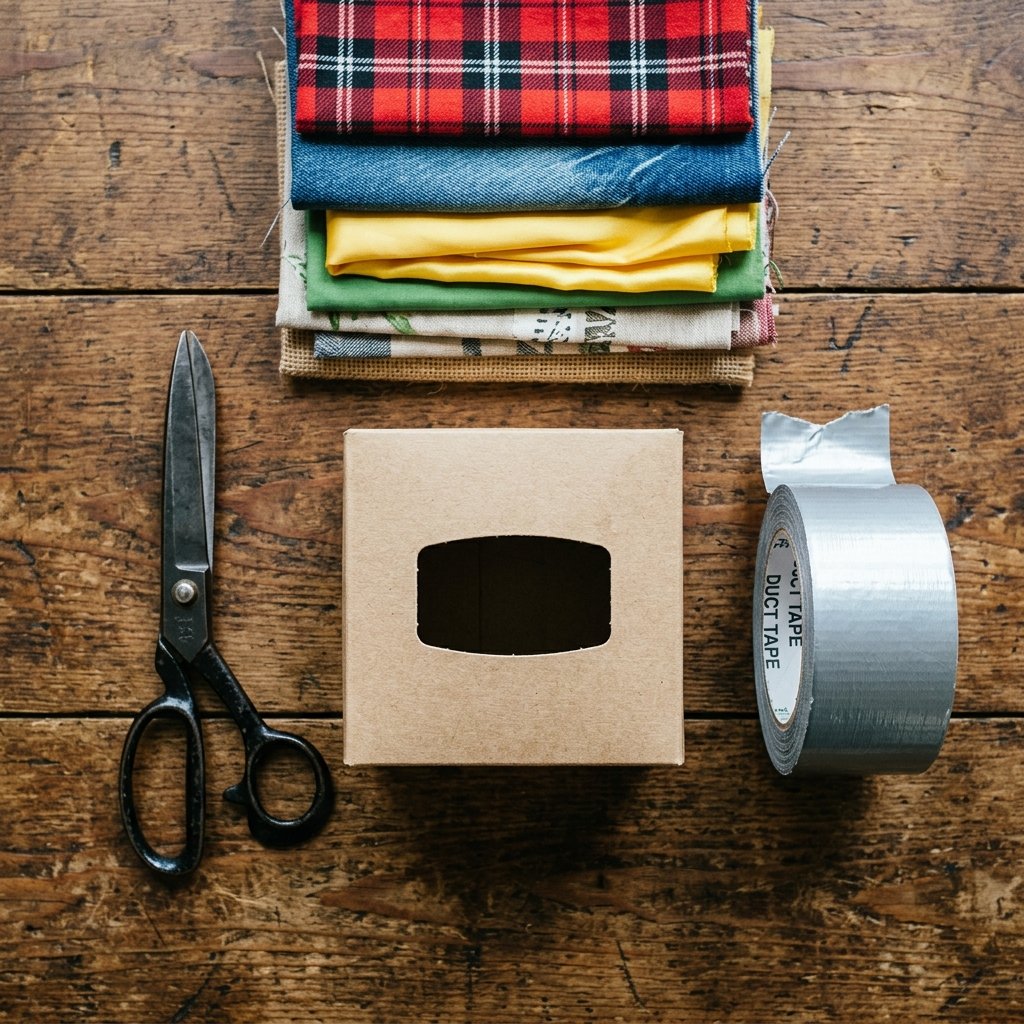
Before we start cutting and taping, let’s talk logistics. The beauty of this project lies in its absolute resourcefulness. You do not need to step foot inside a craft store to make a premium-quality sensory toy. We are going to shop our own homes, utilizing materials that have outlived their original purpose. This is the essence of tactical, budget-savvy parenting.
Your Scavenger Hunt List
- The Chassis: One empty cardboard tissue box (the cube-shaped boxes work best for stability, but rectangular ones are perfectly fine).
- The ‘Tissues’: 10 to 15 squares of scrap fabric. Look for contrasting textures: old flannel shirts, worn-out bandanas, silk scarves you no longer wear, or even clean microfiber cloths.
- Structural Reinforcement: Heavy-duty packing tape or duct tape to fortify the cardboard against aggressive toddler play.
- The Anchor (Optional but Recommended): A heavy piece of scrap wood, a thick piece of double-layered cardboard, or a few large metal washers to weight the bottom of the box.
- Aesthetic Upgrades: Leftover contact paper, peel-and-stick wallpaper scraps, or non-toxic acrylic paint to make the box look like a high-end nursery item rather than actual garbage.
To truly appreciate the value of this DIY, let’s look at the cold, hard numbers. Store-bought sensory tissue boxes are heavily marketed to new parents, often carrying a hefty ‘educational toy’ markup.
| Toy Component | High-End Retail Version | Our Upcycled DIY Version |
|---|---|---|
| The Base Box | $15.00 (Wooden or plush base) | $0.00 (Upcycled empty tissue box) |
| Sensory Tissues | $10.00 (Pre-cut crinkle/silk squares) | $0.00 (Repurposed old shirts/bandanas) |
| Durability/Weight | $5.00 (Weighted bottom design) | $0.00 (Scrap wood or washers) |
| Total Estimated Cost | $30.00 – $40.00 | $0.00 (100% Free) |
The Frugal Mantra: Never pay for what you can creatively repurpose. A baby’s brain cannot tell the difference between a $35 organic cotton toy and a lovingly crafted upcycled flannel square. They only crave the mechanical action of the pull.
Fortifying the Cardboard Chassis: Rugged Reinforcement for Heavy Play
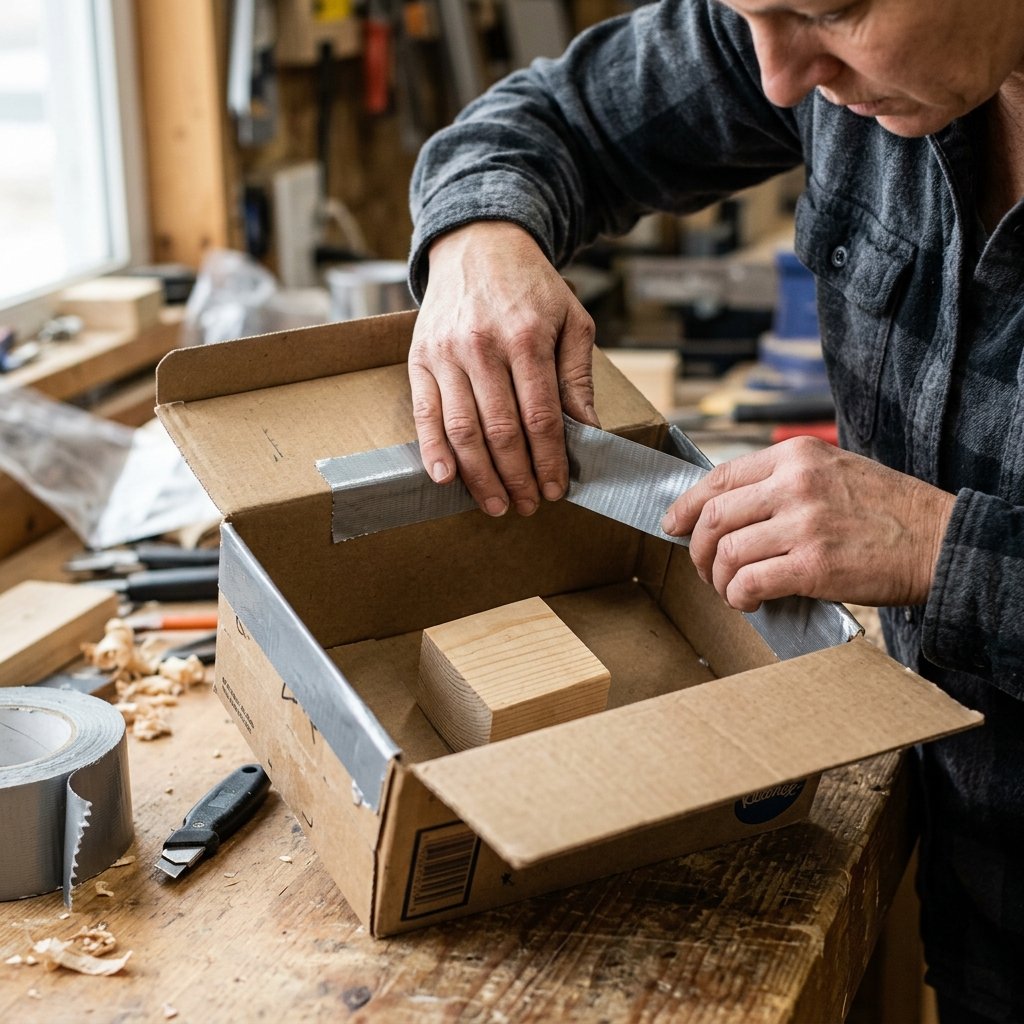
If you hand a standard, unreinforced cardboard tissue box to a determined ten-month-old, it will be crushed, chewed, and dismantled in under 5 minutes. To make this upcycled toy last, we need to treat it like a piece of rugged equipment. We must fortify the chassis.
Step-by-Step Box Reinforcement
- Assess the Integrity: Open the side flaps of the empty tissue box carefully. Inspect the cardboard. If it is already dented, gently pop the dents out from the inside.
- Tape the Interior Seams: Take your heavy-duty tape (duct tape is excellent here for its tensile strength) and run a strip along every interior corner and seam. This prevents the box from easily collapsing when squeezed.
- Install the Anchor Weight: One of the biggest frustrations for a baby is when they pull a tissue and the entire box lifts off the ground. To solve this, cut a piece of scrap heavy cardboard or a thin piece of scrap wood to fit the exact dimensions of the bottom of the box. Tape it securely to the inside floor of the box. If you don’t have wood, taping a few heavy metal washers to the bottom works wonders.
- Seal and Smooth the Dispenser Slot: The plastic film on commercial tissue boxes can be flimsy and sometimes sharp. Carefully rip out the thin plastic film. Take small strips of packing tape and fold them over the raw cardboard edges of the top slot. This creates a smooth, frictionless glide path for the fabric tissues and prevents paper cuts.
- Reseal the Box: Once your interior reinforcements and weights are in place, apply a generous amount of glue or double-sided tape to the side flaps and seal the box shut permanently.
Safety First: Always ensure any weights (like washers or coins) are securely sealed inside the box with heavy-duty tape so they cannot become a choking hazard if the baby eventually destroys the box. Supervised play is always required.
Crafting the Sensory ‘Tissues’: The Art of Fabric Scavenging and Linking
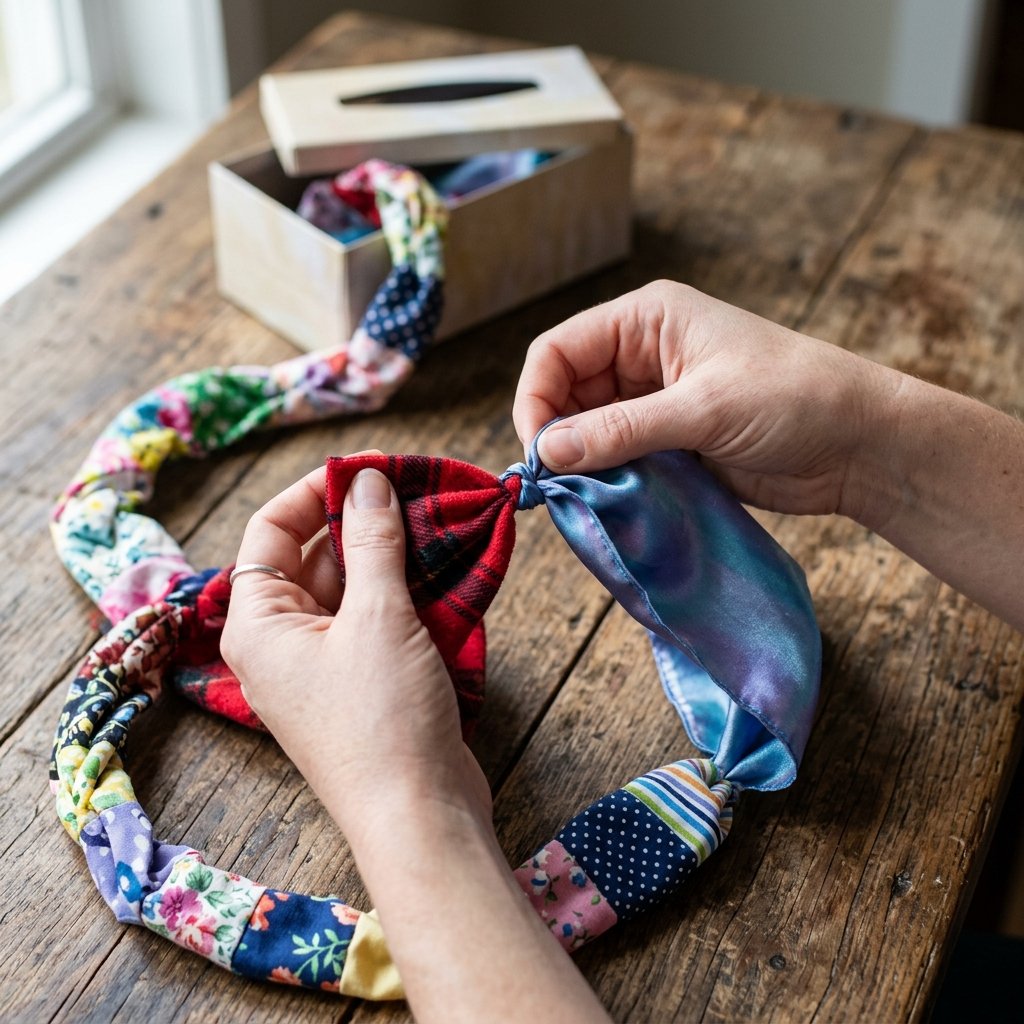
Now that our base is indestructible, it is time to craft the payload. The magic of this toy lies in the continuous pull. When the baby pulls one fabric square out, the next one must pop up, ready for action. To achieve this, we need to select the right materials and link them properly.
Selecting the Ultimate Sensory Textures
Babies learn through tactile feedback. The more varied the textures, the longer their attention span will be held. Dig through your rag bag, your closet of clothes destined for donation, and your linen closet. You are looking to cut squares that are approximately 8×8 inches (the size of a standard tissue).
- The Rugged Flannel: Cut squares from an old, soft lumberjack flannel shirt. The brushed cotton provides a warm, grippy texture.
- The Sleek Silk: A damaged silk scarf or a cheap polyester pocket square offers a smooth, frictionless pull that contrasts beautifully with heavier fabrics.
- The Everyday Cotton: Old bandanas or soft, worn-in t-shirts are perfect staple pieces. They fold easily and knot securely.
- The Textured Terrycloth: A square cut from an old washcloth adds weight and a bumpy texture that is fantastic for teething babies to gum on.
Linking the Fabric: The No-Sew Knot Technique
While you could absolutely break out the sewing machine and stitch buttonholes to link your fabrics, we are focusing on a fast, practical, no-sew method today. We want this done during a single naptime.
- The Slit Method: Take your first fabric square. Fold one corner in about an inch, and use your scissors to snip a tiny, half-inch slit through the fabric. Repeat this on the opposite diagonal corner. Do this for all your fabric squares.
- The Thread and Tie: Take the corner of Square A and push it through the slit in Square B. Pull it through about two inches, and tie a simple, tight overhand knot. The knot should be small enough to pass through the tissue box slot, but bulky enough that it won’t pull back through the slit you cut.
- The Chain Reaction: Continue this process, linking Square B to Square C, Square C to Square D, until you have a continuous chain of 10 to 15 fabric squares.
If you prefer an even simpler method without cutting slits, you can simply tie the corners of the squares together using a standard square knot (right over left, left over right). Just ensure the knots are pulled very tight so they don’t come undone during vigorous play.
Aesthetic Upgrades: Making Trash Look Like High-End Nursery Decor
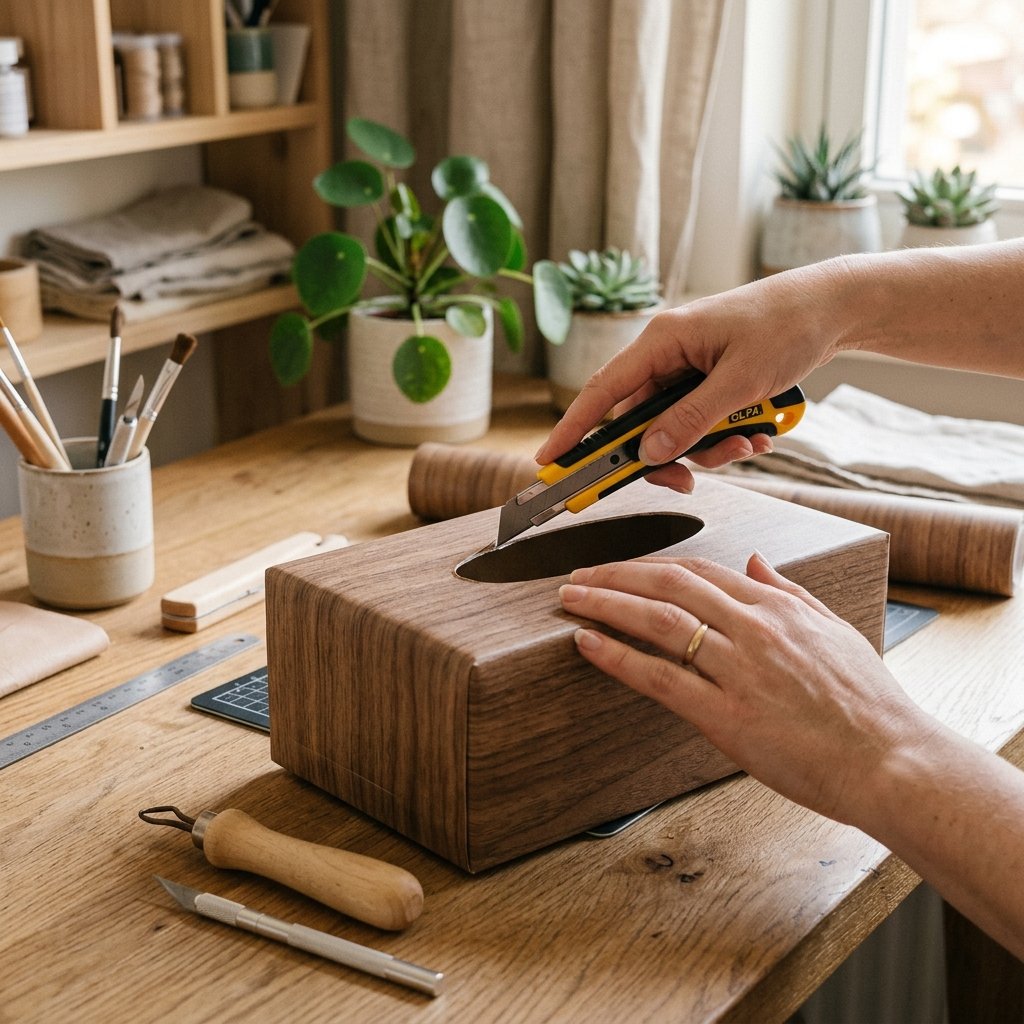
Just because we are building a toy out of garbage does not mean it has to look like garbage. As a crafty, budget-savvy parent, presentation matters. A beautifully finished toy is one you won’t mind leaving out on the living room rug when company comes over.
The Art of the Faux Finish
Cardboard is the perfect blank canvas. Here is how to elevate your reinforced box from a branded Kleenex eyesore to a bespoke wooden-looking Montessori masterpiece, all for under $2 in materials.
- Wood-Grain Contact Paper: This is the holy grail of Dollar Tree interior design. Measure the dimensions of your box and cut a single, continuous strip of wood-grain contact paper to wrap around the four sides. Cut a separate square for the top, using an X-Acto knife to carefully carve out the oval slot in the center. Smooth out any air bubbles with a credit card. Suddenly, your cardboard box looks like a solid oak heirloom.
- The Matte Paint Trick: If you have leftover interior wall paint or acrylic craft paint, mix in a teaspoon of baking soda before painting the box. The baking soda adds a beautiful, chalky, ceramic-like texture that completely masks the glossy cardboard branding underneath. Two coats will give you a high-end, matte finish.
- Fabric Wrapping: If you have an abundance of scrap fabric, you can use spray adhesive or hot glue to wrap the entire box in a neutral canvas or denim fabric, giving it a soft, tactile exterior that matches the sensory tissues inside.
Once your box is wrapped or painted, let it cure completely. The final step is to take your chain of fabric tissues, fold them accordion-style, and stuff them down into the box, leaving just the very first corner poking out of the top slot, whispering a silent invitation to your baby to come and pull.
Advanced Upgrades: Adding Crinkle Sounds and Washability
You have successfully built the core toy. But as master crafters and upcyclers, we always look for ways to push the envelope. How do we take this from a great toy to an extraordinary, multi-sensory experience? By hacking the auditory feedback and ensuring long-term hygiene.
The DIY Crinkle Paper Hack
Babies are obsessed with the sound of crinkling paper (which is why they often prefer the wrapping paper to the actual gift). Store-bought sensory toys use a specialized crinkle material, but you can achieve the exact same effect using items from your recycling bin.
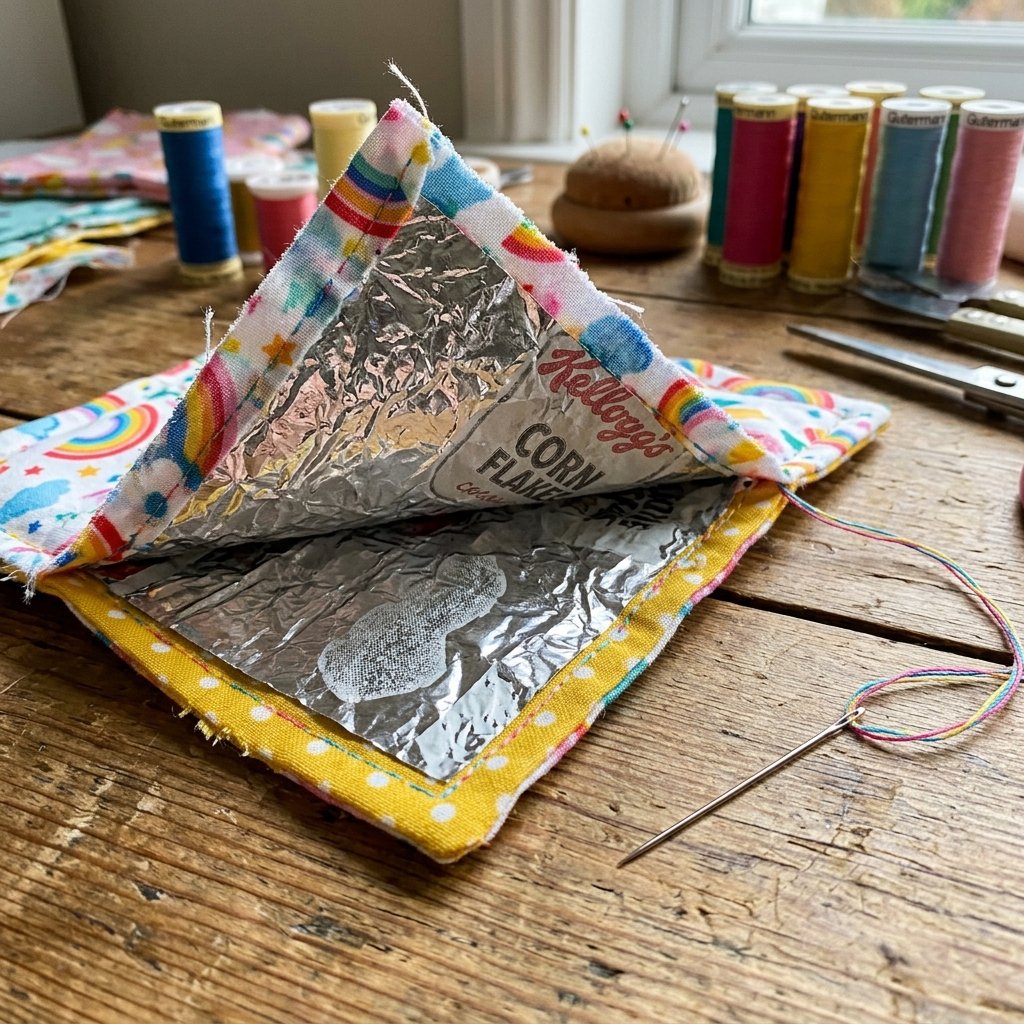
The Upcycler’s Secret: Clean, empty cereal box liners or the inside of clean potato chip bags are the perfect, loud, durable crinkle material. They are food-safe, tear-resistant, and completely free.
To add crinkle to your fabric tissues: Take two squares of fabric (e.g., two squares of cotton). Cut a square of your clean cereal liner slightly smaller than the fabric. Sandwich the plastic liner between the two pieces of fabric. If you have a sewing machine, do a quick straight stitch around the perimeter to lock the plastic inside. If you are strictly no-sew, you can use fabric glue around the edges. Now, when your baby pulls this specific square, they get a loud, satisfying crunching sound that stimulates their auditory senses.
Maintenance and Washability
Babies are notoriously sticky. Because this toy is going to be handled, chewed on, and dragged across the floor, it needs to be washable. This is where our clever design pays off.
- Washing the Tissues: Because you used a no-sew knotting technique or simple stitches, you can easily pull the entire chain of fabric out of the box. Toss the fabric chain into a mesh laundry bag and run it through your washing machine on a gentle, cold cycle. Air dry to preserve the integrity of any crinkle plastic you added.
- Sanitizing the Box: Because we wrapped the box in waterproof contact paper or sealed it with tape, the exterior can be easily wiped down with a standard baby wipe or a damp cloth with mild soap. The reinforced cardboard core will remain dry and intact.
By implementing these advanced upgrades, you have created a toy that not only rivals the expensive store-bought versions but actually surpasses them in durability, sensory variety, and ease of maintenance.
Conclusion
The Joy of Trash-to-Treasure Parenting
Parenting is an expensive endeavor, but fostering your child’s development doesn’t have to be. By taking 20 minutes out of your day to cut, tape, and tie, you have successfully saved yourself $35, rescued materials from the landfill, and provided your baby with an incredibly valuable tool for mastering their fine motor skills. The next time you see your little one eagerly yanking those colorful flannel and silk squares out of their beautifully upcycled box, you can smile knowing that you outsmarted the baby toy industry.
This DIY Cardboard Tissue Box Pull Toy is a testament to the fact that resourcefulness is the greatest tool in a parent’s arsenal. You don’t need a massive budget to be an incredible provider; you just need a little creativity, a roll of heavy-duty tape, and the willingness to look at household trash and see the hidden treasure within. Keep crafting, keep upcycling, and enjoy the peace and quiet that comes when your baby is happily engaged in their new favorite zero-budget activity!

Makenzie is the founder and lead writer at MoneyHackTips.com — a personal finance blog dedicated to delivering street-smart financial wisdom for real people on real budgets. With 300+ published articles covering everything from debt management to investing fundamentals, Makenzie’s mission is to make every dollar work harder. When not writing about money hacks, Makenzie is testing frugal living strategies, optimizing side hustles, and helping readers build financial freedom from scratch.