The Ultimate Trash-to-Treasure Sanctuary
Let’s be honest: our pets don’t care about designer labels or $100 price tags from high-end boutiques. What they crave is comfort, warmth, and most importantly, the scent of their favorite human. As a frugal DIYer, you already have the most precious material sitting in your donation bin: old 100% cotton T-shirts. These worn-out garments are the perfect building blocks for a rugged, stylish, and incredibly soft pet bed. By upcycling these items, you aren’t just saving money; you’re keeping textiles out of landfills and creating a custom piece of furniture that fits your home’s aesthetic perfectly. This guide will walk you through the process of turning ‘tarn’ (T-shirt yarn) into a structural masterpiece. We’re going to use a clever braiding and coiling technique that requires zero knitting needles and zero sewing machines. Whether you have a tiny tabby or a medium-sized mutt, this project is scalable, durable, and 100% budget-friendly.
The Inventory: Scouting Your Supplies for a Zero-Cost Masterpiece
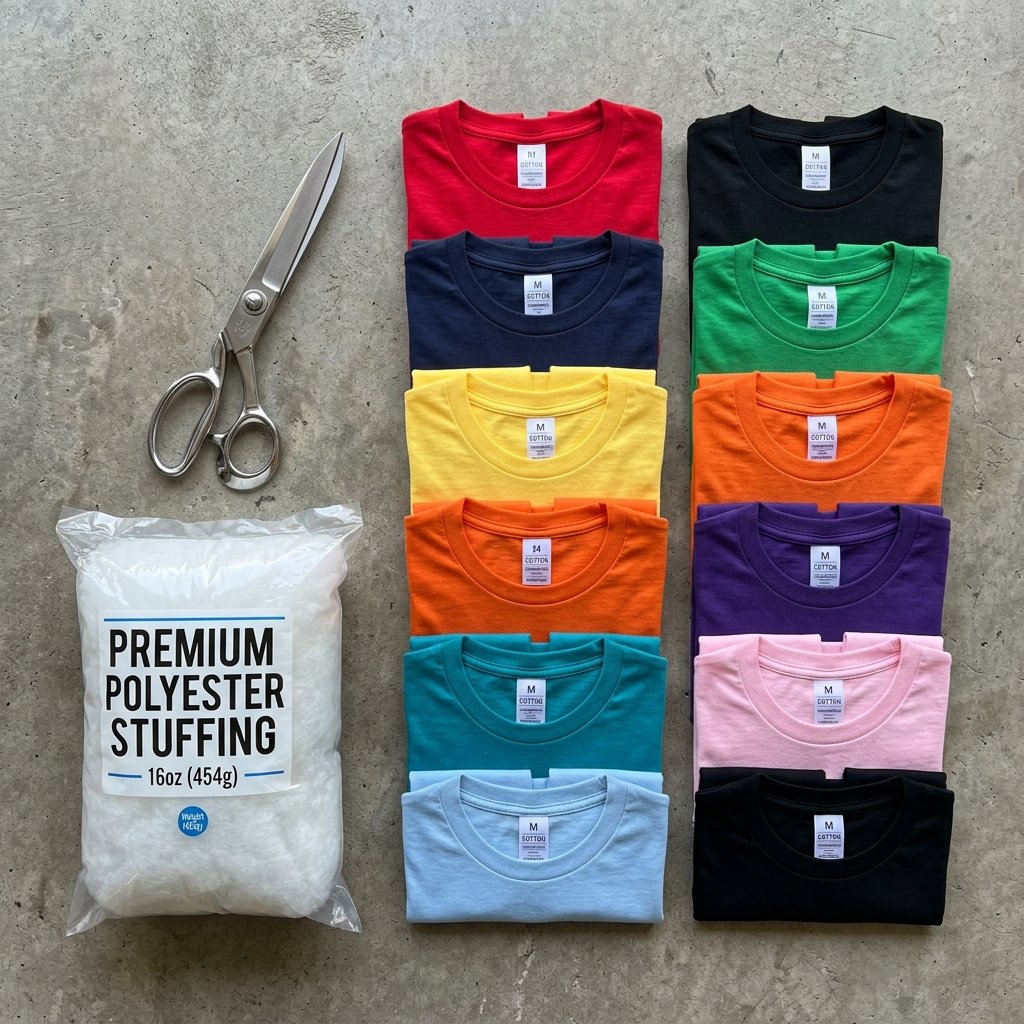
Before we dive into the construction, we need to gather our materials. The beauty of this project is that you likely already own everything required. For a medium-sized pet bed (approx. 20 inches in diameter), you will need between 8 to 12 large T-shirts. The more shirts you use, the thicker and sturdier the walls will be.
Selecting the Right Fabric
Not all shirts are created equal. For the best results, look for 100% cotton or high-cotton blends. These have the right amount of ‘give’ and create a soft, matte finish that pets love. Avoid shirts with heavy plastic-like screen prints across the entire chest, as these will be difficult to braid and won’t feel soft against your pet’s fur.
| Material | Purpose | Estimated Cost |
|---|---|---|
| 8-12 Old T-Shirts | The main structural ‘yarn’ | $0.00 (Upcycled) |
| Fabric Scissors | Cutting strips with precision | $0.00 (Owned) |
| Old Pillow or Poly-fill | Stuffing the base and rim | $0.00 (Upcycled) |
| Safety Pins (optional) | Holding braids in place | $1.25 (Dollar Tree) |
| Total Project Cost | Professional Grade Bed | $0.00 – $1.25 |
Pro-Tip: Use a mix of colors to create a ‘boho-chic’ variegated look, or stick to a monochrome palette (like all navy and grey) for a sophisticated, masculine-elegant vibe that looks like a high-end home decor piece.
The ‘Tarn’ Technique: Transforming Cotton into Construction Material

To build a bed without knitting, we first need to turn our flat shirts into a continuous rope-like material known as ‘tarn’. This is where our resourceful creativity shines. We aren’t just cutting random strips; we are creating long, durable strands that will provide the structural integrity needed to support a sleeping animal.
How to Cut Continuous T-Shirt Yarn
- Step 1: Lay the shirt flat on your workspace and cut off the bottom hem and the top part (from the armpits up). You are left with a large fabric tube.
- Step 2: Cut fringe-like strips about 1.5 to 2 inches wide across the tube, but stop 1 inch before you reach the opposite edge. Do not cut all the way through!
- Step 3: Open the shirt so the uncut 1-inch strip is facing you. Cut diagonally from the first slit to the second, the second to the third, and so on. This creates one long, continuous strand.
- Step 4: Stretch the strand! Pull the cotton tight. This causes the edges to curl inward, creating a rounded ‘yarn’ that hides raw edges and increases durability.
Repeat this for all your shirts. Roll the resulting strands into large ‘yarn balls’ categorized by color. This keeps your workspace organized and prevents tangling during the braiding phase.
The Foundation: Braiding a Sturdy Base Without a Single Stitch
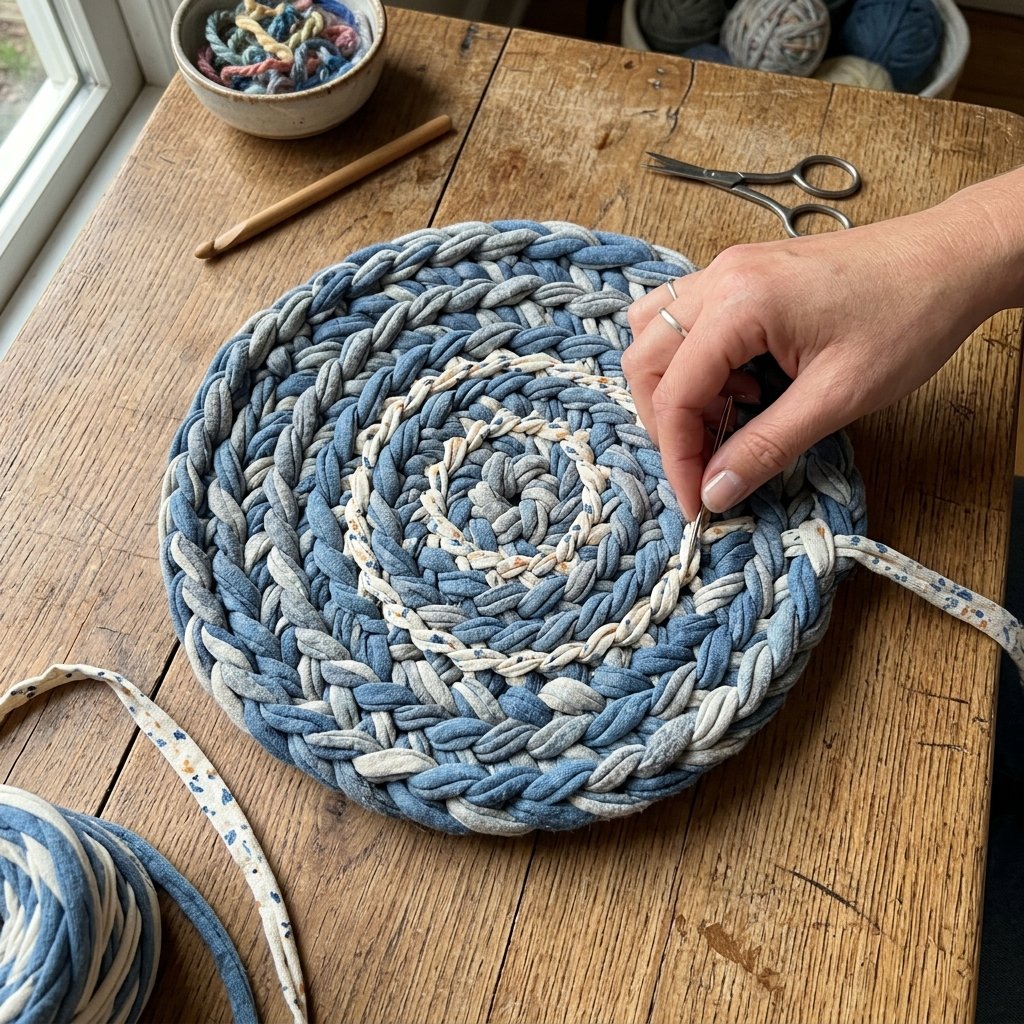
Now that we have our materials prepped, it’s time to build the ‘chassis’ of the bed. We will use a three-strand braid as our primary building block. This provides a rugged, thick texture that mimics the look of expensive chunky-knit wool beds but with the washability of cotton.
Constructing the Coil
- Take three long strands of tarn (different colors look great here) and tie them together at the top with a simple overhand knot.
- Braid the strands tightly. A tight braid ensures the bed won’t sag or lose shape over time. As you reach the end of a strand, simply knot or ‘overlap and fold’ a new strand onto the old one to keep the braid going.
- Once you have a braid about 5 feet long, start coiling it into a flat circle on the floor. This will be the base.
- To secure the coils together without sewing, we use a ‘lacing’ technique. Take a separate thin strip of T-shirt fabric and use it to ‘weave’ the edges of the braids together as you spiral outward.
Safety Note: Ensure all knots are pulled extremely tight. Pets like to dig and nest; a loose knot could become a snagging hazard for claws.
Raising the Walls: Creating a Cozy Perimeter for Maximum Security
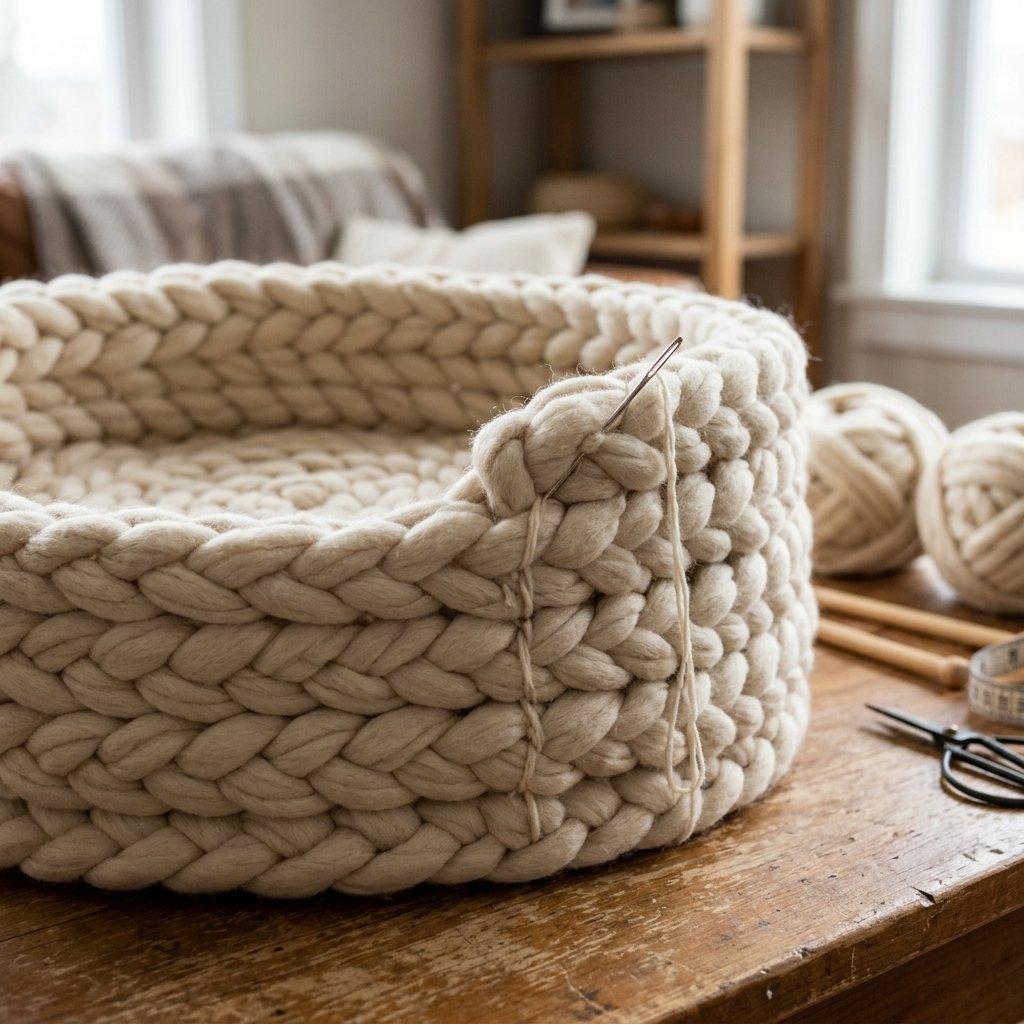
A bed isn’t a bed without a bolster to lean against. Most pets prefer a ‘nesting’ feel, which requires raising the sides of your T-shirt coil. This is where we transition from a flat mat to a 3D structure.
The Vertical Shift
To create the walls, stop laying your braids flat on the table and start stacking them directly on top of the outermost circle of your base. Continue the lacing technique, but pull the lacing strip slightly tighter to encourage the braid to stand upright.
| Bed Size | Base Diameter | Wall Height |
|---|---|---|
| Small (Cat/Chihuahua) | 15 inches | 5 inches |
| Medium (Beagle/Spaniel) | 22 inches | 7 inches |
| Large (Labrador – requires more shirts!) | 30+ inches | 8-10 inches |
As you build the walls, you can incorporate ‘stuffing’ into the braid itself. By braiding around a core of poly-fill or old T-shirt scraps, you create a ‘puffy’ wall that is extra soft. This clever trick adds massive volume without requiring extra complex techniques.
The Finishing Touch: Padding, Stuffing, and Structural Integrity
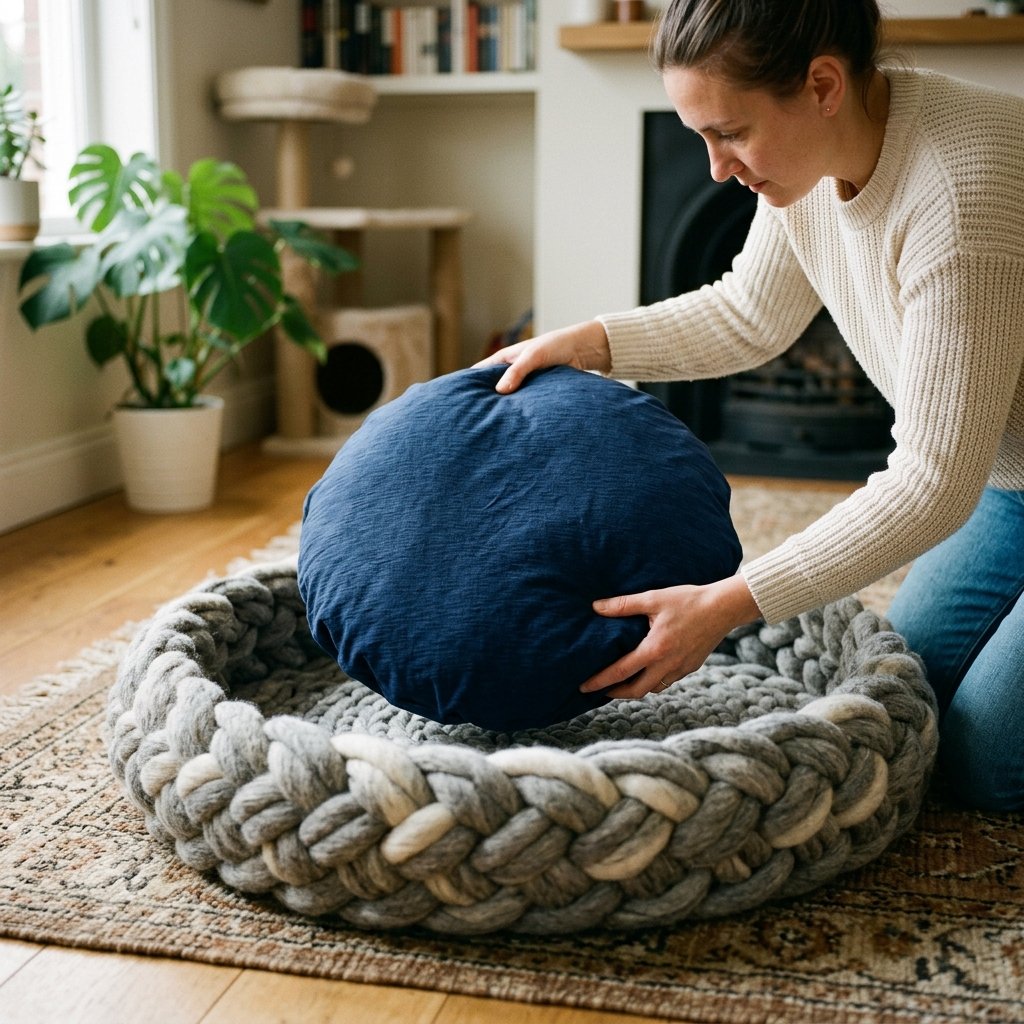
The final step is ensuring the center of the bed is as comfortable as the walls. While the braided base is sturdy, it needs a ‘mattress’ for long-term comfort. You have two budget-savvy options here:
Option A: The Integrated Cushion
Take an old bed pillow and cut it to fit the diameter of your base. Wrap it in one of your remaining T-shirts (a ‘pillowcase’ style) and tuck it into the center of your braided walls. This makes the bed easy to clean—just pop the cushion out and toss it in the wash.
Option B: The Braided Insert
Create a separate, smaller circular mat using the same braiding technique and place it inside. This adds a double layer of braided cotton, which is excellent for pets that like a firmer surface.
The Frugal Mantra: ‘Waste not, want not.’ Use every single scrap of leftover fabric from your cutting phase as internal stuffing for the walls. Nothing goes in the trash!
Maintenance and Longevity: Keeping the Throne Fresh and Clean

One of the biggest advantages of a T-shirt pet bed over store-bought alternatives is the ease of maintenance. Most commercial beds have foam inserts that disintegrate in the wash or covers that are impossible to zip back on.
Care Instructions
- Machine Washable: Because this is made of 100% cotton T-shirts, the entire bed (if small enough) or the individual components can be tossed into the washing machine on a cold, gentle cycle.
- Drying: Air drying is recommended to maintain the structural integrity of the braids, but a low-heat tumble dry can help fluff the cotton back up.
- Durability Check: Every few months, check the lacing strips. If any have loosened due to your pet’s ‘nesting’ behavior, simply tie a new strip of tarn around the area to reinforce it. It takes 2 minutes and costs $0.
By following these steps, you’ve created a piece of furniture that is rugged enough for a dog’s life but elegant enough for your living room. You’ve saved roughly $50 and provided your pet with a scent-soaked sanctuary they will love for years.
Conclusion
A Crafty Victory for You and Your Pet
You’ve done it! By tapping into your inner ‘Trash-to-Treasure’ guru, you have successfully transformed a pile of discarded clothing into a functional, stylish, and incredibly cozy pet bed. This project proves that you don’t need expensive tools or advanced textile skills to create something of high value. Your pet now has a throne that smells like home, and you have the satisfaction of a zero-waste DIY win. Whether you’re a budget bride looking to save on pet-friendly wedding decor, or a handy parent teaching your kids the value of upcycling, this T-shirt bed is a testament to resourceful living. Now, grab a cup of coffee, sit back, and watch your furry friend enjoy the best seat in the house—handcrafted by you for under $2.

Makenzie is the founder and lead writer at MoneyHackTips.com — a personal finance blog dedicated to delivering street-smart financial wisdom for real people on real budgets. With 300+ published articles covering everything from debt management to investing fundamentals, Makenzie’s mission is to make every dollar work harder. When not writing about money hacks, Makenzie is testing frugal living strategies, optimizing side hustles, and helping readers build financial freedom from scratch.