
The Rugged Beauty of Trash-to-Treasure Storage
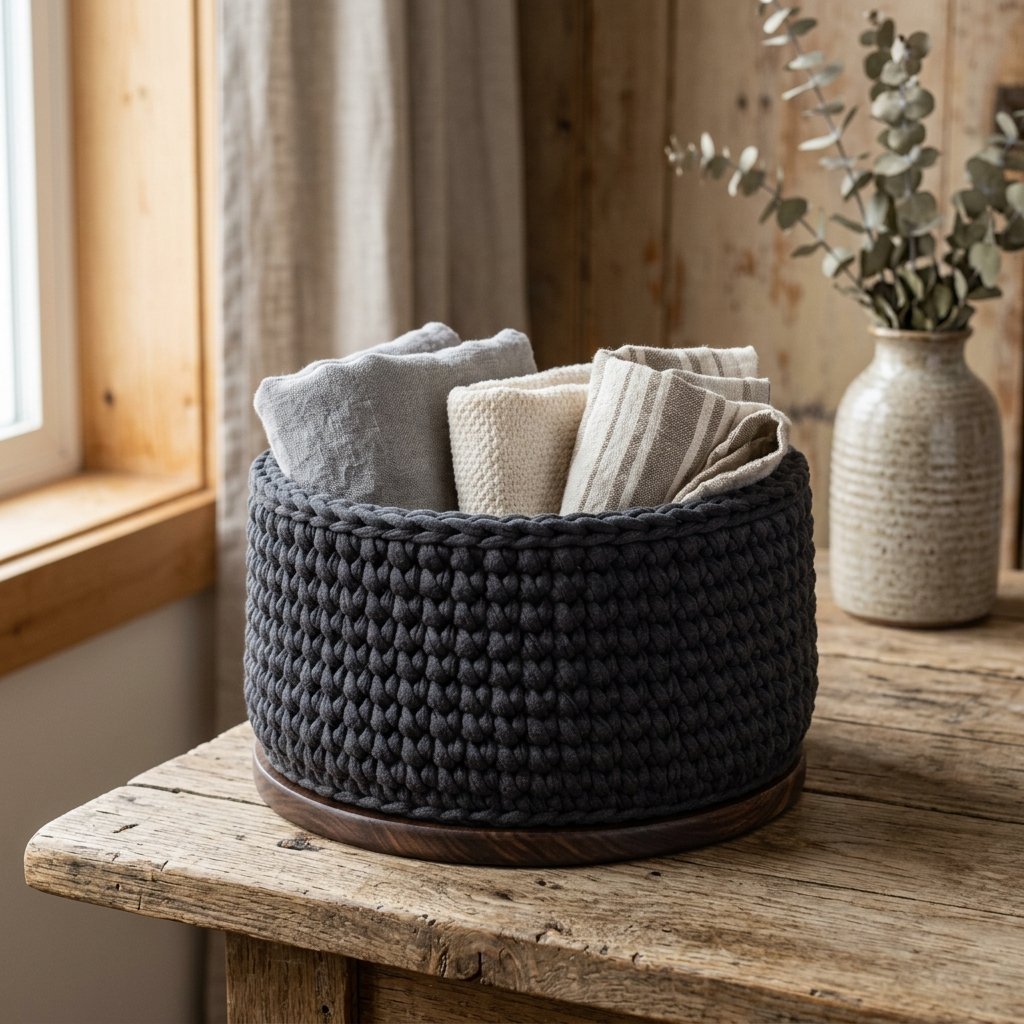
Let’s face it: high-end home organization is expensive. You walk into a boutique and see a sturdy, woven basket with a solid base, and the price tag is enough to make any budget-savvy crafter wince. But here is the secret—you already have the materials to make something better, stronger, and far more stylish sitting in your giveaway pile. This project is the ultimate marriage of resourceful upcycling and practical elegance. By combining the soft, flexible nature of T-shirt yarn with the structural integrity of a wooden base, we are creating a piece of functional art that is as rugged as it is refined. Whether you are a frugal DIYer looking to tidy up your workshop or a creative gift-giver wanting to impress, this basket is your next weekend win. We aren’t just making a container; we are reclaiming ‘trash’ and giving it a permanent, sophisticated place in our homes.
The Budget Blueprint: Materials and Cost Comparisons

Before we dive into the construction, let’s talk numbers. The beauty of this project lies in its near-zero cost. While a similar designer basket might retail for $45 to $65, our DIY version utilizes items you likely already have or can source for pennies. To achieve that ‘masculine-elegant’ look, we focus on high-quality cotton shirts and reclaimed wood.
| Material | Source | Estimated Cost |
|---|---|---|
| Old Cotton T-Shirts (3-5) | Closet/Thrift Store | $0.00 – $3.00 |
| Wooden Base (Scrap Wood or Cutting Board) | Workshop Scraps/Dollar Store | $0.00 – $1.25 |
| Drill & 1/4″ Wood Bit | Existing Tool Kit | $0.00 |
| Crochet Hook (8mm – 10mm) | Craft Stash | $2.00 |
| Sandpaper & Stain | Leftovers from previous projects | $0.00 |
| Total Investment | The Frugal Way | $2.00 – $6.25 |
The budget-savvy mantra: Never buy what you can build better for the price of a cup of coffee.
Sourcing and Prepping Your Foundation
The Perfect T-Shirt Selection
Not all shirts are created equal. For a basket that stands the test of time, look for 100% cotton or high-cotton blends with a bit of spandex. Avoid side seams if possible, as they can create lumps in your yarn. Darker tones like navy, charcoal, and forest green provide that sophisticated, rugged look we’re aiming for.
The Wooden Base: From Scrap to Sophistication
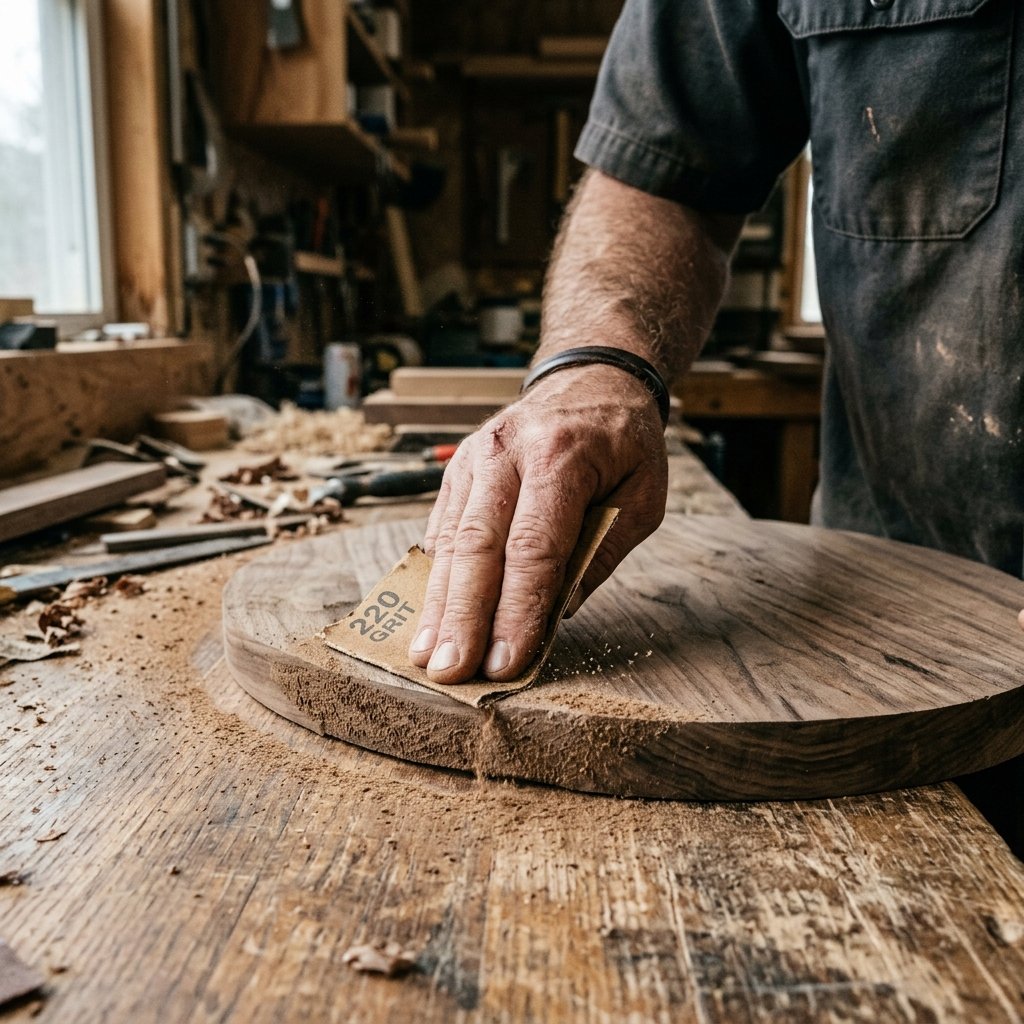
The base is what elevates this from a simple ‘craft’ to a piece of ‘furniture.’ You can use a 1/2-inch thick scrap of plywood, a reclaimed bamboo cutting board, or even a pine round from the hardware store. Pro Tip: Sand the edges until they are buttery smooth. If you want a truly high-end finish, apply a coat of dark walnut or espresso stain. This contrast between the organic wood grain and the soft fabric yarn is what creates that ‘masculine-elegant’ aesthetic.
Safety First: When drilling or sanding wood, always wear eye protection and work in a well-ventilated area to avoid inhaling fine sawdust.
The Art of the Continuous Loop: Making T-Shirt Yarn
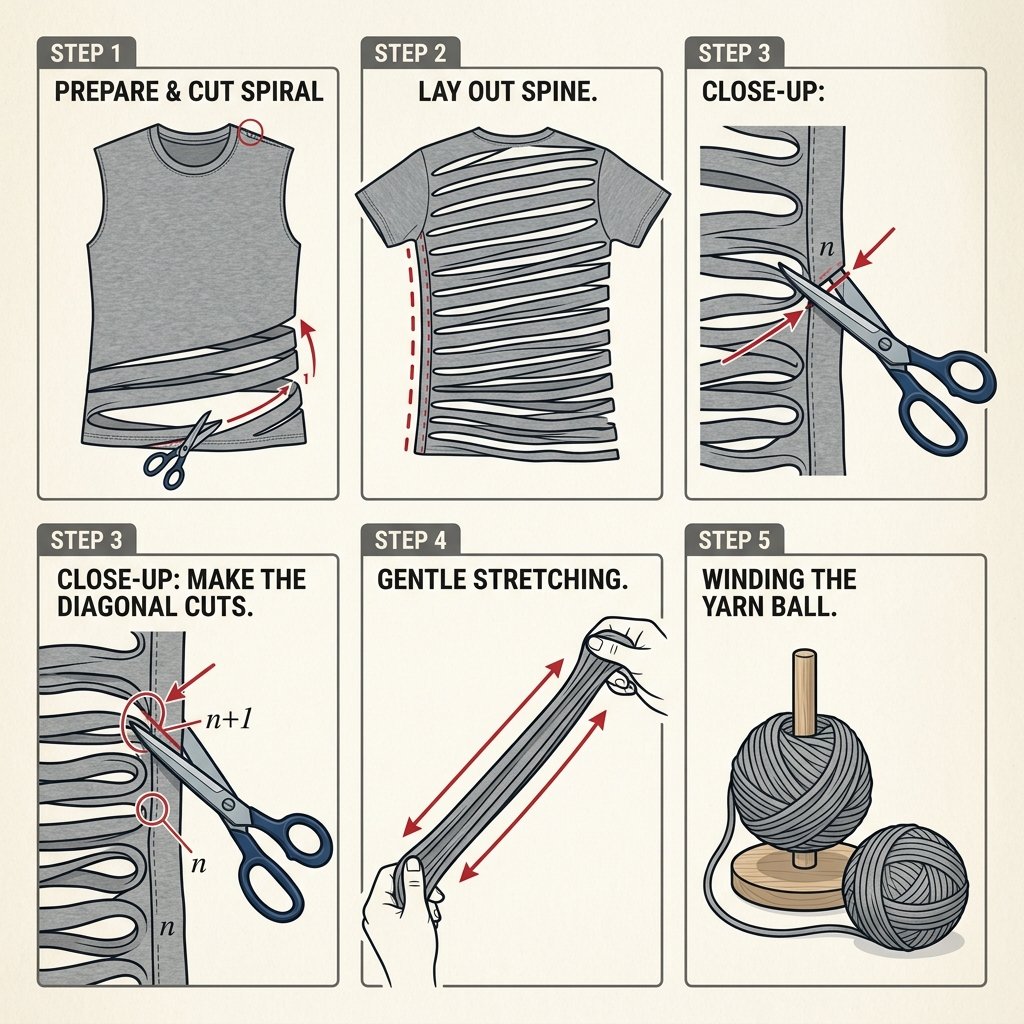
Making T-shirt yarn (or ‘Tarn’) is a clever way to maximize fabric. We want one long, continuous strand to minimize knots. Follow these steps for the perfect spool:
- Lay the shirt flat and cut off the bottom hem and the top section (from the armpits up). You are left with a fabric rectangle.
- Fold the rectangle in half, but leave about 1 inch of the bottom layer protruding past the top layer.
- Cut strips about 1 inch wide from the folded edge toward the protruding edge, stopping exactly at the first fold line. Do not cut through the 1-inch overhang!
- Open the shirt. You will see a ‘spine’ of uncut fabric.
- Cut diagonally across the spine from the first slit to the second, the second to the third, and so on. This creates one unbroken strand.
- Pull the yarn firmly. The raw edges will roll inward, creating a clean, durable cord.
Time-Saving Hack: Rolling the yarn into a tight ball as you go prevents tangling and makes the weaving process much smoother. Expect to spend about 15 minutes per shirt.
Drilling the Framework: Precision is Key
Mapping Your Holes
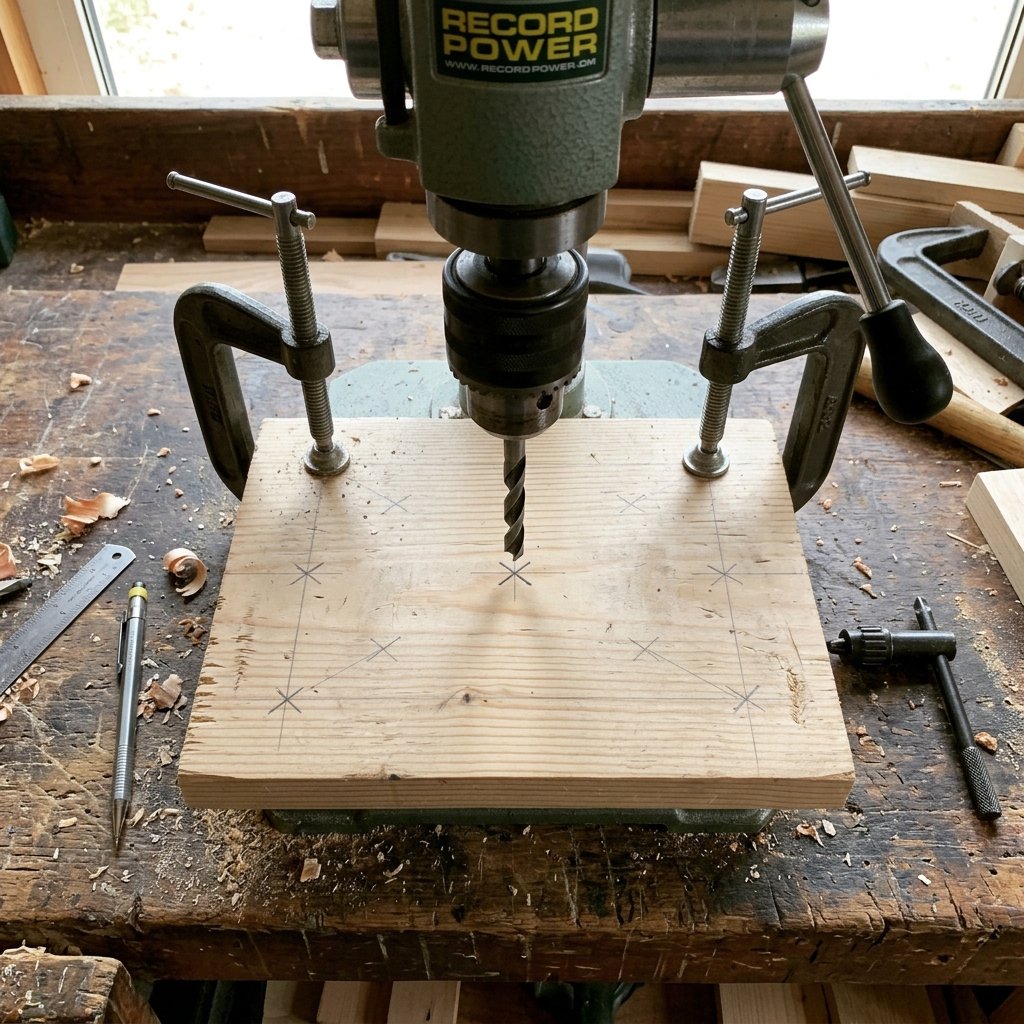
To attach the yarn to the wood, we need a series of holes around the perimeter. Using a ruler or a compass, mark dots 1/2 inch from the edge. Space the holes approximately 3/4 inch apart. Crucial Point: You must have an odd number of holes if you plan on doing a simple weave, though for crochet, any number works. For this rugged basket, an odd number allows for a beautiful, interlocking stitch pattern.
Executing the Drill
Use a 1/4-inch wood bit. Place a scrap piece of wood underneath your base to prevent ‘blowout’ (splintering) when the drill bit exits the bottom. Once drilled, sand the holes lightly to ensure the yarn doesn’t snag on any splinters. This attention to detail is what separates the masters from the amateurs.
Building the Walls: The Weaving Process

Now comes the most satisfying part: watching the basket grow. We will use a basic ‘Single Crochet’ technique directly into the base, but if you aren’t a crocheter, you can ‘weave’ the yarn in and out of the holes using a large tapestry needle.
The Foundation Row
- Pull a loop of yarn through one hole from the bottom to the top.
- Chain one to secure it.
- Work one single crochet into each hole around the perimeter. This creates a ‘ledge’ for the walls to sit on.
- Join the round with a slip stitch.
Ascending the Walls
To get those straight, sturdy walls, keep your tension consistent. If you pull too tight, the basket will bowl inward; too loose, and it will sag. Continue working in rounds until you reach your desired height. For a standard desk organizer, 5 to 7 inches is usually the ‘sweet spot’ for both aesthetics and utility.
Mantra for the Maker: Tension is the key to structure. Keep it firm, keep it steady, and the yarn will do the work for you.
Refined Finishes and Functional Accents

To truly achieve that masculine-elegant finish, the ‘bind-off’ needs to be clean. Use an invisible join to finish your last round. But don’t stop there—let’s add some rugged functionality.
Adding Leather Handles
If you have an old leather belt that has seen better days, don’t toss it! Cut two 6-inch strips. Use a hammer and a small nail (or a leather punch) to create holes at the ends of the strips. Attach them to the sides of your basket using Chicago screws or by sewing them on with a bit of leftover T-shirt yarn. The combination of dark wood, charcoal fabric, and worn leather creates a piece that looks like it belongs in a high-end study or a professional workshop.
Maintenance and Care
Because this is made from cotton and wood, it is incredibly durable. To clean, simply wipe the wooden base with a damp cloth and use a lint roller on the fabric walls. If the yarn gets dusty, a quick vacuum with a brush attachment will have it looking brand new in under 60 seconds.
Conclusion
Your Masterpiece of Frugal Engineering
Congratulations! You’ve just turned a pile of forgotten laundry and a piece of scrap wood into a sophisticated, durable storage basket. This project proves that you don’t need a massive budget to have a stylish, organized home—you just need a little resourcefulness and a bit of ‘maker’ spirit. You’ve saved nearly $50 compared to retail prices, kept fabric out of the landfill, and created something uniquely yours. Whether this basket ends up holding your EDC (Every Day Carry) gear, your craft supplies, or serves as a thoughtful, handmade gift, it stands as a testament to the power of clever upcycling. Now, go take a look at your closet—what other treasures are waiting to be transformed?

Makenzie is the founder and lead writer at MoneyHackTips.com — a personal finance blog dedicated to delivering street-smart financial wisdom for real people on real budgets. With 300+ published articles covering everything from debt management to investing fundamentals, Makenzie’s mission is to make every dollar work harder. When not writing about money hacks, Makenzie is testing frugal living strategies, optimizing side hustles, and helping readers build financial freedom from scratch.