
The Power of First Impressions on a Shoestring Budget
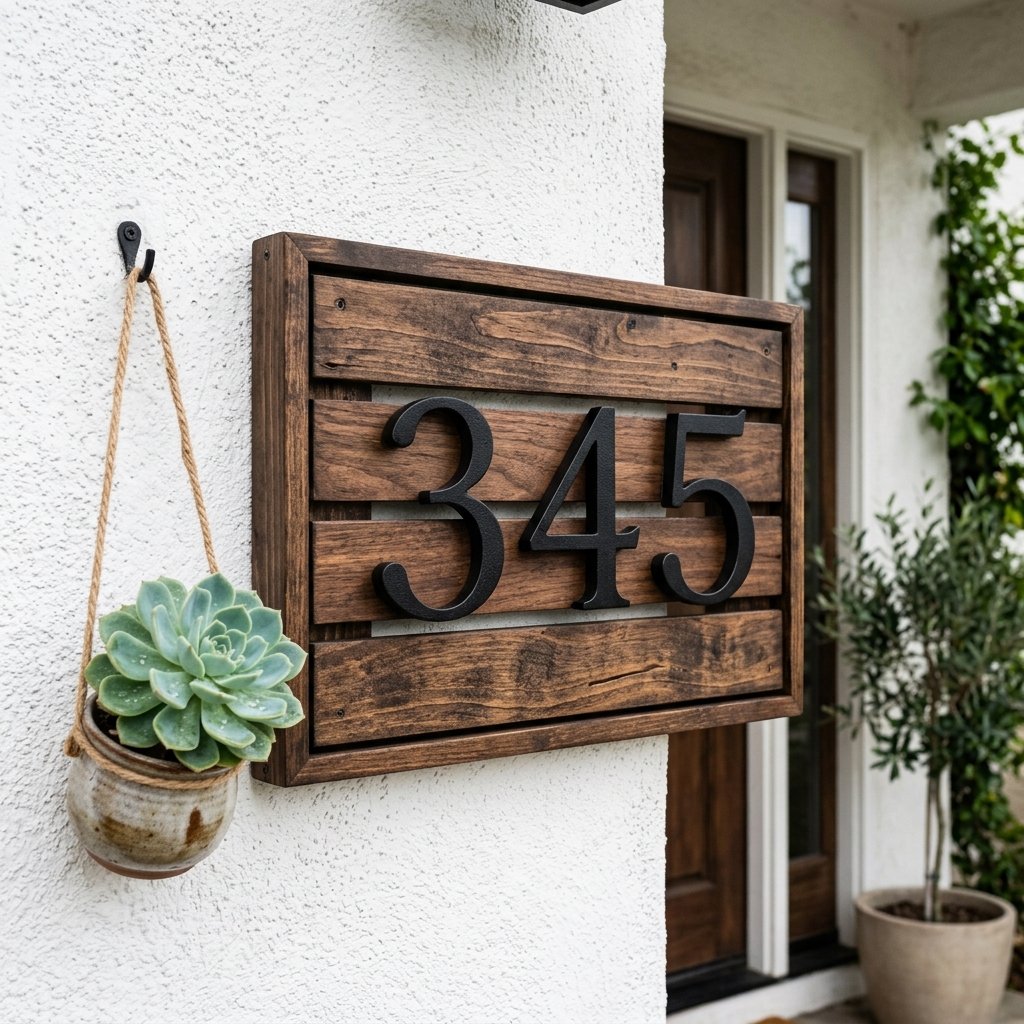
Curb appeal is often the difference between a house that looks like a forgotten relic and one that commands respect on the block. But here is the secret the high-end boutiques don’t want you to know: you do not need a four-figure landscaping budget to achieve that coveted Modern Farmhouse aesthetic. In fact, with a bit of grit, some clever scavenging, and less than $10, you can create a custom slat wood house number sign that rivals anything found in a designer catalog. This project is about more than just numbers; it is about reclaiming the aesthetic of your home using resourceful, masculine-elegant design principles. We are talking about clean lines, rugged textures, and the satisfaction of building something lasting with your own two hands. Whether you are a seasoned tinkerer or a frugal DIYer looking for a weekend win, this guide will walk you through the process of turning scrap wood and basic hardware into a statement piece that screams ‘custom-made’.
The Blueprint: Scavenging and Sourcing for Maximum Savings

Strategic Material Acquisition
To keep this project under the $10 mark, we have to be strategic. The ‘Modern Farmhouse’ look relies heavily on the contrast between natural wood textures and industrial metals. Instead of buying expensive cedar planks, we are going to look for furring strips or, better yet, pallet wood scraps. Furring strips at local hardware stores usually cost less than $2 for an eight-foot length. If you have a neighbor or a local business giving away heat-treated pallets (look for the HT stamp), your lumber cost drops to $0.
| Material Item | Store-Bought Price | DIY Scavenger Price |
|---|---|---|
| Wood Backer & Slats | $25.00 | $1.50 |
| House Numbers (4-inch) | $30.00 (set of 3) | $3.75 (Dollar Tree or Thrifted) |
| Exterior Stain/Paint | $15.00 (Quart) | $2.00 (Sample Pot) |
| Adhesive/Hardware | $10.00 | $1.25 |
| Total Cost | $80.00 | $8.50 |
The frugal maker’s mantra: Never buy a full gallon of stain when a $2 sample pot from the ‘oops’ shelf will cover your project three times over. Look for dark walnuts or ebony tones to achieve that high-end contrast.
The Build: Precision Cutting and Slat Alignment
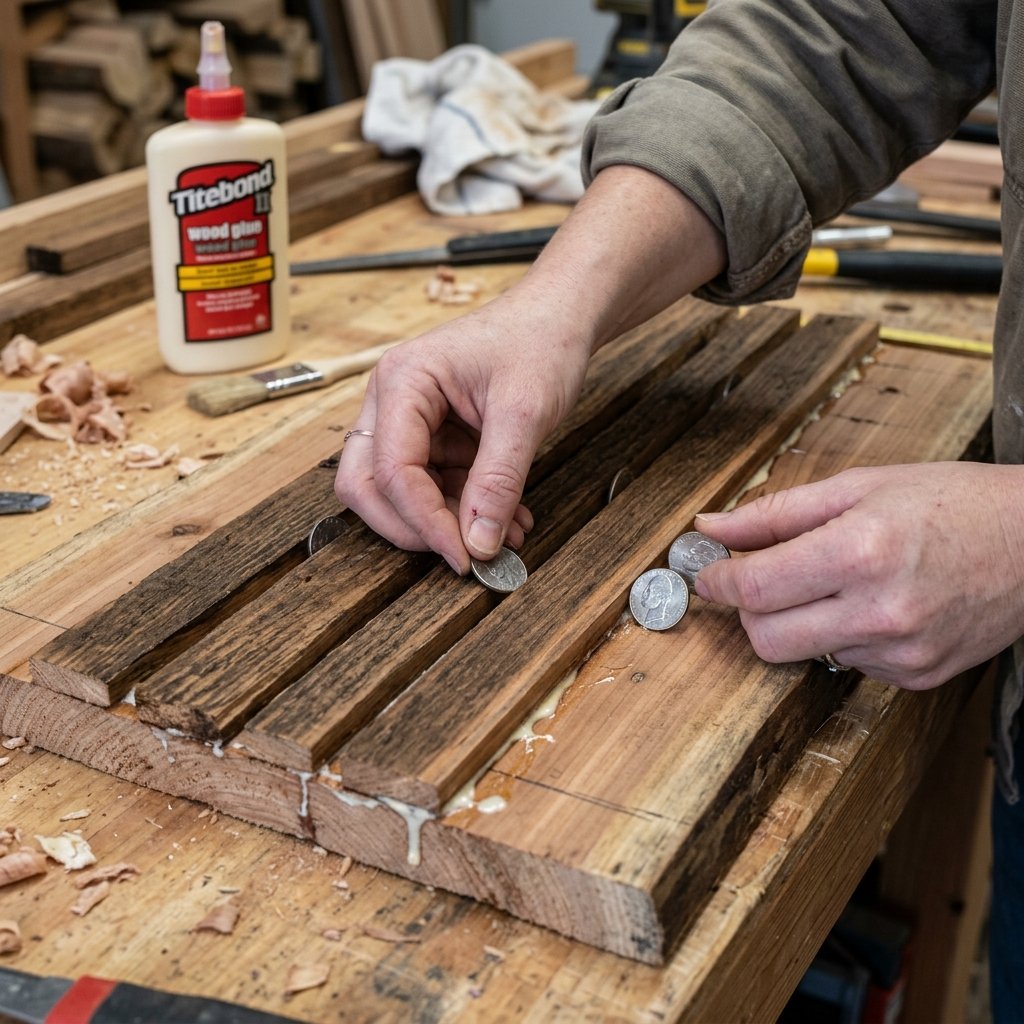
Crafting the Slat Foundation
The hallmark of the modern slat look is the intentional gap. This creates depth and shadow, giving the piece a three-dimensional architectural feel. You don’t need a table saw for this; a simple hand saw and a miter box will provide the precision needed for those crisp, 90-degree cuts.
Step-by-Step Assembly:
- Measure and Cut: Cut your backer board (a piece of 1/4 inch plywood or even a sturdy plastic sign board) to 12 inches by 8 inches.
- Slat Preparation: Cut your furring strips or pallet slats into 8-inch lengths. You will typically need 5 to 7 slats depending on their width.
- The Spacing Trick: To ensure perfect symmetry, use popsicle sticks or nickels as spacers between each wood slat. This ensures a consistent 1/8-inch gap across the entire face.
- Bonding: Apply a generous bead of exterior-grade wood glue to the backer board. Press each slat firmly into place, using your spacers as you go.
- Clamp and Cure: If you don’t have clamps, use heavy books or a couple of bricks to weigh the slats down for at least 2 hours.
By using salvaged wood, you gain a rugged texture that ‘new’ wood simply lacks. The minor imperfections in pallet wood actually enhance the farmhouse vibe, providing a ‘refined grit’ that looks expensive once finished.
The Designer Finish: Weatherproofing and Faux-Staining
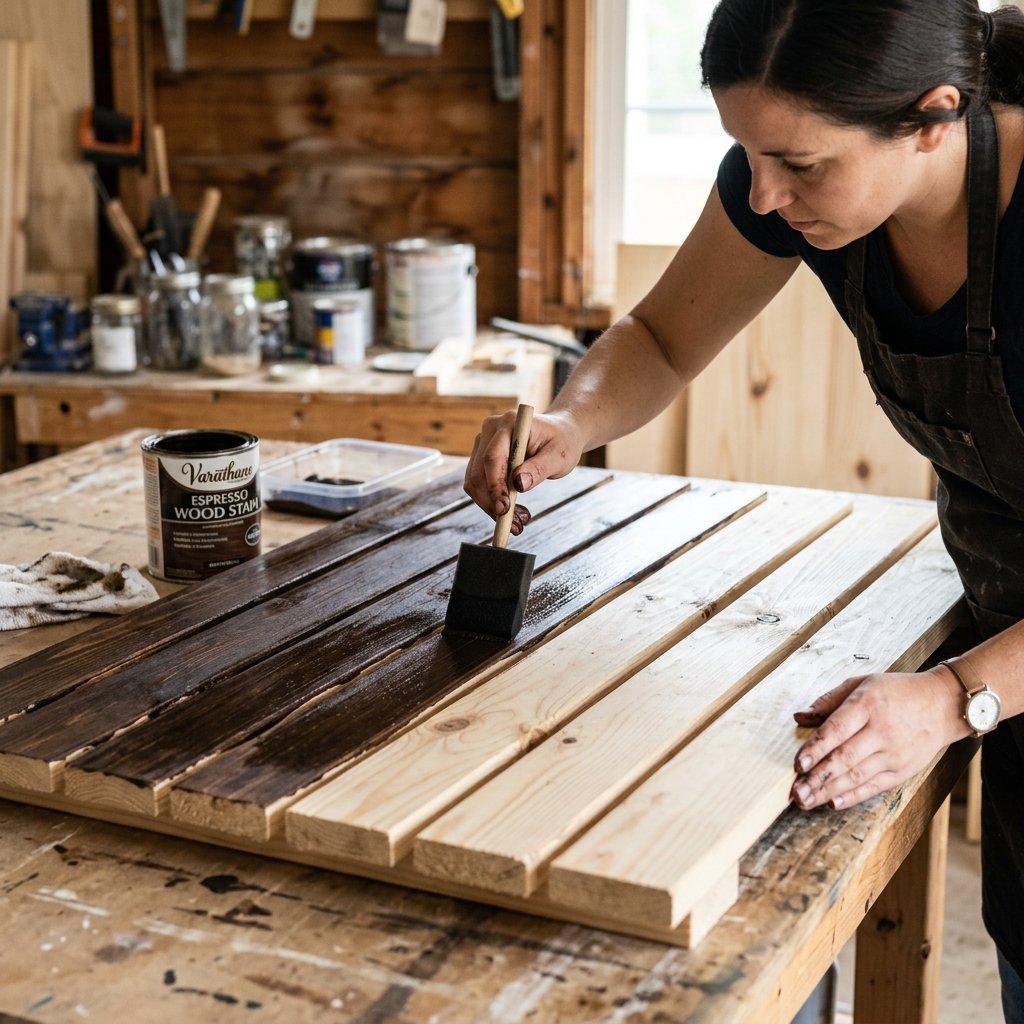
Achieving the High-End Look
Now that the structure is solid, we need to protect it from the elements while making it look like a boutique find. If you are using raw, light-colored wood, we want to deepen the tone to a rich charcoal or a dark oak. This creates the perfect backdrop for your house numbers to ‘pop’.
The ‘Baking Soda’ Weathering Hack:
If you don’t have stain, mix a solution of 1 part baking soda to 1 part water. Brush it onto the wood and let it sit in the sun. The alkalinity reacts with the tannins in the wood to create a naturally aged, ‘driftwood’ grey or deep brown within minutes. It is 100% free if you have a box in the pantry.
Once your base color is dry, you must seal it. Since this sign lives outdoors, a quick coat of clear spray sealant or even a wiped-on layer of diluted exterior glue (the poor man’s varnish) will prevent warping. For the numbers, if you found cheap brass or silver ones at a thrift store, hit them with a coat of Matte Black spray paint. This is the ‘secret sauce’ of the modern farmhouse style: matte black hardware against dark wood.
Final Assembly: Mounting and Alignment
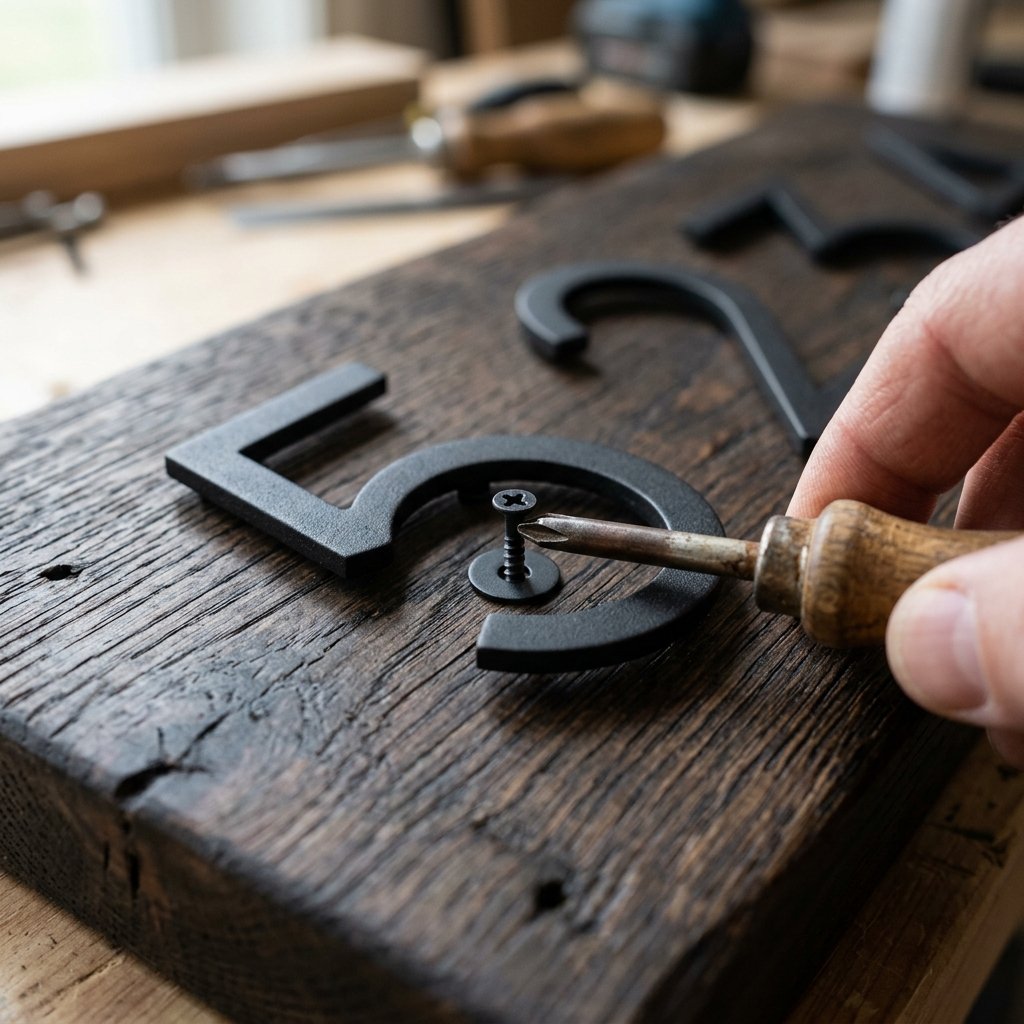
The Professional Touch
The final step is the most critical: the placement of the numbers. Centering is standard, but for a modern, asymmetrical look, try aligning the numbers to the right side of the sign, leaving the left side for a small sprig of faux greenery or just ‘negative space’.
Mounting Instructions:
- Dry Fit: Lay your numbers on the slats. Use a ruler to ensure they are perfectly level. Precision is key here; a crooked number ruins the ‘high-end’ illusion.
- Pilot Holes: If your numbers come with screws, drill tiny pilot holes first. This prevents the thin slats from splitting.
- Flush vs. Floating: For a ‘floating’ look, place a small plastic washer behind the number before screwing it in. This raises the number 1/8 inch off the wood, creating a beautiful shadow line.
- Hanging: Attach a heavy-duty sawtooth hanger to the back, or for a more rugged look, drill two holes in the top corners and use black twine or a leather strip to hang it.
This sign isn’t just a marker; it’s a piece of functional art. By using rugged materials and clever assembly, you’ve created a piece that would easily retail for $85 or more at a home goods boutique.
Conclusion
A Masterpiece of Frugal Ingenuity
There you have it—a custom, high-end Modern Farmhouse House Number Sign for under $10. This project proves that you don’t need a massive budget to have the best-looking house on the street; you just need a bit of resourcefulness and the willingness to look at ‘trash’ like furring strips and scrap wood with a designer’s eye. You’ve successfully combined the rugged durability of upcycled timber with the sleek elegance of modern typography. Not only have you boosted your curb appeal, but you’ve also kept materials out of the landfill and money in your pocket. Now, hang that sign with pride, knowing you’ve mastered the art of the ‘high-end dupe’. What’s the next project on your list? With these skills, the possibilities are as endless as the aisles of a hardware store.

Makenzie is the founder and lead writer at MoneyHackTips.com — a personal finance blog dedicated to delivering street-smart financial wisdom for real people on real budgets. With 300+ published articles covering everything from debt management to investing fundamentals, Makenzie’s mission is to make every dollar work harder. When not writing about money hacks, Makenzie is testing frugal living strategies, optimizing side hustles, and helping readers build financial freedom from scratch.