
The Etsy Sticker Shock vs. The Dollar Tree Reality
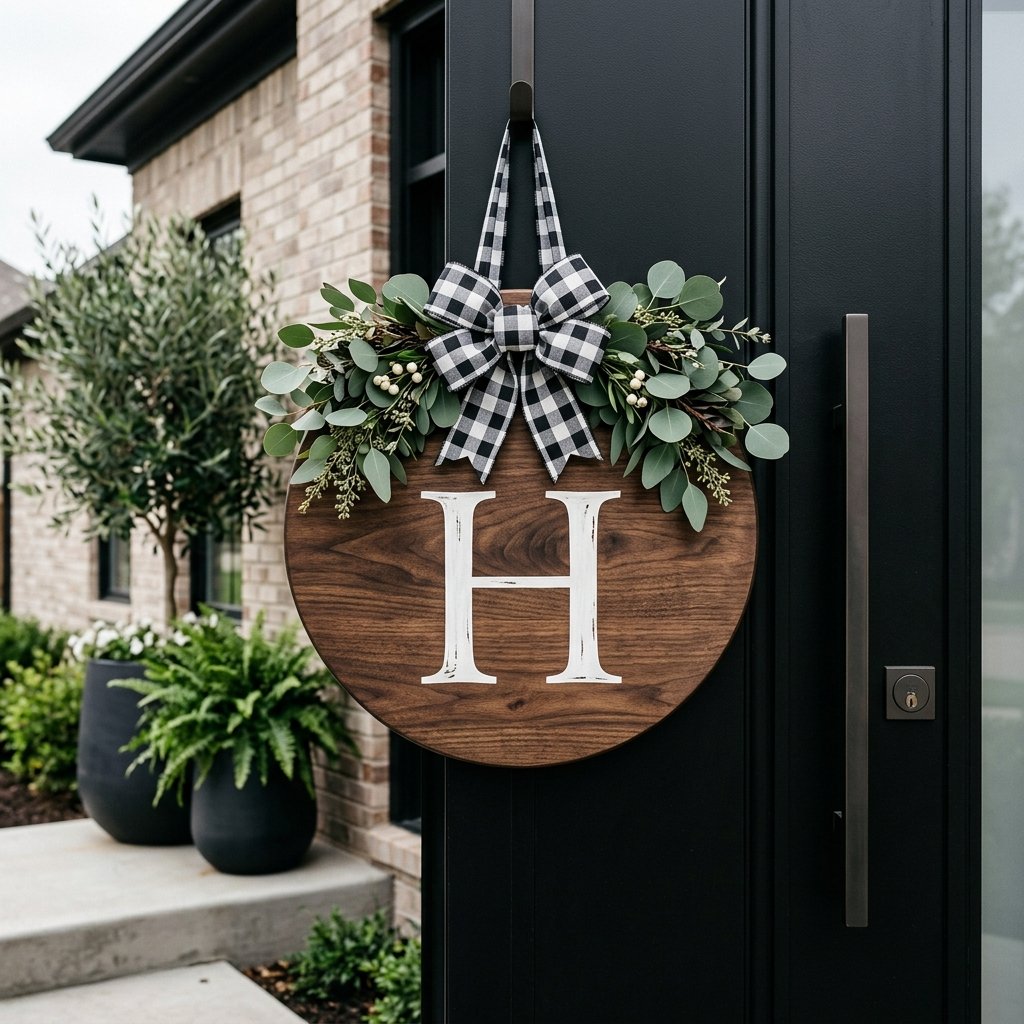
We have all been there: scrolling through Etsy, mesmerized by those gorgeous, oversized monogram door hangers that scream ‘curb appeal.’ Then you see the price tag—$45, $65, or even $85 once you factor in shipping. For a piece of wood, some paint, and a bit of ribbon, that is a steep price to pay for a ‘welcome.’ But here is the secret that the high-end boutiques don’t want you to know: you can achieve that exact same ‘Masculine-Elegant’ look using materials sourced almost entirely from your local Dollar Tree. As a savvy DIYer, you aren’t just saving money; you are reclaiming the craft. We are going to take raw, budget materials and apply professional techniques—sanding, staining, and precise assembly—to create a piece that looks like it was commissioned from a professional woodshop. This guide is your blueprint for a 100% custom door hanger that will make your neighbors think you spent a fortune.
The Strategic Supply List: Sourcing Your $10 Masterpiece
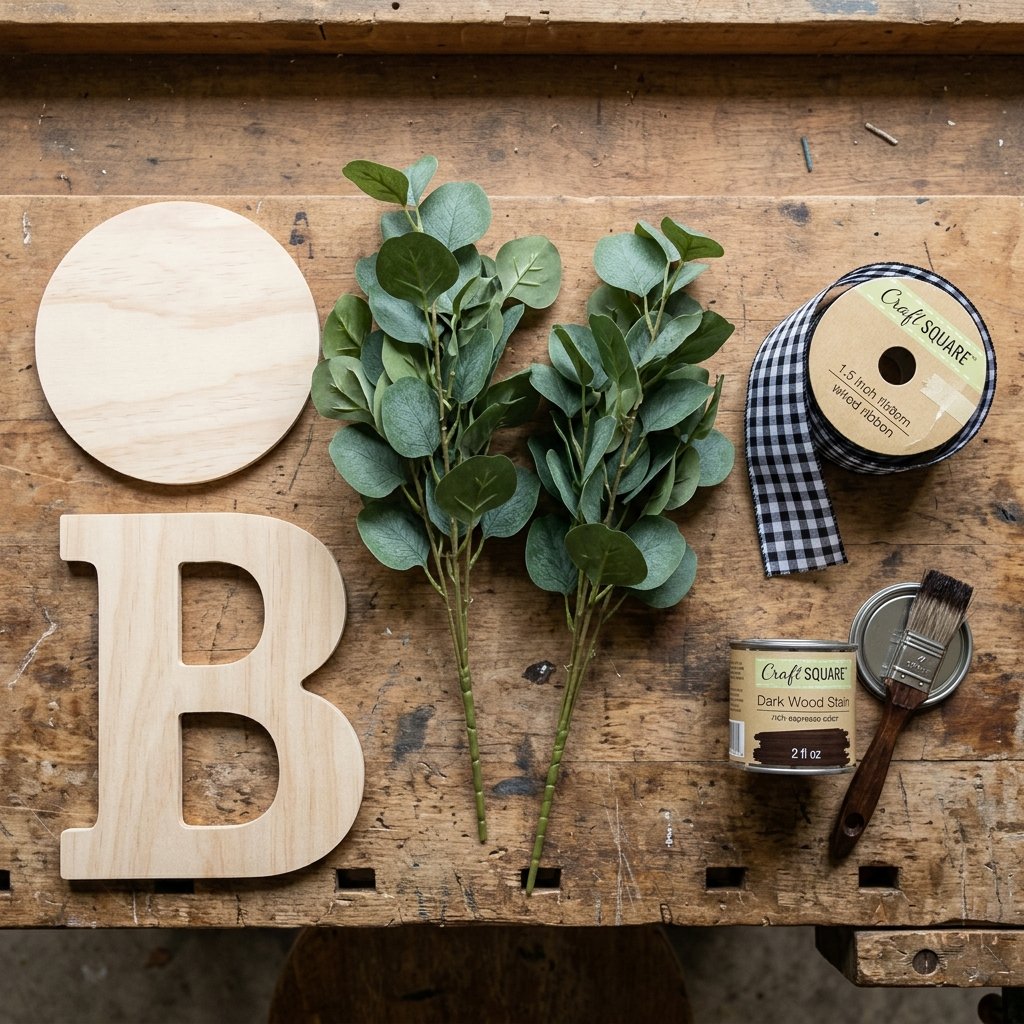
Success in the world of high-end ‘trash-to-treasure’ crafting begins with a discerning eye. You aren’t just grabbing random items; you are looking for ‘blanks’ with potential. At Dollar Tree, the inventory changes seasonally, but the core components for this project are almost always available. To achieve a rugged yet elegant aesthetic, we focus on high-contrast colors and natural textures. Below is the breakdown of what you need to hunt for.
| Item Description | Purpose | DIY Cost | Etsy Price Equivalent |
|---|---|---|---|
| 12-15 inch Round Wood Blank or Pizza Pan | The Foundation/Base | $1.25 | $15.00 |
| Large Wooden Monogram Letter | The Focal Point | $1.25 | $10.00 |
| Faux Eucalyptus or Lambs Ear Stems | Texture and Color | $2.50 | $12.00 |
| Wired Ribbon (Buffalo Check or Burlap) | The Finishing Accent | $1.25 | $8.00 |
| Stain or Chalk Paint (Small Pot) | Professional Finish | $1.50 | $5.00 |
| Total Investment | Professional Result | $7.75 | $50.00+ |
The Budget Guru Mantra: Never judge a material by its price tag, but by its silhouette. A $1.25 piece of MDF is just a canvas waiting for a $50 finish.
Foundational Prep: Achieving the ‘Expensive’ Wood Grain Look

Prepping the Base
The biggest giveaway of a ‘cheap’ DIY project is the texture. Dollar Tree wood rounds are often slightly rough or have a ‘fuzzy’ edge. To make this look like a solid oak piece from a boutique, you must start with a 220-grit sandpaper. Lightly sand the surface and the edges until they are smooth to the touch. This ensures your stain or paint adheres evenly without blotching.
The Staining Secret
If you want a rugged, masculine look, skip the bright colors and go for a Dark Walnut or Weathered Gray stain. If you don’t have wood stain, you can create a ‘faux stain’ by watering down brown acrylic paint (1 part paint to 2 parts water). Wipe it on with a lint-free rag and immediately wipe off the excess. This allows the subtle grain of the wood to peek through, giving it a high-end, organic feel.
- Step 1: Sand the wood round and the monogram letter until perfectly smooth.
- Step 2: Apply your stain or base color. For the letter, use a high-contrast color like Antique White or Matte Black to make it pop against the background.
- Step 3: Let the pieces dry for at least 2 hours. Do not rush this; moisture is the enemy of a permanent bond.
The Monogram Masterclass: Precision Placement and Adhesion
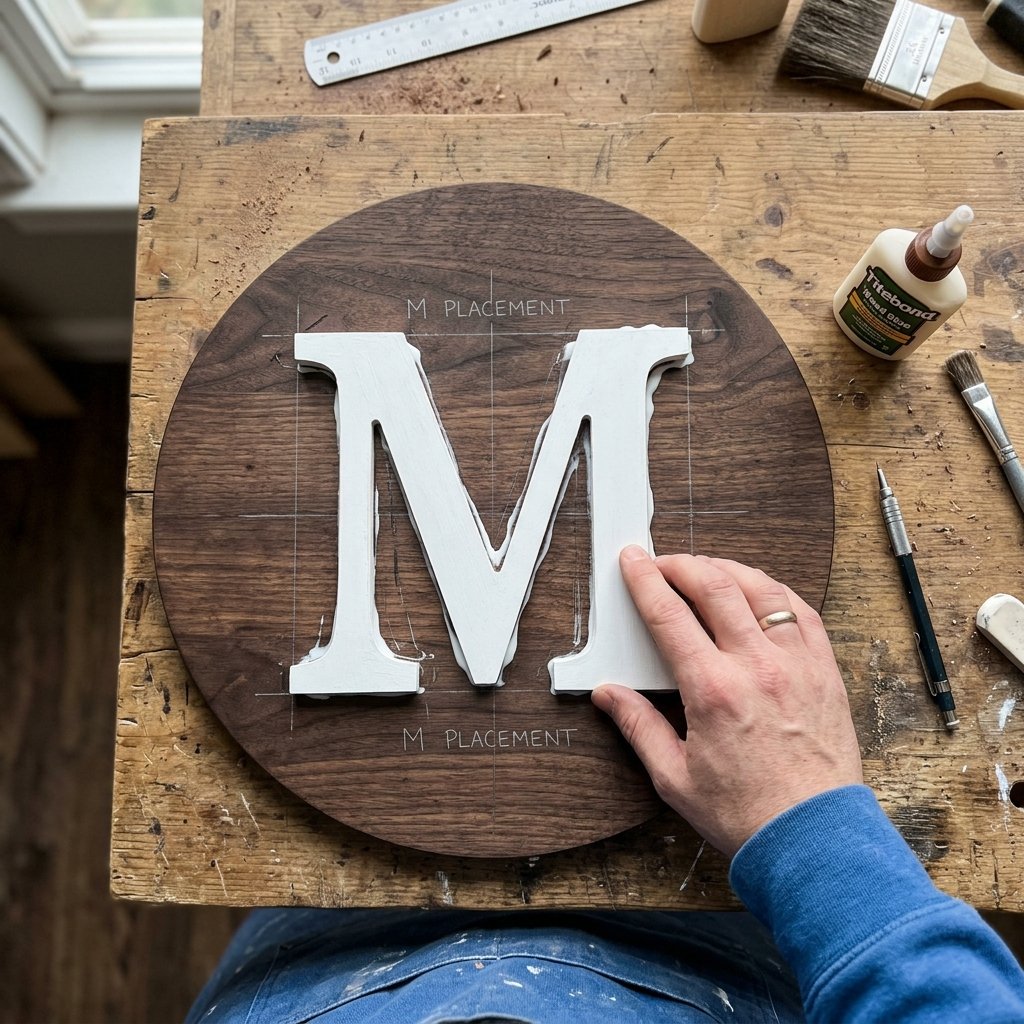
The monogram is the heart of the project. A common mistake is centering the letter perfectly in the middle of the circle. For a more modern, designer look, we are going to use the ‘Rule of Thirds.’ Placing the letter slightly lower or to the right creates a more dynamic and visually interesting composition. This leaves room for our greenery and bow at the top, preventing the design from looking cluttered.
Choosing the Right Adhesive
Forget standard white glue. For a door hanger that will endure heat, humidity, and the occasional door slam, you need a multi-surface bond. I recommend a combination of E6000 industrial adhesive for long-term hold and hot glue for an immediate tack. This ‘hybrid’ method ensures your letter won’t budge for years.
- Dry Fit: Place your letter and greenery on the board without glue to find the perfect arrangement.
- Mark the Spot: Use a pencil to lightly trace where the letter will go.
- Apply Glue: Place small dots of E6000 around the back of the letter, leaving gaps for the hot glue.
- Press and Hold: Press the letter onto the board firmly for 60 seconds.
Pro-Tip: If your monogram letter feels too thin, glue two identical Dollar Tree letters together to create a ‘3D’ effect that adds depth and expensive-looking shadows.
Botanical Brilliance: Layering Greenery for a Lush Look
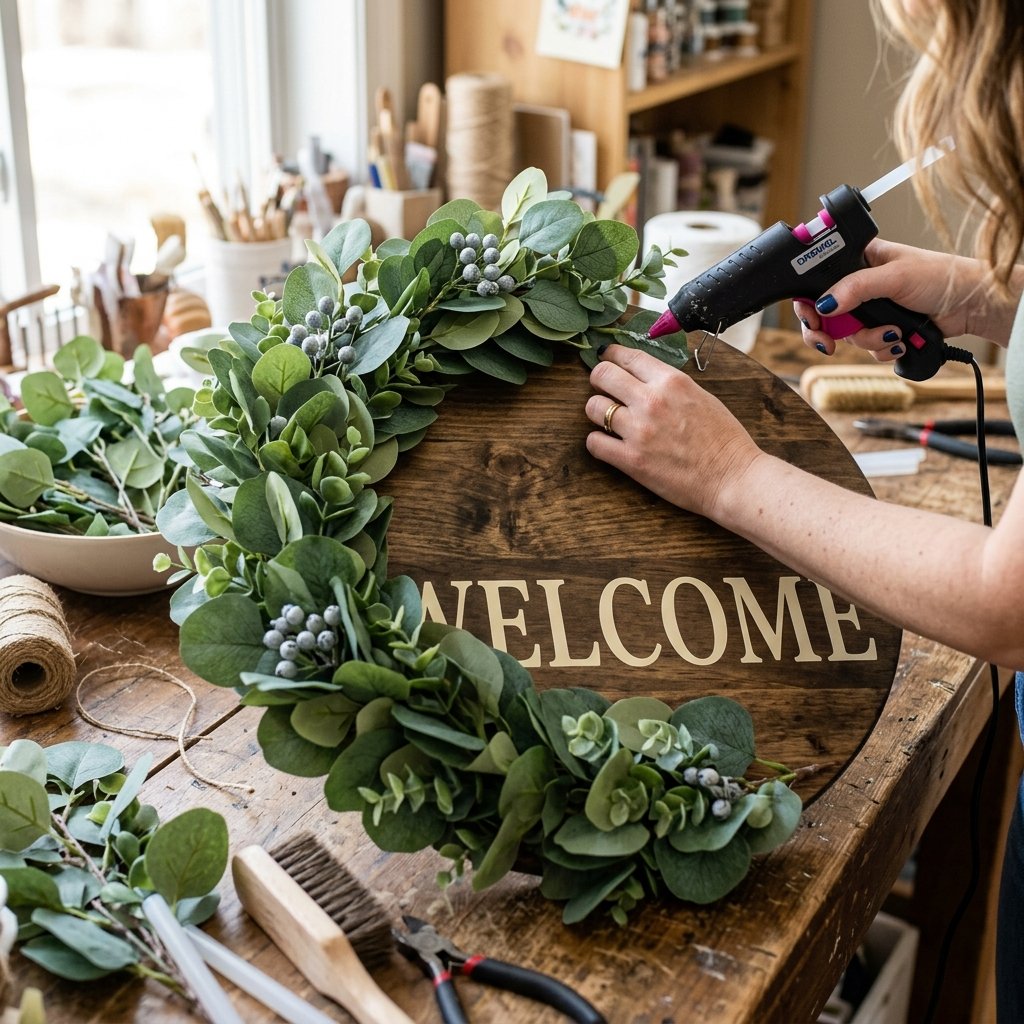
Cheap faux greenery looks… well, cheap. But you can ‘elevate’ Dollar Tree eucalyptus by using a layering technique. Instead of just gluing a single stem down, we are going to deconstruct the bunch. Pull the individual leaves off the main plastic stem and re-assemble them into a ‘spray’ pattern. This mimics the way natural foliage grows and hides the plastic ‘nubs’ that scream budget-buy.
The Symmetry Strategy
For a classic look, create two identical sprays of greenery. Point the tips of the leaves away from the center where your bow will eventually sit. This creates a frame for the top of your monogram. Stagger the heights of the leaves to create volume. If the greenery looks too shiny or ‘plastic-y,’ a quick mist of matte clear sealant will give it a realistic, preserved look.
- Materials: 2-3 stems of Dollar Tree greenery, wire cutters, and hot glue.
- Technique: Layer the largest leaves on the bottom and the smaller, newer-looking buds on top.
- Savings: You are using $2.50 of greenery to replicate a $15.00 florist-grade arrangement.
The Designer Bow: The ‘Re-Loop’ Method
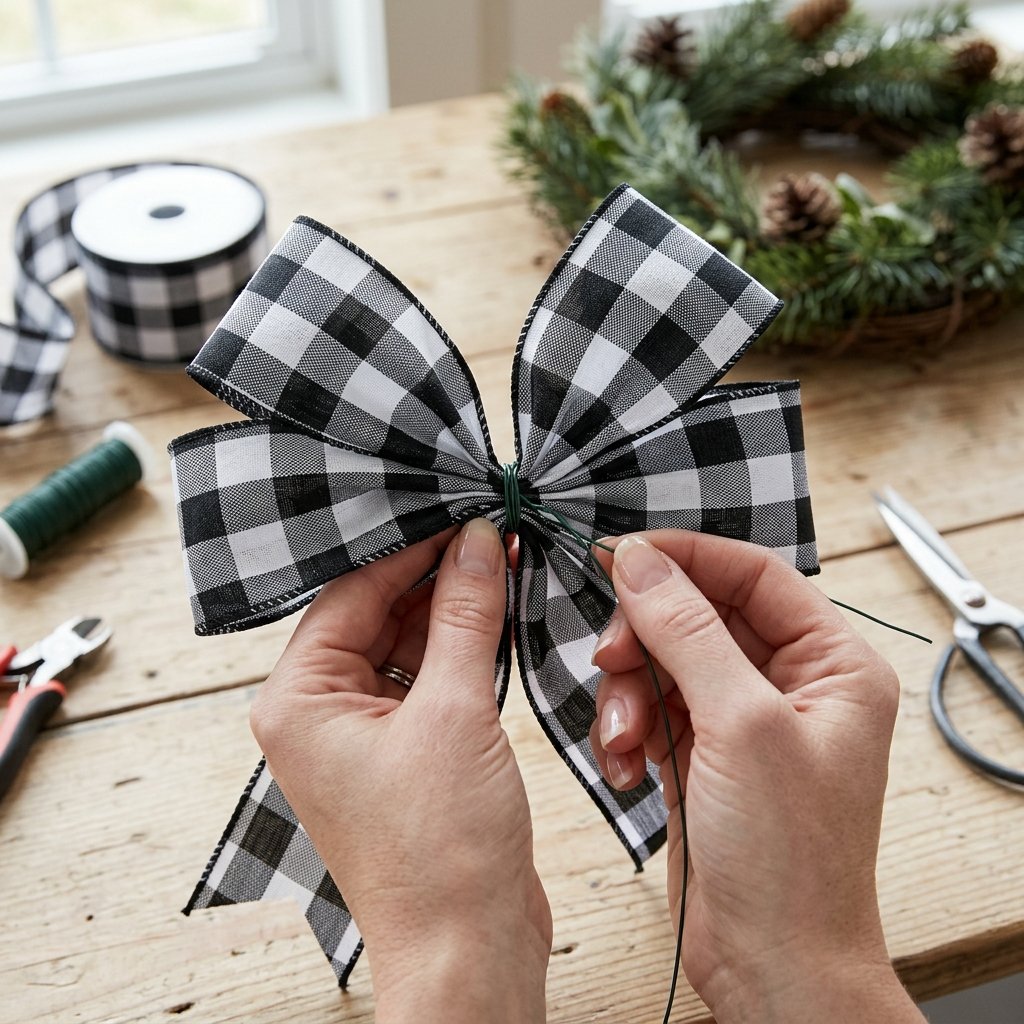
The bow is often the most intimidating part of any DIY project, but it is the ‘crown’ of your door hanger. We are going to avoid the ‘floppy’ bow look by using wired ribbon. Wired ribbon allows you to ‘sculpt’ the loops so they stay perky regardless of the weather. For this project, a Double-Loop Bow provides the best ‘Masculine-Elegant’ balance.
Step-by-Step Bow Construction
- The Loops: Create two loops of ribbon (about 6 inches wide) and pinch them in the center.
- The Tails: Cut a 12-inch strip of ribbon, fold it in half, and place it behind your loops.
- The Center: Use a small piece of floral wire or a pipe cleaner to cinch everything together tightly in the middle.
- The Cover: Wrap a small 2-inch scrap of ribbon around the wire to hide it, securing it with hot glue in the back.
- Dovetail the Ends: Fold the ends of the tails in half and cut at an angle to create those professional ‘V’ shapes.
Mount the bow directly over the center of your greenery sprays using hot glue and a staple for extra security.
Weatherproofing and Mounting: Protecting Your Work
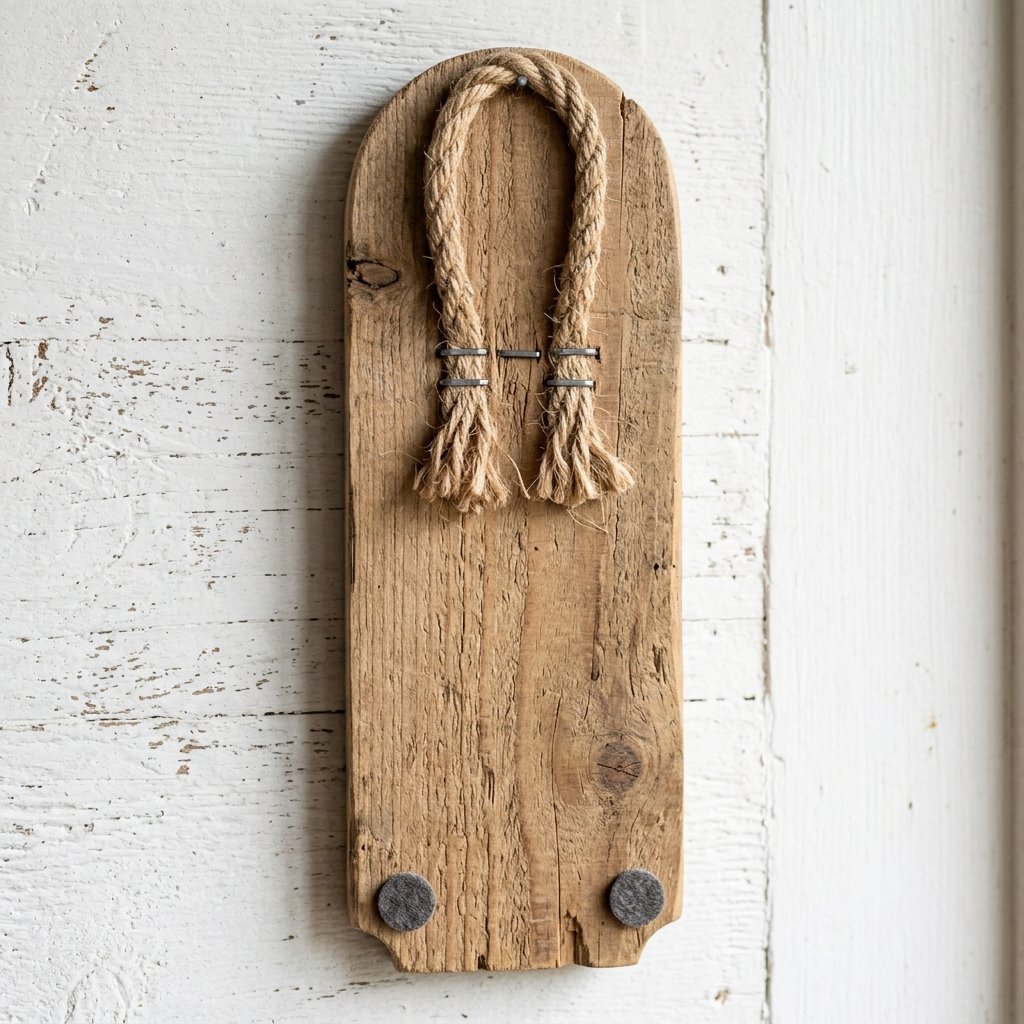
Since this piece will be exposed to the elements, you must protect it. A single coat of Polycrylic Protective Finish (in Matte or Satin) will prevent the wood from warping and the paint from fading in the sun. If you used a pizza pan instead of wood, this also prevents rust.
The Rugged Hanging Solution
For a door hanger that doesn’t ‘clank’ every time the door opens, use braided jute twine or a heavy-duty leather cord. Staple the ends of the cord to the back of the wood round, about 4 inches apart. To protect your door’s paint, glue a few small felt pads (also available at Dollar Tree) to the back of the hanger. This provides a soft buffer and a professional finish.
Safety Note: When using industrial adhesives like E6000 or spray sealants, always work in a well-ventilated area to avoid inhaling fumes. Safety is the first step of any successful build.
Conclusion
Your Boutique-Style Result for a Fraction of the Cost
You have done it! By following these steps, you have transformed approximately $8.00 of basic Dollar Tree supplies into a stunning, personalized monogram door hanger that rivals any $50.00 boutique find. This project isn’t just about the savings—though saving 80% is a massive win—it is about the pride of craftsmanship. You have mastered the art of the ‘high-low’ mix, using professional techniques to elevate humble materials. Hang your new masterpiece with pride, knowing you’ve beaten the Etsy prices while adding a rugged, elegant touch to your home. Now, what’s your next ‘trash-to-treasure’ challenge?

Makenzie is the founder and lead writer at MoneyHackTips.com — a personal finance blog dedicated to delivering street-smart financial wisdom for real people on real budgets. With 300+ published articles covering everything from debt management to investing fundamentals, Makenzie’s mission is to make every dollar work harder. When not writing about money hacks, Makenzie is testing frugal living strategies, optimizing side hustles, and helping readers build financial freedom from scratch.