The Coastal Aesthetic on a Shoestring Budget
There is an undeniable allure to the ocean—the way the salt air feels, the sound of the rhythmic tide, and the frosted treasures spat out by the waves known as sea glass. For a bride or groom planning a coastal or nautical-themed wedding, sea glass is the holy grail of decor. However, if you have ever priced out genuine sea glass jars or high-end frosted glassware at boutique retailers, you know that ‘ocean breeze’ comes with a ‘hurricane price tag.’ We are talking $30 to $60 per vase. When you have twenty tables to decorate, that budget evaporates faster than a puddle in the Sahara.
But here is the secret: you don’t need the ocean, and you certainly don’t need a massive bank account. As a resourceful DIYer, you have the power to manufacture that weathered, tumbled-by-the-tides look using nothing more than thrift store cast-offs and a few household staples. In this masterclass, we are going to dive deep into the art of the ‘faux frost.’ We will take mismatched, dusty glassware and turn it into a cohesive, elegant centerpiece collection that will have your guests asking which high-end boutique you raided. Let’s get our hands dirty and our budgets tight.
The Tactical Hunt: Sourcing Your Glassware

Scouring the Shelves for Diamond in the Rough
Your journey begins not at a craft store, but in the trenches of your local thrift shops, garage sales, and even your own recycling bin. To create an authentic sea glass look, you need variety. Look for interesting shapes: wine bottles, old medicine jars, mason jars, and even those awkward floral vases that seem to multiply in every grandmother’s cabinet. The key is structural diversity. When you cluster bottles of different heights and girths, you create visual interest that looks curated rather than cluttered.
Budget Mantra: A $0.50 mismatched jar is just a masterpiece waiting for a coat of matte finish. Never pay full price for glass that you intend to paint.
Before you start the transformation, cleanliness is paramount. Any grease, dust, or sticker residue will ruin the adhesion of your ‘sea glass’ mixture. Soak your haul in hot, soapy water and use a razor blade to scrape off stubborn labels. A quick wipe with rubbing alcohol ensures a pristine surface for our DIY frosting.
| Item Source | Estimated Cost | Best For… |
|---|---|---|
| Thrift Store (Goodwill/Salvation Army) | $0.50 – $2.00 | Unique shapes and vintage medicine bottles. |
| Garage Sales | $0.10 – $0.50 | Bulk glassware and large floral vases. |
| Recycling Bin | $0.00 | Wine, beer, and sauce bottles (Free!). |
| Dollar Store | $1.25 | Standard cylinders and candle holders. |
The Alchemist’s Formula: Crafting the Faux Sea Glass Finish
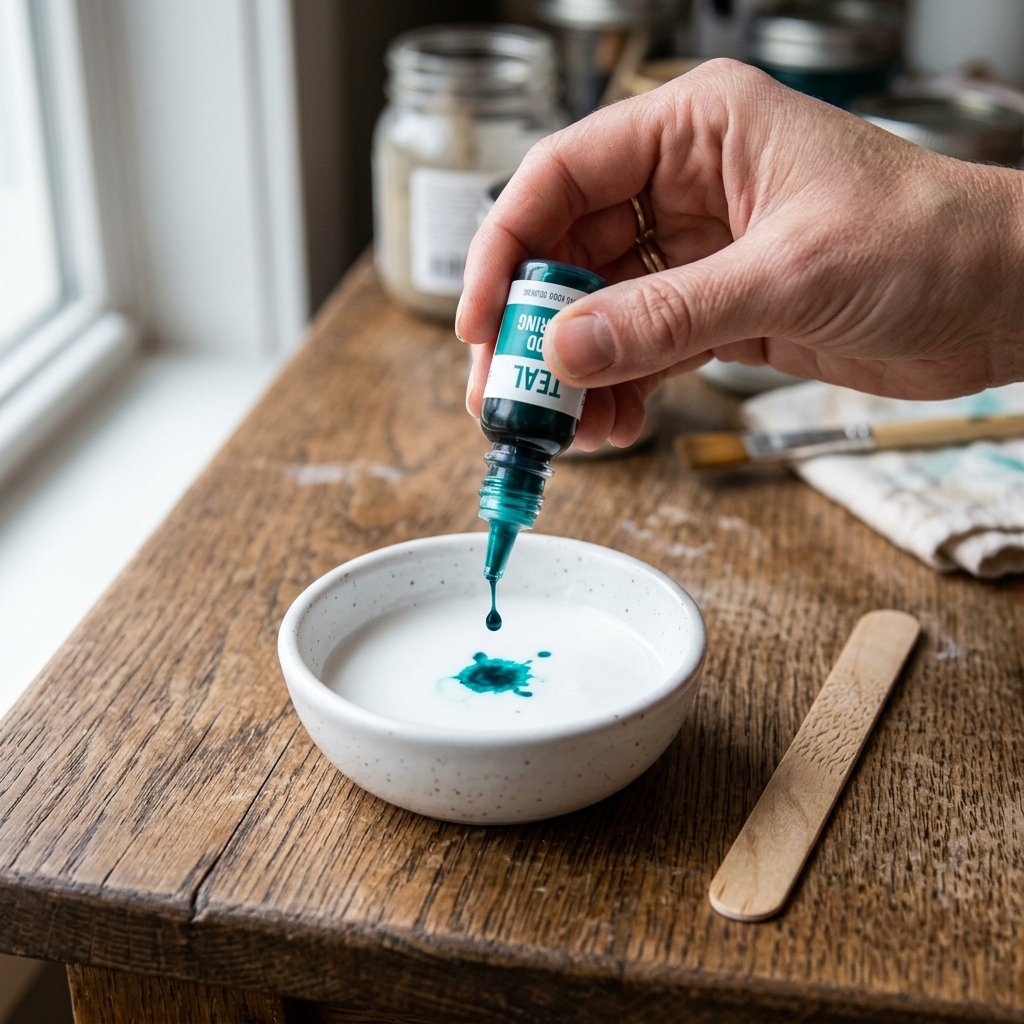
Mixing the Secret Sauce
There are two primary ways to achieve the sea glass look: the ‘Quick Spray’ method and the ‘Artisan Glue’ method. While spray paint is fast, the glue method—using matte Mod Podge and food coloring—gives you a depth of color and a tactile texture that looks remarkably like real glass tumbled in the surf for decades. It is also incredibly budget-friendly, costing pennies per bottle.
- Matte Mod Podge: This acts as our frosting agent. It must be matte; gloss will ruin the effect.
- Food Coloring: Use blues, greens, and a tiny drop of yellow to create that perfect ‘seafoam’ or ‘cobalt’ hue.
- Water: Just a teaspoon to thin the mixture for a smooth application.
- Dish Soap: One tiny drop breaks the surface tension, preventing streaks.
Mix your concoction in a small bowl. Start with a tablespoon of Mod Podge and add your coloring one drop at a time. Remember: the color will look milky and pale when wet, but it will dry vibrant and translucent. Always test a small patch on the bottom of a jar before committing to the whole piece.
The Application: Achieving the Frosted Texture
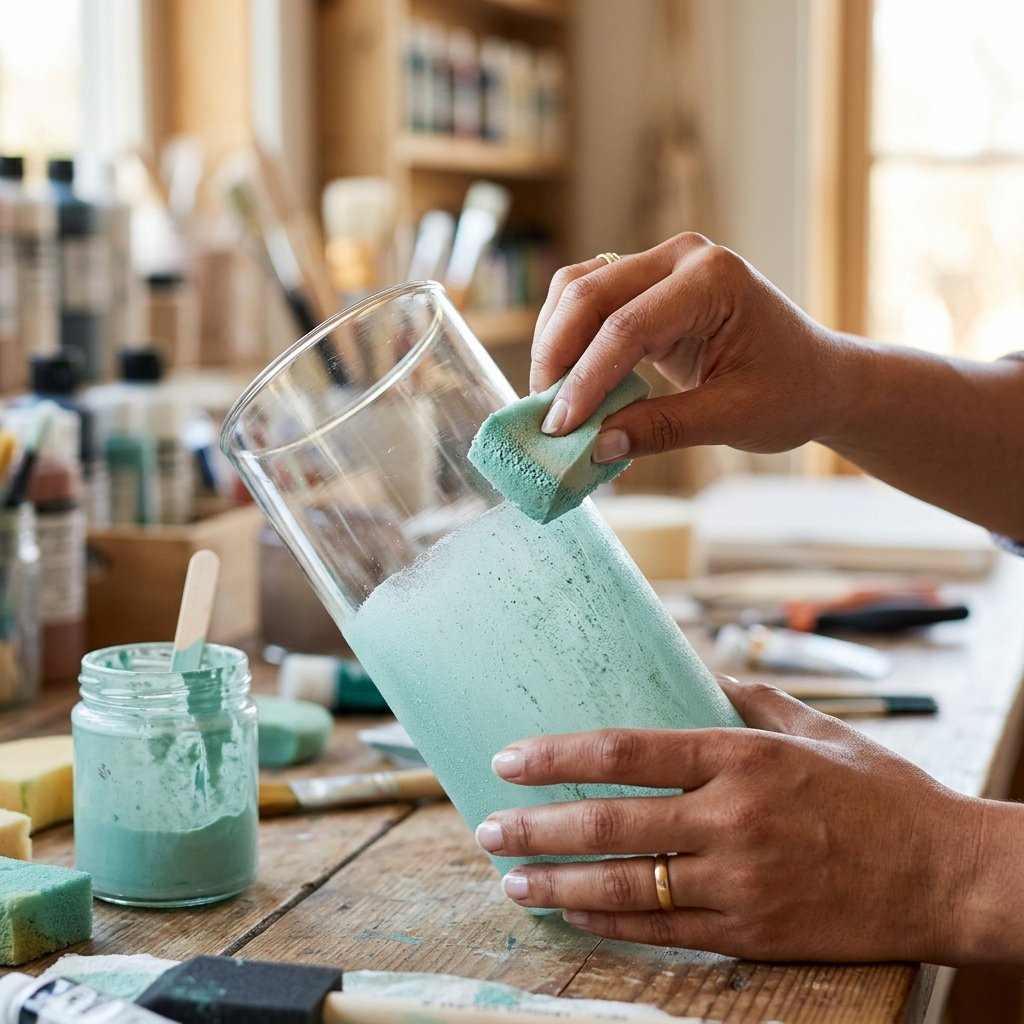
Precision Coating Techniques
Applying the finish is where the magic happens. You have two choices: brushing or pouring. For a rugged, hand-crafted look, use a makeup sponge to ‘stipple’ the mixture onto the exterior. This creates tiny, microscopic peaks that mimic the pitted surface of real sea glass. If you want a perfectly smooth, modern look, you can pour the mixture inside the bottle and swirl it around until coated, then drain the excess.
Pro Tip: If you are coating the exterior, work in thin layers. It is better to apply two light coats than one thick, drippy one. Allow at least 2 hours of drying time between layers.
Safety Note
While these materials are non-toxic, always work in a well-ventilated area to speed up drying times, and remember that these jars are for decorative use only—they are not food-safe once painted on the inside.
The Big Reveal: Cost Comparison and Savings

Why DIY Beats Store-Bought Every Time
When you are planning a wedding, every dollar saved is a dollar that can go toward the honeymoon or the open bar. By choosing the upcycled sea glass route, you are not just being ‘crafty’; you are being a financial strategist. Let’s look at the cold, hard numbers of a 15-table wedding setup.
| Expense Item | High-End Retailer | DIY Upcycled |
|---|---|---|
| Set of 3 Vases (per table) | $45.00 | $2.50 |
| Filler (Sand/Shells) | $10.00 | $2.00 (Bulk) |
| Candles/Lighting | $15.00 | $5.00 (Dollar Store) |
| Total per Table | $70.00 | $9.50 |
| Grand Total (15 Tables) | $1,050.00 | $142.50 |
By investing a few afternoons into this project, you are saving over $900. That is the power of resourceful creativity. Plus, you have the satisfaction of knowing your decor is one-of-a-kind and environmentally friendly.
Styling Your Masterpiece: The Final Touches
Assembling the Centerpiece
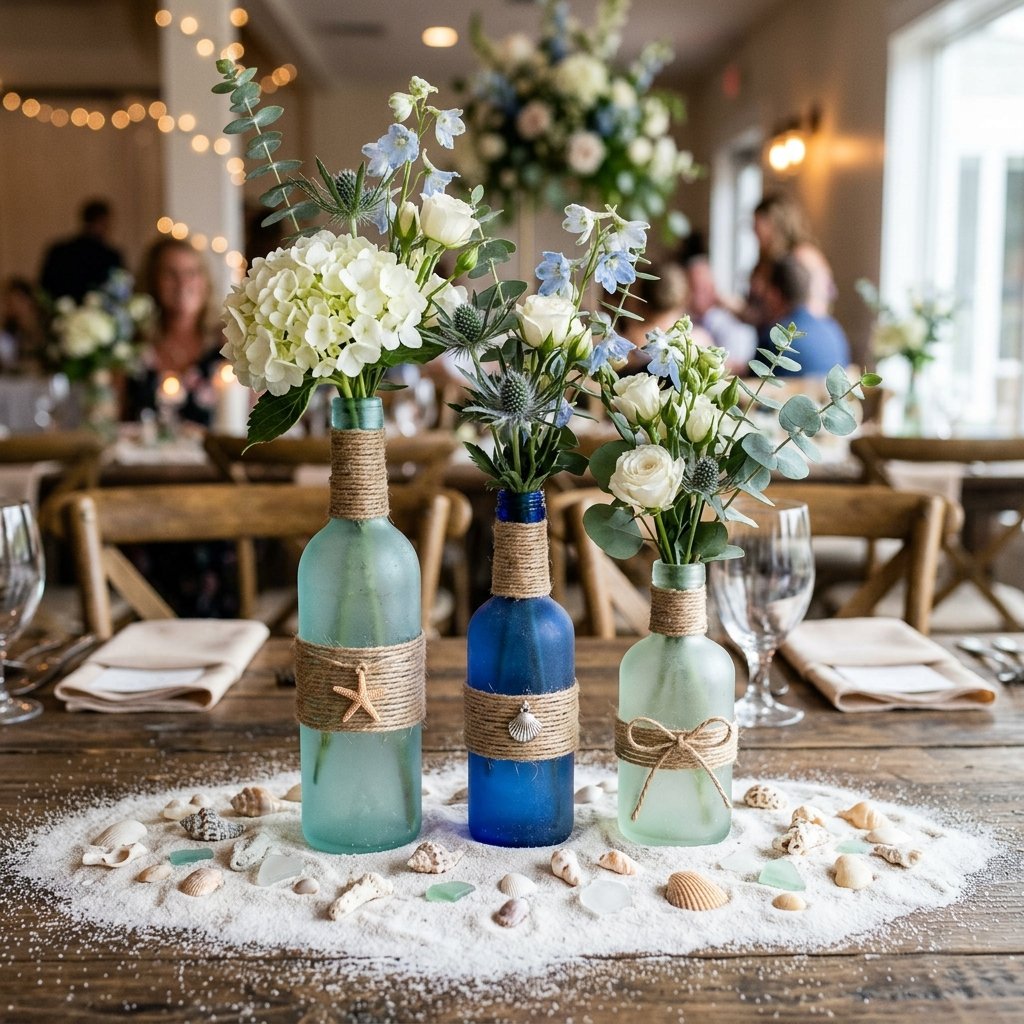
Now that your glass is cured and frosted, it is time to style. A single bottle looks lonely; a cluster looks like a collection. Group your sea glass in odd numbers—threes and fives are most pleasing to the eye. To ground the look, place them on a natural wood slice or a simple cheesecloth runner in a sandy beige tone.
- Add Natural Elements: Wrap the necks of a few bottles in jute twine or ‘fisherman’s knot’ rope for a rugged, masculine-elegant touch.
- Illumination: Drop a thin LED fairy light string inside a frosted cobalt jar. The frost will diffuse the light, creating a soft, ethereal glow that lasts all night.
- Floral Integration: Use simple, white blooms like baby’s breath or anemones. You don’t want the flowers to compete with the stunning texture of the glass.
The beauty of this project is its versatility. Whether your venue is a formal ballroom or a literal beach, these centerpieces bridge the gap between ‘casual’ and ‘sophisticated’ with ease.
Conclusion
A Toast to Your Resourcefulness
Creating your own sea glass wedding centerpieces is more than just a budget hack; it is a testament to your creativity and your commitment to a sustainable, personalized celebration. You have taken items that were destined for the landfill and transformed them into the focal point of your most important day. When your guests lean in to admire the soft, frosted glow of your table settings, you can smile knowing that these ‘treasures’ cost you next to nothing, but added a million dollars’ worth of character to your wedding. Now, grab those bottles, start mixing your seafoam hues, and let the transformation begin. Happy crafting!

Makenzie is the founder and lead writer at MoneyHackTips.com — a personal finance blog dedicated to delivering street-smart financial wisdom for real people on real budgets. With 300+ published articles covering everything from debt management to investing fundamentals, Makenzie’s mission is to make every dollar work harder. When not writing about money hacks, Makenzie is testing frugal living strategies, optimizing side hustles, and helping readers build financial freedom from scratch.