
The Ultimate Everyday Carry Upgrade
Let us face it: the classic pocket protector has a bit of a reputation. Traditionally made from stiff, crack-prone, cloudy plastic, it is often seen as purely functional and entirely devoid of style. But if you have a handyman, engineer, teacher, or artist in your life, you know that protecting a favorite shirt from leaking ink, sharp pencils, or small screwdrivers is an absolute necessity. What if you could take this purely utilitarian item and transform it into a rugged, sophisticated, designer-level Everyday Carry (EDC) accessory? Welcome to the ultimate resourceful masterclass on crafting a DIY leather pocket protector.
Leathercraft might seem like an intimidating, expensive hobby reserved for master artisans with workshops full of specialized tools. But as a frugal DIYer and crafty upcycler, I am here to tell you a secret: you can create heirloom-quality leather goods right at your kitchen table using budget-friendly scraps and a few clever household hacks. By swapping cheap plastic for rich, full-grain leather, you are not just making a tool; you are crafting a personalized, masculine-elegant gift that will develop a gorgeous patina over time. It is the perfect thoughtful Father’s Day gift, groomsman favor, or birthday surprise.
In this comprehensive guide, we will walk through every step of the process, from sourcing budget leather to mastering the unbreakable saddle stitch. Grab your tools, roll up your sleeves, and let us upgrade his style with a project that costs pennies on the dollar compared to high-end boutique versions!
Sourcing the Perfect Hide: Why Full-Grain Leather Beats Plastic Every Time

When it comes to rugged durability and timeless style, nothing beats genuine leather. But walking into a specialty leather shop can give any budget-savvy crafter immediate sticker shock. The good news? You do not need to buy a massive, expensive hide for a pocket protector. This project requires very little material, making it the perfect candidate for upcycling or buying scrap bundles.
Where to Find Budget Leather
Your first stop should be the thrift store. Look for old, thick leather briefcases, oversized belts, or heavy-duty leather jackets that have seen better days but still have large sections of pristine material. If you prefer working with new leather, many craft stores (like Michaels or Hobby Lobby) and online retailers sell “scrap bags” of high-quality remnant leather for under $10. These bags are treasure troves for small EDC projects.
Vegetable-Tanned vs. Chrome-Tanned
For the absolute best results, try to find vegetable-tanned leather (often called veg-tan). Veg-tan leather is stiffer, holds its shape beautifully, and allows you to burnish (smooth and polish) the edges for that high-end designer look. Chrome-tanned leather (often used for garments or soft bags) is softer and harder to burnish, though it can still work if you prefer a floppy, rustic feel. For a pocket protector, a thickness of 3oz to 4oz (roughly 1.2mm to 1.6mm) is the sweet spot—thick enough to prevent a sharp awl or pen from poking through, but thin enough to slide comfortably into a shirt pocket.
| Item / Material Source | Estimated Cost | Durability & Style Factor |
|---|---|---|
| Store-Bought Plastic Protector | $2 – $5 | Low (Cracks easily, looks cheap) |
| Boutique Designer Leather Protector | $45 – $85 | High (Luxurious but expensive) |
| DIY Thrifted Leather Upcycle | $3 – $6 | Maximum (Rugged, custom, eco-friendly) |
| DIY Craft Store Scrap Bag | $8 – $12 | Maximum (Yields multiple protectors) |
“Resourcefulness is the true mark of a craftsman. Transforming an abandoned leather briefcase into a daily-use heirloom isn’t just budget-savvy; it is a tribute to the material itself.”
Gathering Your Leathercraft Arsenal on a Frugal Budget
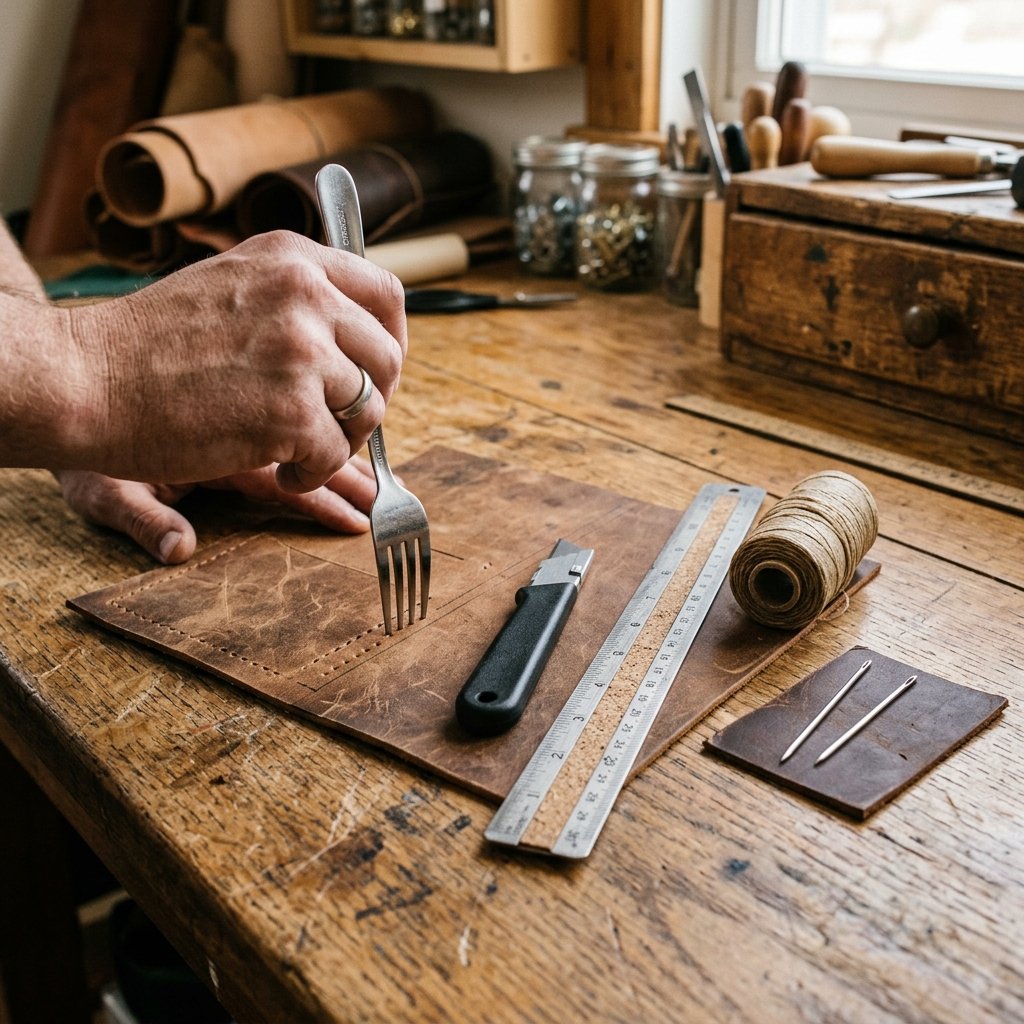
You might see professional leatherworkers online using expensive stitching ponies, diamond chisels, and specialized edge bevelers. While those tools are fantastic, they are entirely unnecessary for your first few projects. We are going to use the frugal DIYer’s approach, substituting expensive gear with clever household alternatives.
The Essential Tool List
- A Sharp Utility Knife: A standard box cutter with a fresh, sharp blade is perfect. Clean cuts are essential for a professional look.
- A Metal Ruler: For guiding your knife and ensuring straight, crisp edges.
- Heavy-Duty Needles: You will need two blunt harness needles. If you only have standard sewing needles, you can dull the tips slightly on a piece of sandpaper so they do not pierce the leather thread.
- Waxed Thread: This is crucial. Waxed polyester or linen thread is incredibly strong and locks stitches in place. You can buy a small spool for about $4.
- An Awl or a Small Nail: To pierce the stitching holes.
- The “Dinner Fork” Hack: Instead of buying a $20 stitching chisel to mark evenly spaced holes, grab a sturdy metal dinner fork from your kitchen! Pressing the tines into the leather creates perfectly spaced, uniform marks for your awl to follow.
Safety First: Utility knives and awls are incredibly sharp. Always cut away from your body, use a self-healing cutting mat or a piece of scrap wood underneath your project, and keep your fingers well clear of the blade path.
Drafting the Blueprint: Precision Cuts for a Tailored Fit
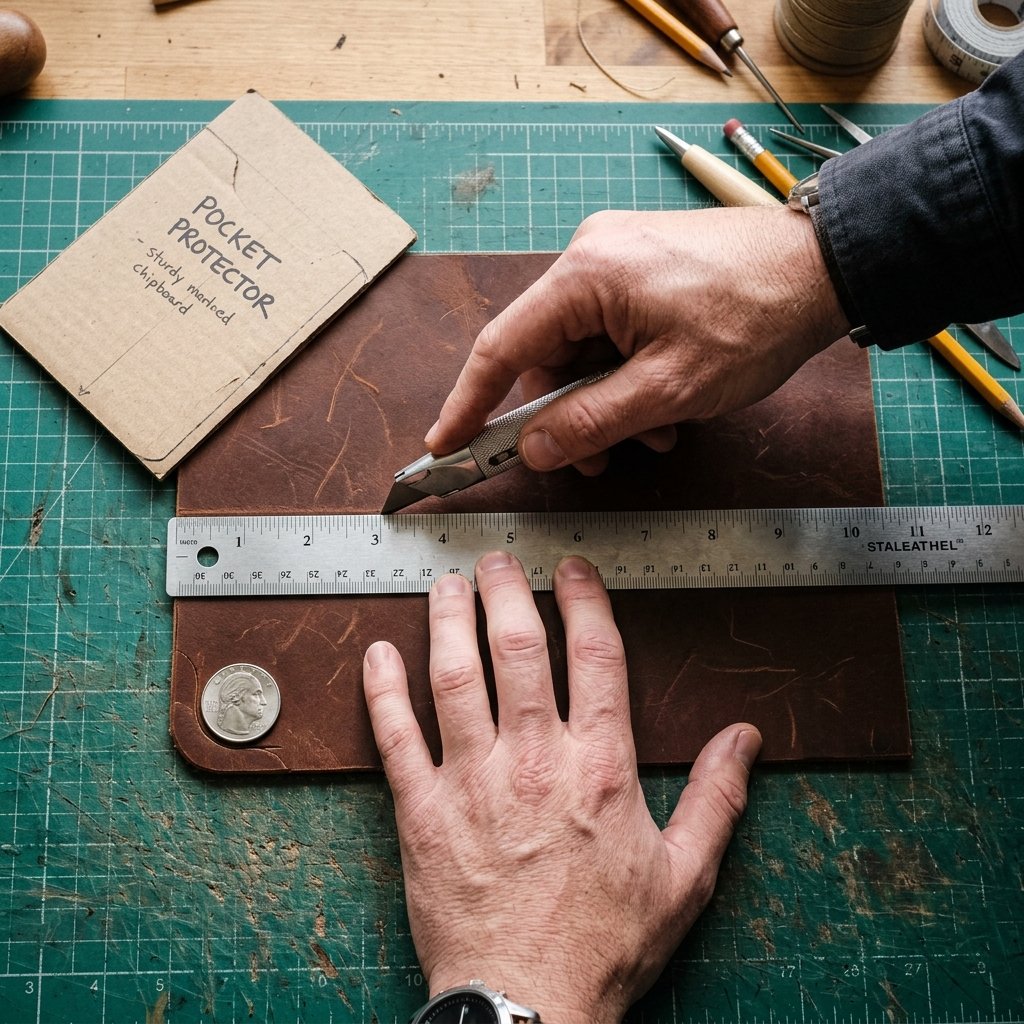
The beauty of a DIY pocket protector is that you can custom-fit it to his specific shirts and his favorite pens. Before cutting into your precious leather, we are going to make a template out of heavy cardstock or a recycled cereal box.
Step-by-Step Template Creation
- Measure the Pocket: Take his favorite work shirt or lab coat and measure the inside width and depth of the breast pocket. A standard size is usually around 3.5 inches wide by 5.5 inches deep.
- Draft the Main Body: Draw a rectangle on your cardboard based on those measurements. This will be the back piece of the protector. Add a top flap (about 2 inches tall) that will fold over the outside of the shirt pocket.
- Draft the Front Pocket: Draw a second rectangle that is the exact same width, but slightly shorter than the depth of the pocket (around 4.5 inches tall). This piece will be stitched to the back piece to hold the pens.
- Cut and Test: Cut out your cardboard template and slide it into the shirt pocket to ensure a snug but comfortable fit.
- Transfer to Leather: Lay your cardboard templates flat onto the rough side (flesh side) of your leather. Trace the outline tightly with a scratch awl or a pen.
- The Final Cut: Place your metal ruler along the traced lines. Using your utility knife, make several light, firm passes rather than trying to cut through the thick leather in one go. This ensures a clean, vertical edge.
Once your pieces are cut, you can use a coin (like a quarter) to trace and round off the bottom corners. Round corners not only look more elegant and finished, but they also prevent the leather from snagging on the fabric of the shirt pocket.
Mastering the Saddle Stitch: Hand-Sewing for Unbreakable Durability

Now comes the most satisfying part of leathercraft: the saddle stitch. Unlike a sewing machine, which uses a locking stitch that will unravel completely if one thread breaks, the hand-sewn saddle stitch uses two needles passing through the same hole from opposite directions. If one thread breaks, the rest of the seam stays completely intact. It is the hallmark of rugged, masculine, high-end leather goods.
Preparing the Holes
Take your front leather piece and lay it on top of your back piece. Apply a thin line of craft glue or double-sided tape along the side and bottom edges to hold them together temporarily. Now, take your trusty dinner fork and press the tines firmly along the edges, about 1/8 inch in from the side. Once you have marked your spacing, place the leather on a scrap block of wood and use your awl (or a small nail and hammer) to punch a hole through both layers of leather at every fork mark.
The Saddle Stitch Technique
- Thread the Needles: Cut a piece of waxed thread that is roughly four times the length of the seam you are sewing. Thread a needle onto each end of the string.
- Start the Stitch: Pass one needle through the first hole (at the top corner) and pull the thread until you have an equal length of thread on both sides of the leather.
- The Weave: Take the needle in your right hand and push it through the second hole. Then, take the needle in your left hand and push it through that exact same hole from the opposite side. Pull both threads tight.
- Repeat: Continue this process—right needle through, left needle through the same hole, pull tight—all the way around the sides and bottom of the pocket protector.
- Backstitch to Lock: When you reach the final hole, sew backward through the last two holes to lock the thread in place. Snip the threads flush with the leather and carefully melt the tiny ends with a lighter to seal them permanently.
“The saddle stitch is a rhythm. Once you find your pace, the repetitive motion becomes almost meditative. It is the invisible backbone of true craftsmanship.”
The Secret to Designer Quality: Burnishing the Edges

If you stop after stitching, you will have a functional pocket protector, but the edges will look raw, fuzzy, and unfinished. The difference between a DIY project that looks “homemade” and one that looks “handmade boutique” is edge finishing. This process, called burnishing, uses friction to melt the natural fibers of vegetable-tanned leather into a smooth, glossy, hardened edge.
The Frugal Burnishing Method
You do not need expensive edge paints or chemical gums. Here is the frugal master’s method for glass-like edges:
- Sand the Edges: Take a piece of fine-grit sandpaper (around 400 grit) from your garage and lightly sand the edges where the two pieces of leather meet. This makes them perfectly flush.
- Wet the Edge: Dip your finger in tap water and lightly dampen the edge of the leather. You want it moist, not soaking wet.
- Create Friction: Take a piece of heavy canvas (scrap denim or an old canvas tote bag works perfectly) or a smooth wooden dowel. Rub the dampened edge briskly back and forth. Apply firm pressure.
- Watch the Magic: As the friction creates heat, the fibers will compress and darken, creating a slick, shiny surface.
- Seal it (Optional): For extra protection, rub a tiny bit of beeswax (a cheap lip balm made of beeswax works in a pinch!) over the smooth edge and rub it briskly with the canvas one more time.
This step takes only about 10 minutes, but it elevates the piece from a $5 scrap project to a $50 luxury accessory.
Adding That Personal Touch: Monograms, Tooling, and Conditioning
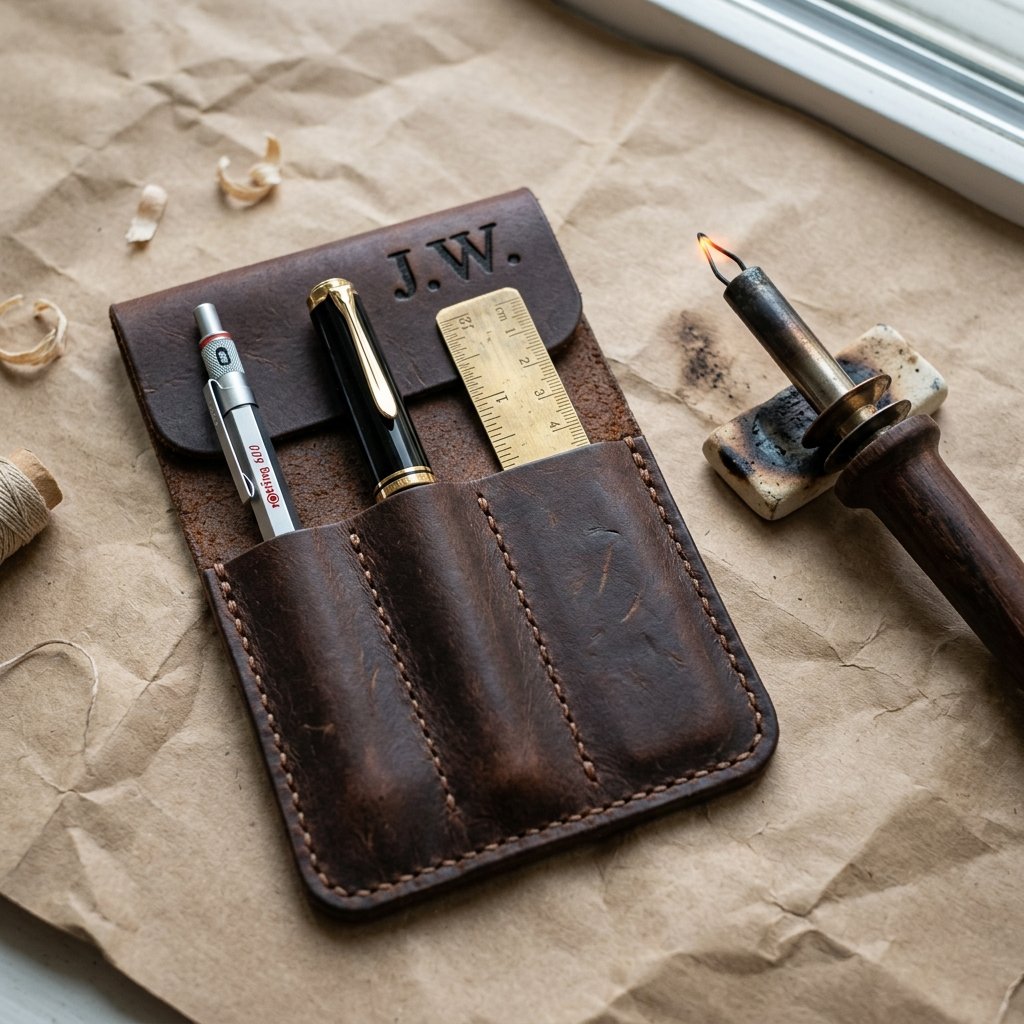
To truly make this a memorable, thoughtful gift for him, personalization is key. A rugged pocket protector is great, but a customized one is an heirloom.
Monogramming on a Dime
If you do not own metal leather stamps, do not worry. You can create a beautiful, rustic monogram using a simple wood-burning tool (often found at craft stores for under $15). Practice on a scrap piece of leather first. Use a low heat setting and slowly trace his initials onto the front pocket or the fold-over flap. The heat will brand the leather, leaving a dark, permanent, masculine mark.
Conditioning for Longevity
Leather is essentially skin; it needs moisture to prevent cracking and to maintain its supple strength. Before gifting, give the pocket protector a good conditioning treatment. If you do not have dedicated leather balm, head to your kitchen. A very light coat of extra virgin olive oil or coconut oil rubbed in with a soft cloth will instantly deepen the color of the leather and provide a layer of protection against ink spills and dirt. Be frugal with the oil—a few drops go a long way.
The Final Presentation
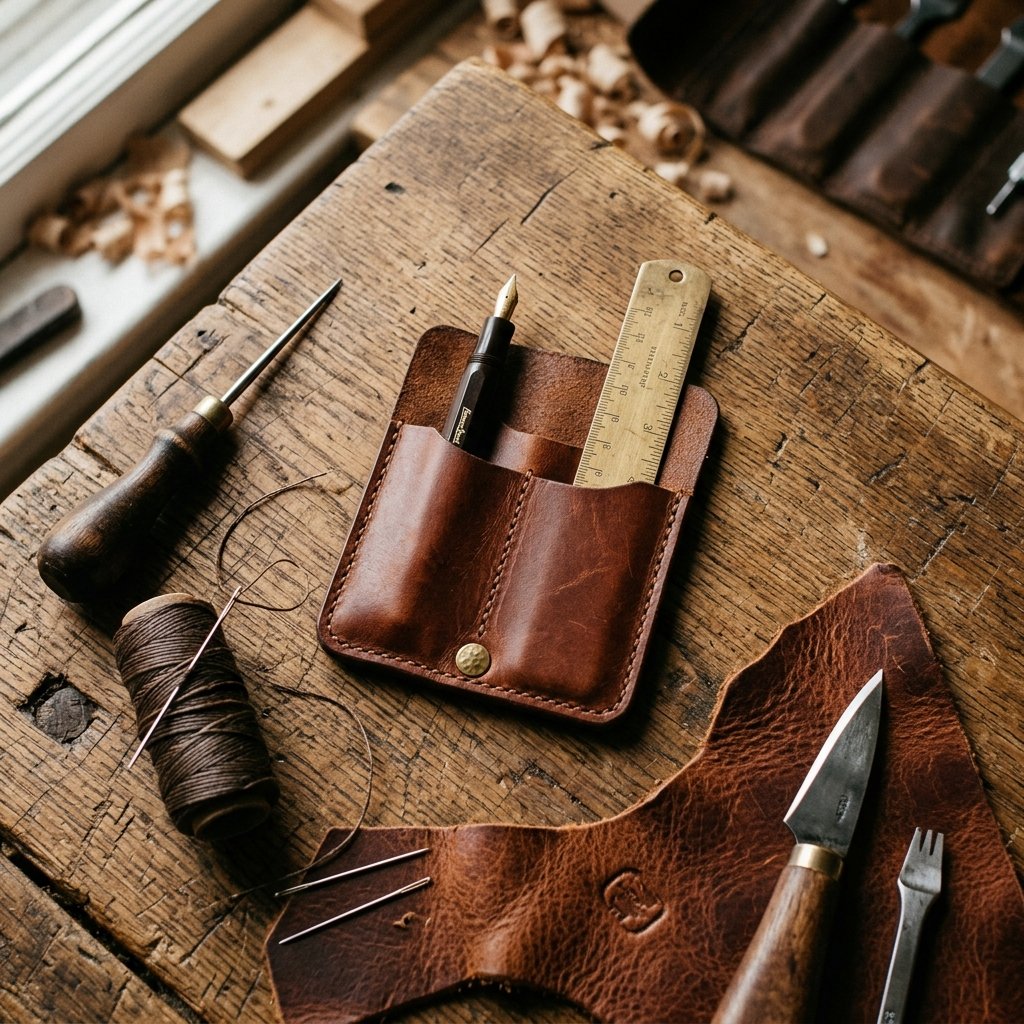
To present this crafty, practical gift, do not just throw it in a gift bag. Slide a high-quality pen, a small mechanical pencil, and perhaps a mini brass ruler into the pockets. Wrap the protector in simple brown kraft paper, tie it with a piece of leftover waxed thread or twine, and attach a hand-written tag. You have just created an incredibly thoughtful, highly functional piece of art that he will use every single day at the workshop, the office, or the drafting table.
Conclusion
Crafting Memories, One Stitch at a Time
There is a unique pride that comes from looking at a high-end, designer-quality item and knowing you made it yourself with your own two hands, a bit of scrap material, and a lot of resourcefulness. By stepping away from cheap, disposable plastics and embracing the rugged elegance of leathercraft, you have created a pocket protector that is not just a barrier against ink stains—it is a statement piece.
This DIY project proves that you do not need a massive budget or a professional studio to create thoughtful, masculine gifts that last a lifetime. Whether you are a frugal DIYer, a budget-savvy upcycler, or just someone looking to give a truly meaningful Father’s Day or graduation gift, this leather pocket protector is the perfect blend of form, function, and frugal ingenuity. The more he wears it, the more the leather will soften, mold to his tools, and develop a rich patina that tells the story of his hard work. So grab that thrifted leather, thread those needles, and start stitching your way to the ultimate EDC upgrade!

Makenzie is the founder and lead writer at MoneyHackTips.com — a personal finance blog dedicated to delivering street-smart financial wisdom for real people on real budgets. With 300+ published articles covering everything from debt management to investing fundamentals, Makenzie’s mission is to make every dollar work harder. When not writing about money hacks, Makenzie is testing frugal living strategies, optimizing side hustles, and helping readers build financial freedom from scratch.