The Art of the Spicy Gesture
There is a specific kind of joy that comes from gifting something that is both practical and deeply personal. For the man who carries a bottle of hot sauce in his glove box or has a dedicated shelf in the fridge for ‘liquid fire,’ a generic store-bought bottle just won’t cut it. To truly make him smile, we are going to dive into the world of bespoke hot sauce labeling. This isn’t just about sticking a piece of paper on glass; it is about creating a rugged, masculine-elegant aesthetic that looks like it came from a high-end boutique, all while spending less than the cost of a cup of coffee. Whether you are upcycling old bottles or dressing up a fresh batch of homemade habanero gold, this guide will walk you through the resourceful, clever, and budget-savvy steps to becoming a master of the custom condiment label.
The goal is simple: make the bottle look so good he won’t want to throw it away when the sauce is gone. That is the mark of a true trash-to-treasure victory.
The Pantry Raid: Gathering Materials on a Dime
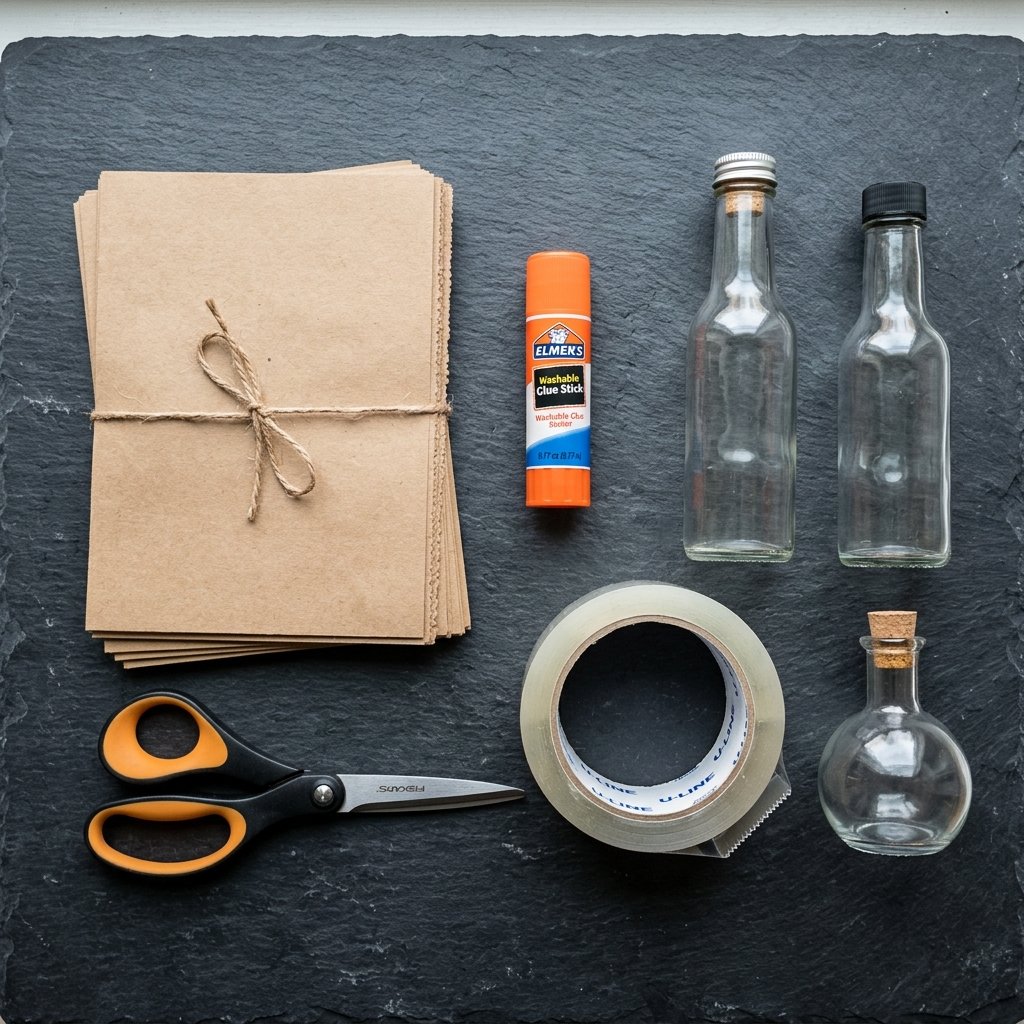
Before we start designing, we need to gather our supplies. A true frugal DIYer knows that the best materials are often already in the house or available for pennies at the local discount store. We are aiming for a professional finish without the professional price tag. You do not need a fancy industrial printer or expensive vinyl cutters to achieve a high-end look. By using common household items like packing tape, recycled paper, and a bit of clever adhesive, we can create labels that are both durable and visually striking.
| Material | Source | Estimated Cost |
|---|---|---|
| Matte or Glossy Paper | Home Office/Printer | $0.05 per sheet |
| Clear Packing Tape | Dollar Tree/Junk Drawer | $1.25 per roll |
| Adhesive (Glue Stick or Spray) | Craft Supply | $1.00 |
| Upcycled Glass Bottles | Recycling Bin | $0.00 (Free!) |
| Total Project Cost | Resourceful Sourcing | Under $3.00 |
Choosing Your Base Material
For a rugged, vintage look, consider using brown kraft paper or even a piece of a grocery bag. If you want a modern, sleek appearance, standard white multi-purpose paper works perfectly when paired with the right typography. If you are feeling particularly crafty, you can even use thin fabric scraps backed with iron-on adhesive for a tactile, industrial feel.
Design Like a Pro: Crafting the Visual Identity
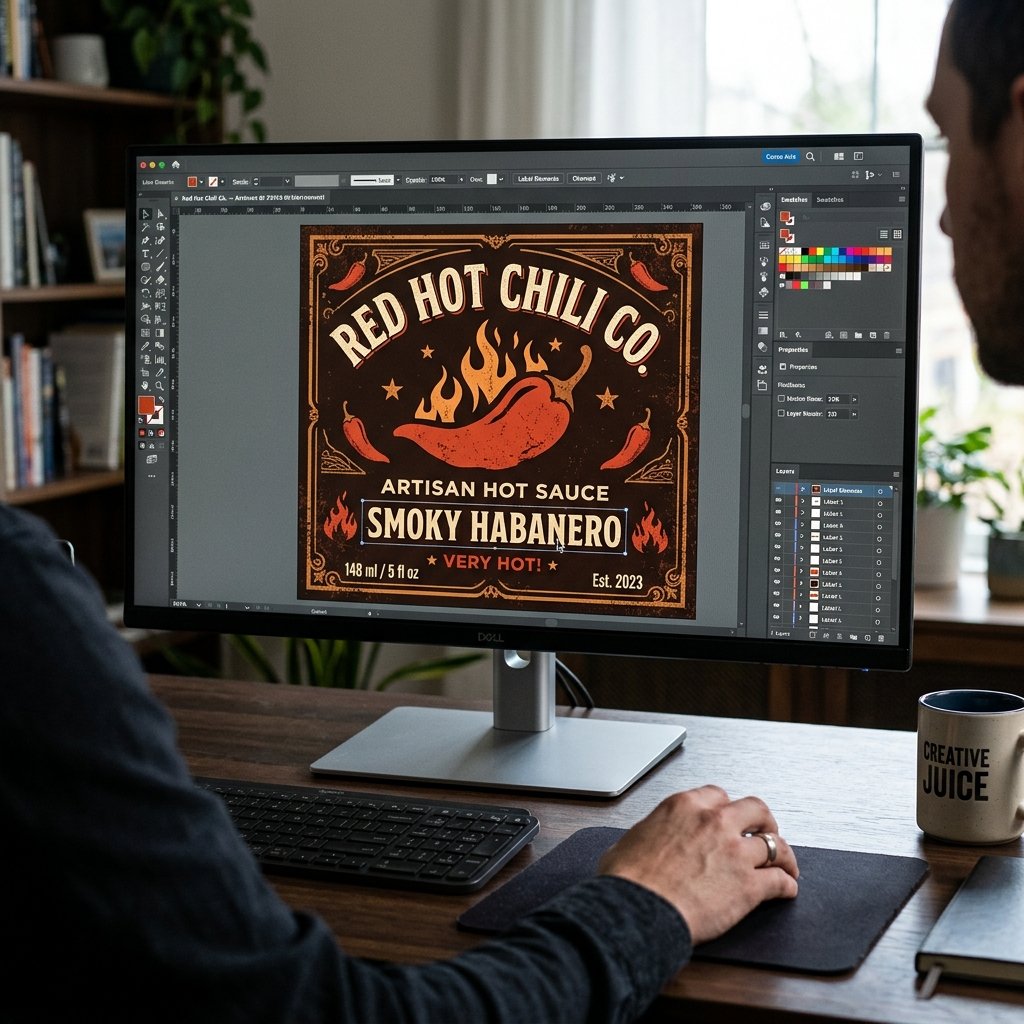
The secret to a label that makes him smile is the ‘brand’ you create. Think about his personality. Is he an ‘Outlaw’ who loves smoky chipotle? Or a ‘Scientist’ who measures Scoville units with precision? Use free online design tools like Canva or even basic word processing software to layout your design. Focus on bold typography and limited color palettes to maintain that masculine-elegant vibe. Avoid cluttered designs; a clean label with one strong graphic element always looks more expensive than a busy one.
Naming Your Creation
The name is where the personalization truly shines. Use inside jokes, his last name, or a play on his favorite hobby. Some ideas include:
- The Burn Unit: For the guy who loves extreme heat.
- Old Man [Name]’s Liquid Gold: For a vintage, heritage feel.
- Tactical Heat: For the military or gear enthusiast.
- [Name]’s Backyard Fire: Perfect for the BBQ king.
Pro Tip: Use a ‘serif’ font for the main title to give it a classic, established look, and a ‘sans-serif’ font for the ingredients or ‘heat level’ to keep it legible and modern.
The ‘Secret Sauce’ Prep: Removing Old Labels and Cleaning
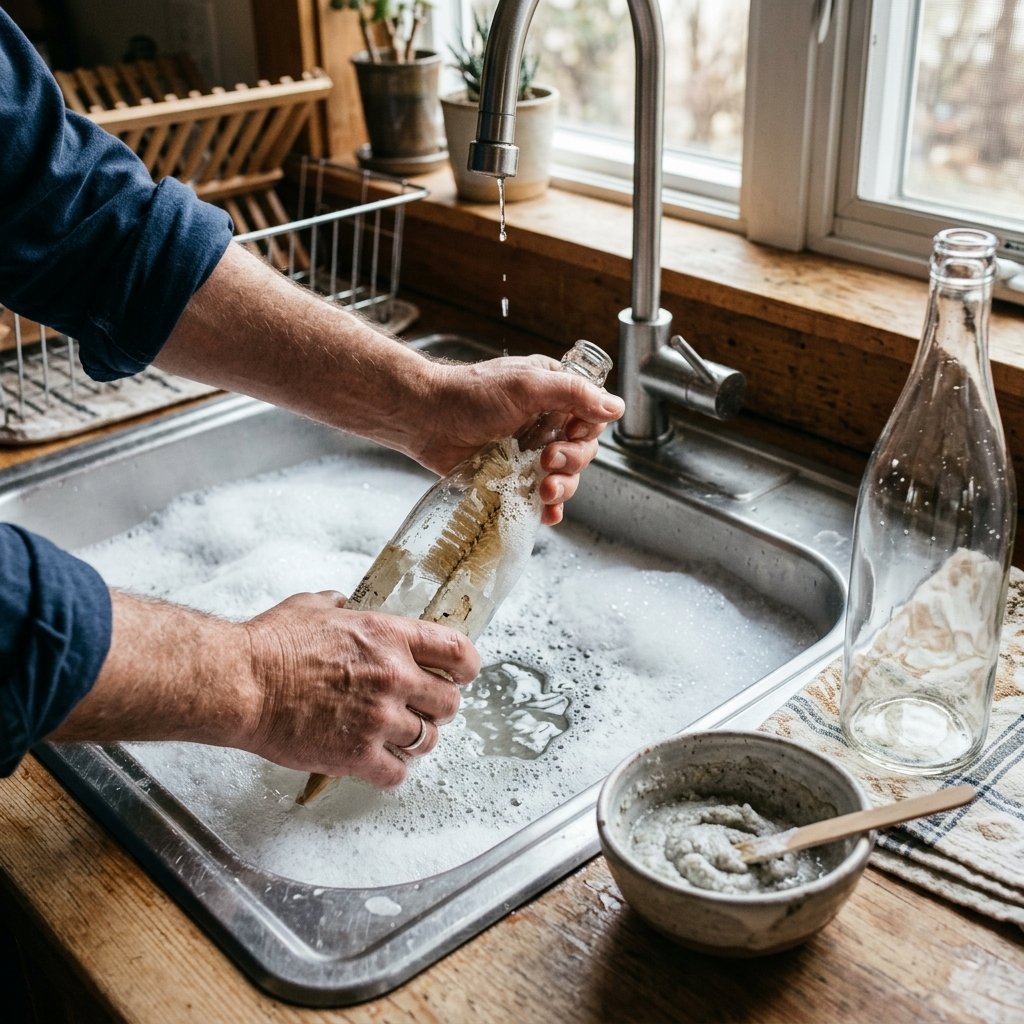
If you are upcycling bottles from the recycling bin (a hallmark of the frugal guru), you must ensure they are surgically clean. Nothing ruins a custom gift like the sticky residue of a previous brand’s label. This is where your resourceful chemistry comes into play. You don’t need expensive ‘goo-remover’ chemicals when you have a pantry full of solutions.
The Fail-Proof Label Removal Method
- Soak: Submerge the bottles in hot, soapy water for at least 20 minutes. Most modern labels will peel right off.
- The Scrub: For stubborn adhesive, create a paste of 1 part baking soda and 1 part vegetable oil. Rub it onto the residue and let it sit for 10 minutes.
- The Polish: Wipe away the paste with a paper towel. The oil dissolves the adhesive, and the baking soda acts as a gentle abrasive.
- The Sterilize: Wash the bottle one last time with dish soap to remove the oil, then dry thoroughly.
Safety Note: If you are reusing bottles that previously contained hot sauce, wear gloves or wash your hands immediately after handling to avoid getting capsaicin in your eyes!
Printing and Waterproofing: The Crafty Expert’s Guide
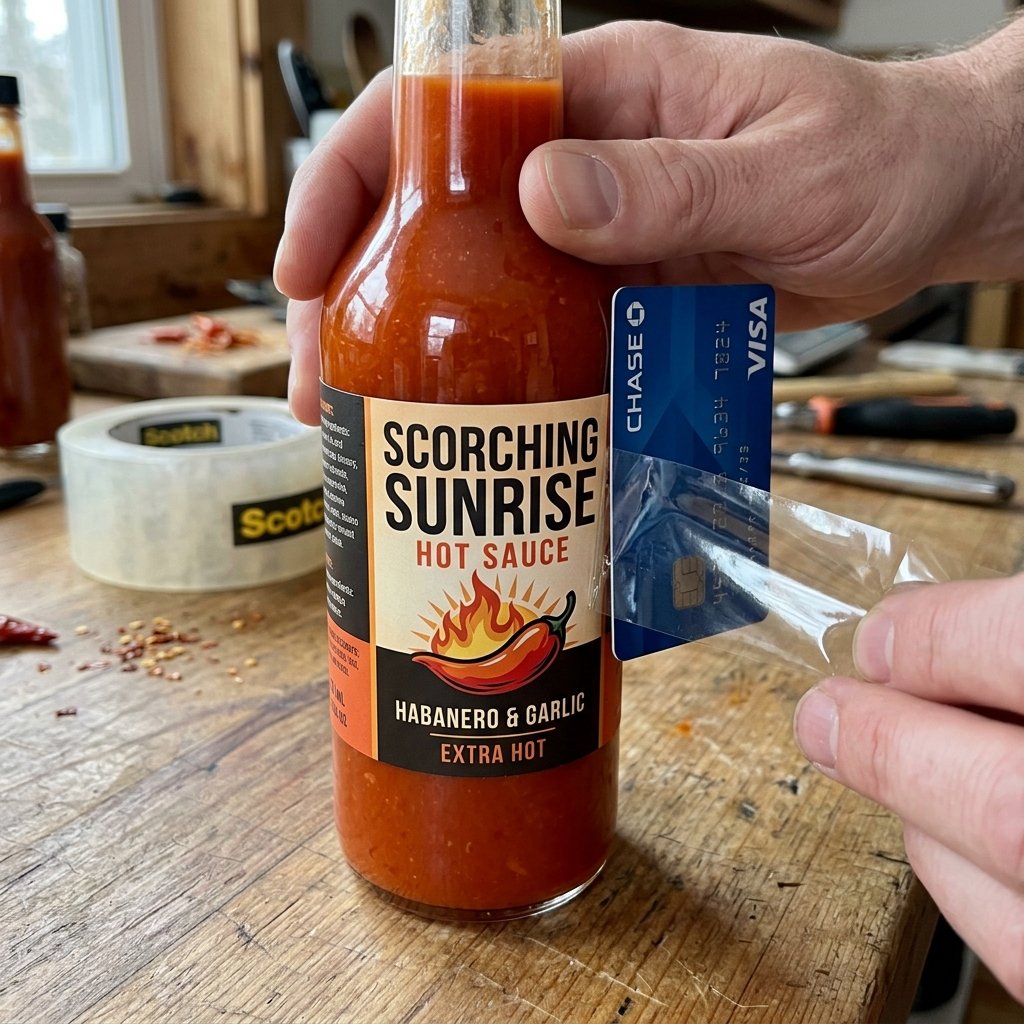
Hot sauce bottles live in a high-moisture environment (the fridge) and are handled by hands that might be messy. A plain paper label will smudge and tear within days. As a budget-savvy crafter, you have two main options for waterproofing your masterpiece without buying expensive vinyl sticker paper.
Method A: The Poor Man’s Lamination (Packing Tape)
This is the ultimate frugal hack. Print your label on standard paper and cut it to size. Lay a strip of clear packing tape over the front of the label, ensuring there are no bubbles. The tape provides a high-gloss, waterproof barrier that looks surprisingly professional. Trim the excess tape around the edges before gluing the label to the bottle.
Method B: The Decoupage Finish (Mod Podge)
If you prefer a matte or textured finish, use a thin layer of Mod Podge or watered-down white glue over the top of the paper label once it is attached to the bottle. Apply 2-3 thin coats, allowing each to dry for 15 minutes. This creates a durable, wipeable surface that feels like a premium artisanal product.
| Method | Finish | Durability |
|---|---|---|
| Packing Tape | High Gloss | High (Waterproof) |
| Mod Podge | Matte/Satin | Medium (Water-resistant) |
| Clear Acrylic Spray | Professional | High (UV Resistant) |
Application Mastery: Getting a Bubble-Free Finish
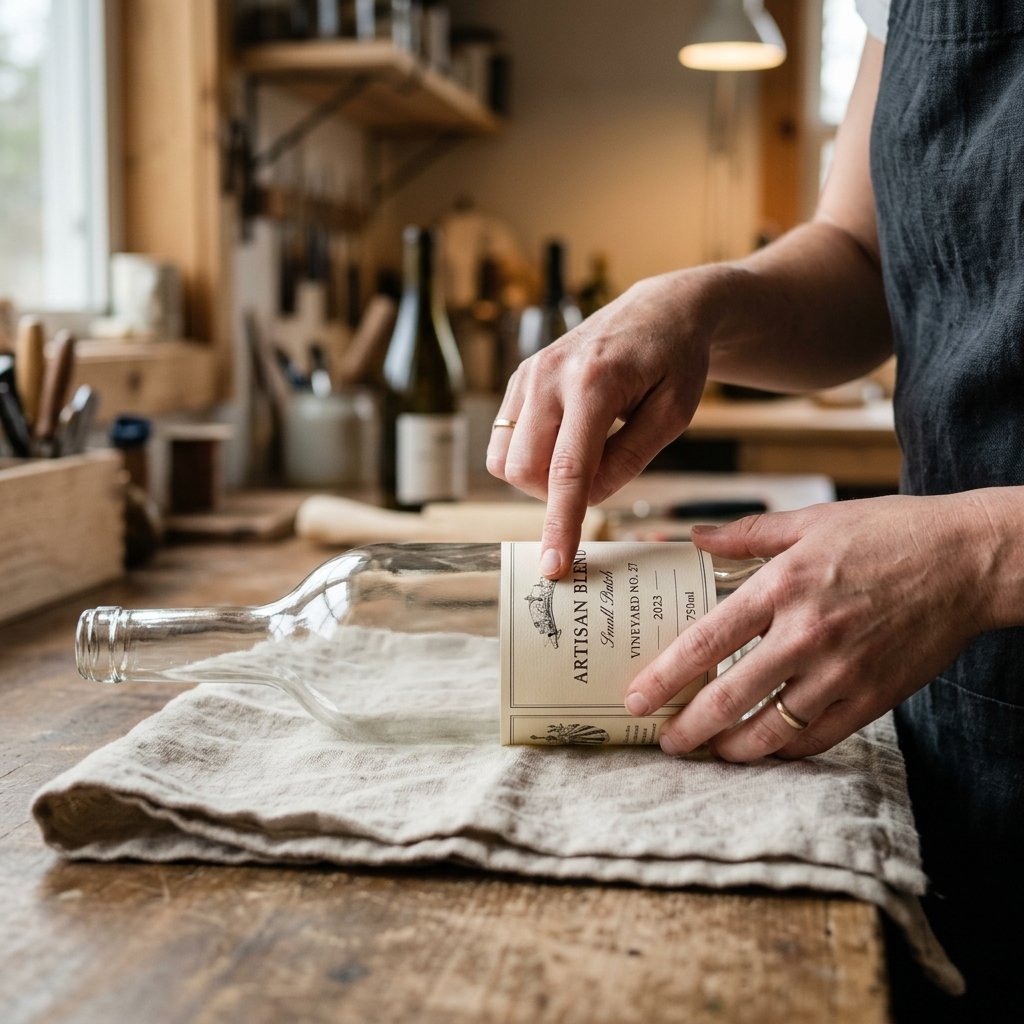
The final step in the crafting process is the application. A crooked or bubbly label is the difference between ‘homemade’ and ‘hand-crafted.’ To achieve the latter, you must use precision. This is where the ‘Practical & Masculine-Elegant’ tone comes into play—think of this like applying a decal to a classic car or a screen protector to a phone.
The Precision Placement Technique
- Find the Center: Mark the center point of your bottle with a small piece of painter’s tape or a dry-erase marker.
- The Anchor: Peel the backing from your label (if using sticker paper) or apply glue to the center of the back of your paper label.
- The Roll: Press the center of the label onto the bottle first, then slowly smooth outward toward the edges using your thumb or a plastic card. This pushes the air out and prevents creases.
- The Seal: Once applied, take a dry cloth and rub the label firmly for 30 seconds. The heat from the friction helps the adhesive bond to the glass.
Mantra: Slow is smooth, and smooth is fast. Take your time with the alignment; you only get one shot at a perfect first impression.
The Ultimate Presentation: Gifting the Heat
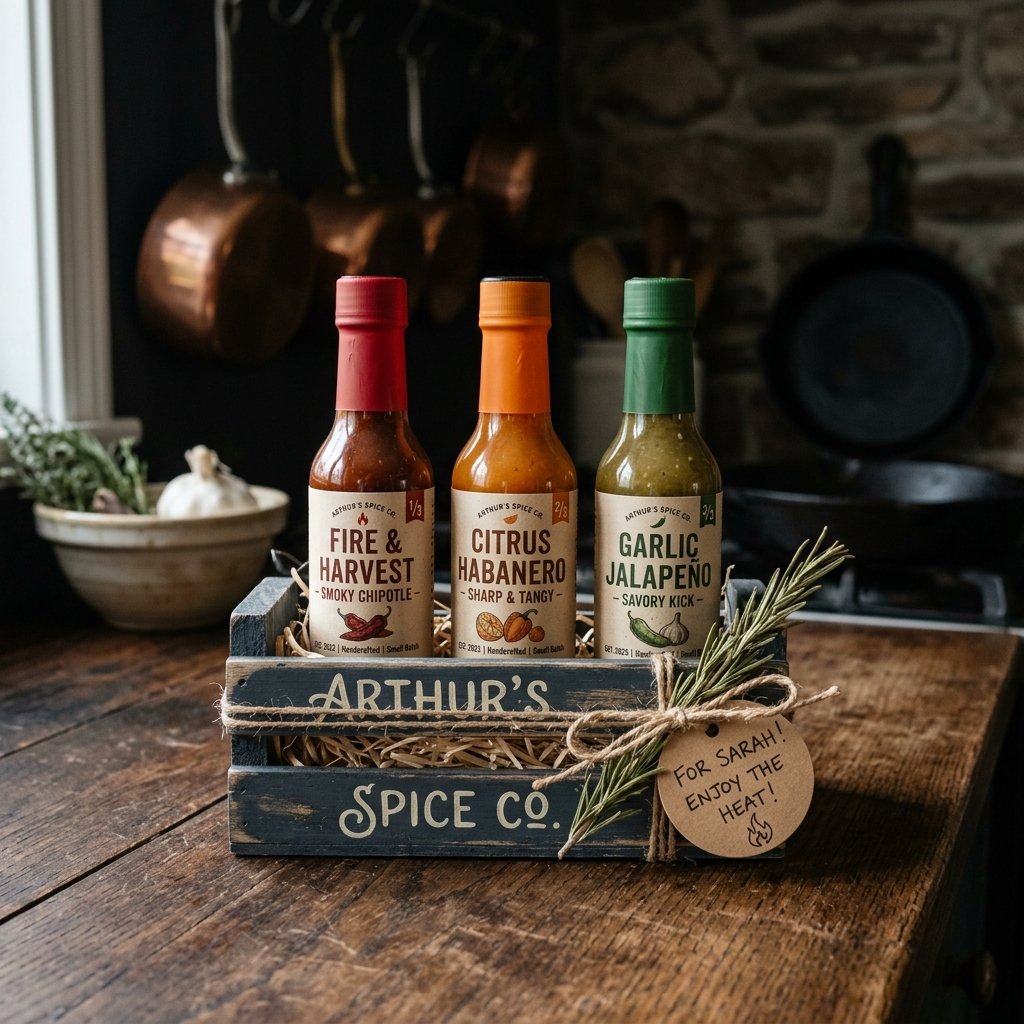
You’ve made the label, now let’s finish the gift. To truly make him smile, the presentation should match the effort you put into the label. Instead of a gift bag, look for ways to upcycle materials into a ‘Hot Sauce Caddy’ or a ‘Spice Survival Kit.’
Budget Presentation Ideas
- The Cardboard Crate: Cut down a small cardboard box and wrap it in twine or paint it to look like weathered wood. Add a bit of shredded brown paper as ‘nesting’ for the bottles.
- The Leather Wrap: If you have an old leather belt or scrap, wrap a small strip around the neck of the bottle and secure it with a brass fastener for a rugged, high-end look.
- The Tag-Along: Attach a small wooden spoon or a dried chili pepper to the neck of the bottle with a piece of jute twine.
By focusing on these small, inexpensive details, you transform a simple bottle of sauce into a curated experience. He will see the thought, the effort, and the cleverness behind the gift, which is exactly what brings that genuine smile to his face.
Conclusion
A Gift That Packs a Punch
Creating DIY custom hot sauce labels is more than just a craft project; it is a way to show the spice-lover in your life that you see his passions and appreciate his unique tastes. By being resourceful with your materials, clever with your designs, and meticulous with your application, you have created a gift that rivals any high-end boutique product. You have turned ‘trash’ into a treasure that will sit proudly on his table or in his fridge. So, the next time a birthday, Father’s Day, or ‘just because’ moment rolls around, don’t reach for a gift card. Reach for a bottle, your printer, and your imagination. You’ve got the skills, you’ve got the budget, and now, you’ve got the heat. Go forth and make him smile!

Makenzie is the founder and lead writer at MoneyHackTips.com — a personal finance blog dedicated to delivering street-smart financial wisdom for real people on real budgets. With 300+ published articles covering everything from debt management to investing fundamentals, Makenzie’s mission is to make every dollar work harder. When not writing about money hacks, Makenzie is testing frugal living strategies, optimizing side hustles, and helping readers build financial freedom from scratch.