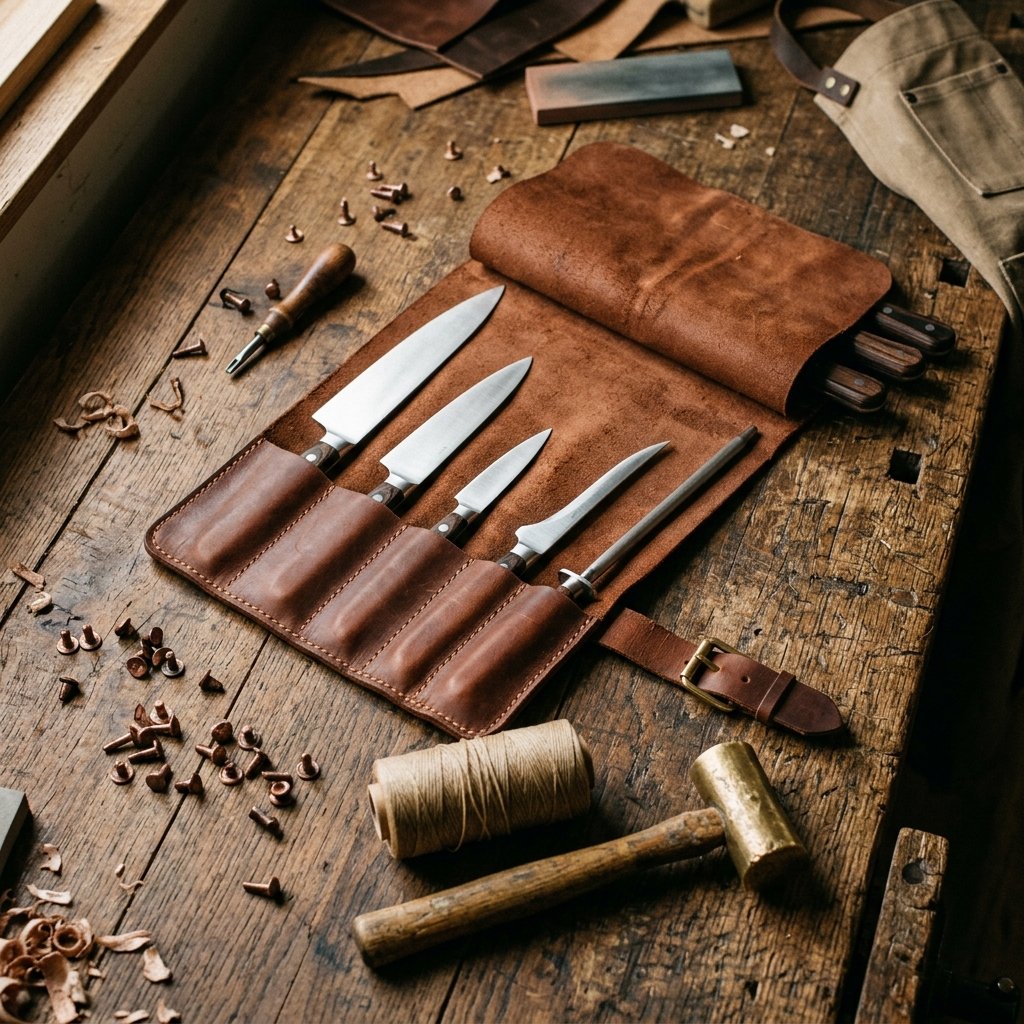

There is something undeniably magnetic about a man who knows his way around a kitchen, and there is something equally powerful about gifting him the rugged, heirloom-quality gear to match his culinary prowess. If you have been searching for the perfect, jaw-dropping gift for the grill master, the home chef, or the culinary student in your life, you have likely stumbled across luxury leather knife rolls. You have also likely stumbled across their eye-watering price tags. High-end, custom-monogrammed leather knife rolls can easily set you back anywhere from $200 to $500. But as a resourceful, budget-savvy DIYer, you know that true luxury isn’t bought—it is crafted.
Welcome to the ultimate masterclass in frugal, masculine-elegant crafting. Today, we are going to bypass the boutique markups and roll up our sleeves to create a stunning, heavy-duty, customized leather chef knife roll. Whether you are a handy parent looking to upcycle materials, a crafty gift-giver wanting to make a profound impact, or a frugal DIYer ready to tackle a new medium, this project is your golden ticket. By utilizing clever material sourcing—like upcycling thrifted leather or hunting down scrap yard bargains—and employing timeless, hand-sewing techniques, we are going to build an artisan-level piece for a fraction of the cost.
This isn’t just a craft project; it is a journey into the rugged art of leatherworking. We will cover everything from mapping out the perfect slots for his prized Japanese steel to mastering the legendary saddle stitch that will hold this roll together for decades. Grab your ruler, a cup of strong coffee, and let’s turn raw materials into a breathtaking, practical masterpiece that he will proudly carry into every kitchen he conquers.
The Blueprint: Designing a Rugged, Heirloom-Quality Knife Roll
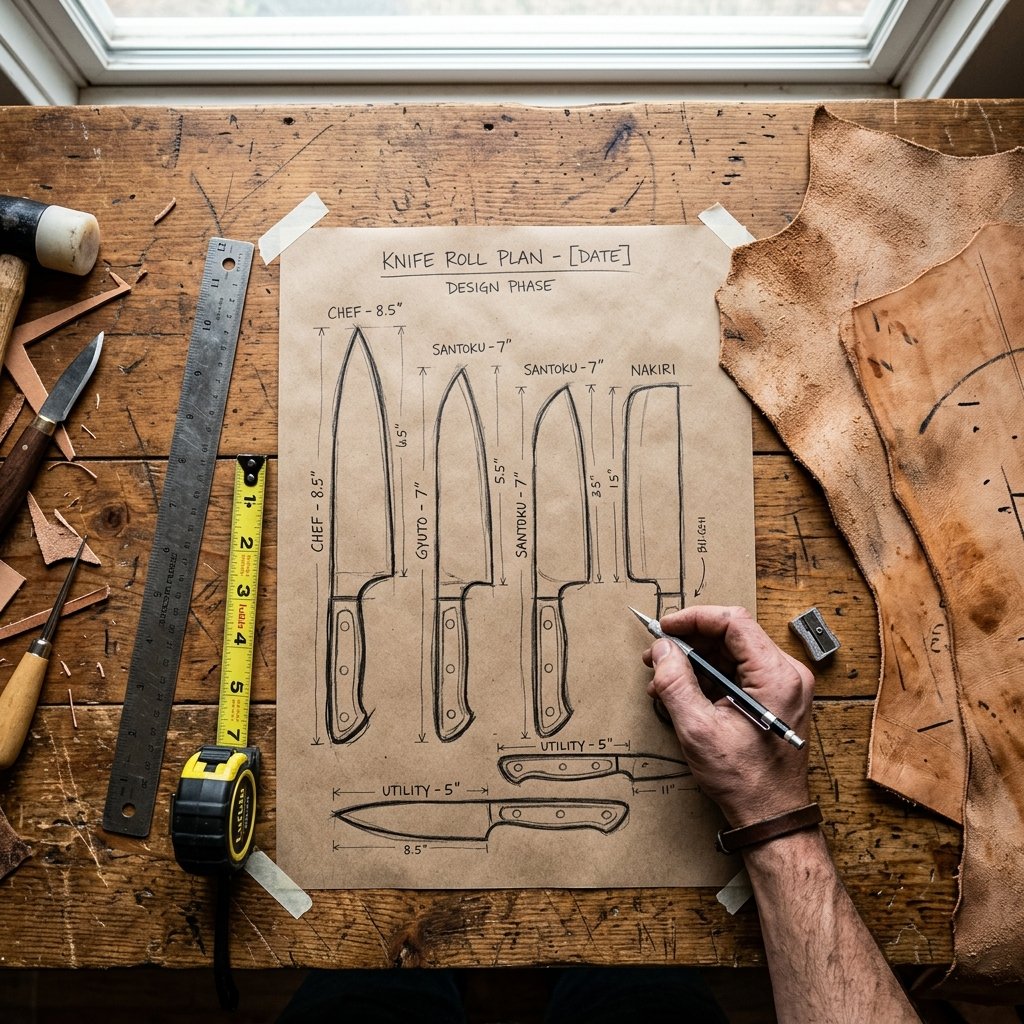
Before a single cut is made, a master craftsman visualizes the final product. A chef’s knife roll is highly personal; it must accommodate his specific arsenal of tools. A standard roll usually holds between five and eight knives, along with slots for a honing steel, tasting spoons, and a meat thermometer. To ensure this DIY gift is as practical as it is handsome, we need to map out the exact dimensions of his cutlery.
Understanding Knife Dimensions and Slot Sizing
Not all knives are created equal. A hefty 10-inch German chef’s knife requires a significantly wider and deeper pocket than a nimble 3-inch paring knife. The beauty of this custom DIY approach is that you can tailor the leather pockets precisely to his collection. A snug fit prevents the blades from knocking against each other, which preserves their razor-sharp edges.
To begin, lay out his knives on a large piece of craft paper or cardboard. This will serve as your mockup template. Space the knives approximately 2 inches apart to allow the leather to fold naturally when rolled. The main body of the leather roll should be tall enough to cover the entire length of the longest knife (usually around 16 to 18 inches tall) and wide enough to wrap around the entire collection (typically 20 to 24 inches wide).
| Tool / Knife Type | Recommended Slot Width | Recommended Pocket Depth |
|---|---|---|
| Paring Knife (3-4 inch) | 1.5 inches | 4 inches |
| Boning / Utility Knife | 2 inches | 5 inches |
| Standard Chef’s Knife (8 inch) | 2.5 inches | 6 inches |
| Cleaver / Santoku | 3.5 inches | 6 inches |
| Honing Steel / Thermometer | 1.5 inches | 7 inches |
The Protective Flap
A crucial element of a luxury knife roll is the top protective flap. This is a secondary piece of leather (or an extension of the main body) that folds down over the exposed handles and blades before the entire rig is rolled up. It ensures that if the roll is turned upside down, the knives do not slide out. Plan for this flap to be roughly 6 to 8 inches long, spanning the entire width of the roll.
Resourceful Scavenging: Sourcing Premium Leather on a Dime

The secret to keeping this project budget-savvy without sacrificing an ounce of rugged elegance lies in how you source your leather. Buying a brand-new, pristine side of vegetable-tanned leather from a specialty supplier can cost upwards of $150. But we are frugal upcyclers, and we know where to find the hidden gems.
Thrift Store Upcycling: The Couch and Jacket Hack
One of the most resourceful ways to acquire large, unbroken panels of high-quality leather is by harvesting it from discarded furniture or thrifted clothing. A genuine leather trench coat or a damaged leather sofa sitting on the curb is a goldmine for a crafty gift-giver. Look for full-grain or top-grain leather; avoid anything labeled ‘bonded leather’ or ‘genuine leather’ if it feels plasticky, as these will peel and crack over time.
Frugal Mantra: ‘Do not judge a thrift store leather jacket by its outdated cut. Judge it by the vast, unbroken panels on its back.’ A single $10 XXL leather coat can yield enough material for a stunning, supple knife roll.
Scrap Bins and Remnant Sales
If upcycling isn’t an option, check out local leather supply shops (like Tandy Leather) or online retailers for ‘remnant bags’ or ‘second-run’ hides. These hides often have minor imperfections—like bug bites, brand marks, or slight color variations. In the world of pristine fashion, these are defects. In the world of rugged, masculine chef gear, these are character marks. A hide with a brand or a scar adds an incredible, rustic backstory to the gift, making it uniquely his.
Budget Breakdown: Store-Bought vs. Zero-Budget DIY
Let us look at the staggering savings you can achieve by employing these clever sourcing tactics. The numbers speak for themselves, proving that a luxurious, masculine gift does not require maxing out a credit card.
| Item / Material | High-End Retail Cost | Frugal DIY Cost |
|---|---|---|
| Leather Body & Pockets | $150 – $300 (Built-in) | $10 – $25 (Thrifted coat/remnants) |
| Heavy-Duty Hardware (Rivets/Buckles) | $20 – $40 (Built-in) | $8 – $12 (Hardware store) |
| Waxed Thread & Needles | N/A | $5 – $7 (Craft store) |
| Custom Monogramming | $30 – $50 extra | $0 – $15 (DIY stamp kit) |
| Total Estimated Cost | $200 – $400+ | $23 – $59 |
The Craftsman’s Toolkit: Essential Tools and Clever Hacks
Leatherworking can seem intimidating because of the specialized tools often associated with the craft. Skivers, edge bevelers, pricking irons, and burnishers sound expensive—and they can be. However, as a resourceful maker, you can hack your way to professional results using items you likely already have in your garage or craft room.
The Absolute Essentials
- A Sharp Cutting Tool: A heavy-duty utility knife (box cutter) or a rotary cutter is mandatory. Leather is tough, and dull blades will create jagged, unprofessional edges. Change your blade frequently!
- A Straight Edge: A metal ruler or carpenter’s square is essential for making perfectly straight cuts. Do not use a plastic ruler, as your knife will easily slice into it.
- Waxed Thread and Harness Needles: You need thick, waxed thread (often called tiger thread) to withstand the sharp edges of knives and the heavy weight of the leather. You will also need two blunt harness needles for the saddle stitch.
- Hole Punching Tool: Leather is too thick to push a needle through directly. You must pre-punch your holes.
Clever Tool Hacks for the Frugal DIYer
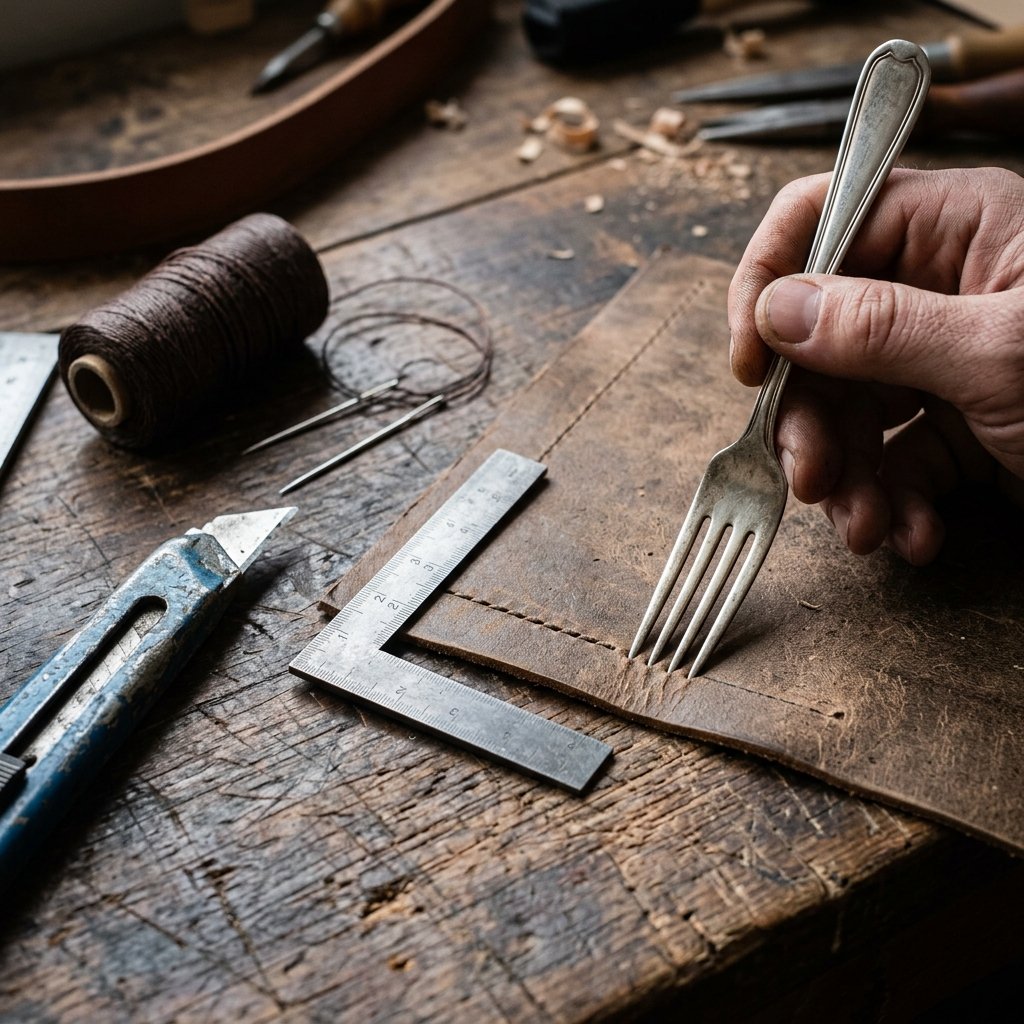
If you don’t want to invest in a $30 diamond pricking iron just to punch stitching holes, look to your kitchen or toolbox. A standard dinner fork with sharp tines can be pressed into the leather to mark perfectly even spacing for your stitches. Once marked, you can use a simple awl, a thin nail, or even a power drill with a micro-bit (1/16 inch) to punch the holes through the leather. It is a wildly effective, budget-savvy trick that yields incredibly neat, professional-looking stitch lines.
Safety First: When cutting leather with a utility knife, always cut away from your body, use a self-healing cutting mat or a piece of scrap wood underneath, and apply firm, even pressure. Multiple light passes are safer and cleaner than one forceful, uncontrolled slice.
Measure Twice, Cut Once: Slicing and Prepping the Leather
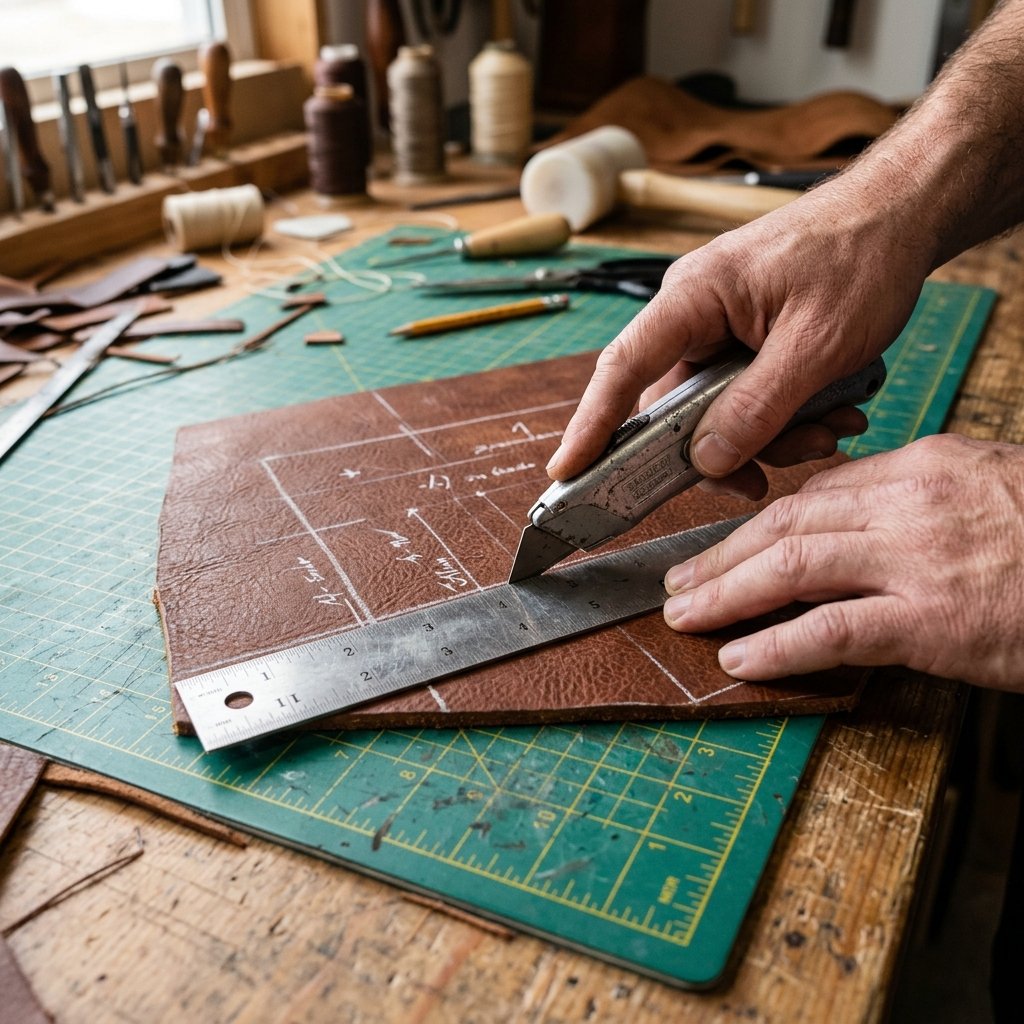
With your materials sourced and your tools prepped, it is time to transform that raw hide or upcycled jacket into the foundation of your luxury knife roll. Precision is key here. A crooked cut will throw off the entire alignment of the roll, so take your time, breathe, and trust your measurements.
Step-by-Step Cutting Guide
- Transfer the Template: Lay your leather flat on your cutting surface. Place your paper template (from Section 1) on top of the leather. Use weights (like heavy books or soup cans) to keep the paper from shifting.
- Trace the Outline: Using a scratch awl, a tailor’s chalk, or a silver marking pen, carefully trace the perimeter of the main body, the protective flap, and the pocket panel onto the flesh side (the fuzzy, suede-like back) of the leather.
- Make the Main Cuts: Align your metal ruler with your traced lines. Pressing down firmly on the ruler so it does not slip, run your utility knife along the edge. Remember the golden rule: make three or four light scores rather than trying to muscle through the thick leather in one go.
- Cut the Pocket Strip: Cut a long rectangular strip of leather that will serve as the knife pockets. This strip should be the same width as your main body panel, and about 6 to 7 inches tall.
- Mark the Pocket Dividers: On the pocket strip, use your ruler and chalk to draw vertical lines where the individual knife slots will be stitched, based on the measurements you calculated earlier (e.g., 2 inches, 2.5 inches, etc.).
Pre-Finishing the Edges
Before you begin assembling, it is a great time to finish the top edge of the pocket strip. Once it is sewn to the main body, it will be harder to access. If you are using vegetable-tanned leather, you can ‘burnish’ the edge by lightly dampening it with water and rubbing it vigorously with a piece of canvas or a wooden slicker until it becomes smooth, dark, and glossy. If you are using chrome-tanned (upcycled) leather, burnishing won’t work, but you can apply a thin layer of edge paint for a highly polished, boutique look.
Forging the Bonds: Heavy-Duty Saddle Stitching and Copper Rivets

This is where the magic happens. We are going to assemble the knife roll using a combination of traditional saddle stitching and heavy-duty hardware. The saddle stitch is revered in leatherworking because, unlike a machine lockstitch, if one loop of thread breaks, the entire seam will not unravel. It is the epitome of rugged durability—perfect for a masculine gift meant to last a lifetime.
The Art of the Saddle Stitch
To attach the pocket panel to the main body, you will need to sew along the bottom edge, the two side edges, and up each of the vertical divider lines you marked.
- Glue First, Sew Second: To keep the leather from shifting while you punch holes and sew, apply a thin line of leather contact cement or double-sided craft tape along the edges of the pocket panel. Press it firmly onto the main body.
- Punch the Holes: Using your pricking iron (or your trusty fork-and-awl hack), punch a continuous line of holes through both layers of leather along the glue lines. Keep your tool perfectly vertical so the holes line up on the back.
- Thread the Needles: Cut a length of waxed thread that is roughly four times the length of the seam you are about to sew. Thread a needle onto each end of the thread, locking them in place by piercing the thread with the needle point.
- The Stitching Rhythm: Pass one needle through the first hole so you have equal lengths of thread on both sides of the leather. Take the left needle and push it through the second hole. Then, take the right needle and push it through that same second hole from the opposite side. Pull both ends tight. You have just created a figure-eight binding that is incredibly strong. Repeat this rhythmic process for every hole.
- Backstitch to Secure: When you reach the end of a line, sew backward for two or three holes. Snip the thread close to the leather and melt the tiny frayed ends with a lighter to lock the stitch permanently.
Reinforcing with Copper Rivets
Chef knives are heavy, and the top corners of the pockets bear a lot of stress when knives are pulled in and out repeatedly. To ensure this roll survives the chaos of a commercial kitchen or a wild weekend camping trip, we will reinforce these stress points with copper rivets.
At the top of every vertical stitch line, punch a small hole. Insert a copper rivet post from the back, place the burr (washer) over the post on the front, and use a rivet setter (or a small socket wrench) to hammer the burr down tight. Finally, use wire cutters to snip off the excess post, and tap the remaining stump with a hammer to mushroom it out, locking it forever. The flash of raw copper against dark leather screams masculine elegance.
Straps, Buckles, and Portability
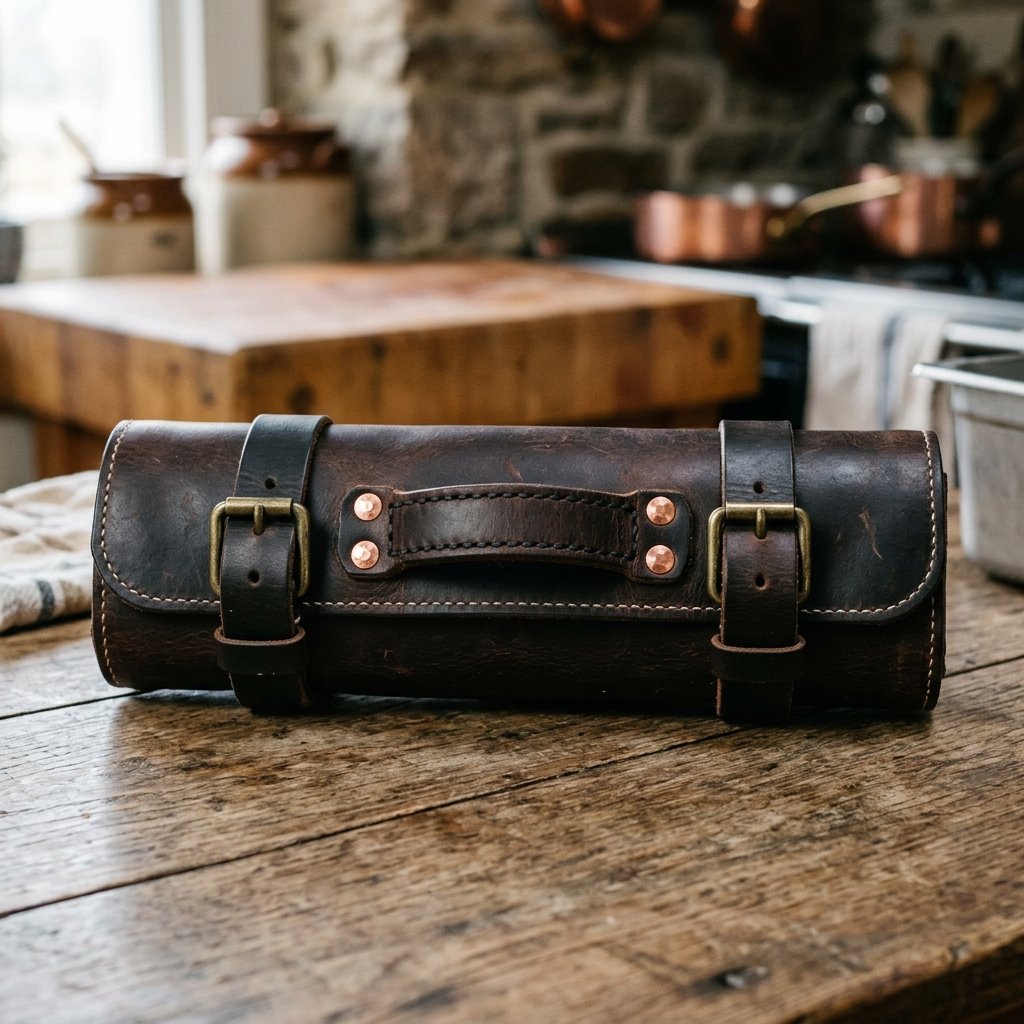
A knife roll must be securely closed and easy to carry. To achieve this, we need to attach sturdy closure straps and a rugged handle. This transforms a simple leather wrap into a highly functional piece of tactical culinary gear.
Crafting the Closure Straps
Cut two long strips of leather, each about 1 inch wide and 24 inches long. These will wrap around the outside of the rolled-up bundle. You can secure these straps using heavy-duty antique brass buckles. Attach the buckles to one end of each strap by folding the leather over the buckle hardware, punching a hole for the prong, and securing the fold with a single, handsome copper rivet.
Next, rivet the opposite ends of these straps to the back exterior of the knife roll. Position them about one-third of the way in from the top and bottom edges so they distribute the pressure evenly when wrapped.
Adding a Rugged Handle
For ultimate portability, a sturdy handle is a must. Cut a piece of leather roughly 1.5 inches wide and 8 inches long. To make it comfortable to grip, fold the middle section of this handle in half lengthwise and stitch it tightly together, leaving the two ends flat. Rivet these flat ends securely to the outside of the roll, positioned directly between the two closure straps.
For an extra touch of luxury, you can add D-rings next to the handle to allow for a detachable, adjustable shoulder strap. You can upcycle a canvas strap from an old duffel bag or make one out of leftover leather scraps.
The Maker’s Mark: Custom Monograms and Protective Finishes
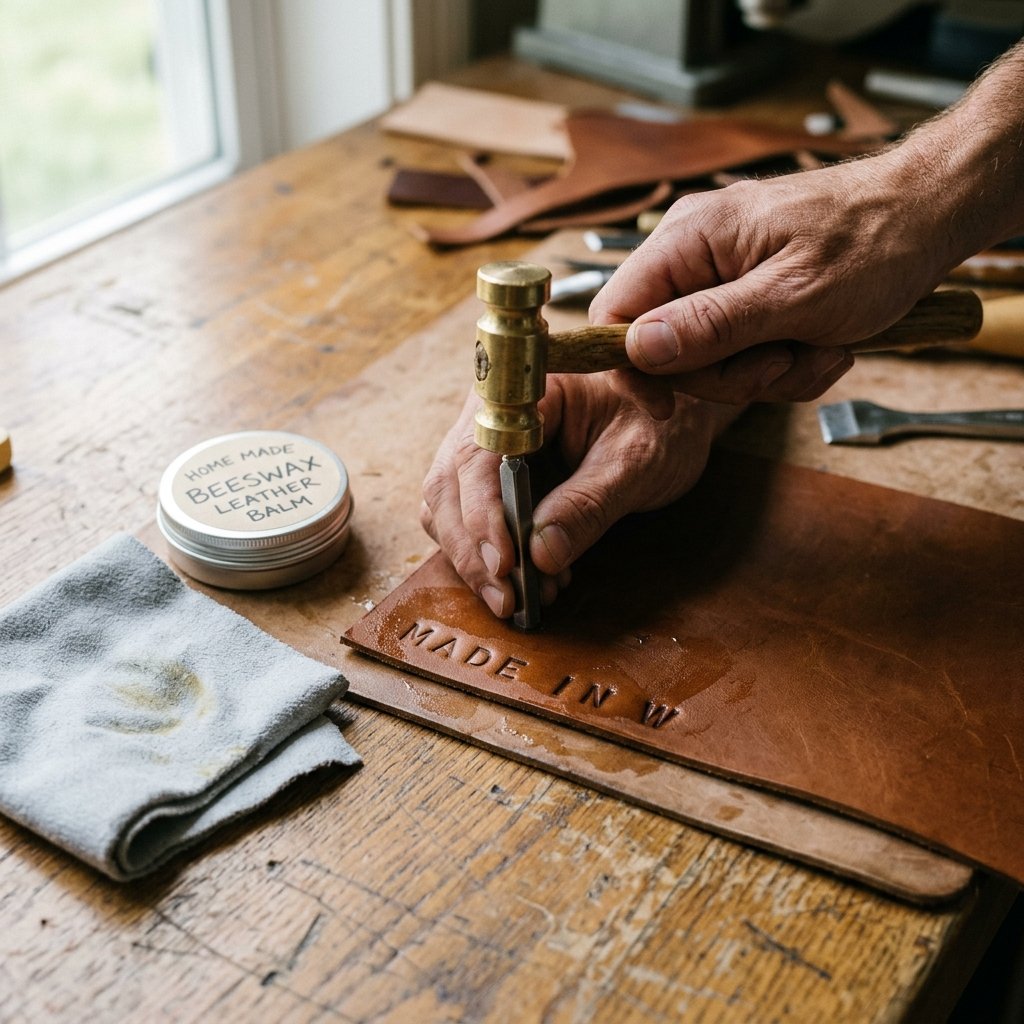
You have constructed a masterpiece of durability and design. Now, it is time to elevate it from a beautiful object to a deeply personal, luxury gift. The finishing touches are what separate a homemade craft from a bespoke, artisan-crafted heirloom.
Custom Monogramming on a Budget
Nothing says ‘luxury’ quite like his initials stamped into the leather. You do not need a custom-made hot foil branding iron to achieve this. You can purchase a basic metal alphabet stamp set from a craft store or hardware store for under $15.
To stamp the leather, lightly dampen the area where you want the monogram (the bottom right corner of the protective flap is a classic, elegant location). Place the metal letter stamp onto the damp leather, ensure it is perfectly straight, and strike the top of the stamp firmly with a wooden or brass mallet. The moisture allows the leather fibers to compress, leaving a deep, crisp impression. Let it dry completely.
Conditioning and Weatherproofing
Whether you used upcycled leather or new remnants, the material needs to be nourished and protected. Kitchens are chaotic environments filled with water, oil, and heat. A good conditioning treatment will protect the knife roll and give it a rich, supple feel.
You can make a frugal, all-natural leather balm right in your kitchen. Melt together one part beeswax and one part sweet almond oil (or neatsfoot oil) in a double boiler. Once melted, pour it into a small tin and let it cool into a soft paste. Using a clean rag, rub this homemade balm vigorously into the leather. The friction will melt the wax into the pores of the leather, deepening the color, hiding minor scratches, and providing a robust, water-resistant seal.
Pro-Tip: Pay special attention to the edges and the folded areas of the roll. These spots experience the most friction and are prone to drying out. A well-conditioned knife roll will develop a breathtaking patina over the years, aging like a fine whiskey.
Conclusion
And there you have it—a breathtaking, heavy-duty, fully customized leather chef knife roll born from frugal ingenuity and crafted with your own two hands. By looking past the outrageous retail markups and embracing the art of upcycling, clever tool hacking, and traditional hand-sewing, you have created something far more valuable than anything bought in a high-end boutique. You have poured time, precision, and love into an heirloom piece that will protect his most prized culinary tools for decades to come.
When he unrolls this rugged masterpiece on the kitchen counter, he won’t just see a practical storage solution; he will see the thick, indestructible saddle stitches, the gleaming copper rivets, and his own initials pressed into the rich, conditioned leather. He will know that this wasn’t just pulled off a shelf—it was forged specifically for him. So wrap it up in some simple brown butcher paper, tie it with a piece of leftover waxed thread, and get ready to give the ultimate masculine gift. Stay crafty, stay resourceful, and keep making beautiful things on a budget!

Makenzie is the founder and lead writer at MoneyHackTips.com — a personal finance blog dedicated to delivering street-smart financial wisdom for real people on real budgets. With 300+ published articles covering everything from debt management to investing fundamentals, Makenzie’s mission is to make every dollar work harder. When not writing about money hacks, Makenzie is testing frugal living strategies, optimizing side hustles, and helping readers build financial freedom from scratch.