
The Rental Trap: Why We’re Taking Decor Into Our Own Hands
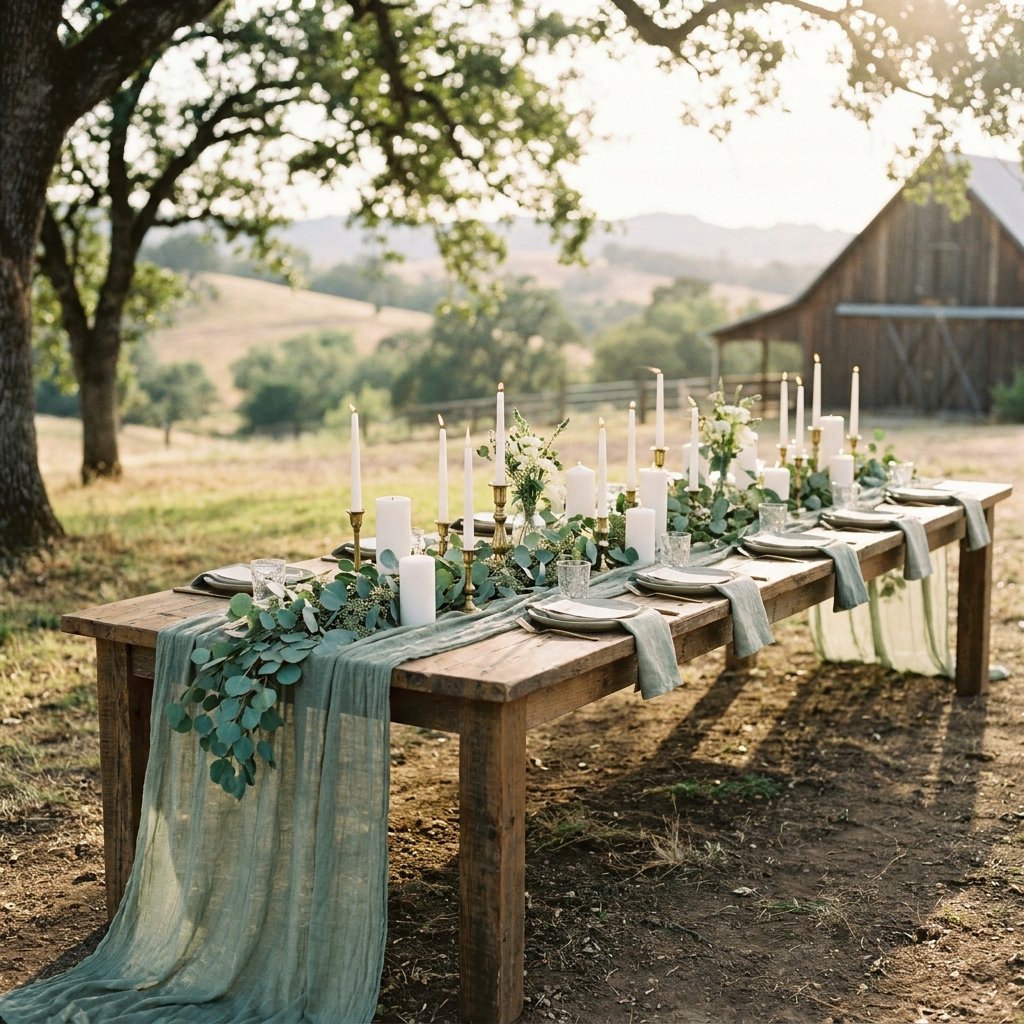
If you have ever planned a wedding, a milestone birthday, or a sophisticated dinner party, you know the immediate sticker shock that comes with event rentals. You see a beautiful, ethereal, gauzy runner in a magazine and think, ‘That’s the one.’ Then you see the price tag: $15 to $25 per runner just to rent it for a single night. For a wedding with 20 tables, you are looking at $500 just for strips of fabric that you have to return the next morning. As a frugal DIYer, that’s not just a budget-buster; it’s a challenge. We don’t pay for what we can create with a little grit and a bucket of dye.
In this masterclass, we are going to break down the exact process of sourcing raw cheesecloth, selecting the right grade for that ‘boho’ drape, and hand-dyeing it to match any color palette imaginable. Whether you are a budget bride, a handy dad helping with decor, or a crafty host, you are about to learn how to produce professional-grade decor for pennies on the dollar. We are talking about high-end aesthetics with a rugged, practical approach to manufacturing. Let’s roll up our sleeves and get to work.
The Material Breakdown: Choosing Your Cheesecloth Grade
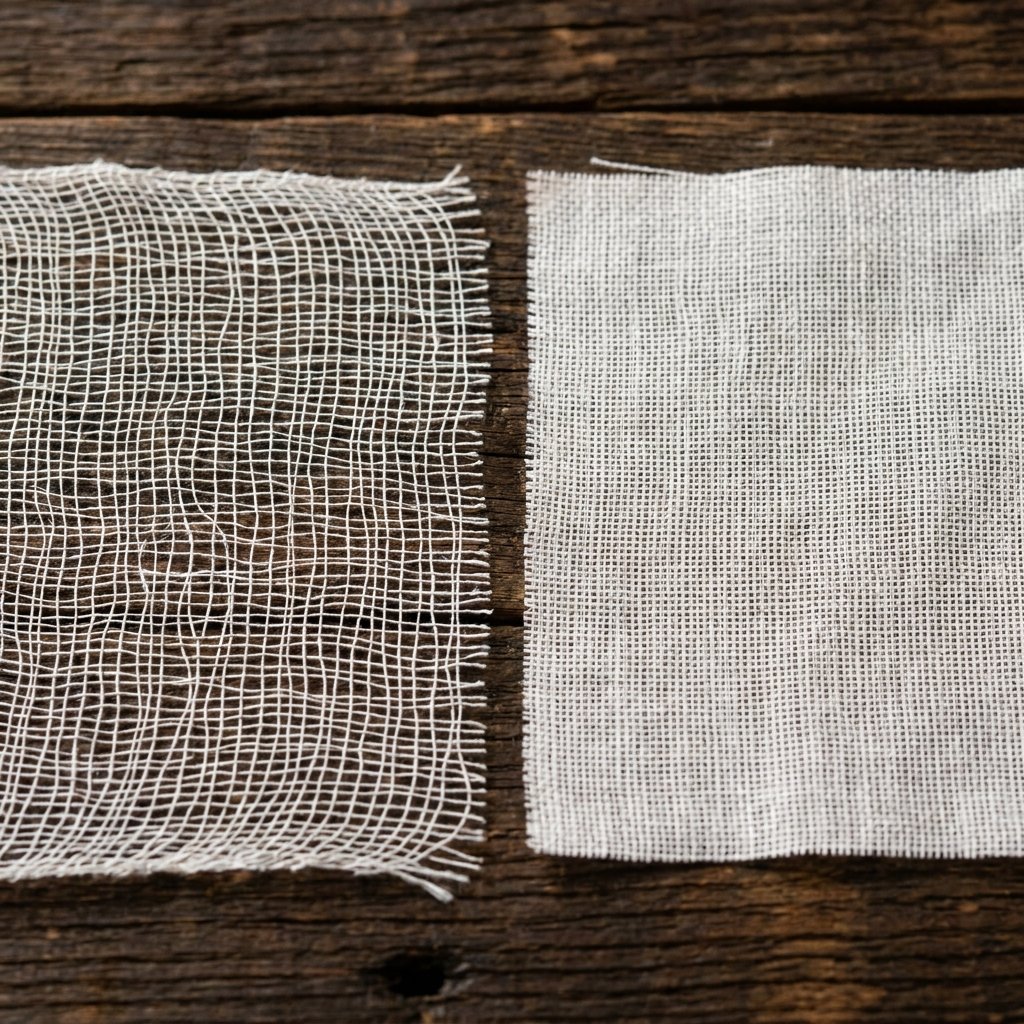
Not all cheesecloth is created equal. If you walk into a grocery store and buy the stuff meant for straining soup, you’ll end up with a runner that looks like a medical bandage. For that professional, flowing look, you need to understand Grades. The grade refers to the weave density—specifically, the number of threads per inch.
- Grade 10: Open, gauze-like weave. This is the most popular for weddings because it provides that sheer, romantic look.
- Grade 40-50: A mid-range weave. It’s more durable and holds color more intensely but is less transparent.
- Grade 90: Very tight weave, almost like a thin muslin. Great for napkins, but lacks the ‘drape’ needed for a runner.
For our purposes, Grade 10 or Grade 40 is the gold standard. You can buy these in bulk bolts of 50 to 100 yards online for significantly less than buying individual packs. This is where the real savings happen.
| Runner Source | Estimated Cost Per Unit | Total for 20 Tables |
|---|---|---|
| Professional Rental | $18.00 | $360.00 |
| Boutique Purchase (Etsy) | $25.00 | $500.00 |
| DIY Bulk Cheesecloth (Grade 10) | $1.25 | $25.00 |
The secret to the ‘expensive’ look is the raw edge. Do not hem these. The slight fraying on the sides adds to the organic, hand-crafted aesthetic that high-end designers charge a premium for.
The Dyeing Process: Achieving Custom Colors on a Budget

Choosing Your Pigment Strategy
You have two main paths here: Synthetic Dyes (like Rit or Tulip) or Natural Dyes (using kitchen scraps). If you need an exact match for a specific wedding color like ‘Dusty Rose’ or ‘Steel Blue,’ synthetic dyes are your best friend. They are consistent, fast-acting, and cost about $4 per bottle, which can dye up to 10 runners.
The Hot Water Method
- Fill a large plastic tub or stainless steel sink with 3 gallons of very hot water (approx 140°F).
- Add 1 cup of salt to help the dye take to the cotton fibers.
- Add 1 teaspoon of dish soap to encourage even leveling of the color.
- Pour in your dye and stir thoroughly. Pro Tip: Test a scrap piece of cheesecloth first; it will look much darker when wet than when dry.
- Submerge your pre-washed, damp cheesecloth. Agitate constantly for 10 to 30 minutes depending on desired depth.
The Natural Route (Eco-Friendly & Free)
If you want a more ‘earthy’ palette, look no further than your pantry. Avocado pits and skins create a stunning dusty pink, while onion skins produce a rich golden amber. This method is essentially 100% free if you save your scraps.
Budget Mantra: Precision is the enemy of the organic. Don’t worry about slight variations in color depth; it creates a ‘watercolored’ effect that looks intentional and high-end.
The ‘Crinkle’ Secret: Styling for Maximum Texture
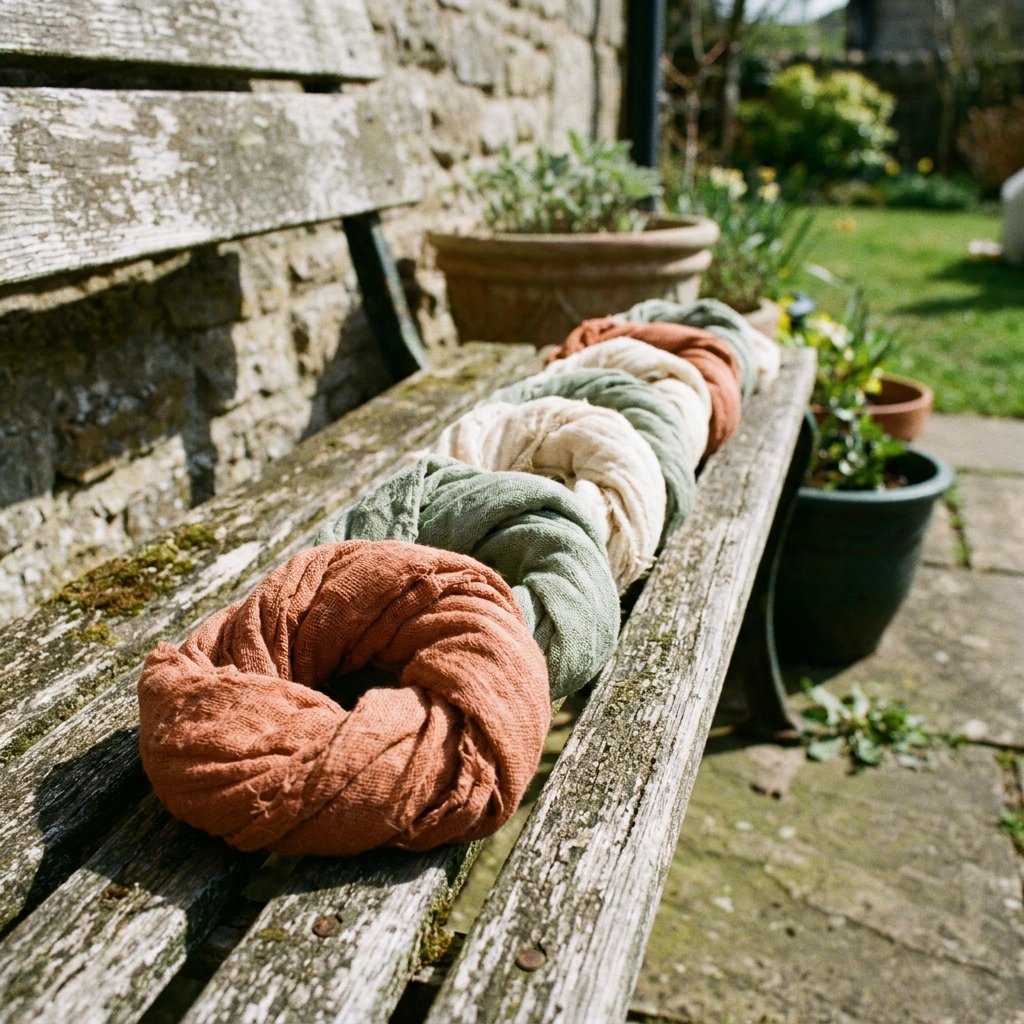
The biggest mistake DIYers make is ironing their runners. A flat cheesecloth runner looks cheap. To get that high-end, ‘boho’ texture that you see in professional styled shoots, you need to master the twist-and-dry technique.
How to Texture Your Runners
- After rinsing your dyed runners until the water runs clear, do not wring them out flat.
- Twist the long strip of fabric into a tight ‘rope’ or ‘donut’ shape.
- Secure the ends with a rubber band or twine.
- Let them dry completely in this twisted state. This can take 24 to 48 hours depending on humidity.
- Once dry, untwist them. You will be left with beautiful, vertical crinkles that give the fabric volume and ‘bounce’ on the table.
This texture allows the runner to ‘puddle’ elegantly at the ends of the table, creating a luxurious look for zero extra cost. If you are prepping for a large event, store them in their twisted state until the morning of the setup to ensure the crinkles stay crisp.
Scaling Production: Tips for the Batch-Crafting Pro

When you are making 20, 30, or 50 runners, you need a system. You cannot treat each one like a boutique art project. You need to think like a manufacturer while keeping the soul of a crafter.
The Assembly Line Workflow
- Measure and Tear: Don’t use scissors. Cut a small notch at your desired length (usually 10-12 feet for an 8-foot table) and rip the fabric. Cheesecloth tears in a perfectly straight line along the grain, giving you that sought-after frayed edge instantly.
- The Pre-Soak: Soak all runners in a tub of plain warm water. Wet fabric absorbs dye much more evenly than dry fabric.
- Large Scale Dyeing: Use a 5-gallon bucket for large batches. You can fit about 5-7 runners in one bucket.
- The Rinse Cycle: If your washing machine has a ‘rinse and spin’ setting, you can use it (without detergent) to get the excess dye out of the runners quickly. Safety Note: Clean your machine with a bleach cycle afterward to prevent staining your next load of laundry!
| Task | Time Per 10 Runners | Tool Needed |
|---|---|---|
| Tearing & Prep | 15 Minutes | Measuring Tape |
| Dyeing & Agitation | 30 Minutes | 5-Gallon Bucket |
| Rinsing | 20 Minutes | Utility Sink/Washer |
| Twisting/Setting | 10 Minutes | Rubber Bands |
Conclusion
The Final Reveal: High-End Style, Frugal Soul
By taking the DIY route, you haven’t just saved hundreds of dollars; you’ve created a custom decor element that perfectly matches your vision. These hand-dyed cheesecloth runners are the epitome of resourceful creativity. They offer a rugged, organic elegance that store-bought polyester simply cannot replicate. Once your event is over, don’t throw them away! These runners can be washed, re-twisted, and gifted to friends, sold on local marketplaces to recoup your entire material cost, or even cut down into high-quality reusable gift wrap.
Remember, the beauty of being a frugal DIYer is that you are never limited by what a rental catalog offers. You have the tools, the technique, and now the knowledge to create a professional-grade atmosphere for pennies. Go forth and craft something beautiful!

Makenzie is the founder and lead writer at MoneyHackTips.com — a personal finance blog dedicated to delivering street-smart financial wisdom for real people on real budgets. With 300+ published articles covering everything from debt management to investing fundamentals, Makenzie’s mission is to make every dollar work harder. When not writing about money hacks, Makenzie is testing frugal living strategies, optimizing side hustles, and helping readers build financial freedom from scratch.