
The Great Toy Industry Heist
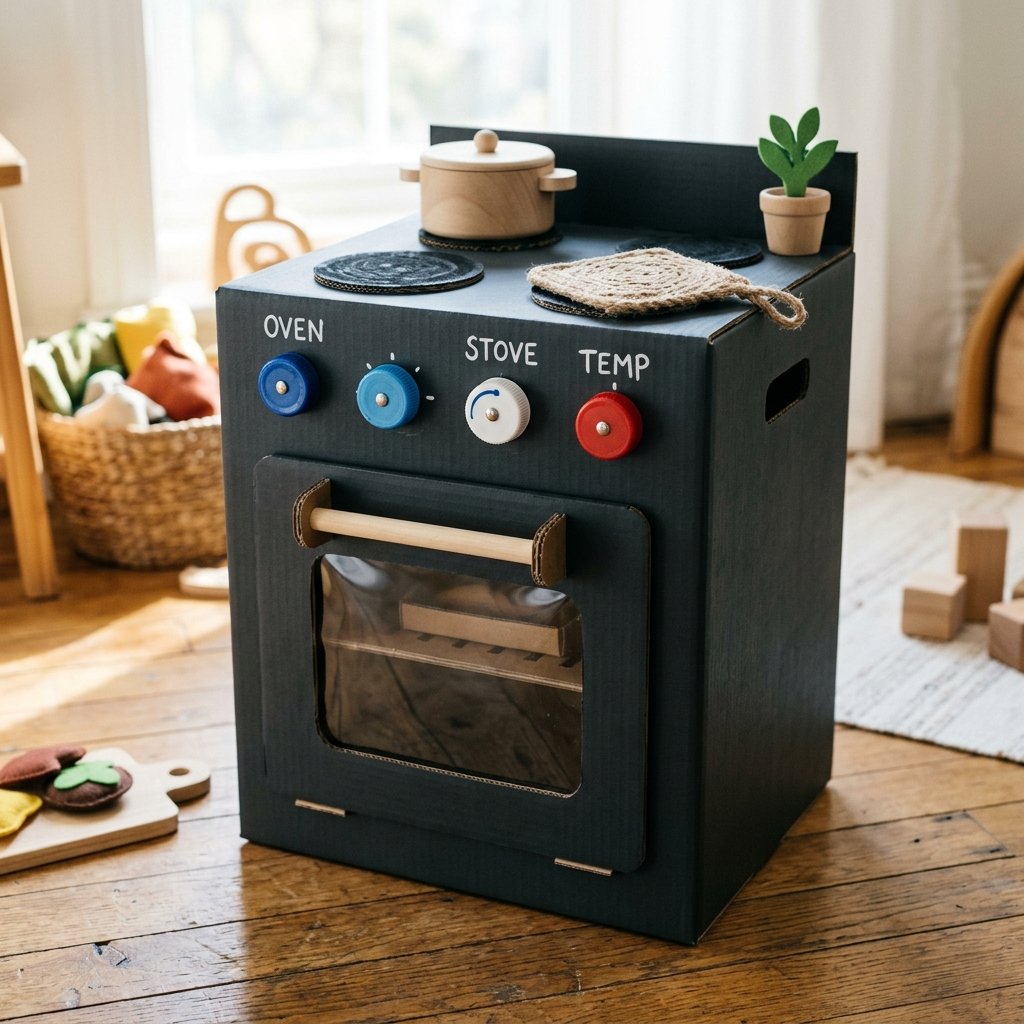
Let’s be honest: the modern toy market is a bit of a racket. We are conditioned to believe that for our children to have a ‘realistic’ play experience, we need to drop $150 to $300 on a molded plastic kitchen set that will eventually end up in a landfill. But as a resourceful DIYer, you know better. You see a shipping box not as trash, but as raw industrial material. You see a bottle cap not as waste, but as a precision-engineered stove knob. Today, we are reclaiming the art of the ‘handmade’ and building a rugged, realistic, and completely free cardboard stove that will outlast any flimsy store-bought alternative. This isn’t just a toy; it’s a testament to your creativity and your commitment to a budget-savvy, sustainable lifestyle.
By using the structural integrity of double-walled cardboard and a few clever upcycling tricks, we can create a play appliance that looks sophisticated enough for a modern living room while remaining tough enough for the most enthusiastic little chefs. Grab your utility knife and your straight-edge; it’s time to build something extraordinary from nothing.
The Blueprint: Sourcing Your Raw Materials for Zero Dollars
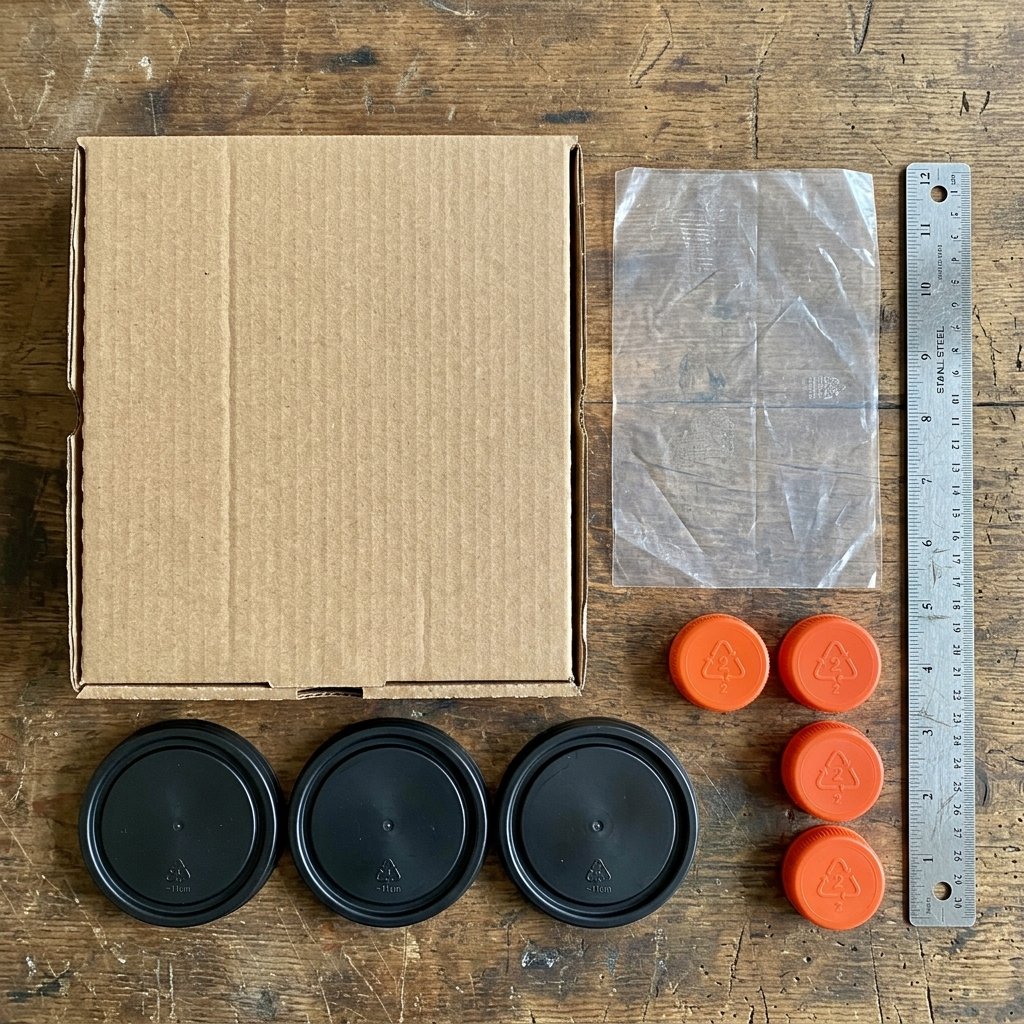
The secret to a ‘high-end’ cardboard project lies in the quality of your substrate. Not all boxes are created equal. For a stove that won’t buckle under the weight of a wooden play pot, you need to hunt for the ‘Heavy Duty’ variety. Look for shipping containers used for appliances or large furniture—these often feature double-walled corrugation that provides incredible compressive strength.
| Material | Upcycled Source | Estimated Cost |
|---|---|---|
| Main Stove Body | Large Shipping Box (e.g., Dishwasher or Large Moving Box) | $0.00 |
| Burners | Old CDs, Black Cardstock, or Plastic Lids | $0.00 |
| Control Knobs | Gatorade or Milk Jug Caps | $0.00 |
| Oven Window | Clear Plastic from Toy Packaging or Sheet Protector | $0.00 |
| Adhesive | Hot Glue Scraps or Flour/Water Paste | $0.00 |
| Total Investment | Your Time & Creativity | $0.00 |
The frugal maker’s mantra: Never buy what you can find, and never find what you can build. If the box has a brand logo on it, don’t worry—we’ll be turning it inside out or painting it for that ‘custom’ look.
Before you begin, ensure you have a sharp blade. A dull utility knife is the enemy of clean lines. If you’re working on a budget, you can sharpen an old blade on the unglazed bottom of a ceramic coffee mug to get that razor edge back for 0 cents.
Structural Integrity: Engineering the Oven Body
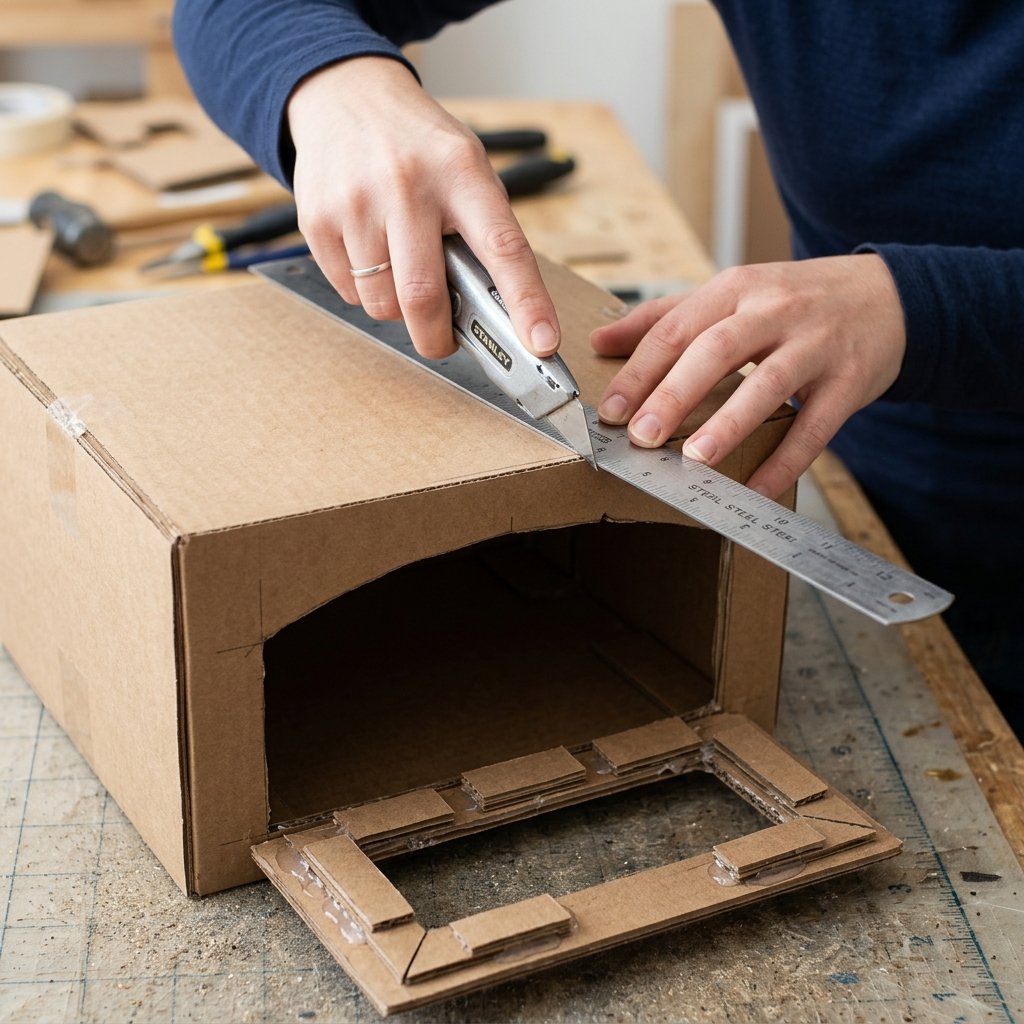
We aren’t just taping a box shut; we are building a chassis. To ensure the stove is ‘toddler-proof,’ we will use a technique called ‘internal ribbing.’ This involves cutting extra strips of cardboard and gluing them vertically inside the corners of your main box. This reinforces the structure so a child can actually lean on the stove without it collapsing.
Step-by-Step Chassis Assembly:
- The Inversion Trick: Carefully open the seams of your box. Re-fold it so the printed logos are on the inside. This gives you a clean, brown ‘kraft’ canvas on the outside.
- The Oven Cutout: Measure 3 inches from the bottom and 2 inches from the sides. Use your straight edge to cut a rectangle for the oven door. Pro Tip: Only cut three sides! Leave the bottom edge uncut to act as a natural hinge.
- Internal Bracing: Cut four strips of cardboard 4 inches wide and as tall as your box. Fold them into ‘L’ shapes and hot glue them into the four interior corners. This triples the load-bearing capacity of your stove top.
- The Shelf: Cut a piece of cardboard exactly the width and depth of the interior. Glue ‘cleats’ (small strips of cardboard) to the side walls and slide your shelf in. Now your little chef has a place for their ‘baked goods.’
When cutting cardboard, always use a ‘multi-pass’ technique. Don’t try to go all the way through in one go. Make one light score line, then a second deeper cut, and a third to finish. This prevents the edges from fraying and keeps the finish professional.
The Master Chef’s Details: Realistic Burners and Click-Knobs
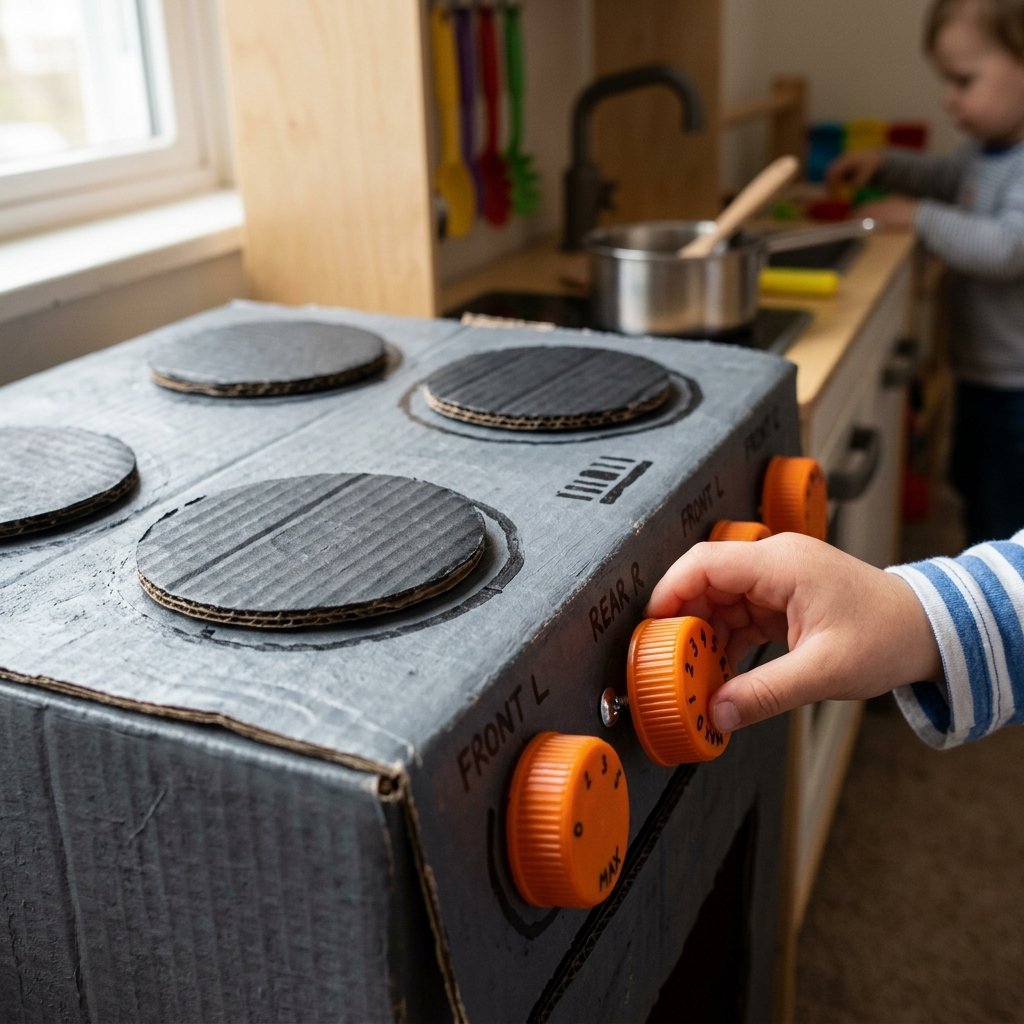
The difference between a ‘box with holes’ and a ‘realistic stove’ is in the tactile details. We want knobs that actually turn and burners that look like they’re ready for a sauté pan. This is where we use our ‘scavenged’ materials to add that masculine-elegant aesthetic.
Creating the ‘Click’ Knobs:
To give the knobs a satisfying tactile feel, we use a simple ‘friction-fit’ method. Poke a small hole through the front panel of the stove. Push a small bolt or even a tightly rolled cylinder of cardboard through the hole. Glue your bottle cap to the end. On the inside of the stove, place a rubber band or a small piece of foam against the ‘axle’ before securing it. This creates resistance, making the knob feel ‘real’ when turned.
Building the Cooktop:
- The Induction Look: For a modern ‘glass top’ stove, glue four old CDs (shiny side down) to the top of the box. Paint the top surface with a mix of black acrylic paint and a dash of baking soda to create a matte, stone-like texture.
- The Gas Grate Look: If you prefer a rugged, professional gas range style, use black chenille stems (pipe cleaners) or even painted twigs glued in a cross-pattern over black circles.
| Feature | DIY Method | Benefit |
|---|---|---|
| Knobs | Bottle caps + Cardboard Axle | Tactile feedback & fine motor skill dev |
| Burners | Recycled CDs or Lids | Visual realism & heat-resistant look |
| Oven Handle | Rolled cardboard tube | Rugged grip & easy to replace |
Durability Secrets: Making Cardboard Last for Years
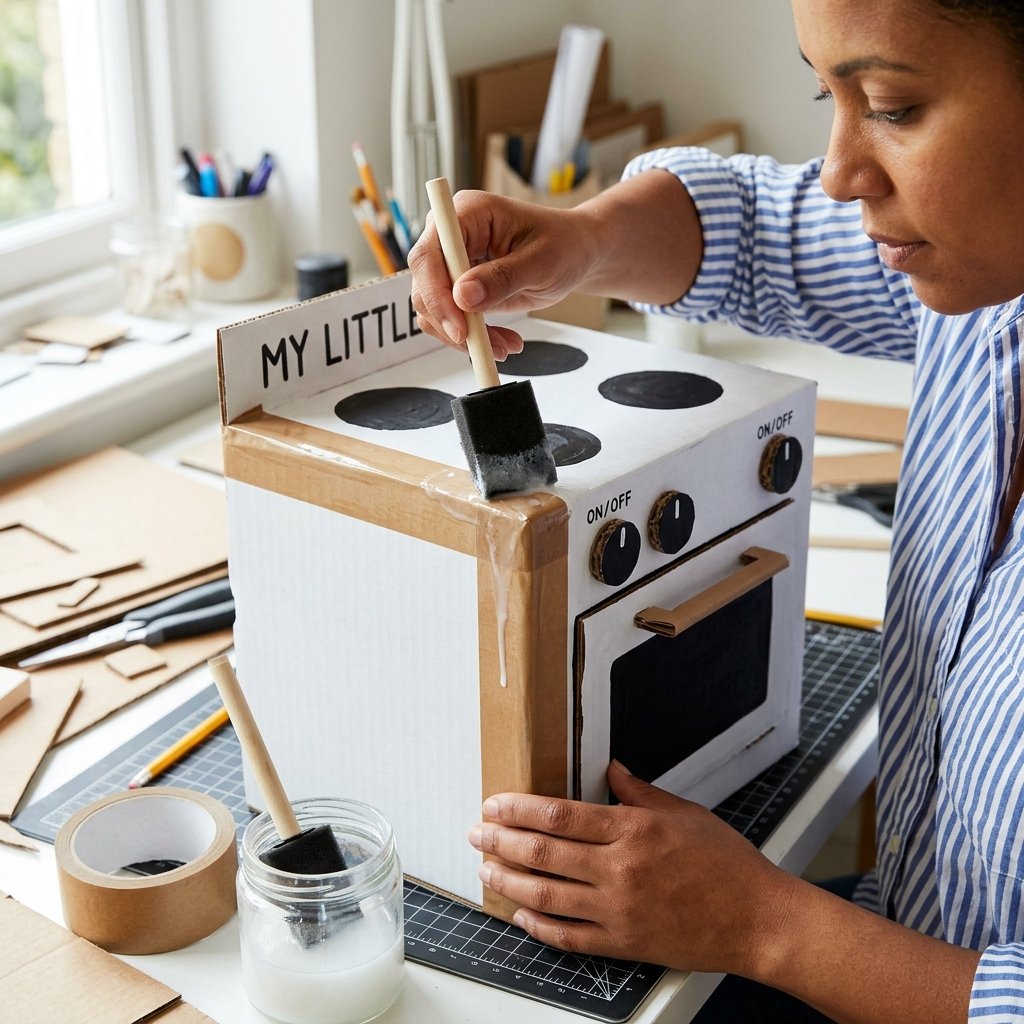
Many parents avoid cardboard toys because they fear they are ‘disposable.’ However, with the right ‘ruggedization’ techniques, a cardboard stove can last through multiple children. The secret lies in sealing the edges and ‘laminating’ high-wear areas.
The ‘Edge-Banding’ Technique:
The most vulnerable part of cardboard is the exposed corrugation on the edges. To fix this, use kraft paper tape (the kind you wet with a sponge) or even strips of old brown paper bags dipped in a 50/50 mix of white glue and water. Wrap these strips over every exposed edge. Once dry, these edges become hard as wood and won’t peel or fray.
Waterproofing the Surface:
Kitchen play involves a lot of ‘imaginary’ spills that sometimes turn into real ones. To protect your masterpiece:
- The Beeswax Buff: Rub a nub of beeswax or an old candle over the top surface and buff it with a cloth. This creates a natural water-resistant barrier.
- The ‘Poor Man’s Lacquer’: Mix two parts white glue with one part water and paint a thin layer over the entire stove. It dries to a hard, clear, wipeable shell.
Safety Note: While cardboard is generally safe, always ensure that any small parts like bottle cap knobs are securely fastened with high-strength adhesive to prevent choking hazards for very young children. Check the ‘integrity’ of the knobs once a month.
Customization: From Rustic Farmhouse to Industrial Modern
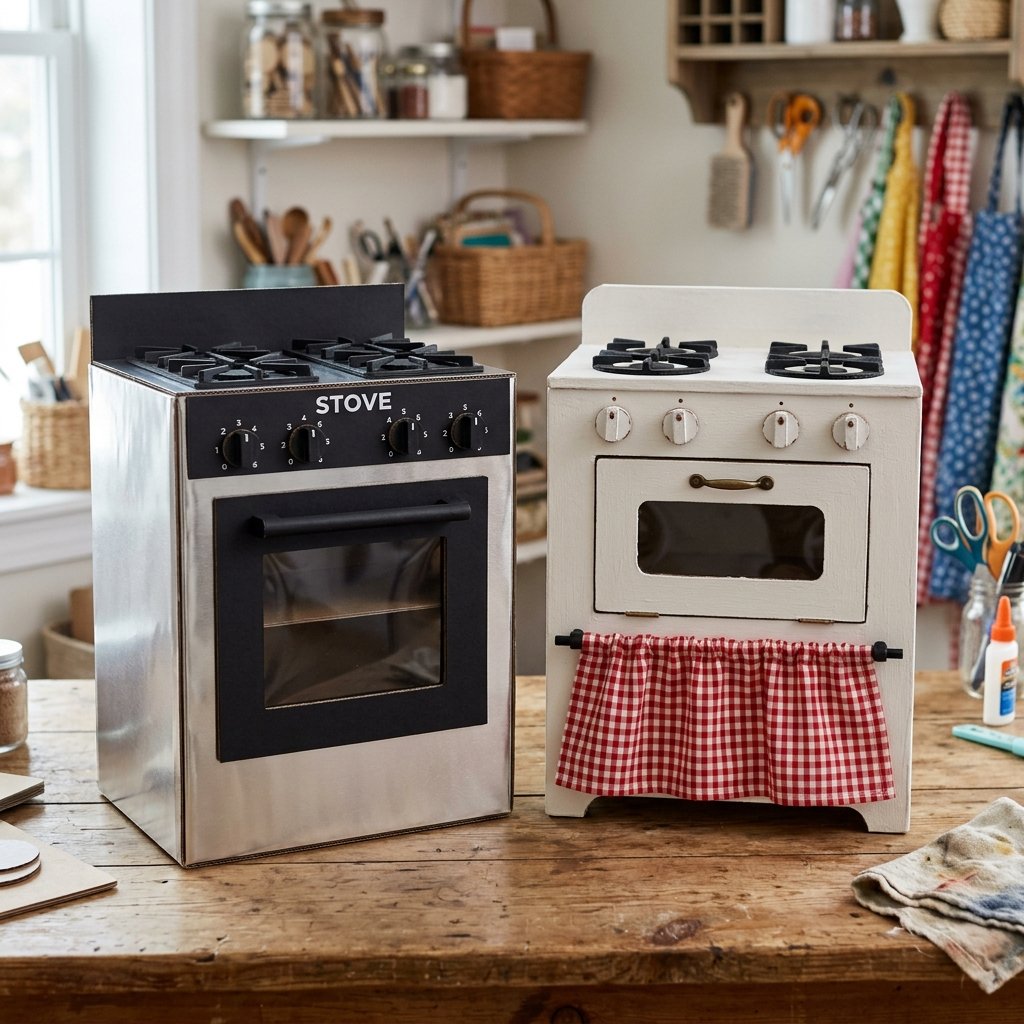
Now that the structure is solid, it’s time for the ‘Designer’ phase. You can tailor this stove to match your own home decor, making it a piece of furniture rather than a toy eyesore. This is where your ‘Dollar Tree Interior Designer’ skills shine.
The Finishes:
- The Stainless Steel Look: Use aluminum foil. Smooth it out carefully over the front panels using a credit card to remove bubbles. It looks remarkably like high-end stainless steel for the cost of $0.05 of foil.
- The Farmhouse Aesthetic: Paint the body white and use a dark brown marker to draw ‘wood grain’ on the handles. Add a small fabric ‘curtain’ over the oven door using an old dish towel and a scrap piece of string.
- The Industrial Look: Keep the natural brown kraft color of the cardboard, but use a black Sharpie to draw ‘rivets’ around the edges. This gives it a rugged, ‘workshop’ feel that looks great in any playroom.
For the oven window, don’t just leave it open. Tape a piece of clear plastic (from a salad container or a toy box) to the inside of the door. This adds an immediate level of ‘wow’ factor that makes the stove look like a $200 boutique item.
Conclusion
The Wealth of Resourcefulness
By choosing to build instead of buy, you haven’t just saved $150; you’ve modeled a lifestyle of resourcefulness and creativity for your children. This cardboard stove is more than a toy—it’s a lesson in seeing the potential in the ‘worthless.’ When your child ‘cooks’ their first imaginary meal on these bottle-cap burners, they won’t care that it came from a shipping box. They will only see the magic that you created with your own two hands.
Remember: The best toys aren’t bought; they are built. Now, take that extra cash you saved and put it into a college fund, or better yet, buy some high-quality real ingredients for a family dinner. Happy building!

Makenzie is the founder and lead writer at MoneyHackTips.com — a personal finance blog dedicated to delivering street-smart financial wisdom for real people on real budgets. With 300+ published articles covering everything from debt management to investing fundamentals, Makenzie’s mission is to make every dollar work harder. When not writing about money hacks, Makenzie is testing frugal living strategies, optimizing side hustles, and helping readers build financial freedom from scratch.