
The Secret to a Designer Wedding on a Yard-Sale Budget
Planning a wedding often feels like a constant battle between your Pinterest dreams and your bank account reality. But what if I told you that those high-end geometric wood centerpieces retailing for $50 to $150 a piece can be yours for literally pennies? As a seasoned ‘trash-to-treasure’ guru, I’ve spent years perfecting the art of the ‘Masculine-Elegant’ aesthetic—combining rugged, raw materials with sophisticated structural design. Today, we are diving deep into the world of geometric woodworking. Whether you are a frugal DIYer, a handy parent helping with a daughter’s big day, or a budget-savvy bride, this guide will show you how to turn literal scraps into the talk of the reception. We aren’t just making decor; we are engineering elegance from the overlooked.
The Anatomy of the ‘Penny’ Centerpiece: Sourcing Your Materials
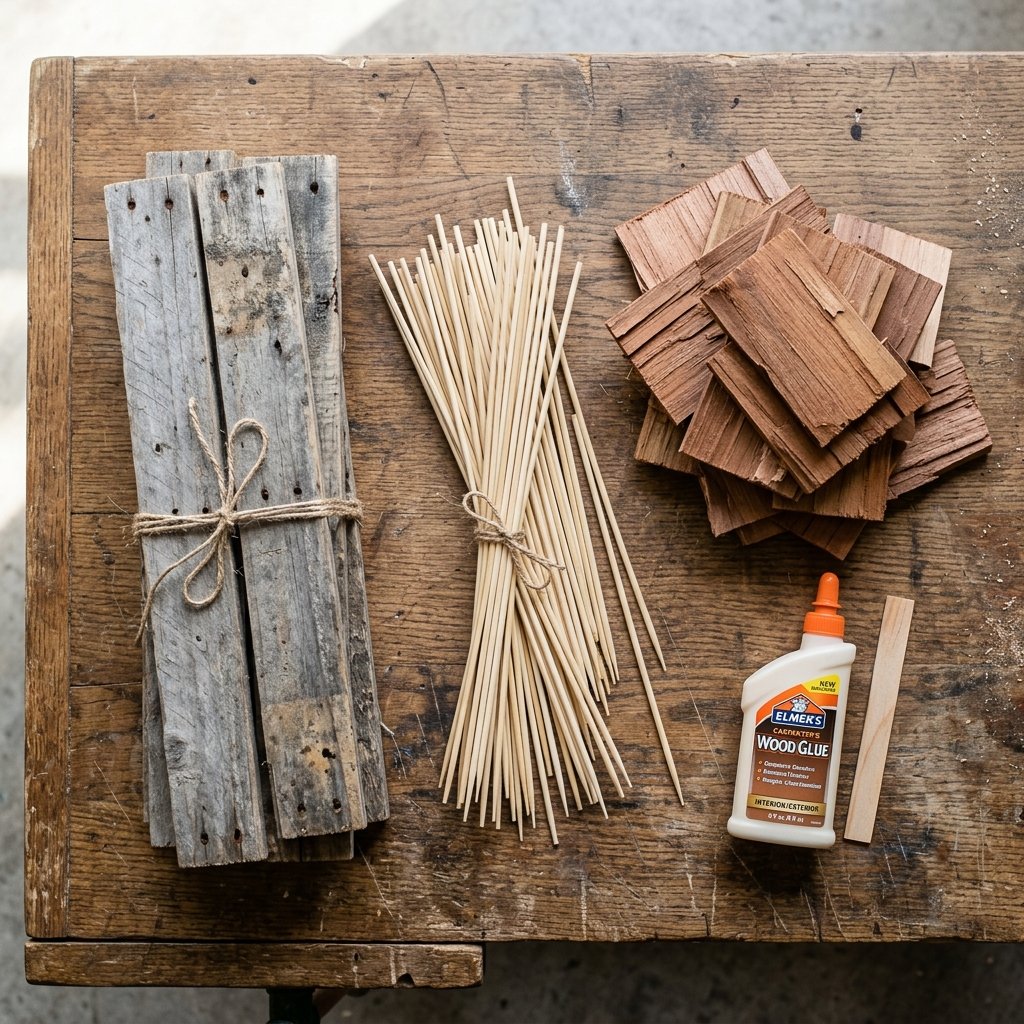
The first rule of the Resourceful Crafter is: never pay retail for wood. To keep our costs down to pennies, we need to look where others don’t. Geometric shapes—triangles, hexagons, and pyramids—require thin, uniform strips of wood. You don’t need a lumber yard; you need a keen eye for ‘waste.’
Where to Scavenge for Free or Cheap Wood
- Construction Site Off-cuts: Visit a local residential build and ask for the ‘dunnage’ or scrap pile. Small strips of 1×2 pine or cedar shingles are often discarded and are perfect for geometric frames.
- The ‘Popsicle Stick’ Secret: For smaller, delicate table accents, heavy-duty jumbo craft sticks can be stained to look like premium walnut or oak.
- Bamboo Skewers: When painted with metallic spray paint, these $1.00 kitchen staples transform into sleek, modern ‘metal’ rods.
- Pallet Slats: If you have a table saw, ripping down a single free pallet can yield enough material for 20+ centerpieces.
| Material Source | Estimated Cost | Vibe/Aesthetic |
|---|---|---|
| Construction Scraps | $0.00 | Rugged, Rustic-Chic |
| Bamboo Skewers (Pack of 100) | $1.25 | Modern, Minimalist |
| Cedar Shingles (Bundle) | $15.00 | Elegant, Fragrant, High-End |
| Jumbo Craft Sticks | $2.00 | Boho, Delicate |
The Budget Mantra: ‘One man’s firewood is another man’s focal point. Look for the grain, ignore the grime.’
Mastering the Geometry: 3 Iconic Shapes You Can Build

Geometric decor works because it plays with light and shadow. You don’t need to be a mathematician to get these right; you just need a few basic angles. We will focus on the three most impactful shapes for wedding tables.
1. The Minimalist Triangle Frame
The triangle is the strongest shape in nature and the easiest to build. By joining three equal lengths of wood at 60-degree angles, you create a modern frame that looks incredible when paired with hanging tea lights or air plants.
2. The Sophisticated Hexagon (The ‘Honeycomb’)
Hexagons are the gold standard of modern weddings. They require 30-degree miter cuts. When clustered in groups of three of varying sizes, they create a ‘wow’ factor that fills large round tables beautifully.
3. The 3D Pyramid (The Lantern Style)
This is where we go 3D. By creating a square base and meeting four uprights at a central point, you create a wooden ‘lantern.’ This is the ultimate ‘dupe’ for expensive West Elm metal lanterns.
Pro Tip: Use a miter box for precision. Even a $5.00 plastic miter box from a discount tool store will ensure your angles are crisp and professional.
Step-By-Step Construction: The Professional’s Method
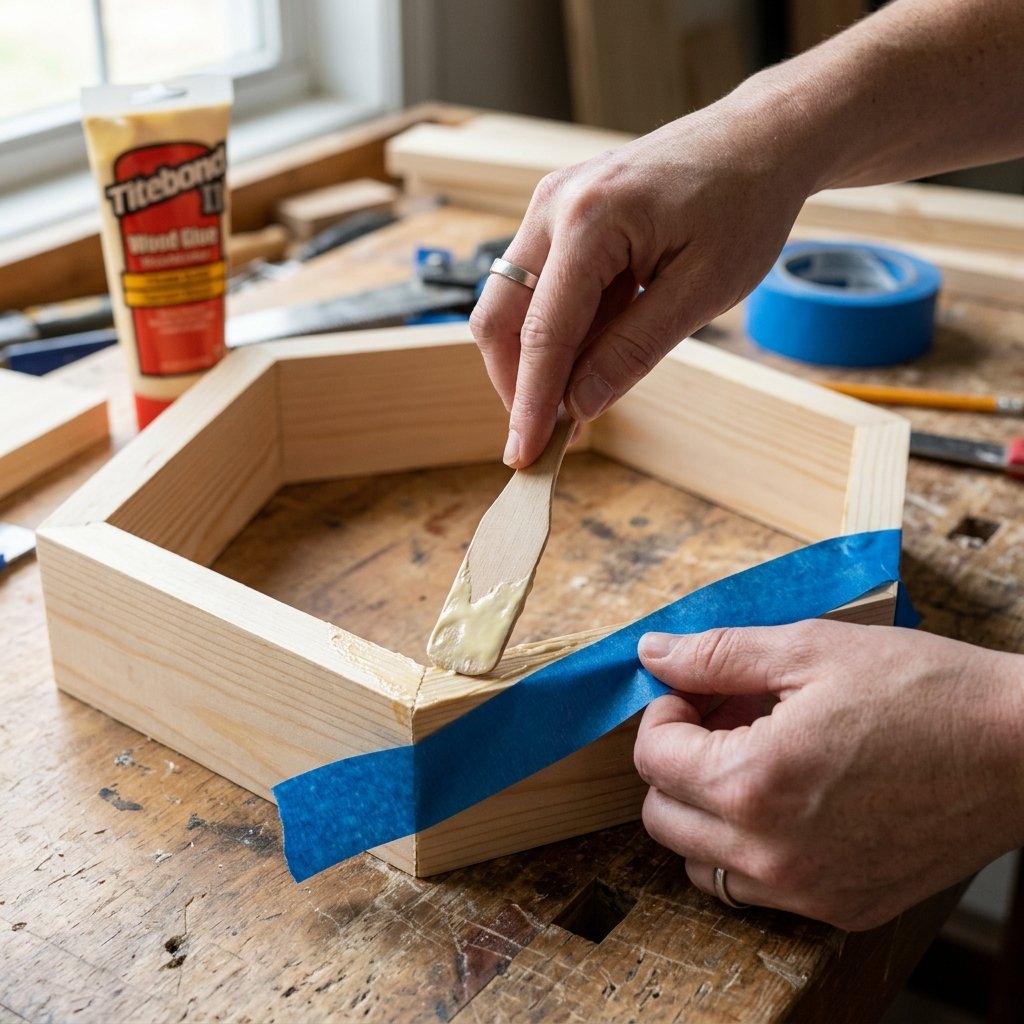
Now, let’s get our hands dirty. This process is designed for efficiency, allowing you to mass-produce 20 centerpieces in a single weekend.
The Assembly Process
- Measure and Mark: Consistency is key. Create a ‘jig’ (a simple stop-block) so every piece of wood is cut to the exact same length. For a standard table, 10-inch sides are ideal.
- The ‘Tape Method’ for Gluing: Lay your pieces end-to-end on a strip of painter’s tape. Apply wood glue to the joints, then ‘roll’ the shape up. The tape acts as a clamp, holding the angles tight while the glue sets.
- Reinforce (The Rugged Way): For larger centerpieces, use a 23-gauge pin nailer or small finish nails. If you are staying ‘pennies-only,’ a high-quality wood glue like Titebond II is stronger than the wood itself once cured.
- Sanding for Elegance: Don’t skip this. Use 120-grit then 220-grit sandpaper to smooth the joints. This makes the ‘scrap wood’ look like a single, seamless piece of furniture.
Safety First: When working with saws or sanders, always wear eye protection and work in a well-ventilated area. If using a hot glue gun for temporary holds, watch those fingertips!
The Finishing Touch: Making ‘Trash’ Look Like a Million Bucks
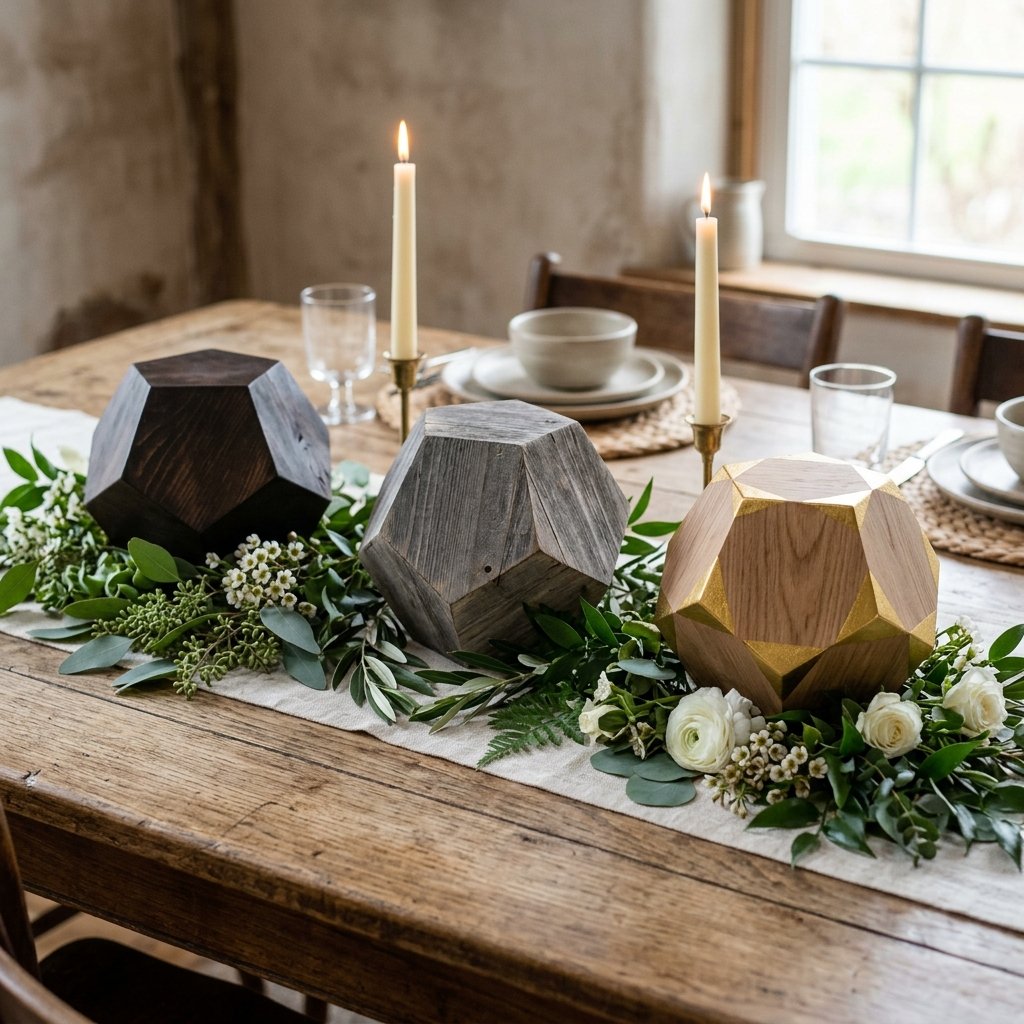
The difference between a ‘school project’ and a ‘wedding centerpiece’ is the finish. We want deep, rich tones or crisp, clean metallics.
Budget-Savvy Staining Techniques
- The Coffee Stain: Brew a pot of triple-strength cheap coffee. Wipe it onto raw pine for a beautiful, weathered tan look for $0.00.
- Steel Wool and Vinegar: Soak a pad of steel wool in apple cider vinegar for 24 hours. Brush it onto wood to create an instant ‘aged oak’ gray patina through a chemical reaction with the wood’s tannins.
- The ‘Dollar Tree’ Gold Leaf: Use a metallic gold paint pen or a small jar of gold acrylic paint to highlight just the edges of your geometric shapes. This ‘dipped’ look is incredibly trendy and costs less than $2.00 to do 20 pieces.
| Finish Type | Cost Per Piece | Drying Time |
|---|---|---|
| Strong Coffee | $0.02 | 1 Hour |
| Vinegar/Steel Wool | $0.05 | 4 Hours (oxidation) |
| Spray Paint (Gold/Black) | $0.25 | 20 Minutes |
| Beeswax Polish | $0.15 | Instant |
Styling and Logistics: The Grand Reveal
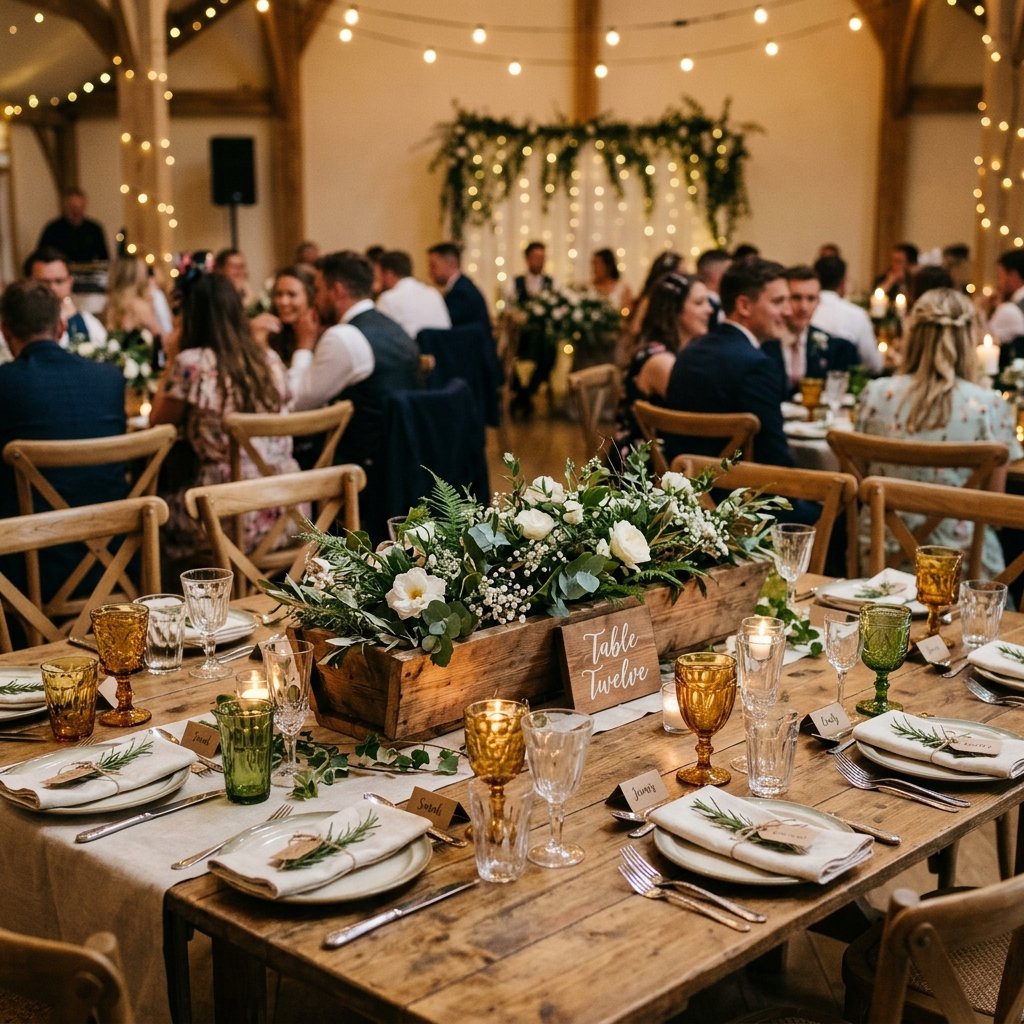
A centerpiece is only as good as its surroundings. To keep the ‘pennies’ theme going, we need to style these frames without breaking the bank on florals.
The Frugal Stylist’s Toolkit
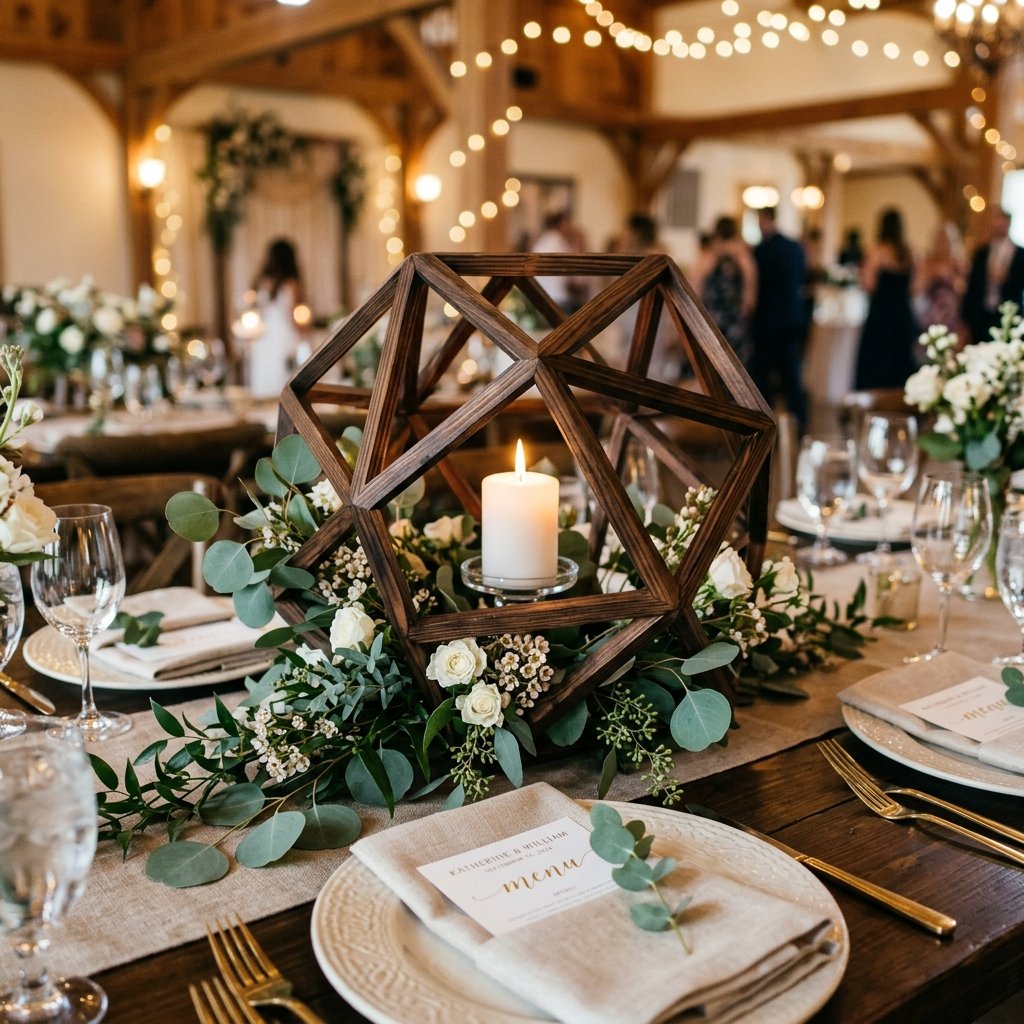
- Foraged Greenery: Don’t buy expensive roses. Use eucalyptus, ferns, or even pine branches foraged from your backyard. They look intentional and rugged inside a geometric frame.
- LED Tea Lights: Safety is paramount. Use bulk-pack LED candles (often 12 for $5.00) to create a warm glow without the fire hazard of wood.
- Thrifted Glass: Place a simple glass votive (found at thrift stores for $0.25) inside your wooden hexagon. The contrast of glass and wood is the height of ‘Masculine-Elegant’ design.
| Item | Retail Rental Price | Our DIY Cost | Total Savings (for 15 tables) |
|---|---|---|---|
| Geometric Lantern | $25.00 | $0.85 | $362.25 |
| Floral Insert | $40.00 | $2.00 (Foraged) | $570.00 |
| Total Per Table | $65.00 | $2.85 | $932.25 Saved! |
Conclusion
Your High-End Wedding is Within Reach
Creating jaw-dropping wedding decor doesn’t require a massive budget; it requires a bit of grit, a dash of creativity, and the willingness to see the potential in a pile of scrap wood. By following these steps, you’ve not only saved nearly $1,000 on your wedding decor, but you’ve also created something with your own two hands that carries a story. These geometric centerpieces are rugged enough for a backyard barn wedding yet elegant enough for a downtown loft gala. So, grab that miter box, start scavenging, and remember: the best things in life (and weddings) aren’t bought—they’re built. Happy crafting!

Makenzie is the founder and lead writer at MoneyHackTips.com — a personal finance blog dedicated to delivering street-smart financial wisdom for real people on real budgets. With 300+ published articles covering everything from debt management to investing fundamentals, Makenzie’s mission is to make every dollar work harder. When not writing about money hacks, Makenzie is testing frugal living strategies, optimizing side hustles, and helping readers build financial freedom from scratch.