In an era where the toy aisles are saturated with flashing lights, synthetic noises, and price tags that rival a monthly utility bill, there is a quiet revolution happening in the homes of resourceful parents. We are returning to the basics. The $0 Montessori toy isn’t just about saving money; it is about the rugged elegance of simplicity. By utilizing nothing more than a discarded shipping box and 10 minutes of your time, you can engineer a cognitive powerhouse that rivals any boutique wooden toy found in high-end catalogs.
This cardboard sorting game focuses on the core Montessori principles: isolation of a single skill, natural materials, and the encouragement of independent discovery. As a frugal DIYer, you aren’t just building a toy; you are upcycling ‘trash’ into a developmental milestone. Let’s look at how we can take a standard Amazon box and turn it into a brain-boosting tool that keeps little hands busy and little minds sharp.
“The greatest gifts we can give our children are the roots of responsibility and the wings of independence—and sometimes, those roots are found in the bottom of a cardboard box.”
The Anatomy of the Build: Why Cardboard is the Ultimate Engineering Material
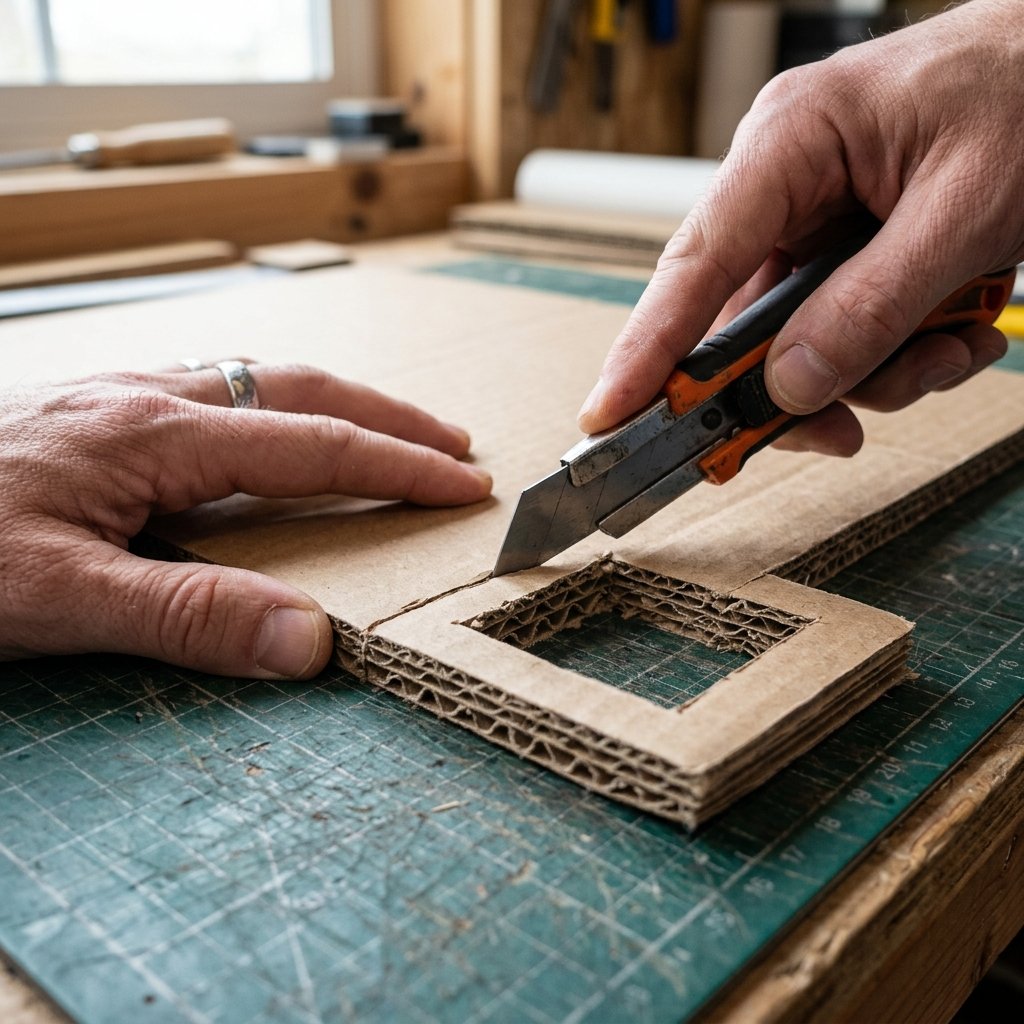
To the untrained eye, a cardboard box is waste. To the crafty expert, it is a structural marvel. Cardboard is lightweight yet durable, easy to manipulate with basic tools, and—most importantly—100% free. When we talk about ‘brain-boosting’ in the context of this sorting game, we are targeting three specific areas of development:
- Fine Motor Precision: The act of grasping a small object and aligning it with a specific slot.
- Visual-Spatial Awareness: Recognizing that a circular cap will not fit into a rectangular slot.
- Task Persistence: The ‘rugged’ focus required to complete a cycle of sorting without distraction.
By choosing cardboard over plastic, you are also providing a tactile experience that is grounded and real. The texture of the fibers and the sound of a cap dropping into a hollow box provide immediate sensory feedback that plastic simply cannot replicate.
Scavenger List: Gathering Your Zero-Cost Components

Before you begin your 10-minute build, you need to scavenge your home for the necessary components. This project requires no specialized hardware or expensive adhesives. We are looking for high-contrast materials that are easy for small hands to manipulate.
| Item | Purpose | Cost |
|---|---|---|
| Shipping Box | The main structural housing | $0.00 |
| Bottle Caps/Milk Lids | The sorting tokens | $0.00 |
| Utility Knife or Box Cutter | Precision cutting tool | Owned |
| Marker or Pencil | Layout and drafting | Owned |
| Masking Tape (Optional) | Reinforcing edges | $0.00 |
When selecting your tokens, aim for variety. Use red soda caps, blue milk lids, and perhaps some large wooden buttons or even dried pasta shapes like rigatoni. The goal is to create a diverse set of challenges for the child’s tactile senses.
Mastering the Build: A Step-by-Step Guide to the 10-Minute Sorter
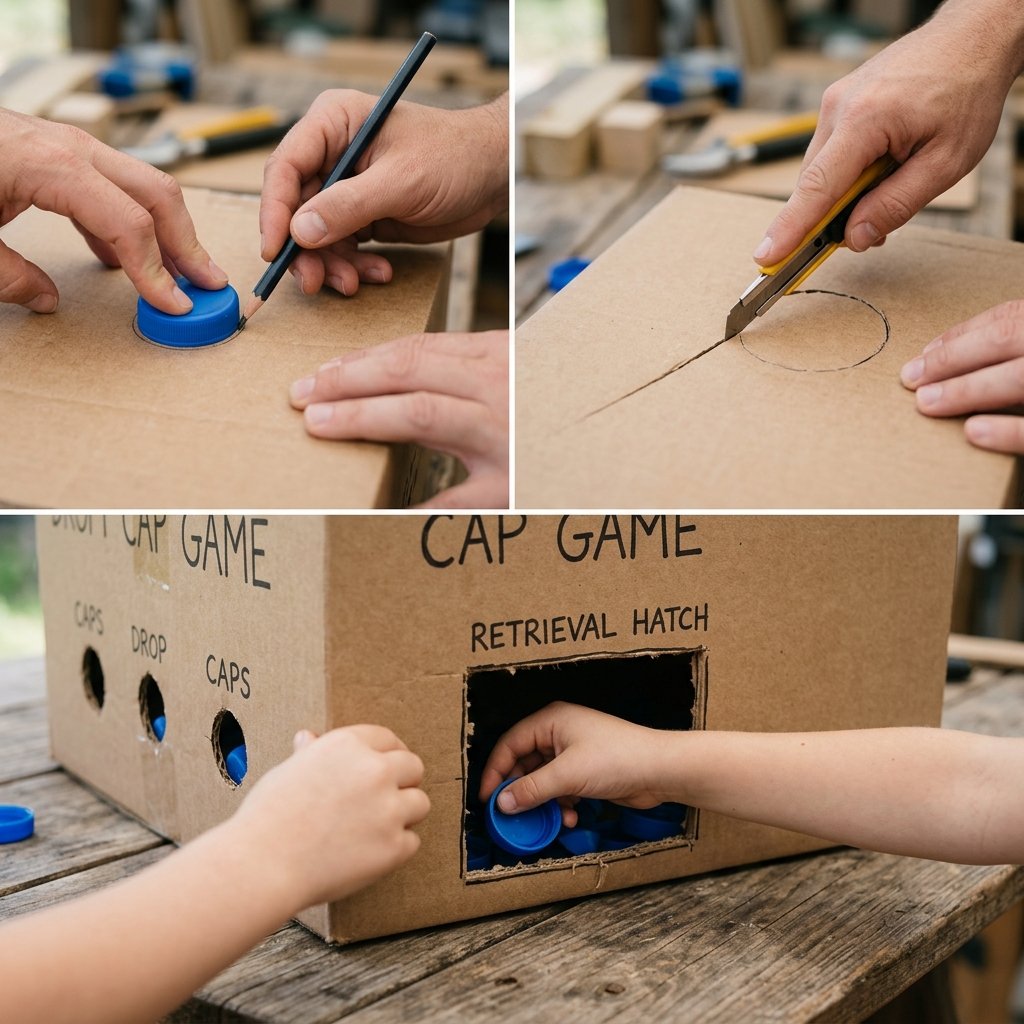
Efficiency is key. Follow these steps to ensure a clean, professional finish that looks more like a designer toy than a weekend project.
- The Layout: Place your box on a flat surface. Arrange your sorting tokens (caps, lids, etc.) on the top flap to plan your spacing. Leave at least 2 inches between each hole to maintain structural integrity.
- The Drafting: Trace around each token with your marker. For a more ‘pro’ look, use a compass or a small glass to ensure perfectly symmetrical circles.
- The Surgical Cut: Using your utility knife, cut slightly inside the lines you traced. You want the fit to be snug but not difficult. Safety Tip: Always cut away from your body and keep your stabilizing hand well clear of the blade’s path.
- The Retrieval Hatch: Cut a large rectangular ‘door’ on the side of the box near the bottom. This allows the child to reach in, retrieve the tokens, and start the cycle over—fostering independence.
- Smoothing the Edges: Run your thumb along the cut edges to flatten any stray cardboard fibers. If you want to get fancy, you can line the holes with colorful masking tape.
“Precision in the cut leads to longevity in the play. Take 60 seconds extra to ensure your lines are sharp; the child will notice the quality of the fit.”
Skill-Scaling: Adapting the Game for Toddlers to Preschoolers
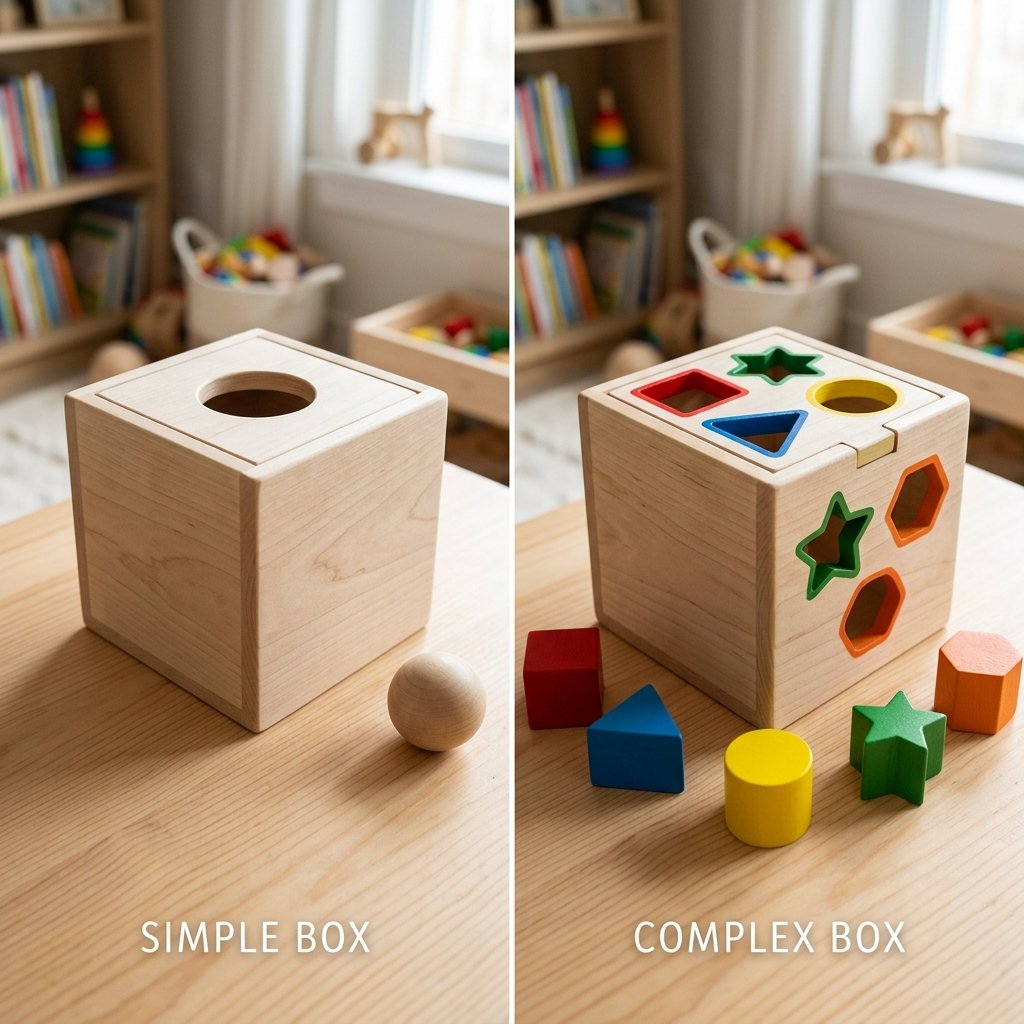
A truly clever DIYer knows that a toy should grow with the child. You can modify this $0 build to increase the difficulty as your child’s cognitive abilities sharpen. Here is how to scale the challenge:
- Level 1 (The Beginner): Simple circular holes of the same size. The focus is purely on the ‘drop’ action.
- Level 2 (The Intermediate): Holes of varying sizes. The child must distinguish between a small water bottle cap and a large wide-mouth juice lid.
- Level 3 (The Advanced): Shape and Color Matching. Paint the rim of each hole to match the color of the specific token, or cut complex shapes like stars and hexagons.
| Age Group | Focus Skill | Modification |
|---|---|---|
| 12-18 Months | Grasp & Release | Single large circular slot |
| 18-24 Months | Size Discrimination | Small, Medium, Large circles |
| 2-3 Years | Shape Recognition | Squares, Triangles, Slits |
| 3+ Years | Color Sequencing | Color-coded rims and patterns |
The Rugged Aesthetic: Making Trash Look Like a Boutique Toy

Just because it’s made of cardboard doesn’t mean it has to look like ‘garbage.’ To achieve that masculine-elegant, minimalist look often found in high-end Scandinavian toy stores, follow these styling tips:
- Monochrome Palette: If you choose to paint, stick to a single accent color or a muted earth-tone palette (sage green, slate blue, or terracotta).
- Natural Accents: Replace plastic bottle caps with smooth river stones or wooden discs for a more ‘rugged’ and organic feel.
- Structural Reinforcement: Use a bit of hot glue on the interior seams of the box. This makes the toy feel solid and ‘heavy’ rather than flimsy.
By treating the cardboard with the same respect you would treat a piece of fine walnut, you elevate the object. It ceases to be a box and becomes a curated piece of educational equipment.
Conclusion
Building the $0 Montessori sorting game is a testament to the power of resourceful parenting. In just 10 minutes, you have diverted waste from a landfill and created a high-value educational tool that promotes focus, coordination, and logic. This project proves that you don’t need a massive budget to provide a rich, stimulating environment for your children; you simply need a sharp blade, a bit of cardboard, and the creative drive to see the treasure hidden in the trash. So, next time that delivery arrives on your porch, don’t just break down the box—build a brain-boosting masterpiece.

Makenzie is the founder and lead writer at MoneyHackTips.com — a personal finance blog dedicated to delivering street-smart financial wisdom for real people on real budgets. With 300+ published articles covering everything from debt management to investing fundamentals, Makenzie’s mission is to make every dollar work harder. When not writing about money hacks, Makenzie is testing frugal living strategies, optimizing side hustles, and helping readers build financial freedom from scratch.