
There is something undeniably restorative about a porch at twilight. It is the rugged sanctuary where the day’s hard work settles, the iced tea (or a good whiskey) is poured, and the evening breeze rolls in. But a porch is not truly complete without the gentle, rhythmic percussion of a wind chime—and when the sun dips below the horizon, a soft, ambient glow elevates the space from a simple deck to a high-end outdoor oasis.
If you have ever strolled through the aisles of premium home goods stores like Pottery Barn or Anthropologie, you have likely admired their gorgeous, illuminated outdoor decor. You have also likely experienced the immediate sticker shock. High-end solar wind chimes can easily set you back anywhere from $60 to $150. For the frugal DIYer, the handy parent, or the crafty upcycler, spending that kind of cash on something meant to hang outside in the weather is simply out of the question.
Welcome to the ultimate trash-to-treasure masterclass. Today, we are channeling our inner crafty-expert and resourceful builder to create a stunning, high-end Whispering Breeze Solar Wind Chime using supplies sourced almost entirely from the $1.25 aisles of Dollar Tree. By combining the practical mechanics of cheap solar path lights with the masculine-elegant textures of nautical twine, wire baskets, and repurposed metals, we are going to build a piece of functional art that looks incredibly expensive but costs less than a fast-food lunch.
Whether you are a budget-savvy homeowner looking to upgrade your curb appeal, a handy parent wanting a fun weekend project, or a creative gift-giver crafting a thoughtful Father’s Day or housewarming present, this step-by-step guide will arm you with the techniques you need. Grab your heavy-duty scissors, plug in that hot glue gun, and let’s get building.
Gathering Your Gear: The Dollar Tree Solar Chime Arsenal
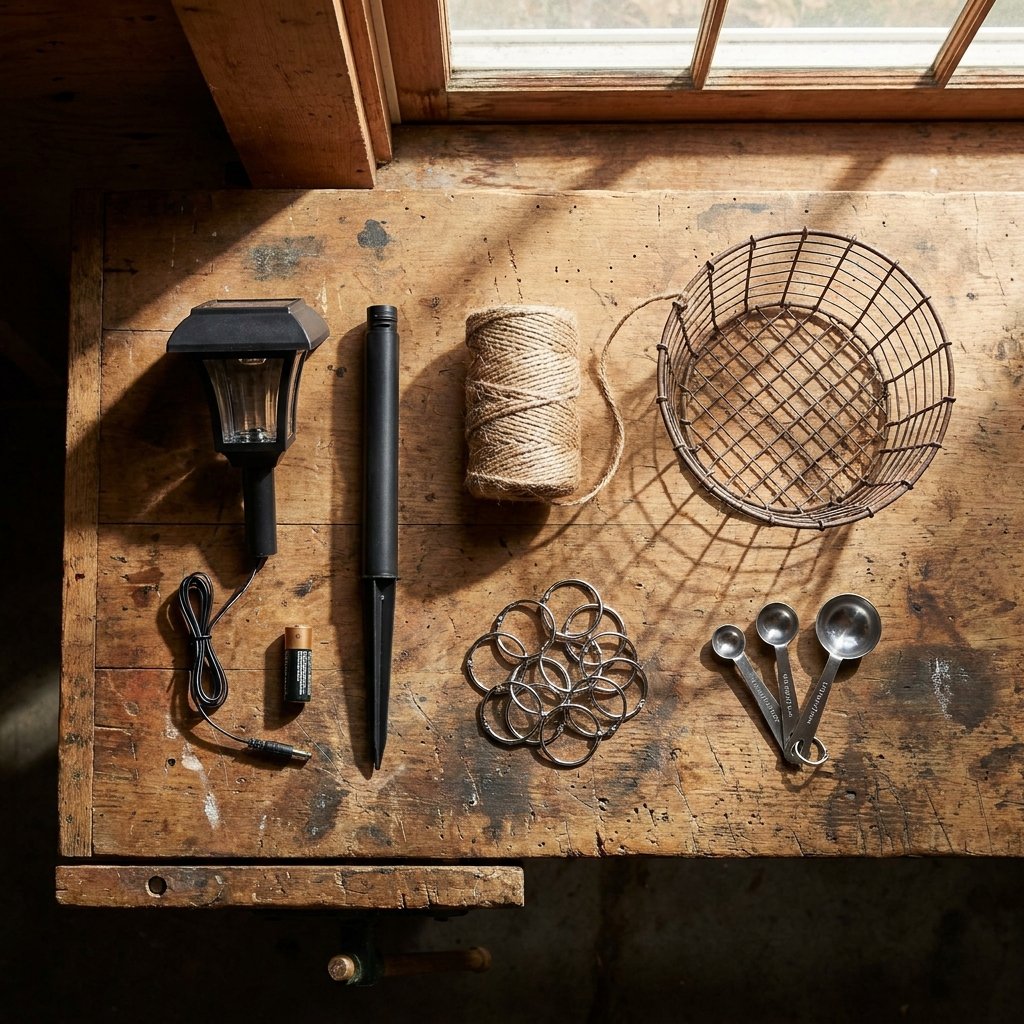
Every great build starts with a solid materials list. The beauty of this resourceful DIY lies in looking at everyday, mundane objects and seeing their architectural potential. We are not just buying craft supplies; we are sourcing building materials for a high-end dupe.
The Shopping List
- The Power Source: 1 Dollar Tree Solar Path Light. Look for the ones with a removable top housing. You want the classic stake light where the solar panel and LED bulb are a single, compact unit.
- The Chime Dome (Base): 1 Wire basket, small metal colander, or a plastic serving bowl with a geometric pattern. For a rugged, industrial look, the wire baskets found in the kitchen or storage aisle are perfect.
- The Rigging: 1 Roll of nautical jute twine or heavy-duty fishing line. Jute adds a handsome, rustic texture, while fishing line creates a magical floating effect.
- The Chimes (Acoustic Elements): Here is where you get creative. You can use Dollar Tree metal measuring spoons, long metal craft tubes, vintage keys from a thrift store, or even glass beads and sea glass for a softer clink.
- The Hardware: Metal craft rings (binder rings work perfectly) to hang the strands, and a sturdy carabiner or S-hook for hanging the final piece.
- The Adhesives: Hot glue gun (for instant tack) and E6000 adhesive (for permanent, weatherproof hold).
Let’s break down the sheer financial victory of this project by comparing our DIY budget to a standard store-bought equivalent.
| Material / Component | DIY Dollar Tree Cost | High-End Store Equivalent |
|---|---|---|
| Solar Light Unit | $1.25 | $25.00 (Integrated Panel) |
| Wire Dome / Base | $1.25 | $30.00 (Wrought Iron Frame) |
| Chimes & Rigging | $3.75 | $40.00 (Tuned Metal Tubes) |
| Adhesives & Hardware | $2.00 (Pantry Stash) | $0.00 (Included) |
| Total Estimated Cost | $8.25 | $95.00 |
You are saving nearly 90% while creating a custom piece tailored exactly to your porch’s aesthetic. That is the true power of clever, budget-savvy crafting.
Building the Foundation: Hacking the Solar Stake Light

To create our illuminated centerpiece, we need to extract the technology from the cheap plastic housing. Dollar Tree solar stake lights are notoriously simple in their construction, making them perfect for upcycling.
Step 1: Dismantling the Path Light
Grab your solar light and gently twist the top cap (the part with the solar panel) counter-clockwise away from the clear plastic lens and the long ground stake. You can discard the stake and lens, or toss them in your upcycling bin for a future garden project. You should now be holding a small, puck-like disc containing the solar panel on top, an LED bulb on the bottom, and a rechargeable battery inside.
Frugal Pro-Tip: Before you build, pull the battery tab and place the solar puck in direct sunlight for 8 hours. Cover the panel with your hand to ensure the LED lights up. Never build a permanent housing around a defective light!
Step 2: Prepping the Dome
Take your wire basket or colander. This will serve as the top dome of your wind chime, protecting the chimes below and holding the solar unit. If you are using a wire basket, flip it upside down so the flat bottom is facing up. You need to create a secure nest for your solar puck.
- Measure and Fit: Place the solar puck in the center of the basket’s bottom. If the wire mesh is too wide, cut a small circle of heavy-duty cardboard or scrap plastic, paint it black or metallic, and zip-tie it to the wire to create a solid mounting plate.
- The Weatherproof Mount: Apply a generous ring of E6000 adhesive around the bottom edge of the solar puck (avoiding the LED bulb in the center). Press it firmly onto your mounting plate or directly onto the wire grid.
- The Instant Hold: Because E6000 takes 24 hours to fully cure, surround the edge with dabs of hot glue. The hot glue acts as a clamp, holding the unit perfectly still while the heavy-duty adhesive works its magic.
If you want a more masculine-elegant, wrought-iron look, take the entire dome assembly (before gluing the solar puck) outside and give it a quick coat of Oil-Rubbed Bronze or Matte Black rust-resistant spray paint. This instantly disguises the cheap wire and elevates it to a designer level.
Tuning the Elements: Crafting the Chime Strands

The soul of any wind chime is its sound. The materials you choose will dictate whether your chime sings with a deep, resonant clonk, a bright, metallic ting, or a soft, glass-like clatter. For this build, we are going to use Dollar Tree metal measuring spoons and heavy metal washers for a brilliant, crisp acoustic profile.
Step 1: Designing the Layout
A balanced wind chime requires symmetry. We will be creating six hanging strands spaced evenly around the perimeter of our wire basket dome, plus one center striker strand that hangs directly below the LED light.
Step 2: Tying the Strands
Cut six lengths of nautical twine, each about 18 inches long. For a rugged, durable finish, we are going to use a modified fisherman’s knot to secure our chimes.
- Thread the end of the twine through the hole in the handle of your metal measuring spoon (or key, or washer).
- Wrap the tail end around the main line twice, then pass it through the loop you just created. Pull tight to cinch the knot down hard against the metal.
- To prevent fraying and ensure longevity against the wind, add a tiny drop of super glue or clear nail polish to the knot.
Acoustic Mastery Mantra: For the best sound, stagger the lengths of your chimes. Cut your first strand so the metal hangs 6 inches down, the next 8 inches, the next 10 inches, and so on, creating a spiral or cascading effect. This ensures the chimes strike each other at different points, producing a richer chord.
Step 3: The Center Striker and Sail
The center strand is the engine of the wind chime. It needs a heavy striker (a large metal washer or a stack of coins glued together) positioned exactly at the height of your surrounding chimes. Below the striker, attach a “sail”—a flat, wide object that catches the wind. A painted wooden circle, a large decorative key, or a hammered piece of tin works beautifully. Tie this entire center assembly to the wire basket directly underneath the LED light, so the light shines down the twine and illuminates the striker at night.
Rigging It Together: Assembly and Weatherproofing Hacks

With our dome prepped and our chime strands tuned and tied, it is time for the final assembly. This step requires patience and an eye for balance. A lopsided wind chime is the enemy of porch harmony.
Attaching the Strands
Flip your wire basket right-side up (so the solar panel is resting on the table). Take your six perimeter strands and tie them to the outer rim of the wire basket. Space them exactly equally apart. If your basket has geometric wire squares, count the squares to ensure perfect mathematical spacing. Use the same secure knots, and trim any excess twine with sharp scissors.
Creating the Hanger
To hang the entire unit, you need a balanced suspension system. Cut three pieces of twine, each 12 inches long. Tie them to the top rim of the basket at three equidistant points (imagine a triangle). Bring the three loose ends together at the top, making sure the basket hangs perfectly level. Tie the three ends into a single, thick overhand knot, leaving a loop at the top. Slip a heavy-duty carabiner or an S-hook through this loop.
Weatherproofing for the Long Haul
Dollar Tree supplies are fantastic, but they aren’t inherently designed to survive a season of heavy thunderstorms and baking sun. To make your frugal DIY last like a premium product, you must weatherproof it.
- Seal the Knots: As mentioned, hit every knot with a dab of waterproof glue.
- Protect the Metal: If you used untreated metal items (like keys or hardware store washers), give the entire lower assembly a quick mist of clear, matte enamel spray paint. This prevents unsightly rust from bleeding onto your twine.
- Protect the Solar Housing: Run a thin bead of clear silicone caulk around the seam where the clear plastic of the solar panel meets its black plastic rim. This prevents rainwater from seeping into the battery compartment, which is the number one cause of premature solar light failure.
Hanging the Masterpiece: Porch Styling on a Dime
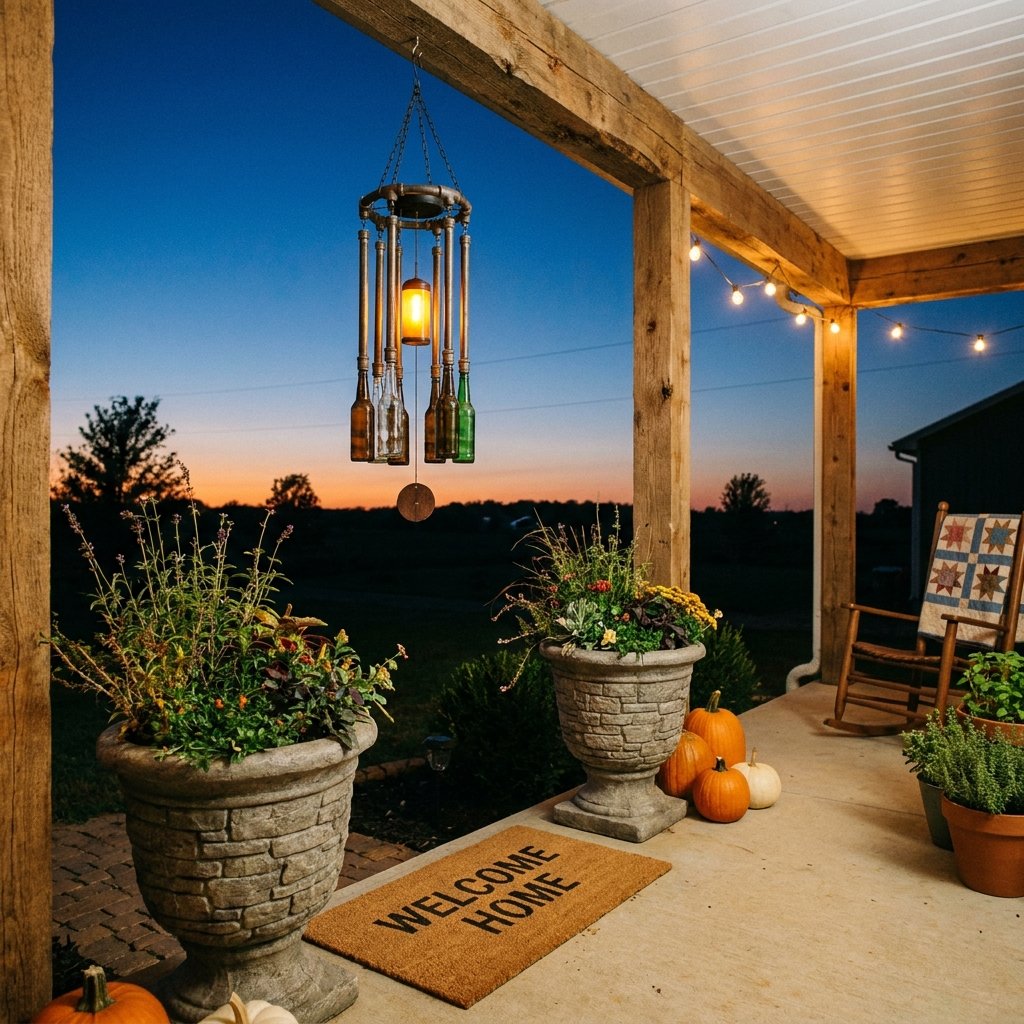
You have successfully engineered a piece of high-end outdoor decor for under $10. Now, it is time to deploy it for maximum visual and acoustic impact. Styling your porch is about creating layers of texture, light, and sound.
Optimal Placement for Solar Success
The golden rule of solar crafts is location, location, location. Your wind chime needs a minimum of 6 to 8 hours of direct sunlight to charge the battery for a full night of illumination. Hang it on the outer edge of your porch awning, from a sturdy shepherd’s hook in your garden bed, or near a sun-drenched corner post. Avoid hanging it deep under a covered patio where the solar panel will be starved of UV rays.
Styling the Space
To truly embrace the masculine-elegant, high-end aesthetic, pair your new wind chime with other clever Dollar Tree upgrades:
- The Faux Stone Planters: Grab cheap plastic planters from the dollar store, mix baking soda into matte black or charcoal acrylic paint, and brush it on for an instant, heavy-duty concrete look. Place these beneath your hanging chimes.
- Upcycled Coir Mats: Buy a plain $1.25 welcome mat and use a homemade stencil and black outdoor paint to add a crisp, geometric border or a classic monogram.
- Ambient Layers: Don’t rely on just one light source. Build three or four of these solar wind chimes and hang them at varying heights along the edge of your porch to create a mesmerizing, glowing curtain of sound.
Troubleshooting Your Build
If your chime stops glowing after a few months, do not throw it away! The rechargeable AA or AAA batteries inside cheap solar lights degrade over time. Simply unscrew the bottom of the solar puck, pop in a fresh rechargeable battery (you can buy packs of them online very cheaply), and your high-end dupe will be back to casting its warm, whispering breeze across your porch.
Conclusion
Transforming your home doesn’t require a bottomless wallet; it requires a creative eye, a bit of rugged ingenuity, and the willingness to look at a dollar-store aisle as a hardware store of endless possibilities. By upcycling simple wire baskets, hacking cheap solar lights, and tying it all together with sturdy nautical twine, you have built a Whispering Breeze Solar Wind Chime that rivals anything found in a premium catalog.
This project is the very essence of frugal DIY: taking control of your space, utilizing budget-savvy materials, and crafting something genuinely beautiful and functional with your own two hands. The next time you sit on your porch with a cold drink, listening to the crisp clink of the chimes and watching that soft amber glow light up the evening, you will know exactly how much money you saved—and that makes the breeze feel just a little bit sweeter.
Keep experimenting, keep upcycling, and remember: the best home decor isn’t bought; it’s built. Share your creations, teach your kids how to tie those knots, and enjoy your elevated, budget-friendly sanctuary.

Makenzie is the founder and lead writer at MoneyHackTips.com — a personal finance blog dedicated to delivering street-smart financial wisdom for real people on real budgets. With 300+ published articles covering everything from debt management to investing fundamentals, Makenzie’s mission is to make every dollar work harder. When not writing about money hacks, Makenzie is testing frugal living strategies, optimizing side hustles, and helping readers build financial freedom from scratch.