

The Allure of Rugged, Budget-Savvy Industrial Decor
Welcome to the ultimate intersection of rugged masculinity, brilliant upcycling, and budget-savvy crafting. If you have ever strolled through a high-end boutique or browsed an upscale modern furniture catalog, you have undoubtedly seen the industrial chic trend dominating the shelves. Heavy, minimalist, raw concrete decor is everywhere. But here is the secret that those luxury retailers do not want you to know: that handsome, heavy-duty pair of geometric concrete bookends retailing for $85 can be made in your own garage or backyard for less than $5.
As frugal DIYers and clever gift-givers, we know that true value comes from rolling up our sleeves and turning raw, inexpensive materials into bespoke treasures. Concrete is the absolute perfect medium for this. It is unapologetically strong, wonderfully textural, and incredibly cheap. Whether you are a handy parent looking to spruce up a home office, a crafty partner creating a thoughtful, personalized Father’s Day gift, or an upcycler wanting to add some serious weight to your man cave aesthetic, this project is for you.
In this comprehensive masterclass, we are going to dive deep into the art of small-batch concrete casting. We will transform everyday trash—like empty milk cartons and scrap shipping boxes—into custom molds, mix up the perfect batch of cement, and cure a set of bookends that look like they belong in a million-dollar loft. Get ready to trade your delicate crafting tools for a trowel and some heavy-duty ingenuity. Let’s build something rock solid.
The Blueprint: Why Concrete is the Ultimate Masculine Medium
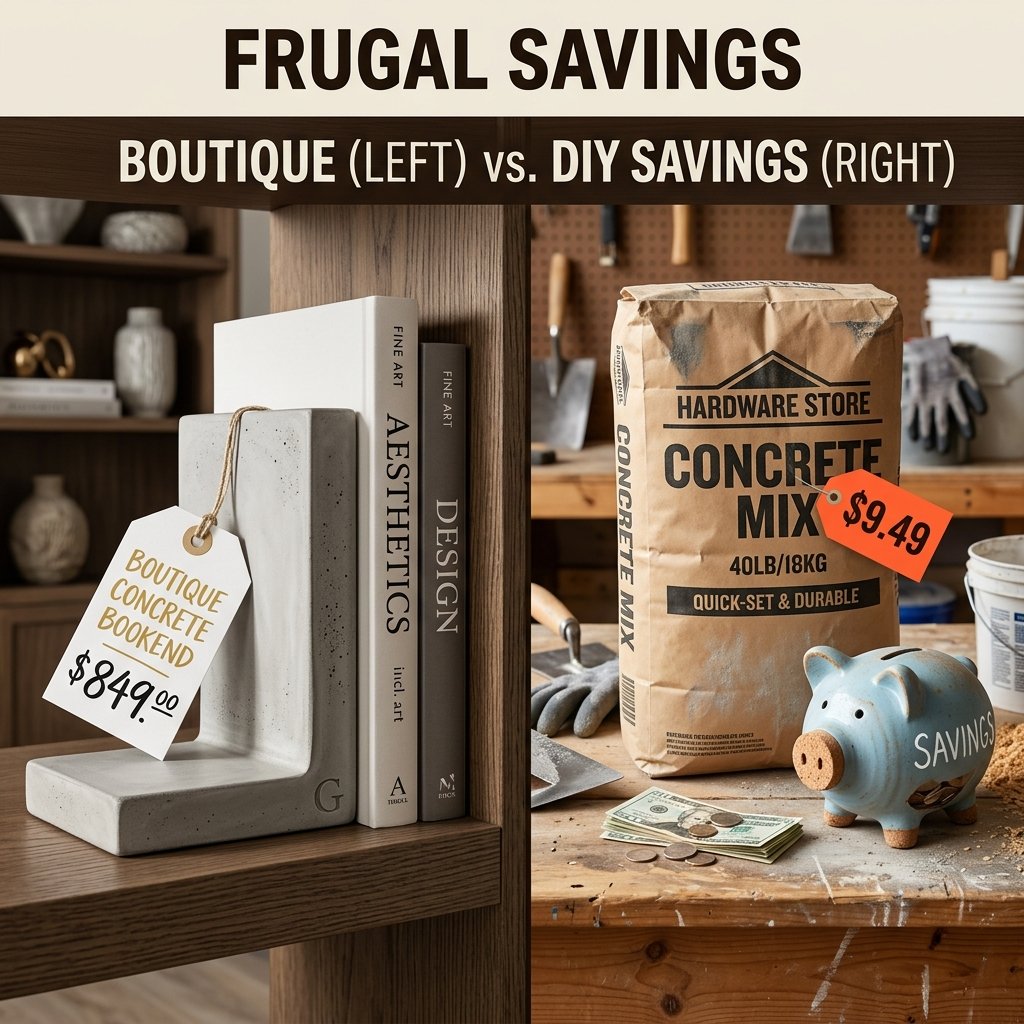
Breaking Down the High-End Markups
Before we get our hands dirty, let us talk about why concrete is the darling of the industrial design world and why making it yourself is a stroke of financial genius. Concrete offers a raw, unpolished elegance that perfectly balances modern minimalism with rugged utility. It is heavy enough to hold up the thickest automotive repair manuals or vintage encyclopedias, yet sleek enough to look intentional and refined.
When you buy concrete decor from a store, you are paying for the brand name, the shipping weight, and the boutique overhead. By stepping into the role of a crafty-expert, you bypass all of that. A standard 80-pound bag of high-strength concrete mix costs roughly $6 at your local hardware store. That single bag is enough to make dozens of bookends, valet trays, and pen holders. Let us look at the undeniable math of this frugal triumph:
| Decor Item | High-End Retail Cost | Our Zero-Budget DIY Cost | Total Frugal Savings |
|---|---|---|---|
| Geometric Concrete Bookends (Pair) | $85.00 | $3.50 | $81.50 |
| Concrete Valet/Catchall Tray | $45.00 | $1.50 | $43.50 |
| Industrial Pen/Tool Cup | $28.00 | $0.75 | $27.25 |
As you can see, the savings are staggering. Not only are you keeping your hard-earned cash in your wallet, but you are also gaining the immense satisfaction of crafting a custom piece of functional art. You get to control the shape, the texture, and the final finish, ensuring it perfectly matches the vibe of the ultimate man cave.
Gearing Up: Materials, Molds, and Safety Essentials
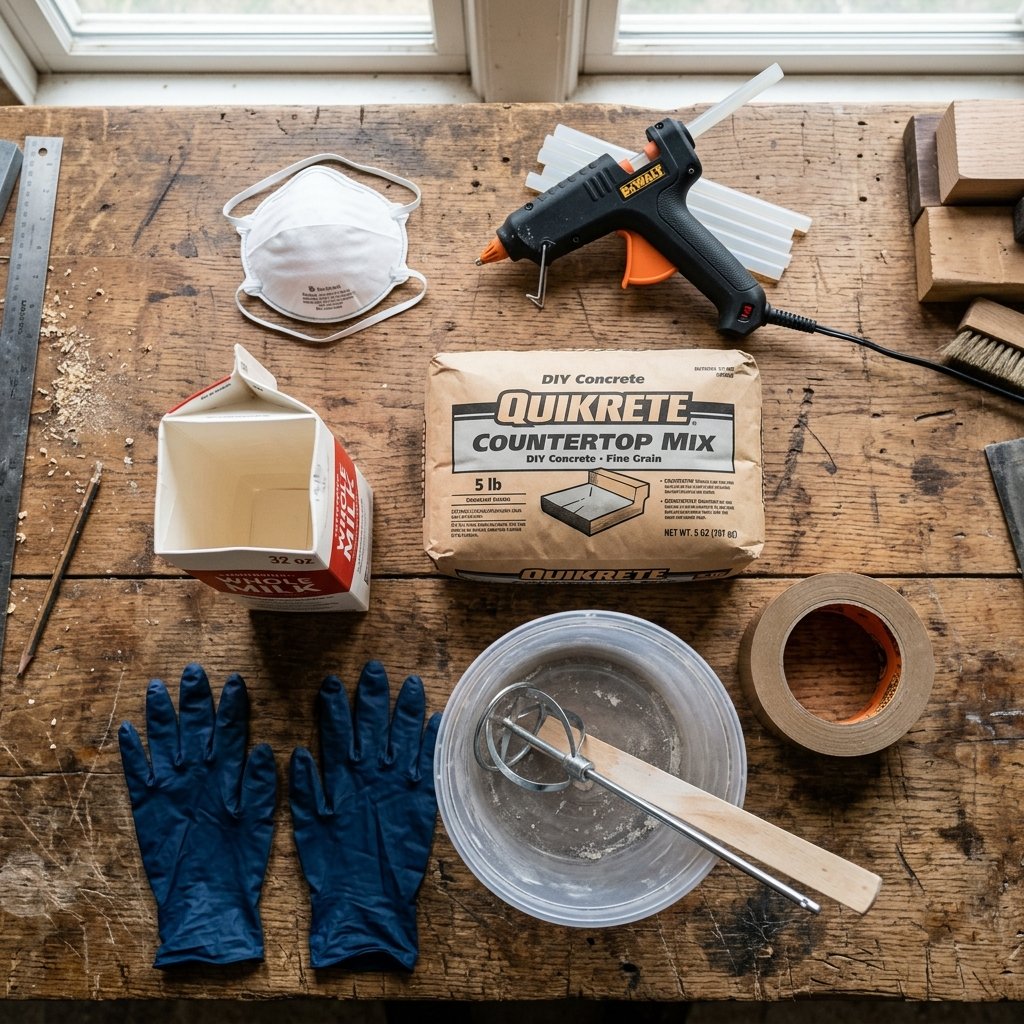
Assembling Your Concrete Crafting Arsenal
To execute this project flawlessly, we need to gather our supplies. The beauty of this craft is that you likely already have half of what you need sitting in your recycling bin. Here is the ultimate budget-savvy breakdown of your materials and their estimated costs.
| Material / Tool | Purpose in Project | Estimated Cost |
|---|---|---|
| Quikrete or Maker’s Mix (Sand Topping Mix) | The core building material. Sand topping mix yields a smoother finish than standard concrete. | $6.00 to $15.00 |
| Recycled Milk Cartons or Cardboard | Free, upcycled molds to shape the bookends. | 100% Free |
| Packing Tape & Hot Glue | To seal the molds and prevent watery concrete from leaking out. | $2.00 (Pantry staple) |
| Cooking Spray or Mineral Oil | Acts as a cheap, effective mold release agent. | $1.00 (Pantry staple) |
| Bucket & Sturdy Stirring Stick | For mixing the concrete. An old plastic bucket and a paint stick work perfectly. | 100% Free (Upcycled) |
| Felt Pads or Cork Sheet | To glue to the bottom of the bookends to protect wooden furniture. | $3.00 |
The Golden Rules of Concrete Safety
Concrete is an alkaline substance that can dry out your skin, and the fine dust is not something you want in your lungs. As a handy mom or dad, protecting yourself is step one.
The Rugged Crafter’s Safety Mantra: Never mix dry concrete indoors without ventilation. Always wear a snug dust mask, heavy-duty nitrile gloves, and protective eyewear. Respect the mix, and the mix will reward you.
Set up your mixing station outdoors or in a well-ventilated garage. Lay down an old tarp or a split-open trash bag to catch any spills. Preparation is the hallmark of a true craftsman.
Designing the Mold: Crafting the Perfect Shape from Trash
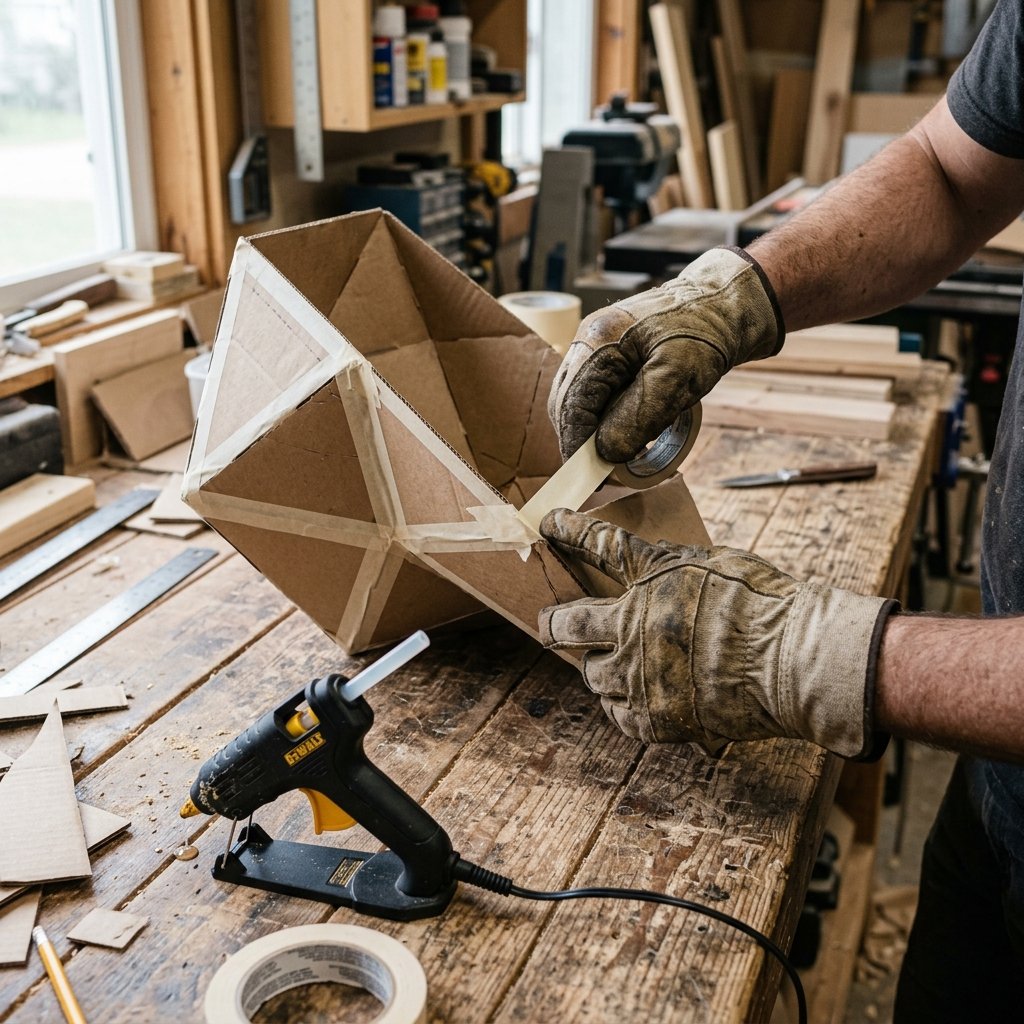
The Magic of Upcycled Molds
This is where your resourcefully-creative skills shine. You do not need to buy expensive silicone molds to get stunning, geometric shapes. We are going to upcycle everyday household waste into precise casting forms. For bookends, you want a shape that has at least one perfectly flat, vertical side to sit flush against the books, and a flat bottom to rest on the shelf.
Option 1: The Classic Milk Carton Block
This is the easiest and most foolproof method for beginners.
- Take two empty, clean half-gallon milk or juice cartons.
- Using a sharp utility knife, carefully cut the top off each carton so you are left with two identical rectangular boxes, about 6 inches tall.
- Ensure the insides are completely dry. The waxy coating on the inside of the carton acts as a natural moisture barrier, making it an excellent mold.
- Reinforce the outside of the cartons with a few wraps of packing tape to ensure the cardboard does not bulge under the heavy weight of the wet concrete.
Option 2: The Custom Geometric Cardboard Mold
If you want a more faceted, architectural look (like a modern mountain peak or an angled wedge), you can build your own mold from scrap shipping boxes.
- Sketch your desired shape onto a flat piece of sturdy corrugated cardboard. Remember, you are building the *negative* space.
- Cut out your panels using a straight edge and a utility knife for crisp, clean lines.
- Assemble the pieces using generous amounts of hot glue on the *outside* seams.
- Crucial Step: Line the entire inside of the cardboard mold with smooth packing tape. Concrete will stick to raw cardboard and warp it. The tape creates a smooth, waterproof barrier.
- Seal every single interior corner and seam with a thin bead of hot glue or extra tape to prevent leaks.
Once your molds are built, take a paper towel, apply a small amount of cooking spray or mineral oil, and lightly wipe the inside of the molds. This DIY mold release will make demolding a breeze later on.
The Perfect Pour: Mixing, Pouring, and Vibrating
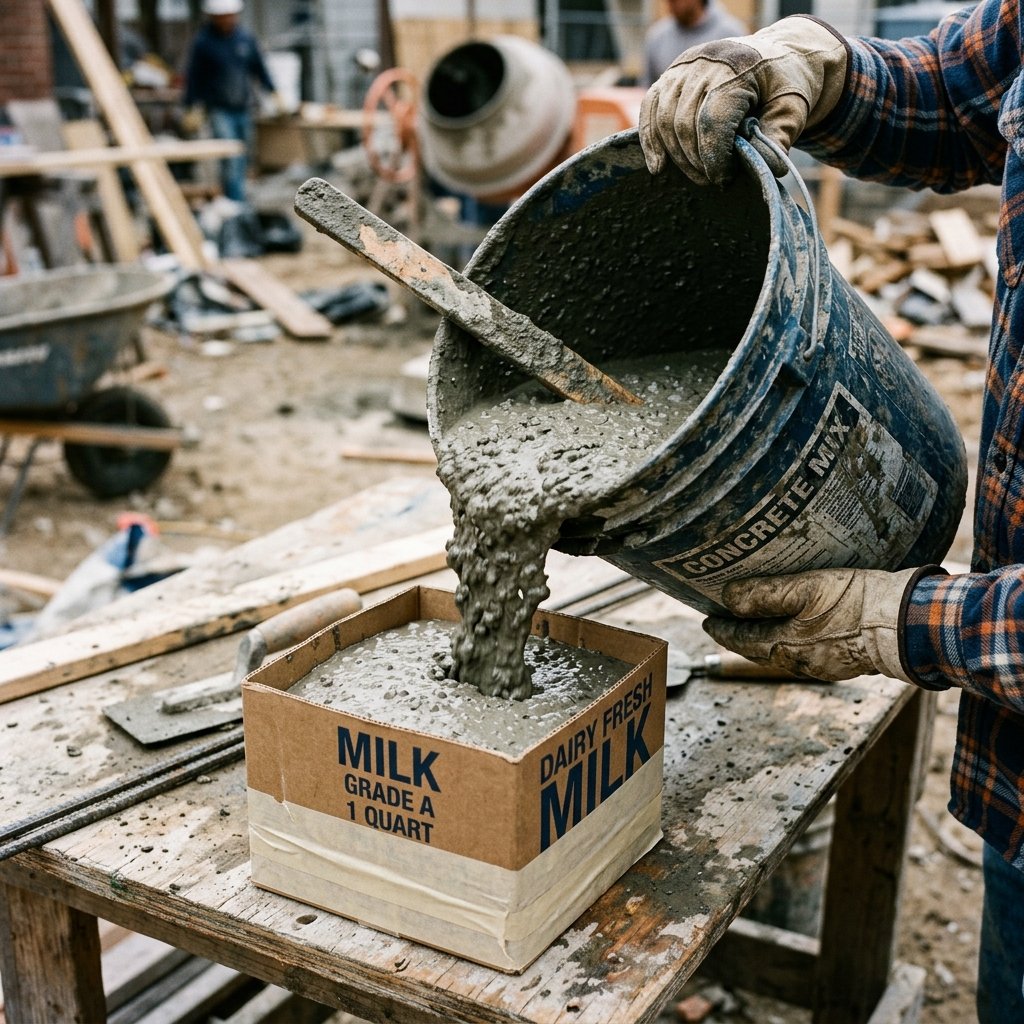
The Alchemy of Concrete Mixing
Mixing concrete is part science, part intuition. You want to achieve a consistency that is pourable but not overly watery. Too much water will weaken the final cured concrete and cause excessive cracking and shrinking. Too little water, and you will have dry pockets and crumbly edges.
The Perfect Recipe Ratio: Aim for a consistency resembling thick pancake batter or creamy peanut butter. Start by adding your dry mix to the bucket, then slowly add water in small increments, stirring vigorously from the bottom up.
Follow these steps for a flawless pour:
- Measure Your Mix: Estimate the volume of your molds and pour slightly more dry mix than you think you need into your bucket. It is always better to have a little leftover than to run out halfway through a pour.
- Add Water Gradually: Pour in a small splash of water and mix thoroughly with your sturdy stick or a garden trowel. Scrape the sides and bottom of the bucket.
- Check the Texture: If it is too dusty, add another splash of water. If it gets too soupy, add a handful of dry mix to balance it out.
- The Pour: Carefully scoop or pour the wet concrete into your prepared molds. Fill them up to your desired height, ensuring both molds are filled equally so your bookends match.
The Secret to a Flawless Finish: Vibrating the Air Bubbles
When you pour concrete, air gets trapped inside the mixture. If left alone, these air pockets will dry as holes (called “bug holes”) on the surface of your bookends. While a few holes add to that rugged industrial charm, too many will compromise the structural integrity.
To release the trapped air, you must vibrate the mold. Firmly tap the outside of your molds with the handle of a screwdriver, a rubber mallet, or just your hands for about 5 to 10 minutes. You will literally see tiny air bubbles rise to the surface and pop. Keep tapping until the surface looks smooth and watery, and the bubbles stop appearing.
The Waiting Game: Curing and Demolding
Patience is a Frugal Crafter’s Best Friend
Now comes the hardest part of any DIY project: waiting. Concrete does not just “dry”; it cures through a chemical reaction called hydration. This process requires time and a bit of moisture to achieve maximum strength.
- Setting the Environment: Place your filled molds on a perfectly level surface in a dry, room-temperature area away from direct sunlight or freezing temperatures. A garage workbench is ideal.
- The Curing Timeline: Allow the concrete to sit undisturbed for a minimum of 48 hours. While the concrete may feel hard to the touch after 24 hours, it is still incredibly fragile inside. Rushing this step will result in cracked corners and heartbreak.
- Moisture Control (Optional Pro-Tip): If you live in a very hot or dry climate, lightly mist the top of the exposed concrete with water and cover it loosely with a plastic bag. This slows down the evaporation process, resulting in a stronger, harder final product.
The Grand Reveal: Demolding Your Masterpiece
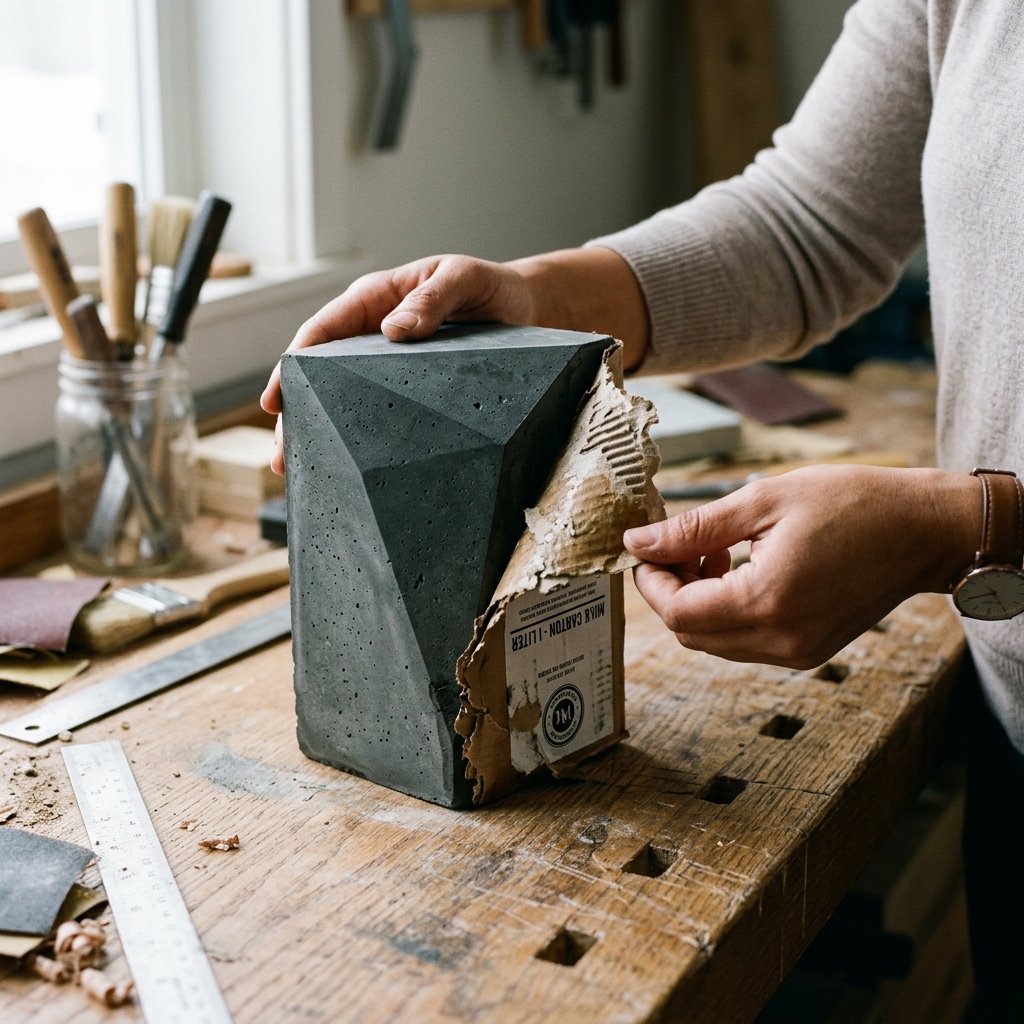
After 48 hours, it is time to unveil your industrial creation. This is where your upcycled molds prove their worth.
If you used milk cartons, simply use a utility knife to score the side of the carton and peel the cardboard away like a banana skin. If you built a custom taped mold, carefully pry the taped cardboard away from the concrete. Because you used a mold release agent, the cardboard should pop off cleanly, revealing a handsome, raw concrete block.
The concrete will likely look dark gray and feel slightly damp. This is normal. It will continue to cure and lighten in color over the next week. Take a piece of medium-grit sandpaper (around 120 grit) and gently sand down any sharp edges, rough corners, or unevenness on the bottom while the concrete is still slightly “green” (not fully hardened). This ensures your bookends are safe to handle and perfectly flat.
The Finishing Touch: Sealing, Painting, and Adding Base Pads
Elevating the Aesthetic: From Raw to Refined
Your concrete bookends are now structurally complete, but to make them a truly thoughtful, high-end gift for a man cave, we need to add a few finishing touches. These small details separate a cheap craft from a sophisticated, masculine decor piece.
Sealing the Concrete
Concrete is naturally porous, meaning it can absorb oils from hands and dust from the air. To protect it, apply a coat of concrete sealer, matte Mod Podge, or even a natural beeswax polish. Using a clean rag, rub the wax or sealer into the surface. This will slightly deepen the color of the concrete, giving it a rich, finished look while maintaining that rugged, matte texture.
Adding Frugal Flair (Optional)
If you want to customize the bookends further, consider these budget-savvy embellishments:
- The Color Block: Use painter’s tape to tape off a diagonal section of the bookend. Paint the exposed area with matte black or metallic copper spray paint for a striking, two-tone modern look.
- The Leather Handle: Take an old, upcycled leather belt. Cut two short strips. Using a masonry drill bit and a small concrete screw (or heavy-duty construction adhesive), attach a looped leather handle to the top of each bookend. This adds a massive dose of rugged, masculine charm.
Protecting the Furniture
This is the most critical step for functional bookends. Raw concrete will brutally scratch wooden shelves, desks, and side tables. We must protect the furniture.
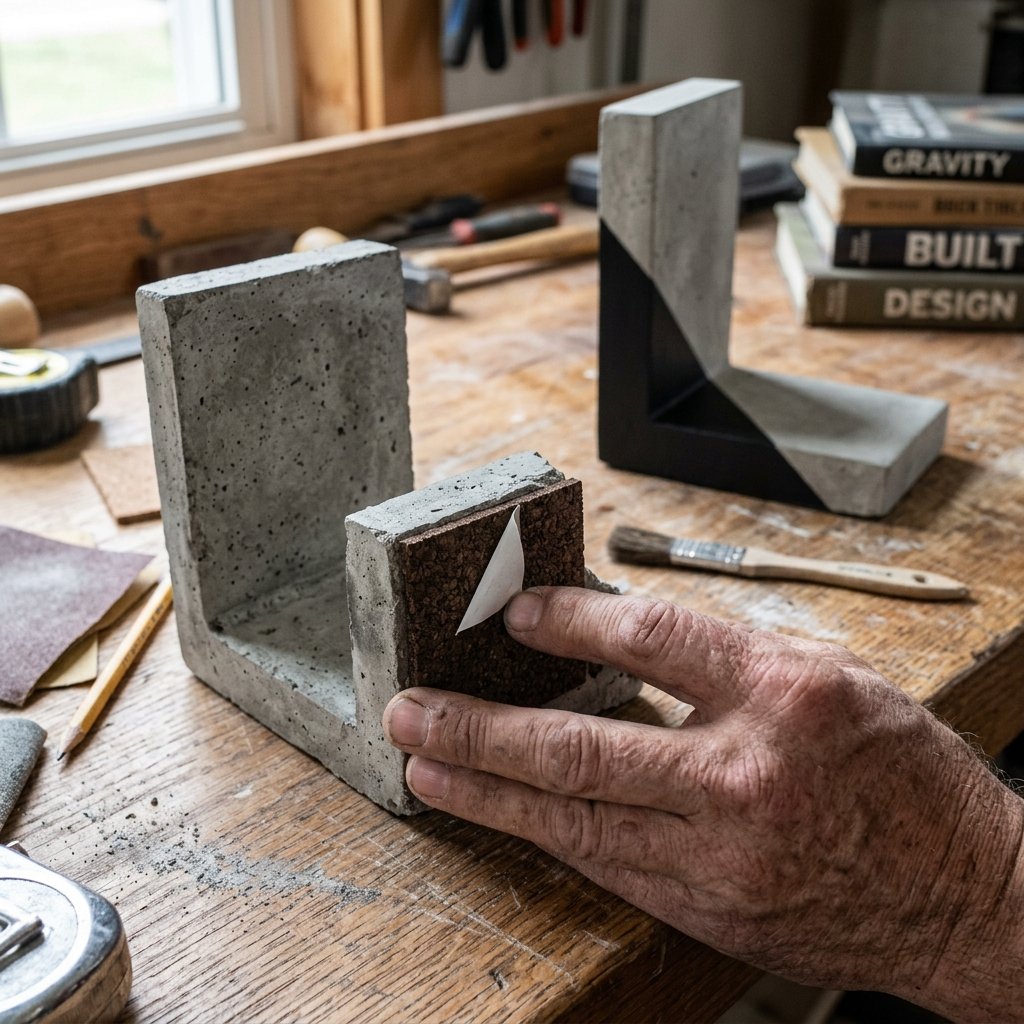
The Frugal Finishing Hack: Do not buy expensive custom rubber feet. Head to the Dollar Tree or use scraps from your craft bin. Cut a piece of self-adhesive cork shelf liner, or a square of thick felt, to the exact dimensions of the bottom of your bookend.
Peel the backing off the cork or apply a generous layer of hot glue to your felt, and press it firmly onto the bottom of the fully dried concrete block. This provides a soft, non-slip grip that will keep heavy books in place without damaging the man cave furniture.
Conclusion
Rock Solid Decor on a Dime
And there you have it—from a pile of dusty powder and a few pieces of trash-bound cardboard, you have engineered a stunning, heavy-duty set of industrial chic concrete bookends. You bypassed the exorbitant $85 boutique price tag and created a bespoke, rugged piece of functional art for mere pennies. This is the true essence of frugal DIY and clever upcycling.
Whether these bookends are destined to hold up a collection of vintage vinyl records, a stack of woodworking magazines, or classic literature in a home office, they bring an undeniable, masculine elegance to any space. By taking the time to mix, pour, and finish this project with your own hands, you have crafted a thoughtful, enduring gift that any father, husband, or man cave dweller will proudly display for decades.
So keep your eyes peeled for interesting cardboard shapes, save those milk cartons, and never underestimate the transformative power of a cheap bag of concrete. Stay resourceful, stay crafty, and keep building beautiful things on a budget!

Makenzie is the founder and lead writer at MoneyHackTips.com — a personal finance blog dedicated to delivering street-smart financial wisdom for real people on real budgets. With 300+ published articles covering everything from debt management to investing fundamentals, Makenzie’s mission is to make every dollar work harder. When not writing about money hacks, Makenzie is testing frugal living strategies, optimizing side hustles, and helping readers build financial freedom from scratch.