The Art of the Budget-Savvy Geek Gift
Let’s be honest: being a fan can be expensive. Between the high-priced statues, the limited-edition prints, and the cost of actual issues, our ‘geeky’ hobbies often take a toll on the wallet. But what if I told you that you could create a piece of functional, ruggedly elegant home decor that celebrates your favorite heroes for less than the price of a fancy latte? Enter the DIY Comic Book Coaster. This isn’t just a craft; it’s a mission in resourcefulness. We are taking the humble, $0.15 ceramic tile and the forgotten dollar-bin comic book to create something that looks like it belongs in a high-end boutique or a curated man-cave. Whether you are a frugal DIYer looking to spruce up your coffee table or a crafty gift-giver searching for the perfect Father’s Day present, this project hits the sweet spot of practicality and masculine-elegant style. In this guide, we’re going to master the craft of upcycling, ensuring every fold and every seal is professional-grade without the professional price tag.
The Scavenger Hunt: Sourcing Materials for Maximum Savings
Finding Your Raw Materials
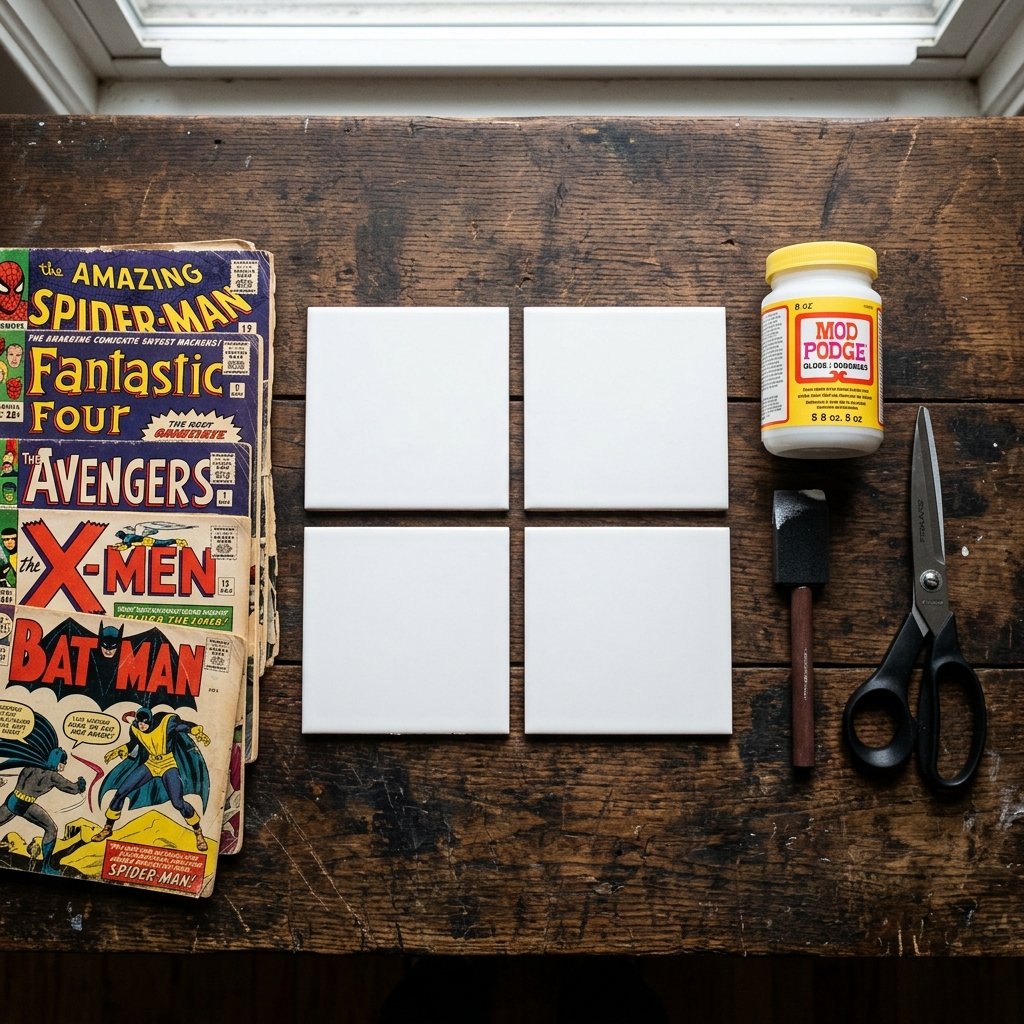
The secret to a $5 project is knowing exactly where to look. We aren’t going to the big-box craft stores for everything; we’re going to the hardware store and the back-issue bins. To keep costs low, we need to be clever. Ceramic tiles are the backbone of this project. Skip the fancy marble and head straight for the 4×4 white or cream ceramic bathroom tiles. They usually retail for about $0.15 to $0.80 each. For the art, check the ‘quarter bins’ at your local comic shop. You don’t need a mint-condition #1 issue; you need a beat-up copy with great interior art.
| Material | Source | Estimated Cost |
|---|---|---|
| 4×4 Ceramic Tiles (4) | Local Hardware Store | $0.60 |
| Back-Issue Comic Book | Local Comic Shop (Dollar Bin) | $1.00 |
| Mod Podge (Small Bottle) | Dollar Tree / Craft Store | $1.25 |
| Clear Acrylic Sealer | Hardware Store (Shared Supply) | $1.50 |
| Felt or Cork Scraps | Upcycled or Dollar Store | $0.50 |
| Total Cost | – | $4.85 |
Pro-Tip for the Resourceful Crafter
If you don’t have a comic shop nearby, look for old calendars, graphic novels at thrift stores, or even high-quality wrapping paper. The goal is to find rugged, vibrant imagery that speaks to the recipient’s personality. Remember, we are looking for ‘reader copies’—books that have already lived a full life and are ready for a second act as functional art.
Precision Cutting: Selecting and Preparing Your Panels
The Eye of the Editor
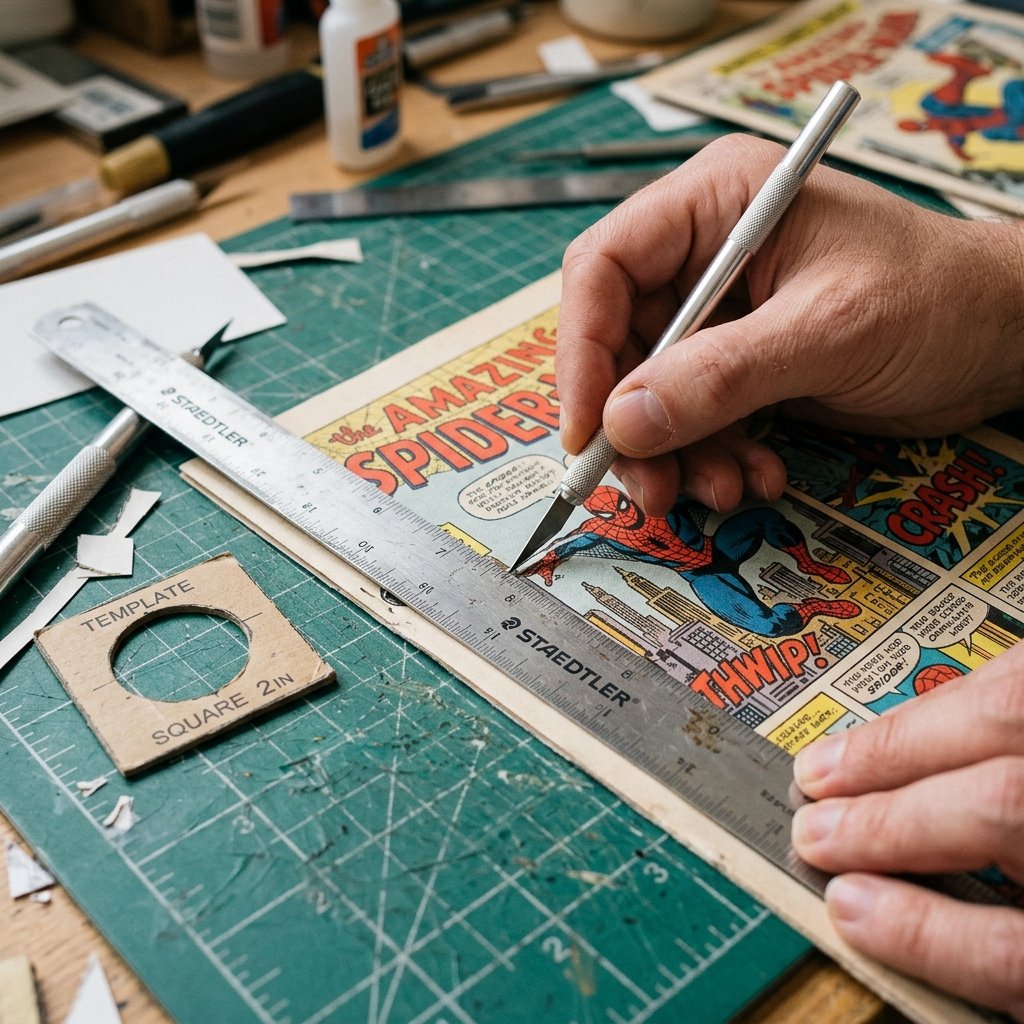
Before you even touch the glue, you must act like a comic book editor. You are selecting the ‘money shot’ for each coaster. Look for iconic poses, dynamic action sequences, or recognizable logos. Since the tile is 4×4 inches, you want to cut your paper to approximately 3.75×3.75 inches. This leaves a small border of the tile showing, which creates a ‘framed’ look that is much more sophisticated than a full-bleed edge.
“Measure twice, cut once, and always center the hero. A off-center Batman is a crime against Gotham and your coffee table.”
Step-by-Step Cutting Instructions
- Template Creation: Create a 3.75-inch square template out of cardboard. This allows you to slide the template over the comic page to see exactly what will be included in the frame.
- The Straight Edge: Use a metal ruler and a utility knife for the cleanest edges. Scissors can work, but a blade ensures that masculine-elegant precision we’re aiming for.
- Paper Weight Matters: If the comic page is very thin, be careful not to tear it. If it’s a modern glossy page, it will handle the glue better than older, pulpy newsprint.
The Mod Podge Mastery: Adhesion Without the Bubbles
The Science of Glue
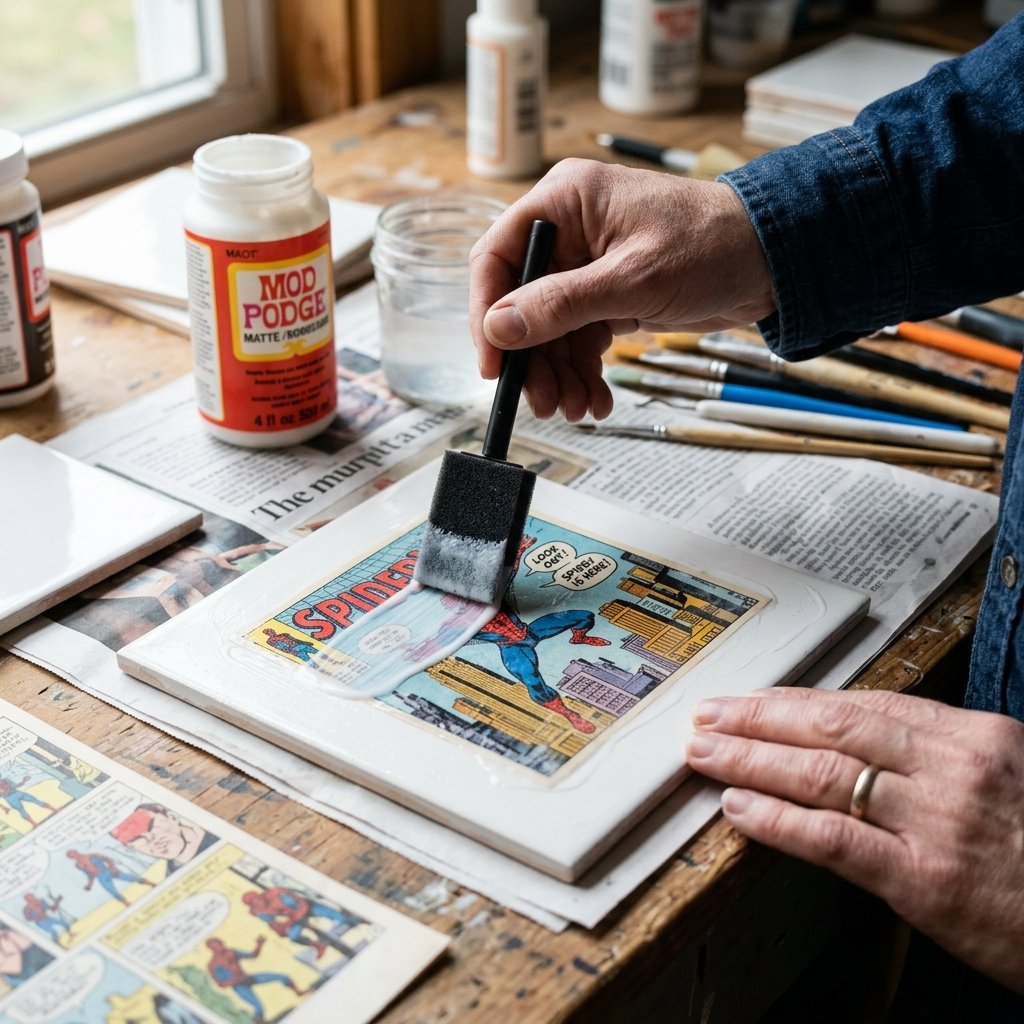
Applying paper to ceramic is where many DIYers fail. The enemy here is the air bubble. To achieve a professional, ‘store-bought’ finish, you must use a specific technique. Mod Podge is our weapon of choice because it acts as both an adhesive and a primer. It’s budget-friendly and incredibly forgiving if you move quickly.
The Layering Technique
- The Base Coat: Apply a thin, even layer of Mod Podge to the tile. Do not glob it on. You want just enough to make the surface tacky.
- The Placement: Carefully center your comic square onto the tile. Press down firmly from the center outward to push any air to the edges.
- The Smoothing: Use an old credit card or a brayer to smooth the paper. This is critical for a rugged, flat finish.
- The Top Coat: Once the base is dry (wait at least 20 minutes), apply a thin coat of Mod Podge over the top of the paper to seal the ink.
“Patience is the secret ingredient. Rushing the drying process leads to ripples. Let the glue do its work while you plan your next hero.”
Weatherproofing Your Art: Sealing for Durability
Resisting the Condensation
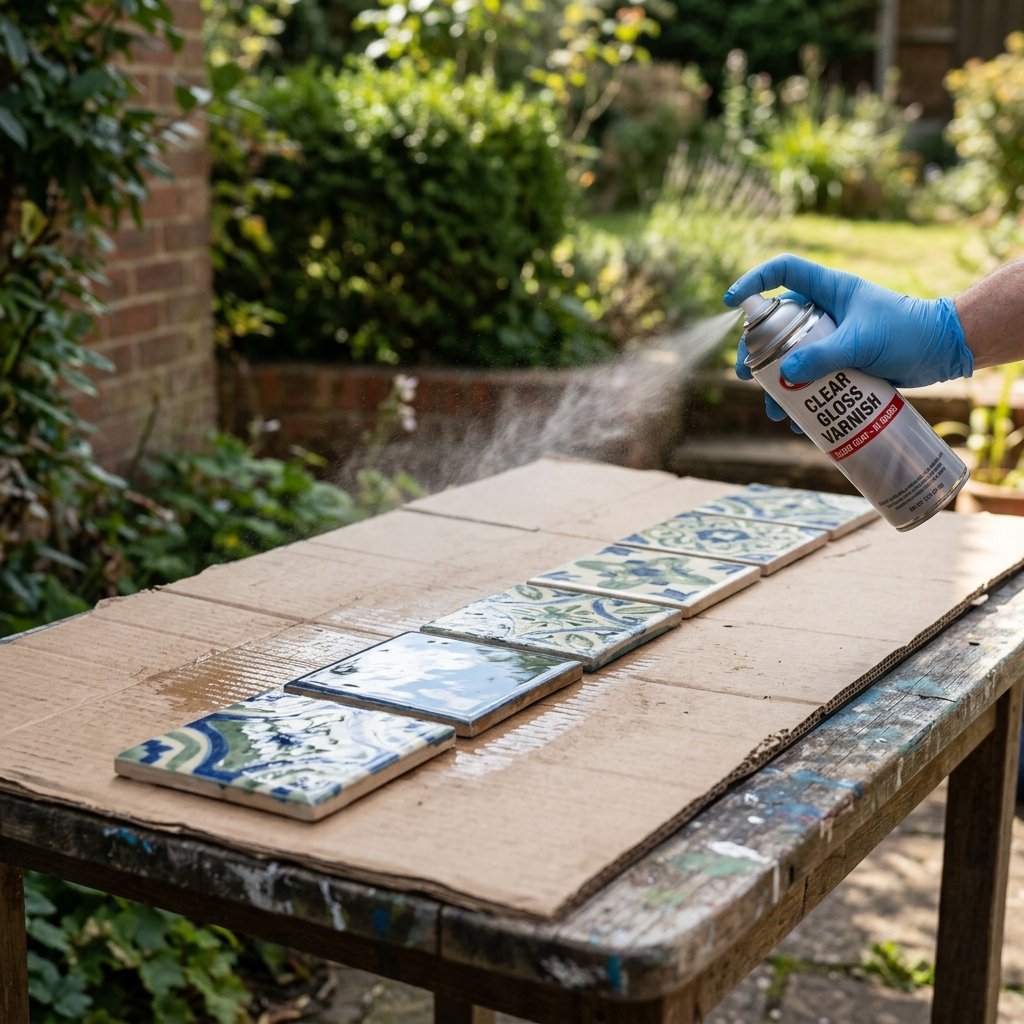
A coaster that falls apart when it gets wet is just a piece of trash. Since comic book paper is essentially wood pulp, we need a heavy-duty seal to protect it from the condensation of a cold soda or the heat of a coffee mug. While Mod Podge is a great sealer, it is water-based and can become tacky if it gets wet. For a truly rugged and practical coaster, we need a solvent-based clear coat.
| Sealer Type | Pros | Cons |
|---|---|---|
| Mod Podge Only | Cheap, Easy | Not waterproof, gets sticky |
| Clear Acrylic Spray | Fast, Good Finish | Requires multiple coats |
| Polyurethane (Brush-on) | Very Durable | Yellows over time |
| Environmentally-Friendly Resin | High-End Gloss | Expensive, hard to use |
The Spray Method
I recommend a Clear Gloss Acrylic Spray. It provides a crystal-clear, hard finish that mimics the look of professional merchandise. Go outside or into a well-ventilated garage. Apply 3-4 light coats rather than one heavy coat. This prevents runs and ensures a uniform sheen. Allow 2 hours of drying time between coats for the best results.
Safety Note: Always use spray sealants in a well-ventilated area. Wear a mask if you are sensitive to fumes, and keep away from open flames.
The Finishing Touch: Rugged Backing and Presentation
Protecting Your Furniture
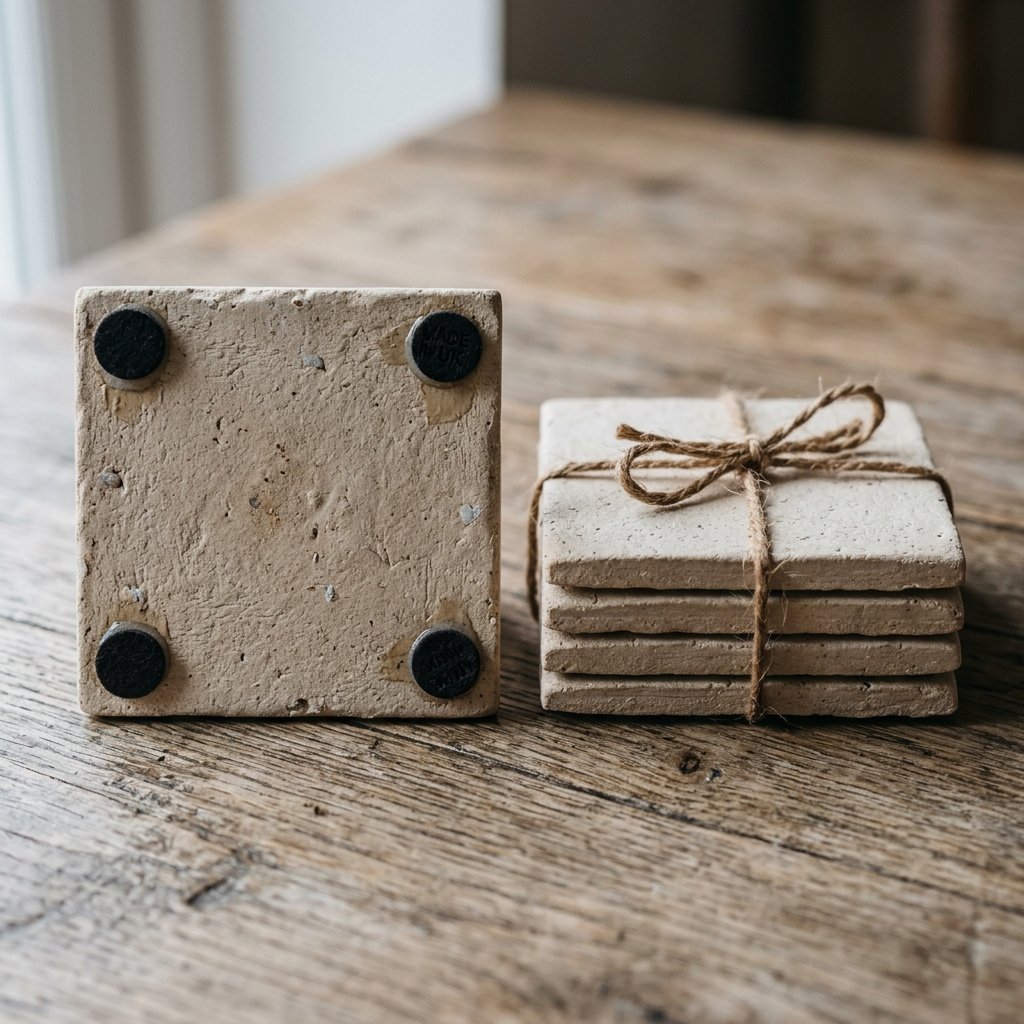
The bottom of a ceramic tile is abrasive. If you leave it bare, it will scratch your wooden surfaces, defeating the entire purpose of a coaster. We need a soft, practical backing. You have two main budget options: felt or cork. Felt is cheaper (often $0.25 a sheet), while cork provides a more sophisticated, high-end feel.
Applying the Base
- Felt Squares: Cut four small circles of felt and hot glue them to the corners. This is the most budget-savvy method.
- Full Cork Bottom: Buy a roll of thin adhesive cork. Cut it to 3.75×3.75 inches and apply it to the entire bottom of the tile. This adds a nice weight and professional ‘clink’ when you set it down.
The Gift Presentation
If you are giving these as a gift, don’t just hand over a stack of tiles. Wrap them in a rugged twine or a strip of leftover comic book paper. Stack them four-high and tie them like a parcel. It adds a touch of masculine elegance that proves you put thought into every detail, from the art to the packaging.
Conclusion
The Power of Frugal Creativity
And there you have it—a set of custom, durable, and incredibly cool comic book coasters for under $5. This project is the perfect example of why DIY is so rewarding. You’ve taken items that were headed for a landfill or gathering dust in a basement and turned them into a conversation piece. You didn’t just buy a gift; you crafted a legacy. Whether you’re protecting your own desk or surprising a fellow geek, these coasters stand as a testament to the fact that you don’t need a massive budget to have a massive impact. Now, grab a cold drink, set it down on your new masterpiece, and enjoy the satisfaction of a job well done. Stay crafty, stay frugal, and keep building!

Makenzie is the founder and lead writer at MoneyHackTips.com — a personal finance blog dedicated to delivering street-smart financial wisdom for real people on real budgets. With 300+ published articles covering everything from debt management to investing fundamentals, Makenzie’s mission is to make every dollar work harder. When not writing about money hacks, Makenzie is testing frugal living strategies, optimizing side hustles, and helping readers build financial freedom from scratch.