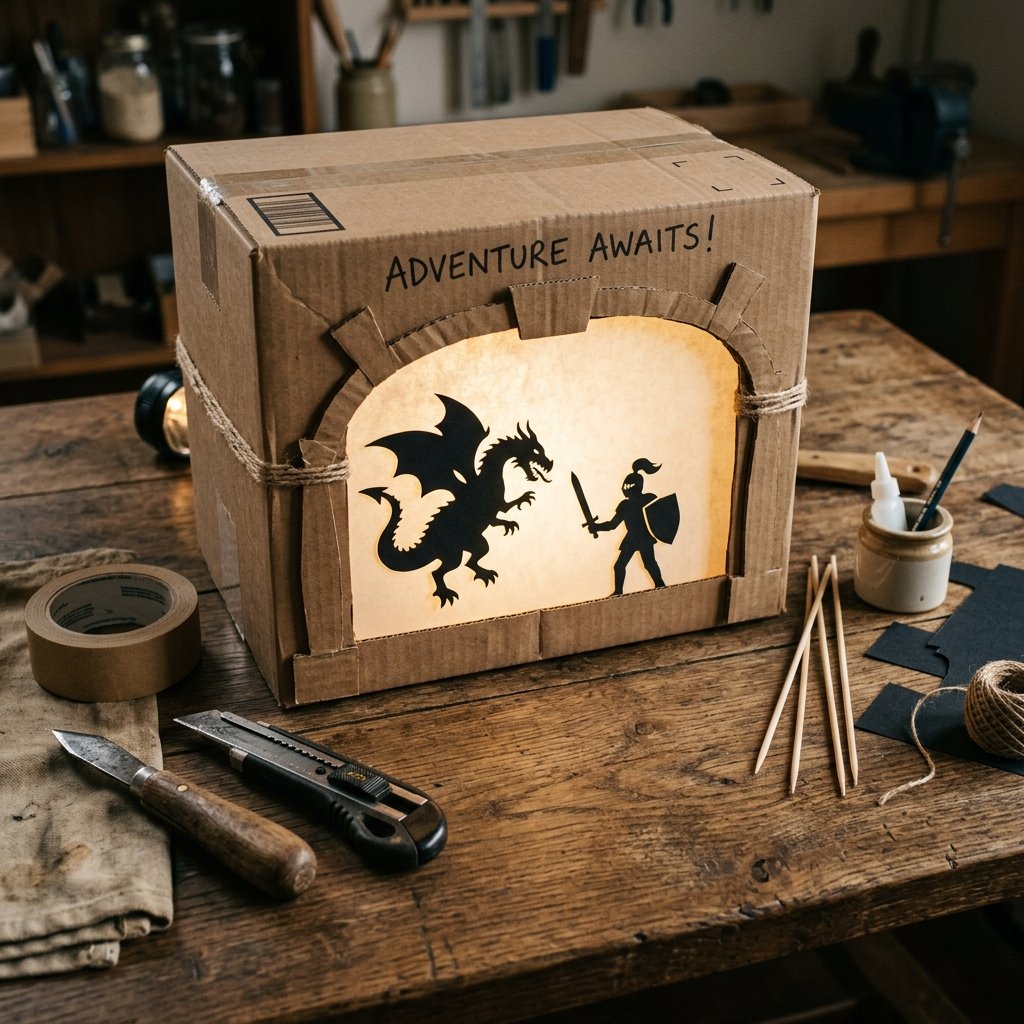

The Magic of the Humble Box
In a world of glowing screens and expensive plastic toys, there is something profoundly masculine and resourceful about taking a piece of ‘trash’ and turning it into a portal for imagination. As frugal DIYers, we know that the best memories aren’t bought; they are built. This 10-minute project isn’t just about glue and cardboard; it is about reclaiming bedtime. By upcycling a standard shipping box, you are demonstrating to your kids that creativity and clever engineering trump a high price tag every single time. We are going to build a shadow puppet theater that looks sophisticated, stays rugged enough for daily play, and costs exactly $0. Let’s get to work.
The Inventory: Scavenging Your Supplies
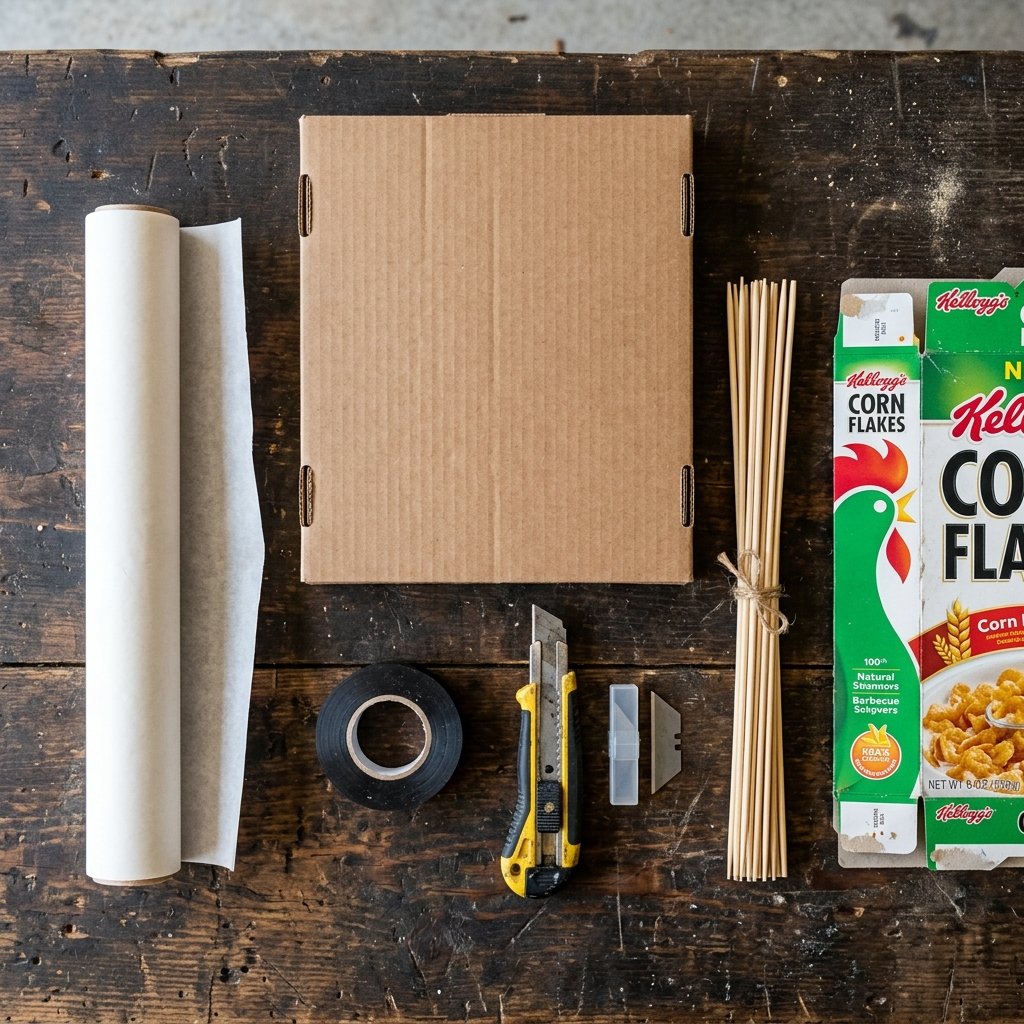
Before we start cutting, let’s gather our materials. The beauty of this project is that you likely already have everything sitting in your recycling bin or kitchen junk drawer. We are looking for high-contrast materials that will create sharp, crisp shadows.
Materials Needed & Estimated Cost
| Item | Source | Cost |
|---|---|---|
| Medium Shipping Box | Recycling Bin | $0.00 |
| Parchment Paper or Tissue Paper | Kitchen Drawer | $0.00 |
| Utility Knife or Box Cutter | Toolbox | Owned |
| Duct Tape or Masking Tape | Toolbox | Owned |
| Wooden Skewers or Twigs | Kitchen/Backyard | $0.00 |
| Cereal Box (for puppets) | Pantry | $0.00 |
| Total Project Cost | – | $0.00 |
Budget Guru Tip: If you don’t have parchment paper, a white trash bag or a piece of an old white bedsheet works perfectly as a screen. The goal is translucency, not transparency.
Engineering the Frame: Cutting for Strength
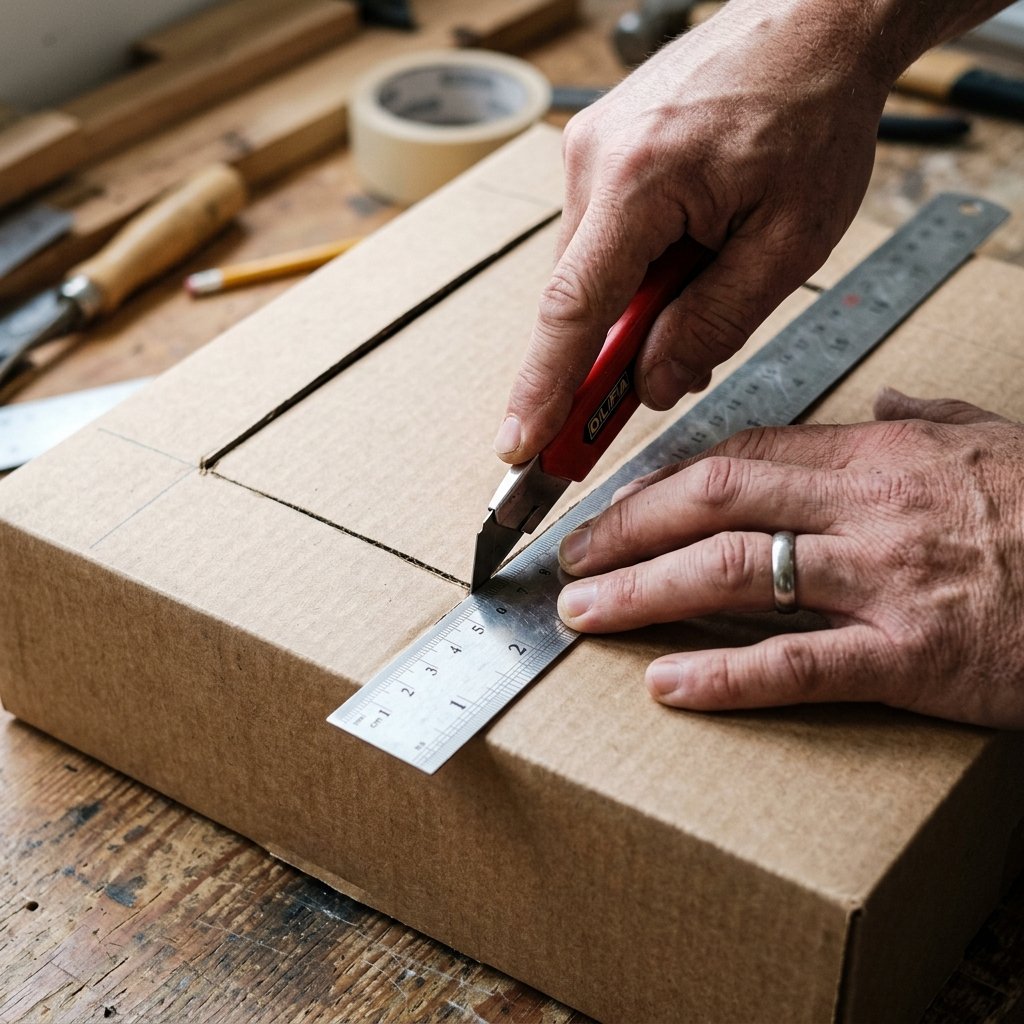
A flimsy theater won’t last a week. We want a structure that is rugged and stable. Follow these steps to ensure your theater stands tall during the most dramatic performances.
- Seal the Bottom: Ensure the bottom of your box is taped securely. This provides the structural foundation.
- The Proscenium Cut: On one of the large flat sides, measure 2 inches in from every edge. Use your utility knife to cut out the center rectangle. This is your ‘stage’ window.
- The Access Hatch: On the opposite side of the box, cut a much larger opening or remove the back entirely. This is where you, the puppeteer, will operate.
- Side Vents: For a clever touch, cut small slits in the sides of the box. This allows you to slide puppets in from the wings, not just the bottom.
Safety Note: Always cut away from your body. Cardboard can be surprisingly tough, and a slipping utility knife is a quick way to ruin a fun project. Keep blades sharp; a dull blade requires more force and is more dangerous.
Installing the Screen: Achieving the Perfect Glow
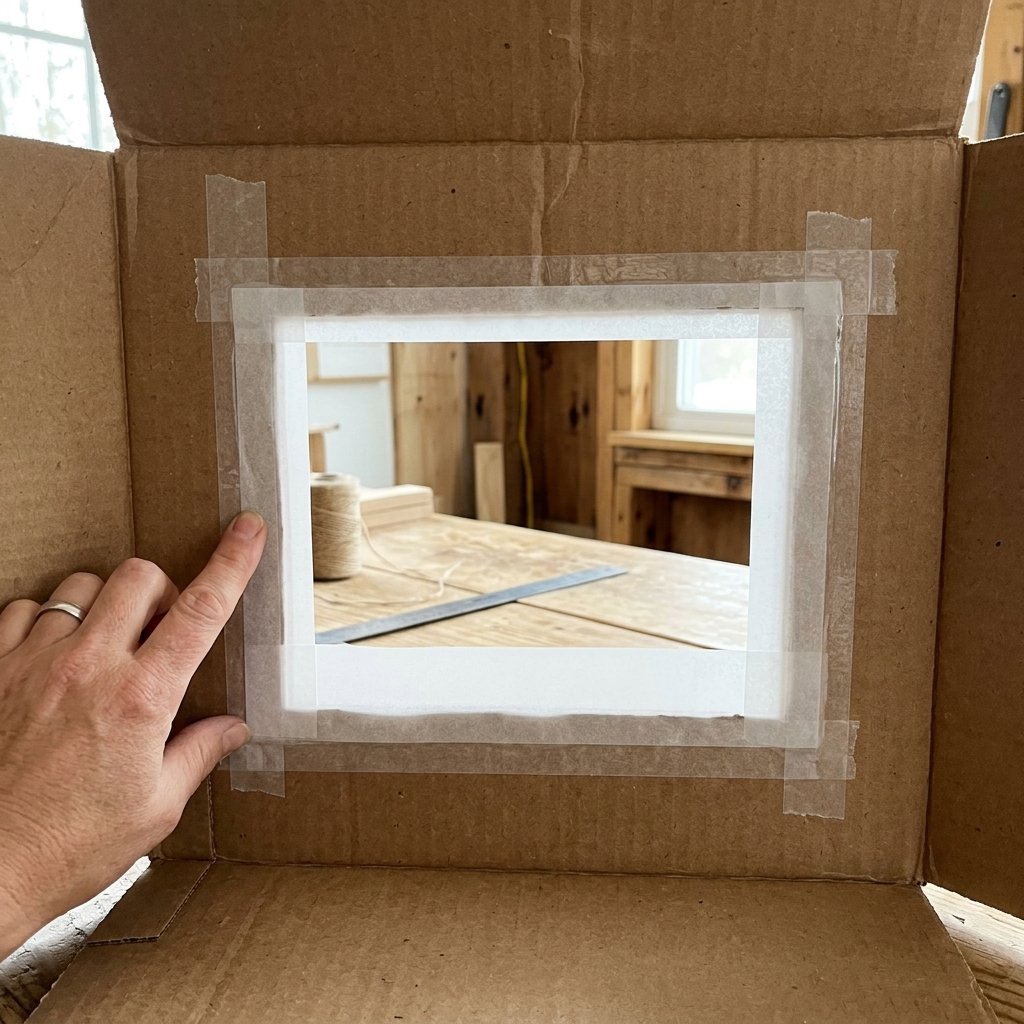
The screen is the most critical component. It needs to be taut to prevent distorted shadows. This is where we turn a box into a cinematic experience.
- Measure Twice: Cut your parchment paper so it is 1 inch larger than the window you just created.
- The Tension Technique: Tape the top edge of the paper to the inside of the box. Pull it tight toward the bottom and tape it down. Then, pull the sides tight and secure them.
- Reinforce: Use duct tape or heavy-duty masking tape along the entire perimeter of the paper. This prevents the paper from tearing if a ‘dragon’ accidentally bumps into it during a show.
By placing the screen on the inside, you create a recessed look that mimics a real theater stage, adding a touch of masculine elegance to the final design.
Crafting the Cast: Silhouette Secrets
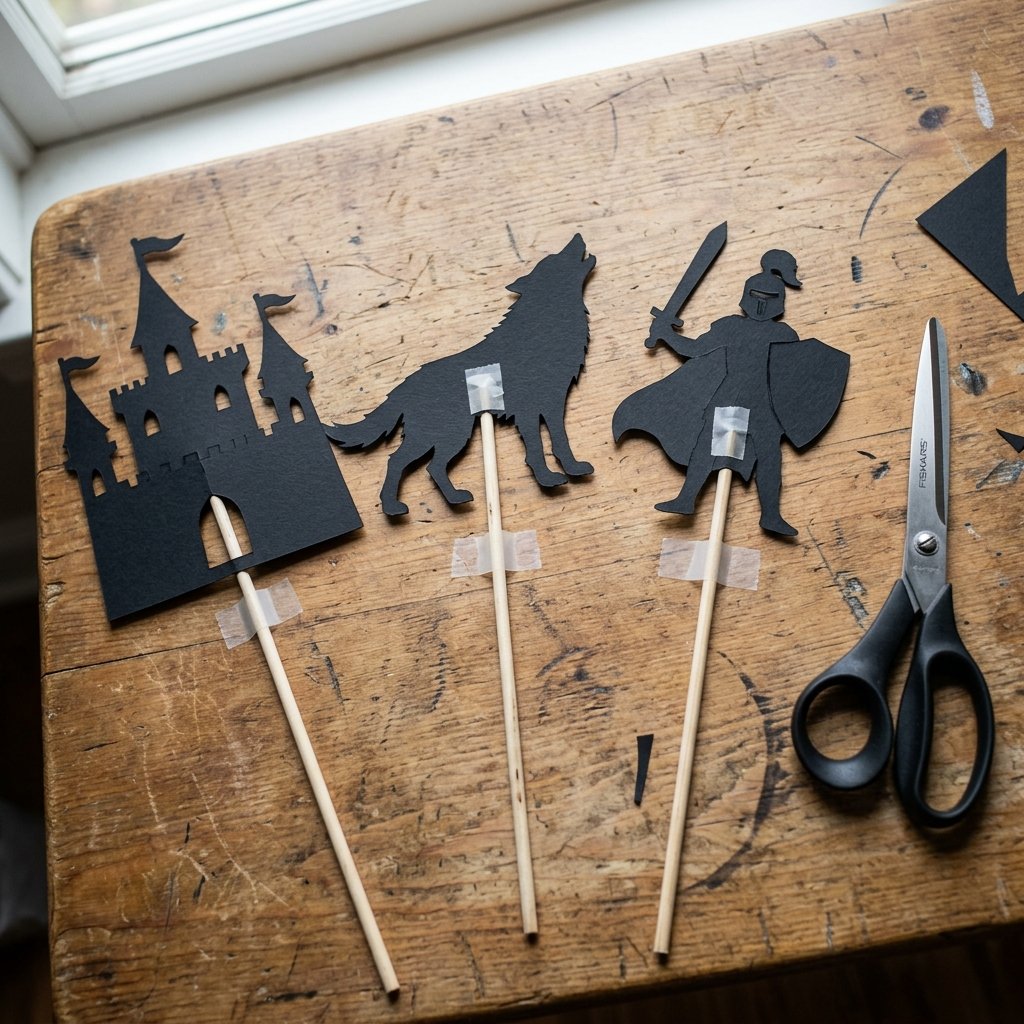
Your puppets need to be opaque to block the light completely. Cereal boxes are the gold standard here—they are thin enough to cut easily but thick enough to remain rigid.
Puppet Material Comparison
| Material | Shadow Quality | Durability |
|---|---|---|
| Printer Paper | Poor (Translucent) | Low |
| Cereal Box Cardboard | Excellent (Opaque) | High |
| Construction Paper | Good | Medium |
| Cardstock | Great | High |
To make your puppets:
- Sketch your characters on the plain side of the cereal box. Think in silhouettes—big noses, pointy hats, and distinct tails.
- Cut them out with scissors or a precision knife.
- Tape a wooden skewer or a straight twig to the back of the puppet. Pro Tip: Attach the stick to the side of the puppet rather than the bottom to keep your hands out of the light beam.
Lighting and Stagecraft: The Science of Shadows
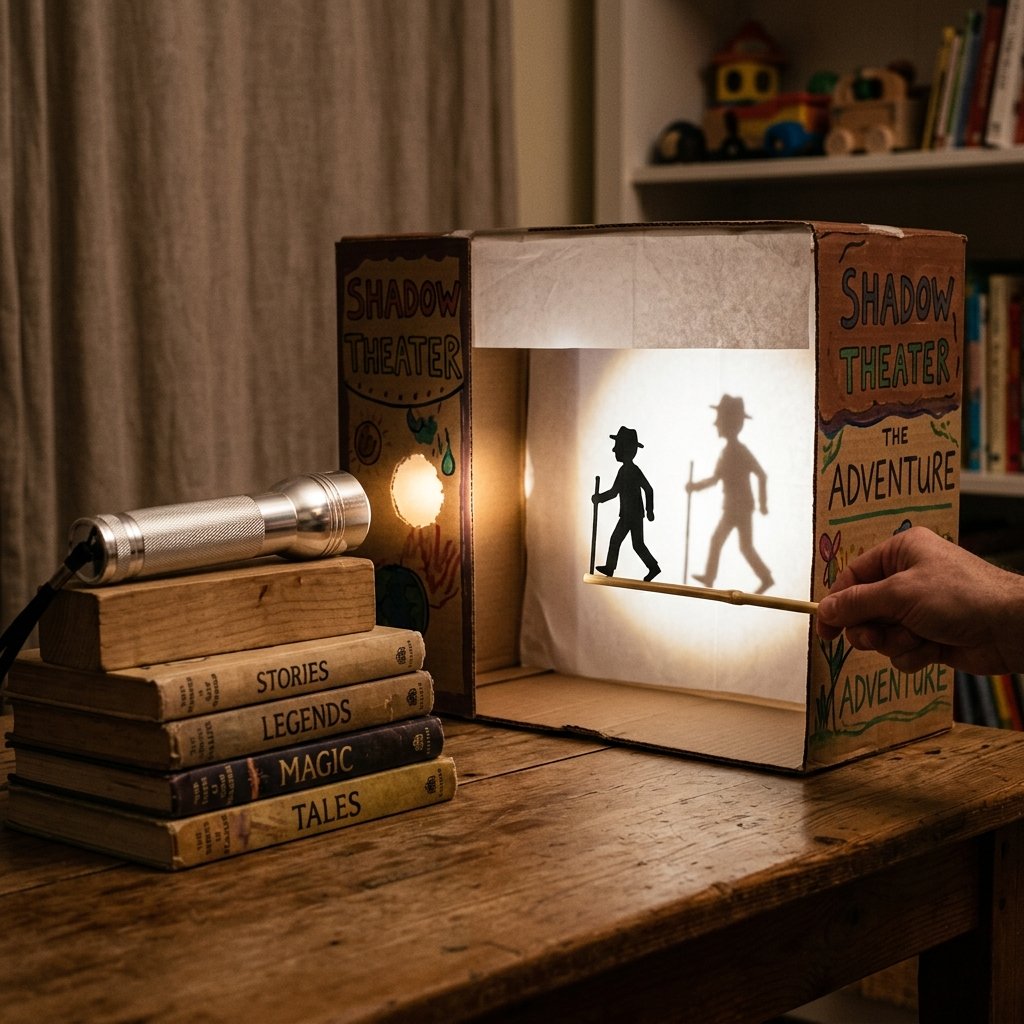
The light source is your engine. For a 10-minute DIY, your smartphone flashlight is the most convenient, but a dedicated LED flashlight offers more control. Position the light about 2 to 3 feet behind the theater.
The Golden Rule of Shadows: The closer the puppet is to the screen, the sharper the shadow. The closer the puppet is to the light source, the larger and blurrier the shadow becomes. Use this to create ‘approaching’ monsters or ‘fading’ ghosts.
To make the theater truly ‘magical,’ consider the following setup:
- Steady Base: Prop your flashlight up on a stack of books so it points directly at the center of the screen.
- Ambient Light: Ensure the rest of the room is as dark as possible. This increases the contrast and hides the ‘seams’ of your cardboard construction.
- Sound Effects: Use your phone to play subtle forest sounds or medieval music to fully immerse your audience.
Conclusion
In just 10 minutes, you’ve transformed a piece of waste into a treasure chest of stories. This cardboard shadow puppet theater is a testament to what a resourceful DIYer can achieve with zero budget and a bit of clever thinking. It’s rugged, it’s functional, and it provides a high-end experience without the high-end price tag. Tonight, when you turn off the main lights and click on that flashlight, you aren’t just telling a story—you’re showing your family that the best kind of magic is the kind you build yourself. Happy crafting!

Makenzie is the founder and lead writer at MoneyHackTips.com — a personal finance blog dedicated to delivering street-smart financial wisdom for real people on real budgets. With 300+ published articles covering everything from debt management to investing fundamentals, Makenzie’s mission is to make every dollar work harder. When not writing about money hacks, Makenzie is testing frugal living strategies, optimizing side hustles, and helping readers build financial freedom from scratch.