
The Magic of the Humble Box
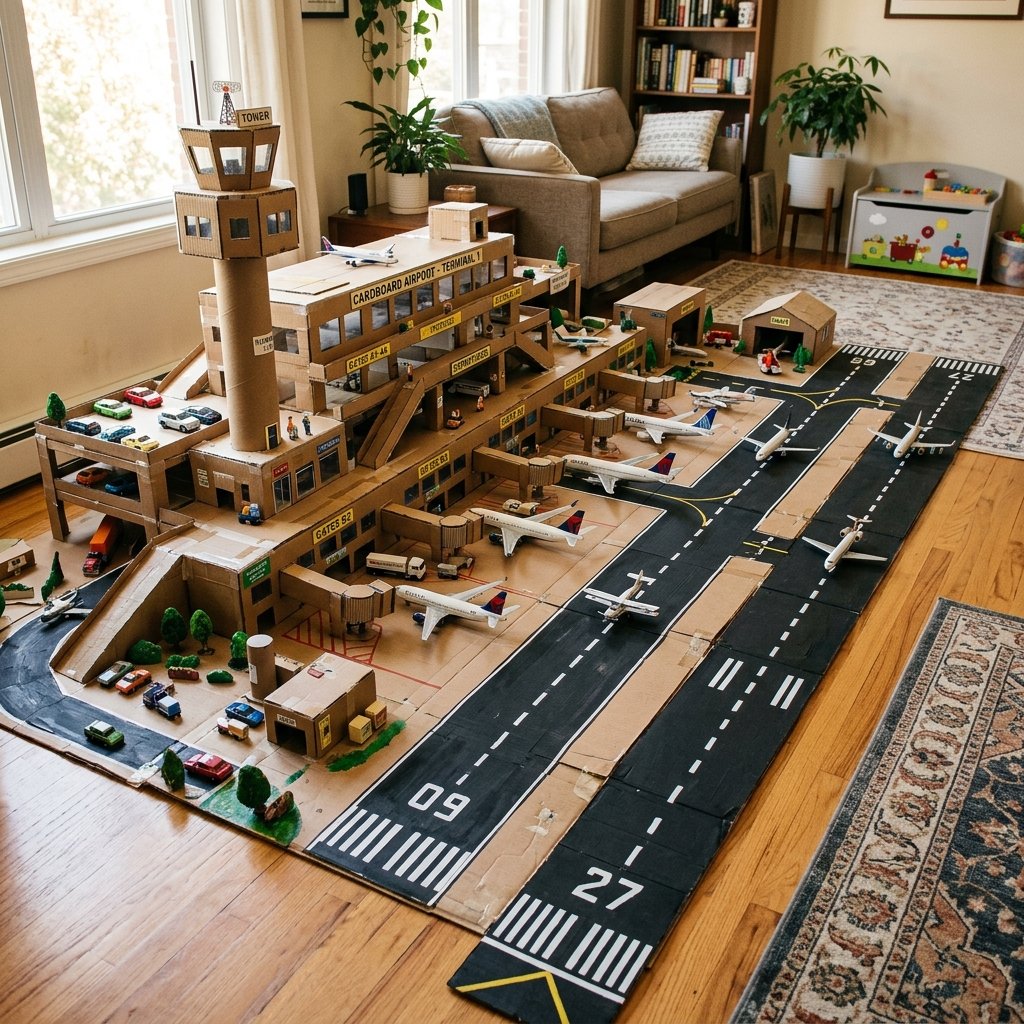
Let’s be honest: we’ve all been there. You spend $50 on a shiny, plastic toy only for your toddler to spend the entire afternoon playing with the box it came in. As a resourceful DIYer, it’s time to lean into that instinct. Why fight the cardboard obsession when you can master it? Today, we are going to take those Amazon delivery boxes cluttering your garage and upcycle them into a rugged, masculine-elegant, and incredibly detailed DIY Cardboard Airport and Runway. This isn’t just a craft; it’s an engineering marvel for the pint-sized pilot in your life. By using a few clever hacks and budget-savvy materials, you can create a play center that rivals expensive store-bought sets while costing you exactly $0 out of pocket. Not only is this project environmentally friendly, but it also provides a unique opportunity for ‘quiet play’—that holy grail of parenting where your child is so deeply immersed in their own world that you might actually get to finish a cup of coffee while it’s still hot.
The Blueprint: Materials and Budget Breakdown
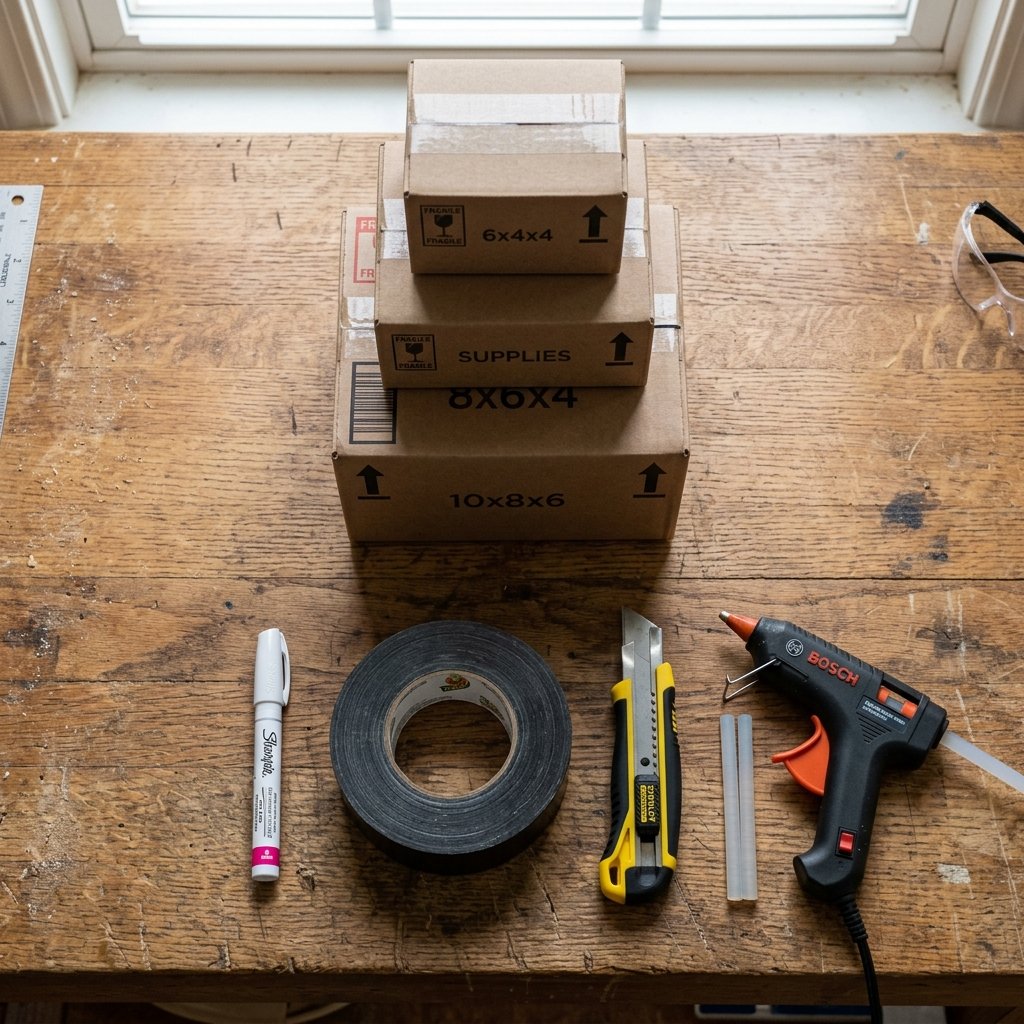
Before we clear for takeoff, we need to gather our supplies. The beauty of this project is its rugged simplicity. You don’t need a high-end workshop; you just need a sharp blade and a bit of creative grit. We are aiming for a zero-budget build here, utilizing items you likely already have in your recycling bin or junk drawer.
Budget Mantra: The best toys aren’t bought; they are built with imagination and a roll of masking tape.
Here is how the DIY approach stacks up against the pricey plastic alternatives you’ll find at the big-box stores:
| Item | Store-Bought Plastic Set | DIY Cardboard Version |
|---|---|---|
| Main Structure | $45.00 | $0.00 (Upcycled Boxes) |
| Runway Mats | $20.00 | $0.00 (Black Marker/Tape) |
| Control Tower | Included | $0.00 (Oatmeal Container) |
| Total Cost | $65.00+ | $0.00 – $5.00 |
Essential Gear List:
- Large, flat cardboard boxes (for the base/runway).
- Medium boxes (for the terminal and hangars).
- Cardboard tubes (paper towel or mailing tubes for the control tower).
- Utility knife or heavy-duty scissors (for clean, masculine lines).
- Black duct tape or electrical tape (perfect for asphalt texture).
- White paint pen or chalk (for runway markings).
- Hot glue gun (the crafter’s best friend for structural integrity).
Phase One: Engineering the Runway and Tarmac
Laying the Foundation
Every great airport starts with the tarmac. We want this to be expansive enough for multiple ‘landings’ but sturdy enough to withstand a toddler’s enthusiastic play. Take your largest, flattest piece of cardboard. If you have a massive appliance box, 100% use that as the primary base. If not, you can tape several large flaps together from the underside using heavy-duty packing tape.
Creating the Asphalt Look
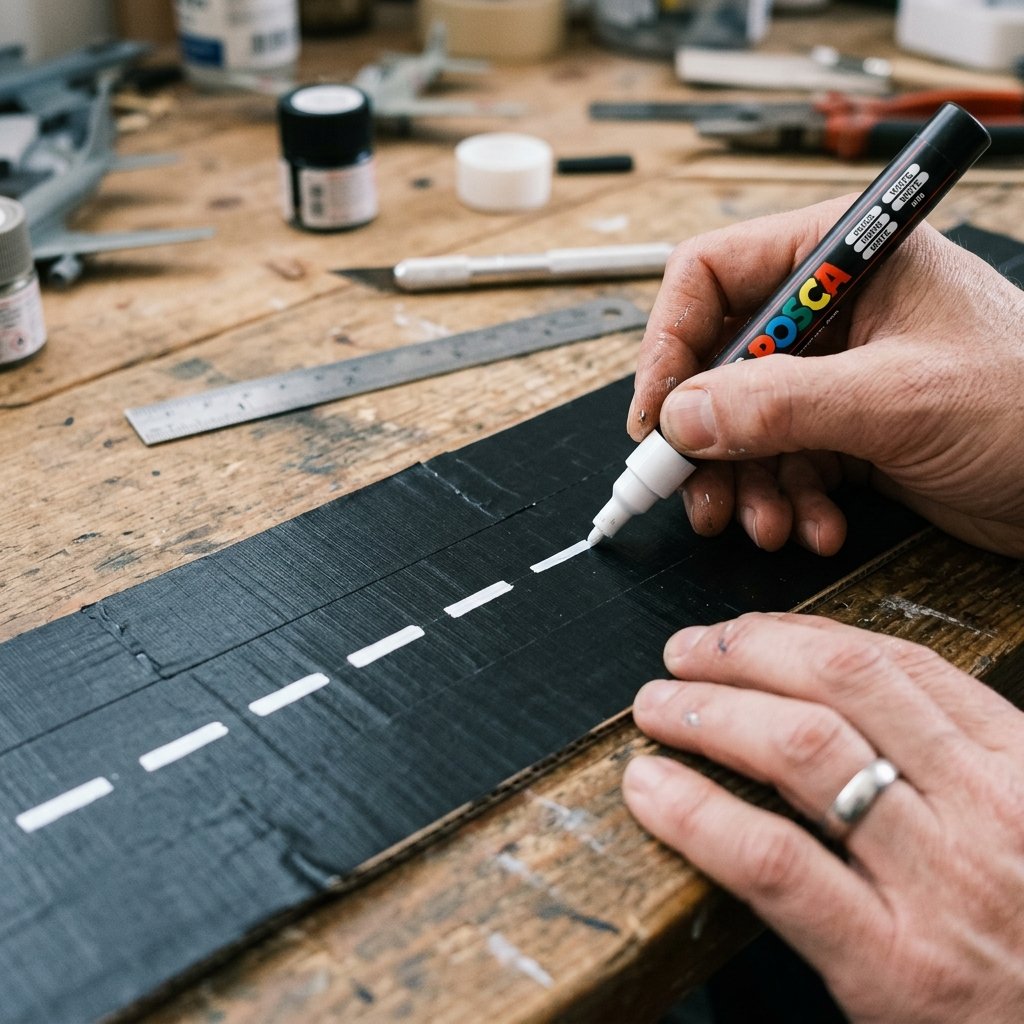
You have two budget-savvy options here. You can either paint the cardboard with inexpensive black acrylic paint (the ‘baking soda paint’ trick adds a great gritty texture) or use black duct tape. I prefer the tape method for its rugged durability; it adds a layer of ‘armor’ to the cardboard that prevents it from fraying.
Pro-Tip: Use a ruler to ensure your runway is at least 5 inches wide to accommodate most standard toy planes (like Matchbox or Green Toys).
- Mark the Centerline: Use your white paint pen to draw dashed lines down the center. This is a great moment to teach your toddler about ‘staying in the lanes.’
- Number the Runways: Add numbers like ’09’ or ’27’ at the ends. It adds a professional, sophisticated touch that makes the project feel like a high-end replica.
- The Taxiways: Use yellow tape or markers to create curved paths leading off the main runway toward where the terminal will sit.
Phase Two: Constructing the Terminal and Control Tower
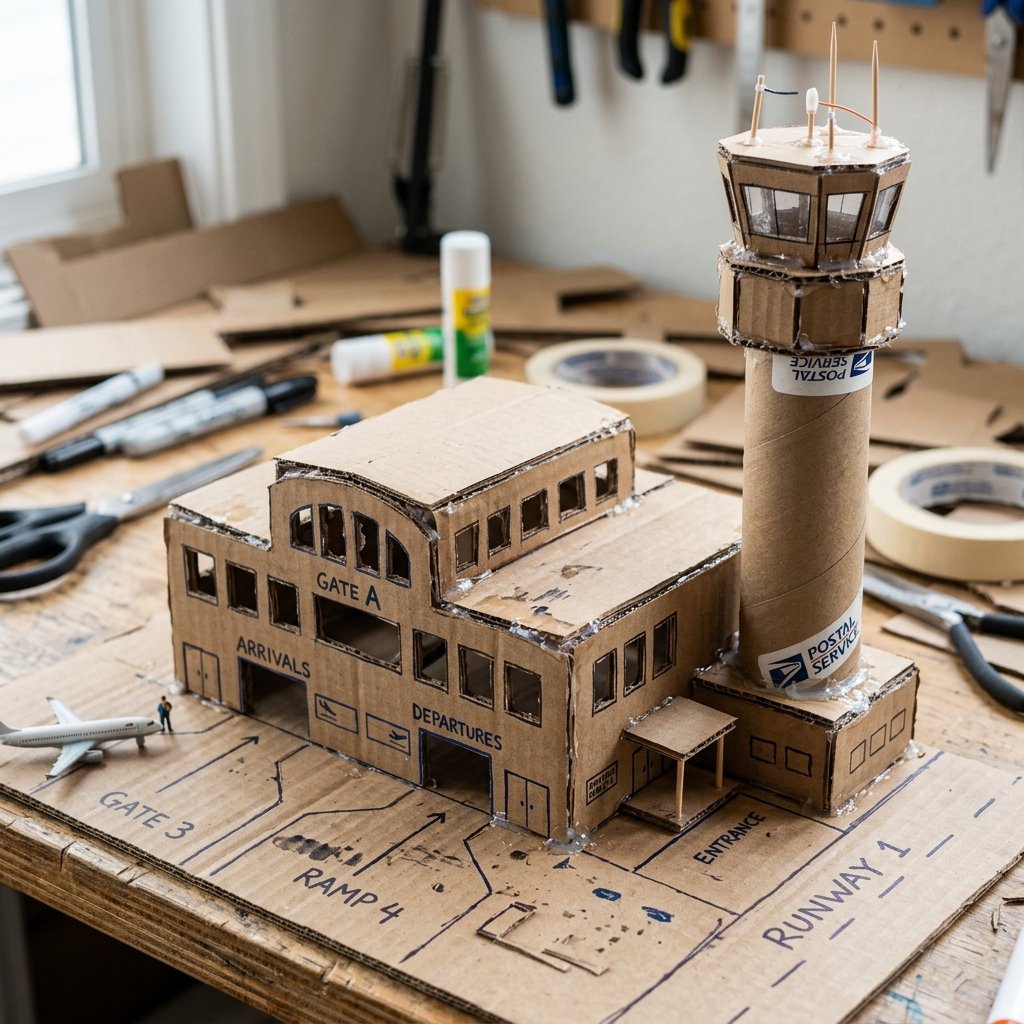
Vertical Integration
Now that the ground is set, it’s time to build up. The terminal is the heart of the airport. Use a medium-sized box and cut out large ‘windows’ using your utility knife. To give it a modern, ‘industrial-chic’ look, you can leave the cardboard raw or spray it with a metallic silver paint for that Pottery Barn aesthetic on a Dollar Tree budget.
The Control Tower
No airport is complete without the tower. This is where you can get really crafty. An old oatmeal canister or a sturdy mailing tube makes the perfect pedestal.
- The Observation Deck: Glue a smaller, square jewelry box or a cut-down milk carton to the top of the tube.
- The Radar Dish: Use a plastic lid from a yogurt container or a spray paint cap. Paint it silver and glue it to the roof.
- Windows: Instead of cutting them out (which can weaken the tube), use a black permanent marker to draw sleek, wrap-around windows.
Safety Note: Always handle utility knives and hot glue guns away from children. If you want your toddler to help, let them be the ‘Chief Decorator’ using stickers or washable markers once the structural cutting is complete.
Phase Three: Adding Functionality and Play Features
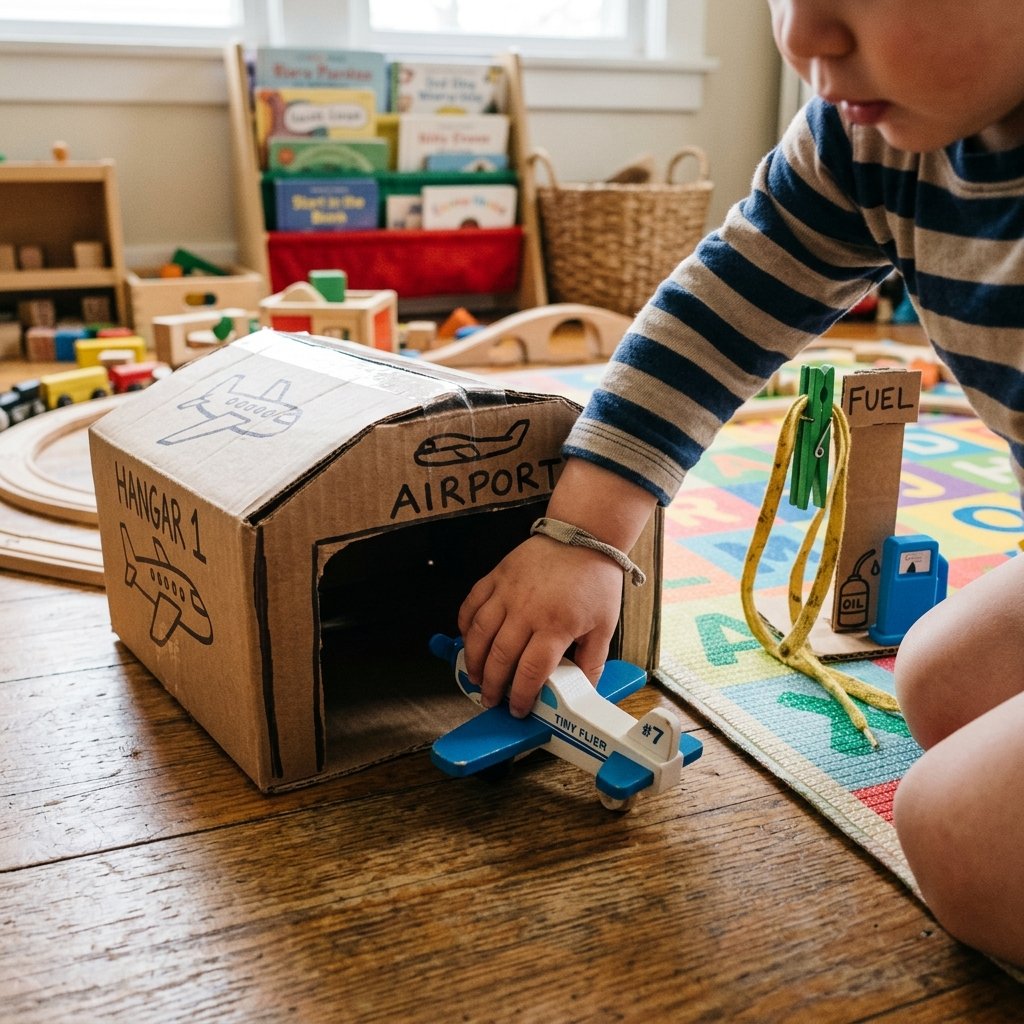
Details That Delight
To keep a toddler engaged for hours, you need interactive elements. A flat piece of cardboard is a start, but a ‘working’ airport is a destination. Let’s add some clever features that encourage fine motor skills.
The Baggage Claim Slide
Cut a long strip of cardboard, fold the edges up to create ‘rails,’ and lean it against the side of the terminal. Your toddler can slide small blocks or ‘suitcases’ down into a designated area. It’s simple physics and endless fun.
The Hangar
Every pilot needs a place to park. Use a smaller box with one side completely removed. Reinforce the opening with extra tape because this area will see a lot of ‘in-and-out’ traffic. You can even create a ‘garage door’ using a piece of felt or fabric scraps glued to the top, allowing it to roll up and down.
Fueling Station
Take a piece of twine or an old shoelace and glue it to the side of a small box. Attach a clothespin to the end of the string. Now your toddler can ‘clip’ the fuel line onto their planes for a quick refill before takeoff. This 5-minute addition adds layers of imaginative play.
Durability Hacks: Making It Toddler-Proof
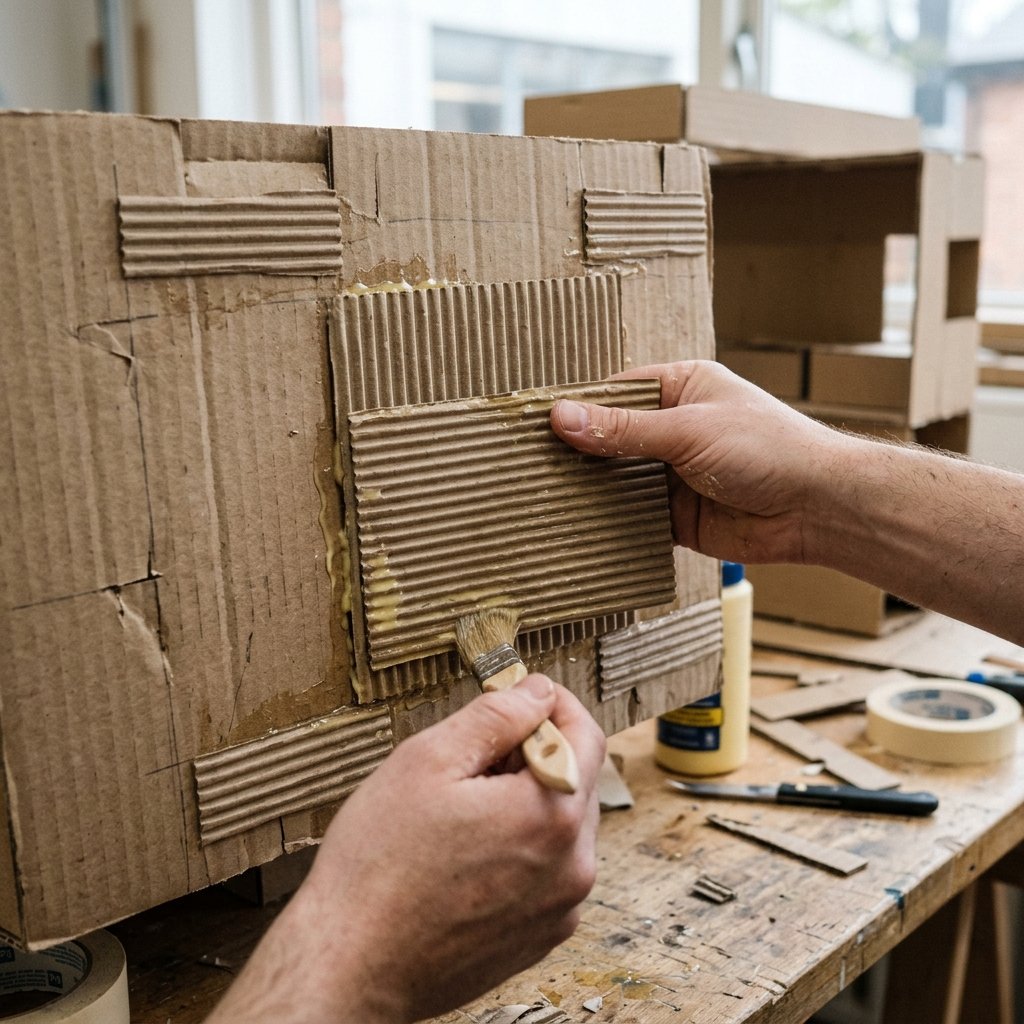
Built to Last
Cardboard is surprisingly resilient, but toddlers are a force of nature. To ensure your masterpiece lasts longer than a single afternoon, you need to apply some ‘rugged’ engineering. Double-walling is your best friend. If a section feels flimsy, glue a second layer of cardboard with the corrugation running in the opposite direction. This creates a cross-grain strength similar to plywood.
| Weak Point | The Reinforcement Fix |
|---|---|
| Terminal Roof | Insert a ‘pillar’ (toilet paper roll) inside for support. |
| Runway Edges | Wrap in duct tape to prevent peeling and ‘paper’ cuts. |
| Control Tower Base | Glue to a wide ‘flange’ of cardboard before attaching to the main floor. |
If the airport needs to be put away at night, consider building it in modular sections. Use Velcro strips or large binder clips to join the runway to the terminal. This allows you to break it down and slide it under a bed or behind a sofa, keeping your living room from becoming a permanent flight path.
The Finishing Touches: Aesthetics on a Dime
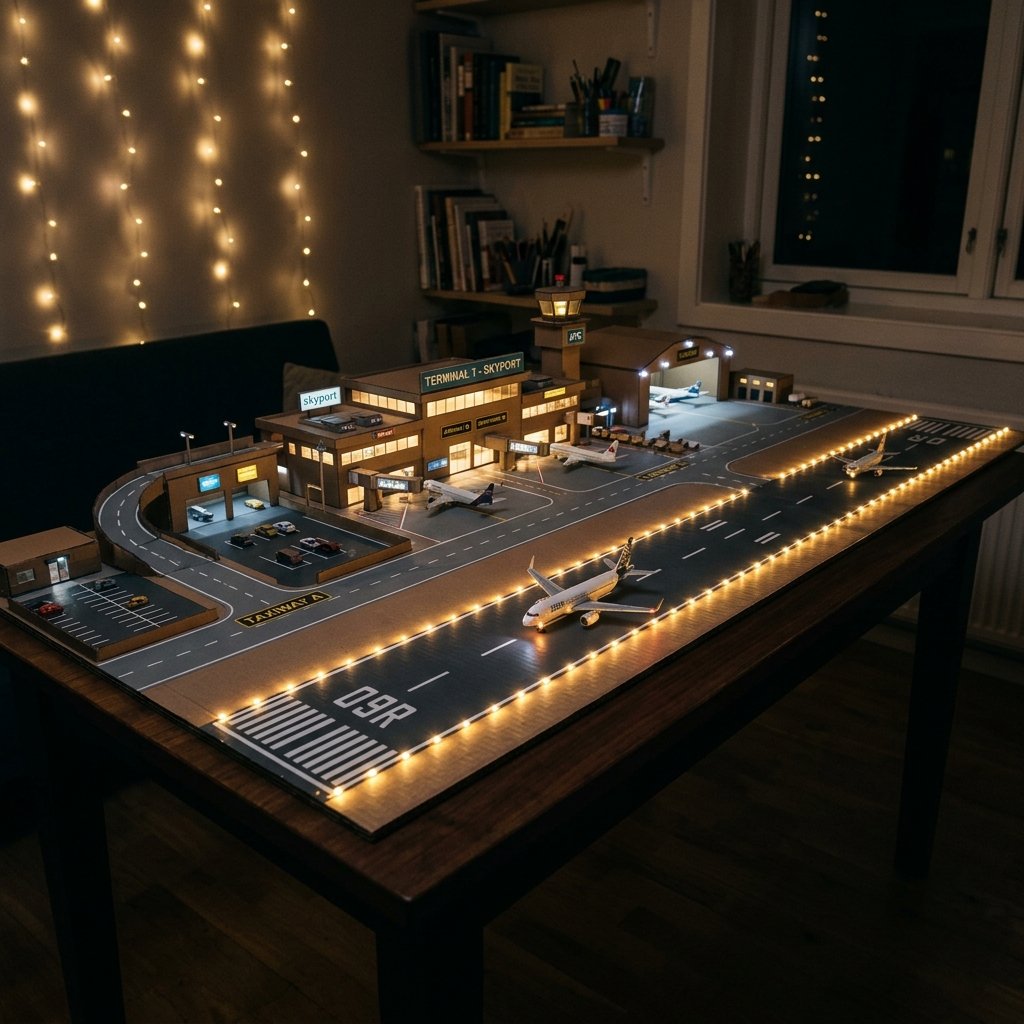
From Trash to Treasure
The difference between a ‘pile of boxes’ and an ‘awesome airport’ is in the finishing. Even with zero budget, you can make this look like an expensive boutique toy. Use stencils (cut from scrap paper) to spray-paint or sponge-paint ‘Gate A1’ or ‘Arrivals’ onto the terminal walls.
- Greenery: Use green kitchen sponges cut into small squares to represent bushes or hedges around the parking lot.
- Lighting: If you have a spare string of LED fairy lights, poke small holes through the runway and thread the lights through for a ‘night flight’ experience. It looks magical and costs nothing if you’re reusing holiday lights.
- Signage: Print out small logos or ‘Arrival/Departure’ boards on a home printer and glue them to the interior walls of the terminal.
These small, clever details respect the child’s imagination while satisfying the parent’s desire for a ‘clean,’ well-designed play space.
Conclusion
Cleared for Takeoff
Building a DIY Cardboard Airport is more than just a frugal way to avoid a trip to the toy store. It’s an act of creative love that shows your child how ‘trash’ can be transformed into something extraordinary with just a little bit of grit and imagination. For the cost of a roll of tape and a few hours of your time, you’ve created a rugged, multi-sensory environment that fosters independent play and fine motor development. So, the next time a large box arrives at your doorstep, don’t see it as recycling—see it as a new terminal, a control tower, or a 3-foot runway waiting to happen. Happy building, and may your ‘quiet play’ hours be long and frequent!

Makenzie is the founder and lead writer at MoneyHackTips.com — a personal finance blog dedicated to delivering street-smart financial wisdom for real people on real budgets. With 300+ published articles covering everything from debt management to investing fundamentals, Makenzie’s mission is to make every dollar work harder. When not writing about money hacks, Makenzie is testing frugal living strategies, optimizing side hustles, and helping readers build financial freedom from scratch.