
The Magic of the Humble Cardboard Box
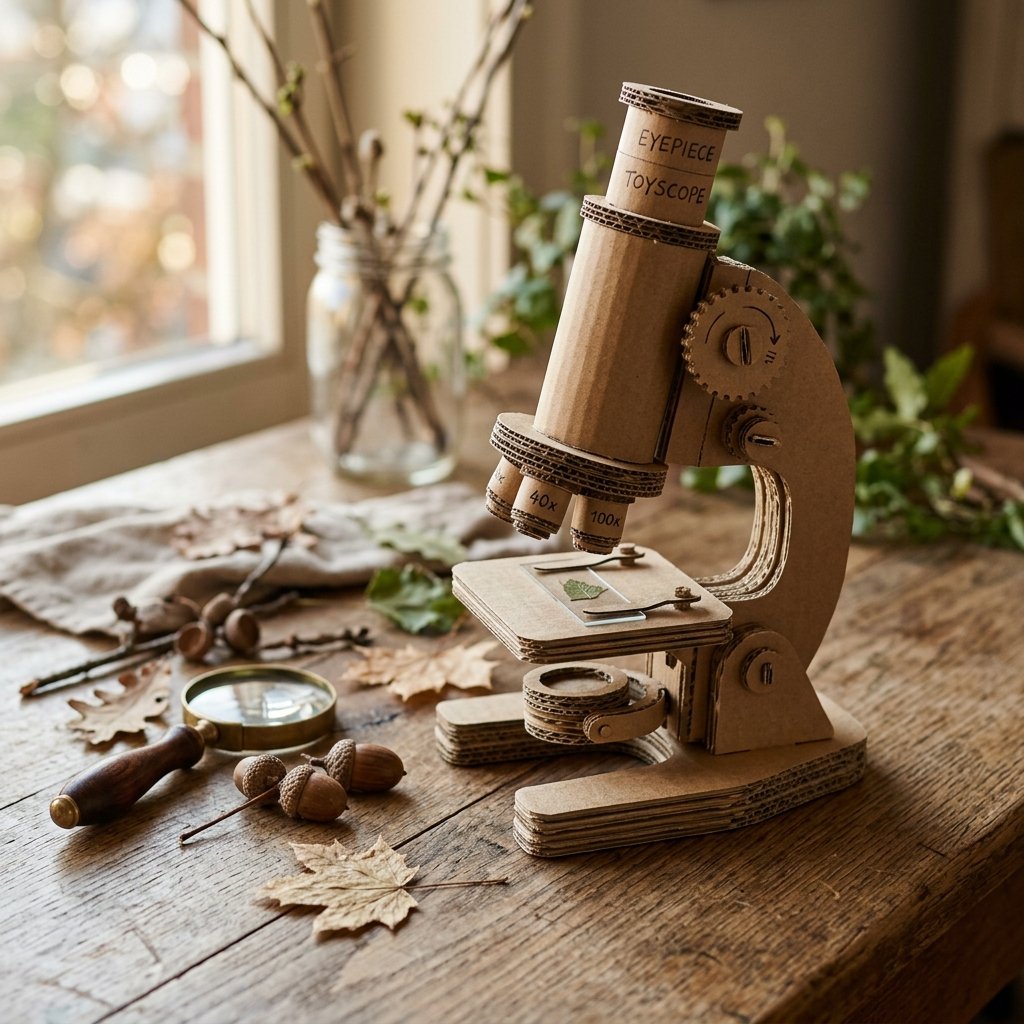
In a world of flashing plastic toys and expensive electronic gadgets, there is a quiet revolution happening in the living rooms of resourceful parents. We are returning to the basics, where $0 budget projects outperform the most expensive store-bought items. The cardboard box is the ultimate raw material for the frugal engineer. It is sturdy, versatile, and—best of all—completely free. Today, we are going to take that discarded shipping container and transform it into a sophisticated, Montessori-approved play microscope. This isn’t just a toy; it is a gateway to scientific inquiry that respects a child’s intelligence and a parent’s wallet.
The Montessori philosophy emphasizes ‘real-world’ tools that allow children to explore their environment with dignity and focus. By crafting this microscope with a rugged, masculine-elegant aesthetic, you are providing your toddler with a tool that feels substantial and important. We aren’t just taping boxes together; we are engineering a masterpiece of upcycling that will survive the rigors of toddler exploration while looking like a designer piece on your playroom shelf.
The Blueprint: Materials and Cost Comparison
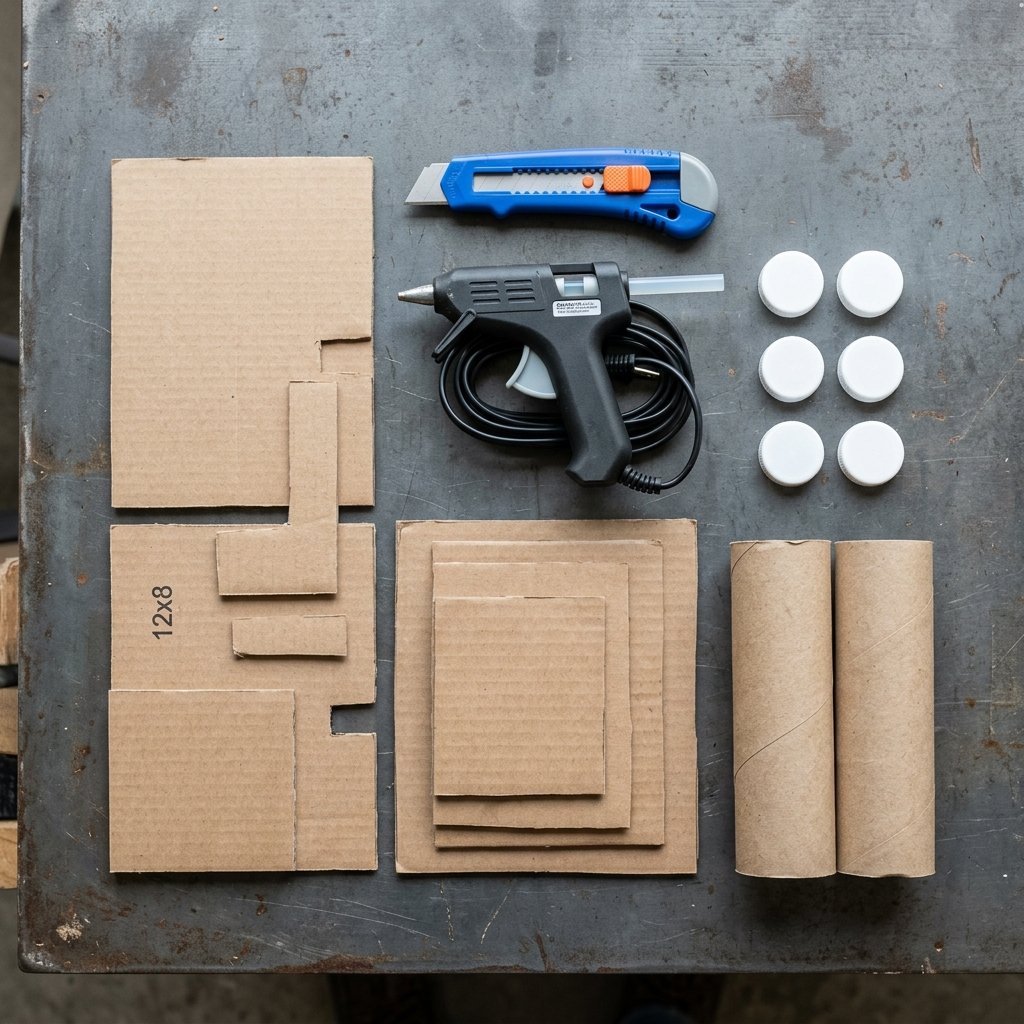
Before we pick up the utility knife, let’s look at the logistics. Most ‘educational’ microscopes for toddlers retail for anywhere between $25 and $60. They are often made of brittle plastic and offer very little in the way of tactile satisfaction. Our DIY version uses high-quality corrugated cardboard, giving it a weight and texture that plastic simply cannot match. By using what you already have in your recycling bin, you are achieving a 100% savings.
| Material Item | Source | Estimated Cost |
|---|---|---|
| Heavy-Duty Corrugated Cardboard | Shipping Boxes | $0.00 |
| Cardboard Tubes (2 sizes) | Paper Towel/Toilet Paper Rolls | $0.00 |
| Plastic Packaging Scraps | Fruit Containers/Toy Boxes | $0.00 |
| Bottle Caps | Milk or Juice Jugs | $0.00 |
| Hot Glue / Wood Glue | Workshop Staples | $0.25 |
| Total Project Cost | Recycling Bin | $0.25 |
“The best toys aren’t bought; they are built with intention. A child values the work of a parent’s hands more than the swipe of a credit card.”
Step 1: Engineering the Structural Base
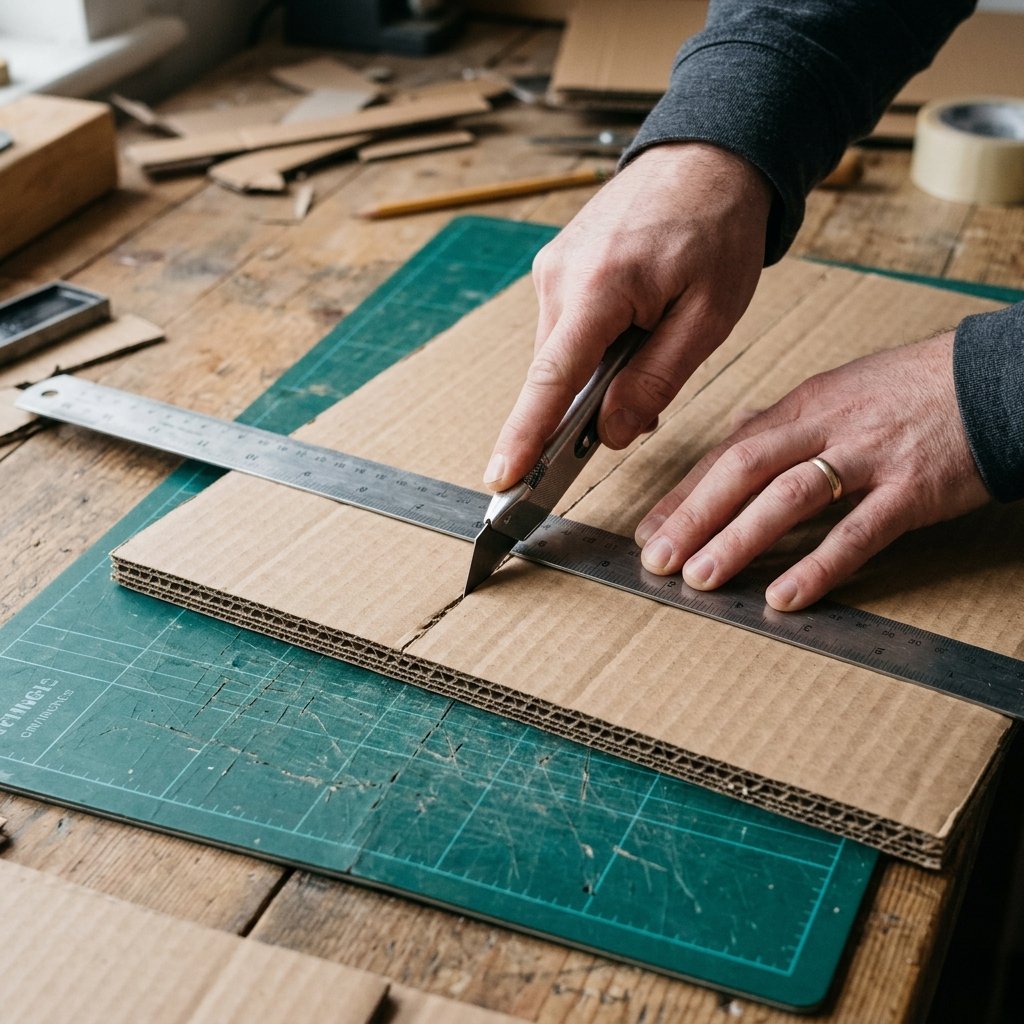
The foundation of any scientific instrument is its stability. To ensure this microscope doesn’t topple during intense ‘research’ sessions, we need a weighted, multi-layered base. Start by cutting four identical rectangles of cardboard, measuring approximately 6 inches by 8 inches. Glue these layers together using a thin, even spread of wood glue or hot glue. This creates a ‘plywood’ effect with cardboard, making it incredibly rigid.
Creating the Vertical Support
Next, we need the ‘arm’ of the microscope. Cut a long strip of cardboard 4 inches wide and 12 inches long. Score the cardboard lightly every 1 inch to allow it to bend into a sturdy rectangular pillar. Glue this pillar to the back of your base. For a rugged, professional finish, ensure your cuts are straight and your corners are square. This isn’t just a craft; it’s a build.
- Use a metal ruler for perfectly straight lines.
- Always cut on a self-healing mat or a sacrificial piece of wood to protect your surfaces.
- Hold the pieces in place for 30 seconds to allow the glue to set firmly.
Step 2: The Optical Tube and Focus Mechanism
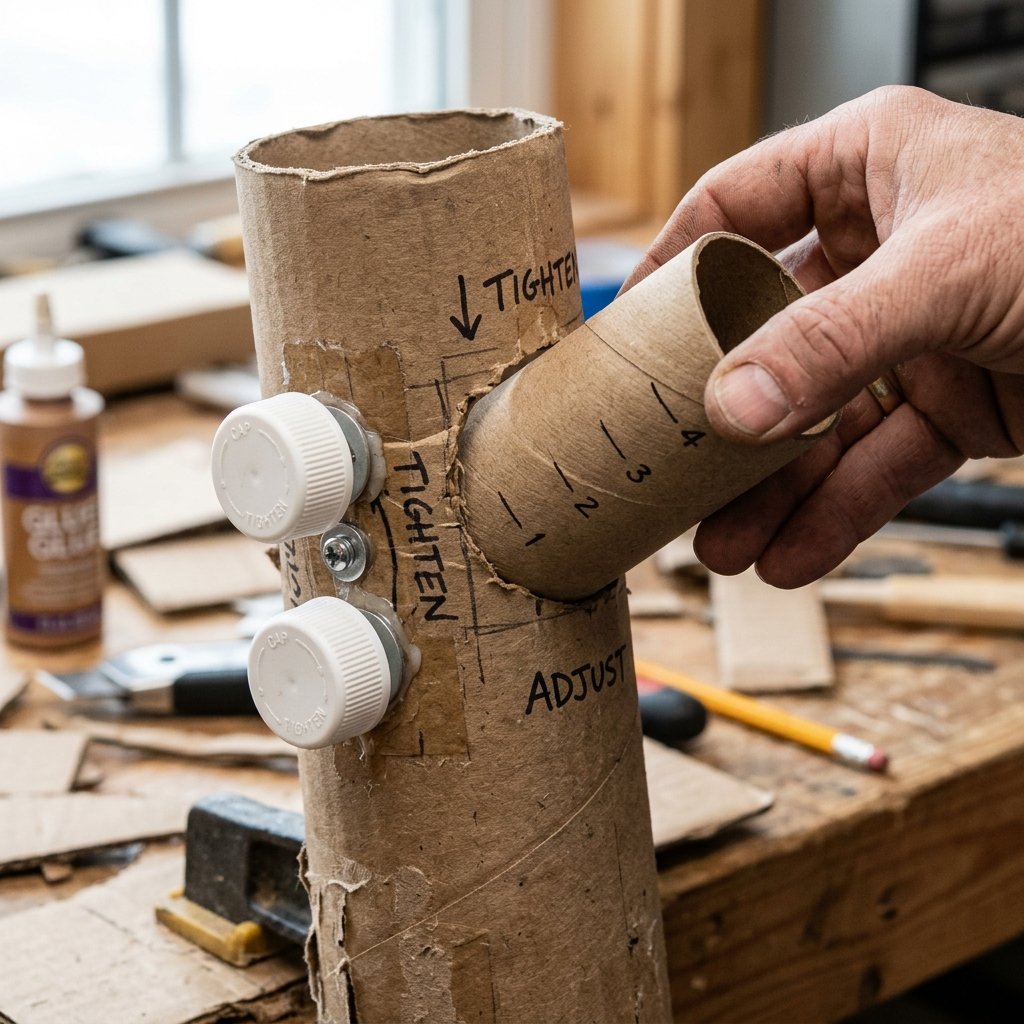
This is where the magic happens. We need two tubes of slightly different diameters so one can slide inside the other—this mimics the actual focusing movement of a real microscope. A paper towel roll and a slightly trimmed toilet paper roll usually work perfectly.
The Clever ‘Focus’ Knobs
To give your toddler the tactile experience of ‘focusing,’ we will attach bottle caps to the sides of the vertical support. Poke a small hole through the support arm and the center of two milk jug caps. Thread a wooden skewer or a sturdy piece of rolled cardboard through, and glue the caps to the ends. Now, when the child turns the ‘knobs,’ they feel the mechanical movement. It is a genius, budget-savvy way to introduce fine motor skills.
“Precision in the build leads to longevity in the play. Take the extra five minutes to align your tubes perfectly.”
Secure the larger tube to the vertical arm at a 45-degree angle or vertically, depending on your preferred style. The smaller tube will slide inside, providing that satisfying ‘click’ and ‘slide’ that keeps little hands busy for hours.
Step 3: Crafting the Specimen Stage and Slides
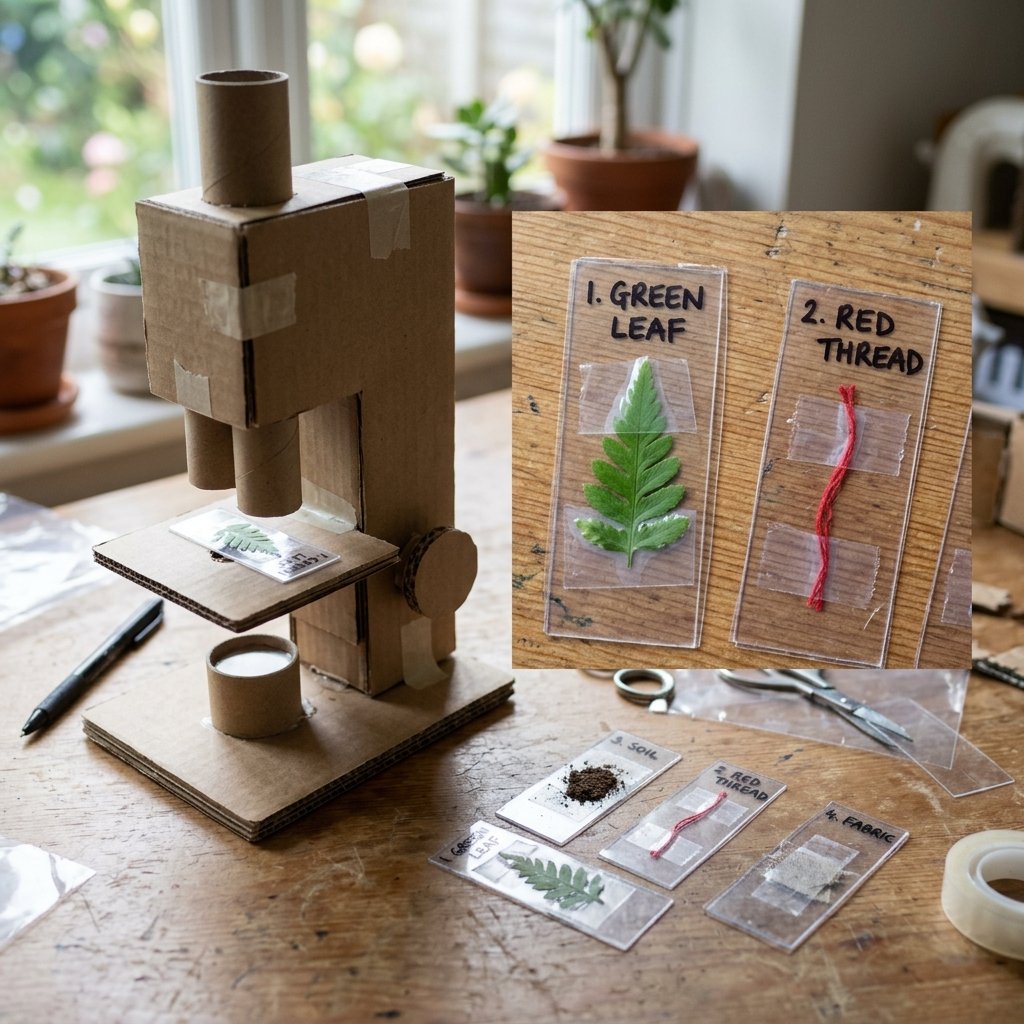
Every scientist needs a platform for their samples. Cut a small square of cardboard (about 4×4 inches) and glue it to the vertical arm, directly beneath the optical tube. To make it truly ‘Montessori,’ we want to use contrasting colors. Paint the stage black or white so the ‘specimens’ stand out clearly.
The ‘Glass’ Slides (Toddler-Safe)
Don’t throw away that clear plastic from the strawberry container! Cut it into small rectangles to serve as microscope slides. Use a permanent marker to draw ‘microbes,’ ‘cells,’ or ‘leaf patterns’ on the plastic. You can also glue actual flat items like dried petals, threads, or feathers onto the slides.
| Slide Type | Material Used | Educational Value |
|---|---|---|
| Botanical | Dried Leaves/Petals | Biology & Nature Study |
| Textile | Felt/Thread Scraps | Texture & Pattern Recognition |
| Artistic | Drawn ‘Germs’ | Imagination & Hygiene Lessons |
Step 4: The Finishing Touches and Aesthetic Upgrades
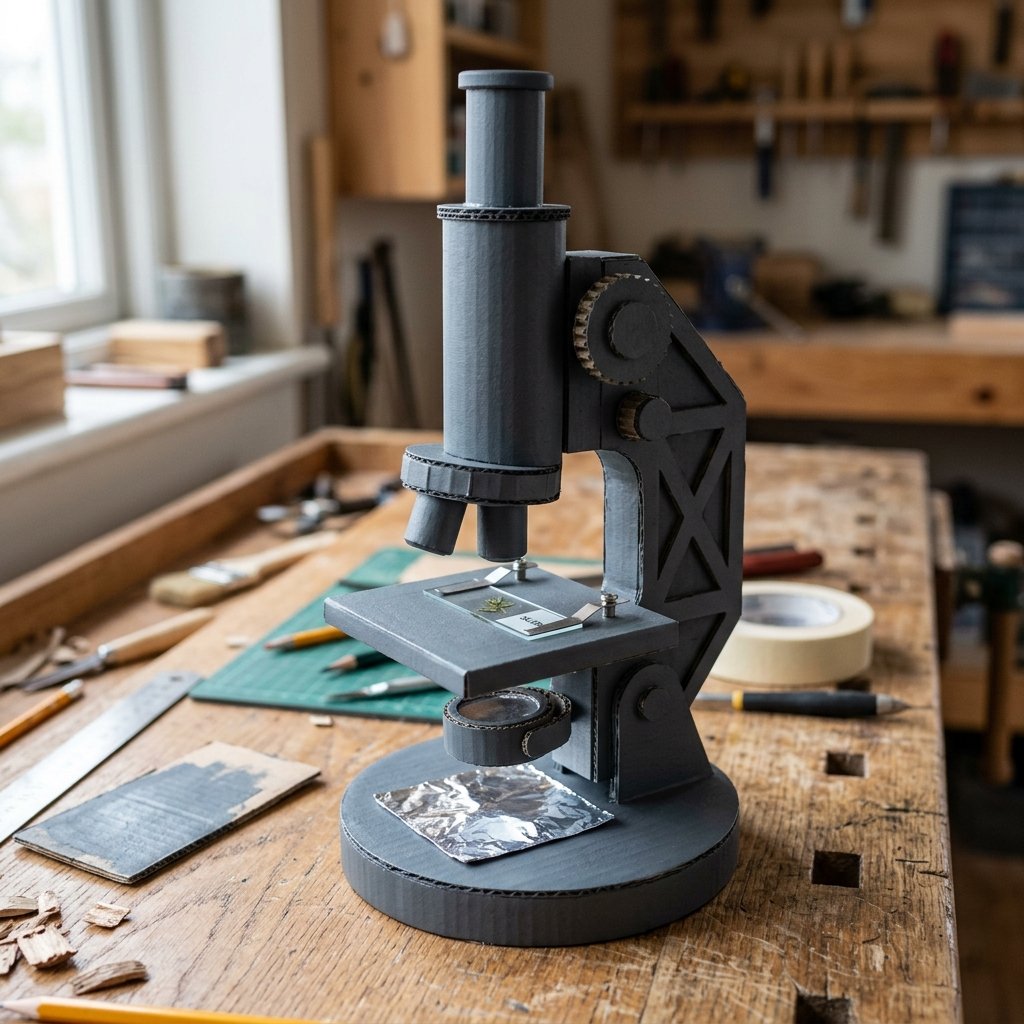
To elevate this from a ‘box toy’ to a ‘high-end replica,’ we need to focus on the finish. A masculine-elegant look can be achieved by using a simple ‘baking soda paint’ technique to give the cardboard a ceramic or cast-iron look. Mix black acrylic paint with a teaspoon of baking soda to create a textured, matte finish that hides the cardboard fluting.
Safety First
“While cardboard is generally safe, always ensure there are no sharp staples or rough edges. If using hot glue, ensure all ‘glue strings’ are removed before handing the toy to a toddler. Always supervise play with small specimens like acorns or pebbles.”
Add a small ‘mirror’ at the base using a piece of aluminum foil or a shiny silver candy wrapper. This mimics the light-reflecting mirror found on vintage microscopes, adding another layer of clever, resourceful realism to the project.
How to Use: Montessori Play Scenarios
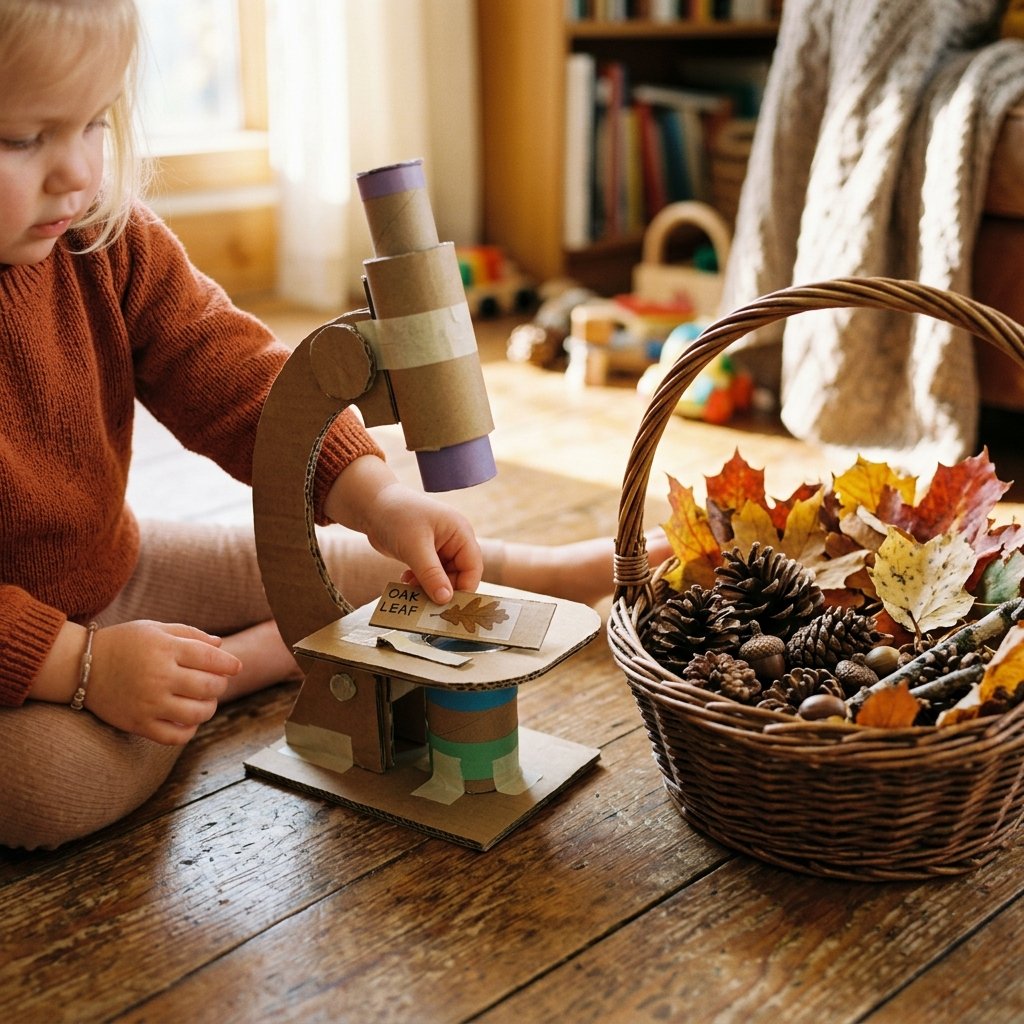
The beauty of this genius DIY project is that it isn’t just for looking at. It’s a prop for deep, imaginative play. Here are three ways to keep your toddler busy for hours with their new instrument:
- The Nature Hunter: Give your child a small basket and ask them to find five different ‘samples’ from the backyard to examine under the lens.
- The Lab Doctor: Pair the microscope with a white button-down shirt (a DIY lab coat) and some band-aids. They can ‘analyze’ slides to find ‘cures’ for their stuffed animals.
- The Artist’s Eye: Ask the child to look at a slide and then draw the ‘giant’ version of what they see on a large piece of paper.
By providing these prompts, you transition from a simple toy to a comprehensive learning experience that fosters independence and concentration—the hallmarks of the Montessori method.
Conclusion
The Reward of Resourceful Crafting
Building this cardboard microscope is about more than just saving $50 at the toy store. It is about demonstrating to your children that we can create our own fun, solve our own problems, and find value in the things others throw away. This project is rugged, practical, and undeniably clever. It proves that with a little hot glue and a lot of imagination, you can provide a world-class educational experience on a zero-dollar budget. So, the next time a package arrives at your door, don’t just see a box—see a scientific discovery waiting to happen. Happy crafting!

Makenzie is the founder and lead writer at MoneyHackTips.com — a personal finance blog dedicated to delivering street-smart financial wisdom for real people on real budgets. With 300+ published articles covering everything from debt management to investing fundamentals, Makenzie’s mission is to make every dollar work harder. When not writing about money hacks, Makenzie is testing frugal living strategies, optimizing side hustles, and helping readers build financial freedom from scratch.