The Frugal Parent’s Guide to High-End Play
Let us set the scene: You are scrolling through a beautiful, minimalist, high-end baby boutique online. You see a gorgeous wooden box with a hole on top and a tray at the bottom. The description promises it will unlock your baby’s cognitive development. Then you look at the price tag. $45.00. For a box. With a hole in it. If you are a resourceful, budget-savvy parent with a knack for DIY, your inner craftsman probably just screamed. You do not need to spend the equivalent of a tank of gas to give your baby top-tier developmental tools. You just need an Amazon box, a utility knife, and a little bit of crafty ingenuity.
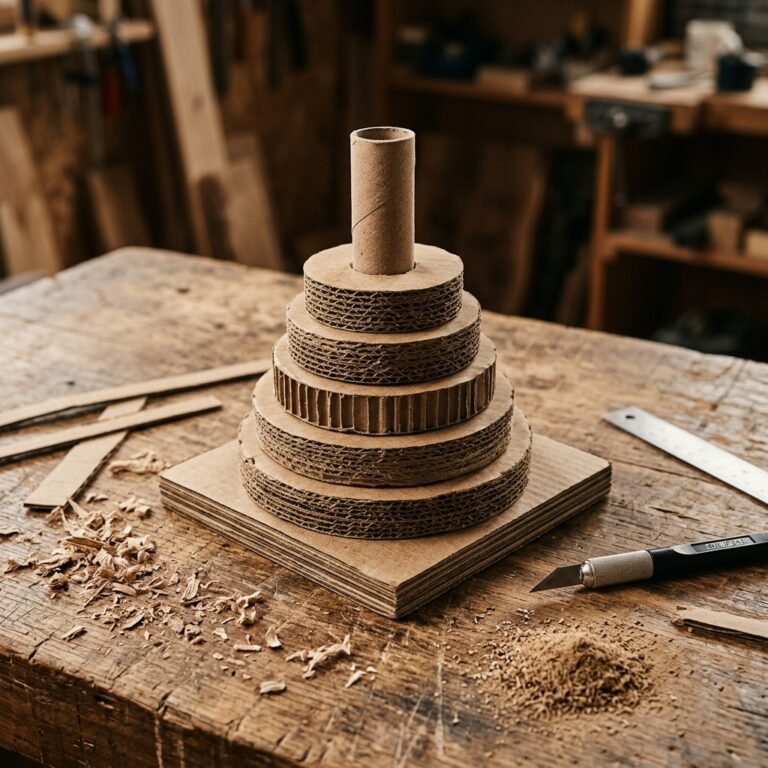
Welcome to the ultimate trash-to-treasure project. Today, we are going to build a DIY Cardboard Object Permanence Box that looks incredible, functions perfectly, and costs absolutely nothing if you use materials you already have lying around the house. This is about practical, hands-on parenting. It is about taking everyday materials and engineering them into something that provides hours of educational entertainment for your little one.
The true hallmark of a master upcycler is not how much money they spend, but how much value they can extract from what others throw away. Never buy what you can build with a sturdy piece of cardboard and some elbow grease.
In this comprehensive masterclass, we will cover the cognitive science behind why your baby needs this toy, how to source the best zero-budget materials, and step-by-step instructions for measuring, cutting, and assembling a rugged, baby-proof structure. We will even cover aesthetic upgrades to make your cardboard creation look like it belongs in a high-end Montessori classroom. Roll up your sleeves, grab your trusty cutting mat, and let us get to work.
Why Spend $40 When You Already Have the Box? The Montessori Magic Explained
Understanding the Cognitive Mechanics
Before we start slicing into corrugated cardboard, it is crucial to understand what we are actually building. The Object Permanence Box is a staple in Montessori education, typically introduced when a baby is between 8 to 12 months old. But what exactly is object permanence?
Coined by developmental psychologist Jean Piaget, object permanence is the understanding that objects continue to exist even when they cannot be seen, heard, or touched. When your baby drops a spoon off the highchair and looks down to find it, they are demonstrating object permanence. Before this milestone is reached, if you hide a toy under a blanket, to the baby, it has literally ceased to exist in the universe.
The Mechanics of the Box
The design of the box is deceptively simple but mechanically brilliant. The baby drops a ball into the hole on the top. The ball disappears from view for a split second, then rolls down an internal ramp and reappears in the front tray. This simple action teaches several critical skills:
- Cause and Effect: ‘If I drop this ball, something happens.’
- Hand-Eye Coordination: Grasping the ball, aiming for the hole, and releasing it requires complex motor skills.
- Focus and Concentration: The repetitive nature of the task builds an infant’s attention span.
- Object Permanence: The realization that the ball did not vanish, but simply traveled through the box to reappear.
The Frugal Advantage: Store-Bought vs. DIY
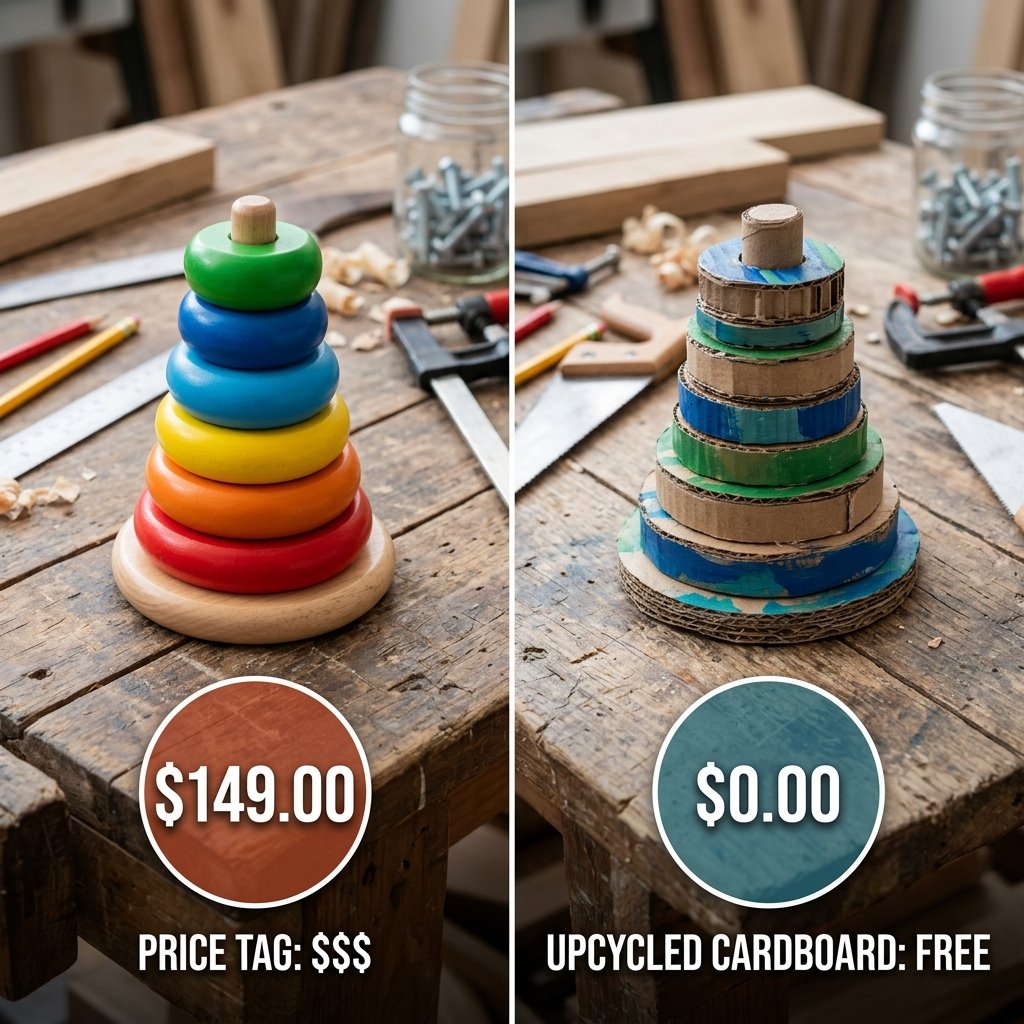
Let us look at the raw numbers. Wood is expensive. Shipping heavy wooden toys is expensive. The brand name markup is exorbitant. By utilizing the structured integrity of corrugated cardboard, we can replicate the exact same physical mechanics for pennies.
| Feature | High-End Wooden Box | Our Rugged DIY Cardboard Box |
|---|---|---|
| Average Cost | $35 – $50 | $0 – $3 (depending on decor) |
| Material | Birch or Beechwood | Upcycled Corrugated Box |
| Build Time | 0 minutes (Just click buy) | 45 – 60 minutes of satisfying craft time |
| Customizability | None (Standard natural wood) | Infinite (Paint, contact paper, fabric) |
| Eco-Friendly Factor | Moderate (Depends on sourcing) | Maximum (Pure trash-to-treasure upcycling) |
As you can see, the DIY route not only keeps your hard-earned cash in your wallet, but it also gives you a satisfying, practical project that results in a custom-made heirloom (even if that heirloom is made of cardboard). Your baby will not care about the brand name; they will care about the satisfying thunk and roll of the ball.
The Scavenger Hunt: Gathering Your Zero-Budget Materials

Sourcing the Best Trash
Not all cardboard is created equal. If you want this object permanence box to survive the enthusiastic pounding of a ten-month-old, you need the right structural foundation. You are looking for double-wall corrugated cardboard if possible, or at least a very sturdy, uncrushed single-wall box. Diaper boxes, heavy-duty appliance boxes, or medium-sized shipping boxes are your best friends here. Avoid cereal boxes or thin cardstock; they lack the masculine, rugged durability required for infant play.
Your Master Crafter Tool Kit
You likely have everything you need in your garage, junk drawer, or craft bin. Here is the breakdown of what to gather before you begin:
- The Canvas: One medium-to-large sturdy cardboard box (at least 12×12 inches of usable flat space).
- The Projectile: A ball that is safe for babies. A ping-pong ball is too light. A golf ball is too heavy and dangerous. A wooden craft ball (at least 1.75 inches in diameter to prevent choking), a plastic ball pit ball, or a heavily rolled pair of baby socks works perfectly.
- The Cutting Implement: A sharp utility knife or craft scalpel (X-Acto knife). A dull blade will tear the cardboard and leave messy edges.
- The Measuring Tools: A metal ruler (plastic will get nicked by the knife), a pencil, and a compass (or a round cup to trace the drop hole).
- The Binding Agents: Hot glue gun with extra sticks, and optionally, some heavy-duty packing tape or masking tape for reinforcing internal joints.
- The Finishing Touches (Optional): Wood-grain contact paper, matte spray paint, or non-toxic acrylic paint to elevate the aesthetic from ‘shipping container’ to ‘chic nursery decor’.
Safety First: Whenever working with sharp utility knives, always cut away from your body, use a self-healing cutting mat to protect your table, and keep blades far out of reach of tiny, curious hands. Furthermore, ensure the ball you select is strictly larger than 1.25 inches in diameter to pass the standard choke-tube test.
Take 10 minutes to gather your supplies, lay them out on your workspace, and plug in that hot glue gun. Preparation is the hallmark of a successful, stress-free DIY project.
Drafting and Cutting: Precision Engineering for Tiny Hands
Measure Twice, Cut Once
Now comes the architectural phase. We are essentially building a rectangular housing unit with an open front tray and a sloped internal floor. Precision here ensures the ball rolls smoothly and the box does not collapse when your baby inevitably tries to lean their entire body weight on it.
The Master Dimensions
While you can scale this to fit whatever box you have, here are the ideal, tried-and-true dimensions for a standard object permanence box. We will be cutting individual panels and assembling them, which yields a much stronger final product than trying to fold a single piece of cardboard.
- Side Panels (Cut 2): 6 inches wide by 6 inches tall.
- Back Panel (Cut 1): 6 inches wide by 6 inches tall.
- Top Panel (Cut 1): 6 inches wide by 6 inches deep.
- Bottom Base/Tray Floor (Cut 1): 6 inches wide by 10 inches deep (The extra 4 inches will stick out the front to form the catch tray).
- Tray Front Lip (Cut 1): 6 inches wide by 1.5 inches tall.
- Tray Side Lips (Cut 2): 4 inches deep by 1.5 inches tall.
- The Internal Ramp (Cut 1): 6 inches wide by 7 inches deep (The extra length accounts for the slope angle).
Executing the Cuts
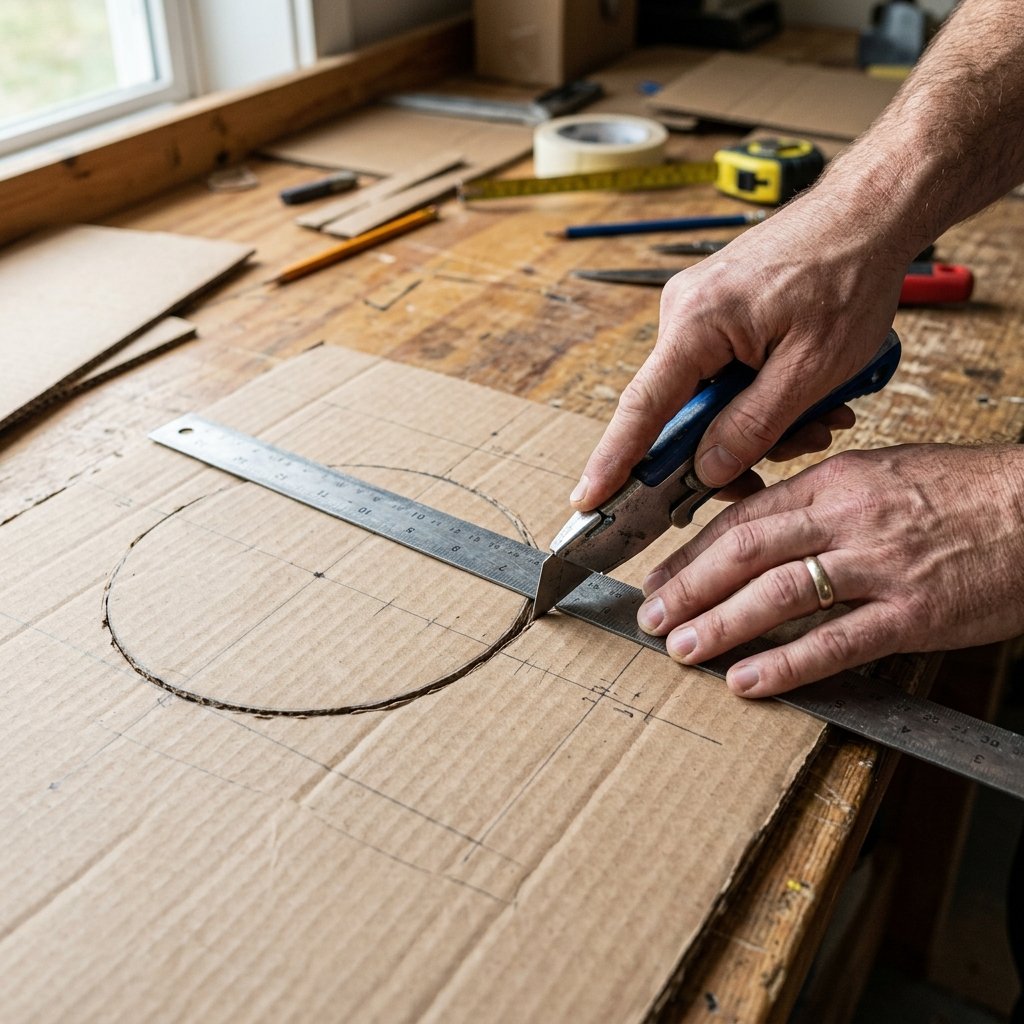
- Drafting: Lay your cardboard flat. Use your metal ruler and pencil to draw out all the panels listed above. Ensure your corners are perfectly square (90 degrees). A framing square is a handy tool here if you have one.
- Scoring: Run your utility knife lightly over the pencil lines first. Do not try to cut all the way through the corrugated cardboard on the first pass. This ‘score’ line creates a track for the blade to follow.
- The Deep Cut: Make a second and third pass with the knife, applying firm, even pressure until you slice cleanly through the back layer. This technique prevents the cardboard from crushing or tearing, leaving you with crisp, professional edges.
- The Drop Hole: Take your Top Panel. Find the center by drawing an ‘X’ from corner to corner. Use your compass or trace a cup to draw a circle that is about 0.5 inches wider than your chosen ball. Carefully cut this circle out. Take your time; a jagged circle will ruin the sleek illusion of your DIY masterpiece.
Once all your pieces are cut, do a ‘dry fit’. Stand them up against each other to ensure the dimensions align. If one panel is slightly off, trim it now. Craftsmanship is all in the details.
Building the Drop Ramp: The Secret to the Perfect Roll
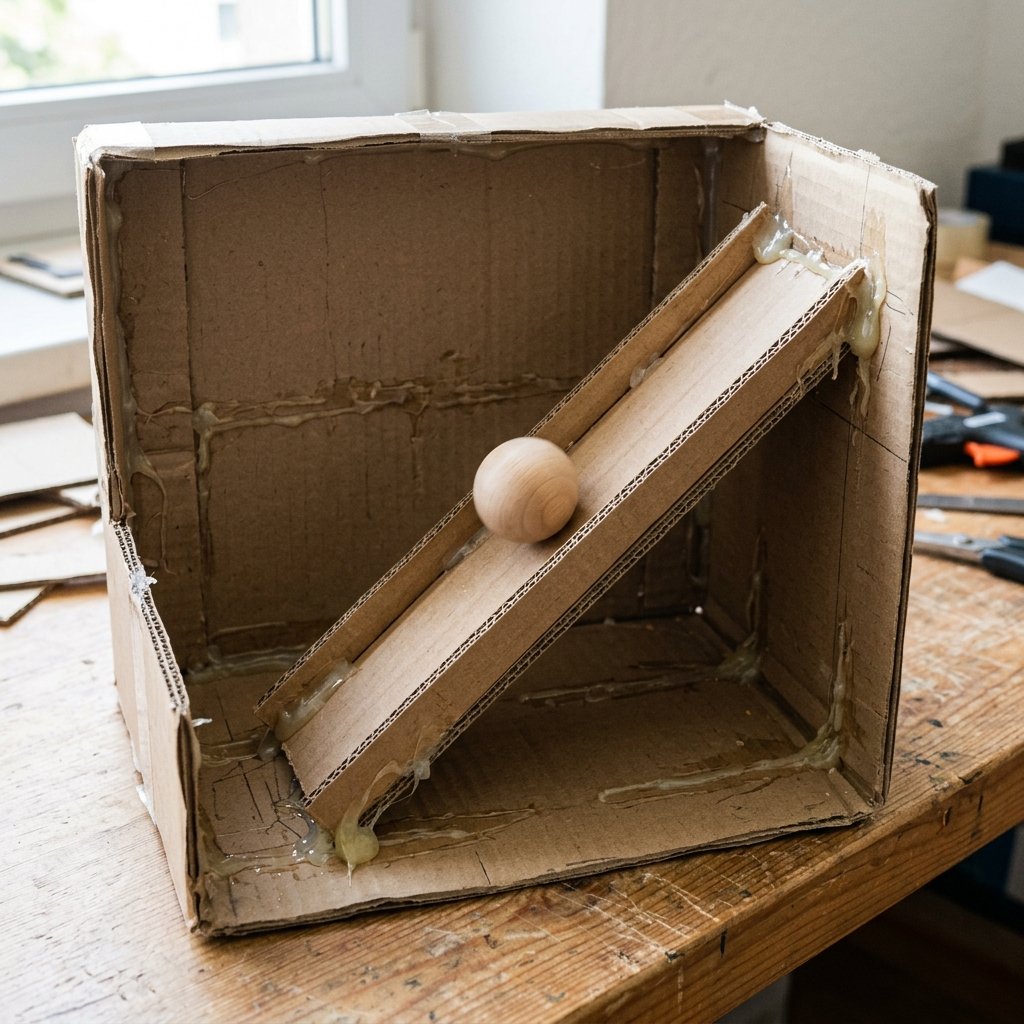
The Physics of Playtime
The internal ramp is the heart and soul of the object permanence box. If the ramp is too flat, the ball will just sit inside the box, defeating the entire purpose. If the ramp is too steep, the ball will shoot out like a cannonball and bounce over the tray lip, causing frustration. We need the Goldilocks slope.
Engineering the Slope
To achieve the perfect, satisfying roll, we need to install the internal ramp at approximately a 20 to 30-degree angle. Here is the step-by-step method to get it right without needing a protractor:
- Mark the Anchor Points: Take your two Side Panels. On the inside face of both panels, make a pencil mark on the back edge that is 3 inches up from the bottom. Make another mark on the front edge that is 0.5 inches up from the bottom.
- Draw the Guide Line: Connect the back mark to the front mark with a straight line. This diagonal line is where the underside of your ramp will rest.
- Test the Ramp: Hold the two Side Panels up and rest the Internal Ramp piece along your guide lines. Drop your ball onto the top of the ramp. It should roll down smoothly and exit the front with enough momentum to hit the tray lip, but not so much speed that it jumps the track.
- Adjusting the Momentum: If you are using a heavier ball (like a wooden craft ball), you might want a slightly shallower angle so it doesn’t slam into the front lip too hard. If you are using a lighter ball (like a hollow plastic ball), a steeper angle ensures it doesn’t get stuck halfway down.
The Master Crafter Tip: Before gluing the ramp permanently, take a small piece of fine-grit sandpaper and lightly sand the top surface of the cardboard ramp. This removes any microscopic friction points and ensures a buttery-smooth roll every single time.
Once you have confirmed the slope provides the perfect rolling speed, you are ready to move on to the final structural assembly. This is where the magic truly comes together and your pile of cardboard transforms into a high-end developmental tool.
Assembly and Reinforcement: Making It Baby-Proof and Rugged
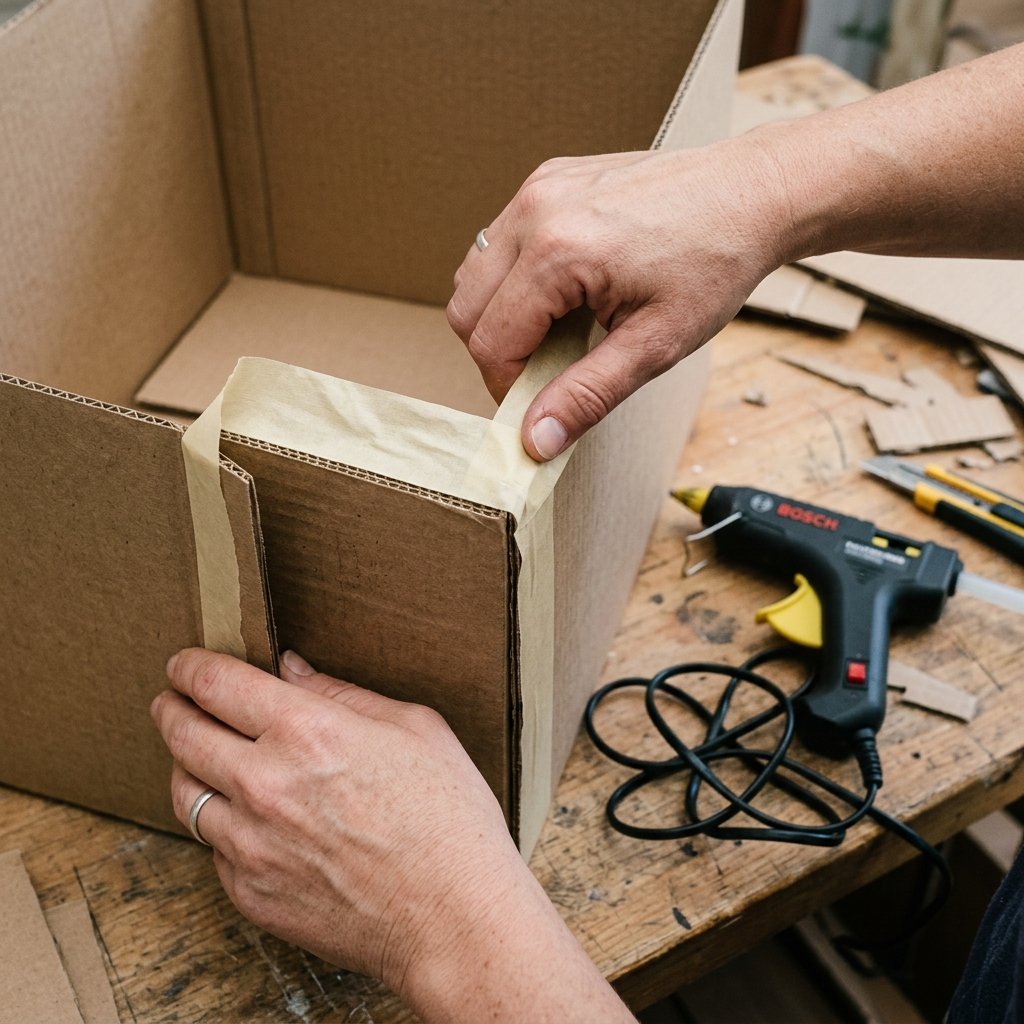
Fortifying the Structure
Babies are not gentle. They will slap this box, try to sit on it, and potentially gnaw on the edges. Therefore, simple craft glue or a single piece of scotch tape will not suffice. We need rugged, architectural reinforcement. Enter the hot glue gun and the masking tape binding method.
The Step-by-Step Assembly Protocol
- Construct the Base Chassis: Lay down your Bottom Base/Tray Floor piece. Run a generous bead of hot glue along the bottom edge of the Back Panel and press it firmly onto the back edge of the base. Hold it at a perfect 90-degree angle for 30 seconds until the glue sets.
- Attach the Sides: Run glue along the bottom and back edges of one Side Panel. Press it into place against the base and the back panel. Repeat for the other Side Panel. You now have a three-sided box with an extended floor for the tray.
- Install the Ramp: Remember those diagonal guide lines we drew? Run a thick bead of hot glue right above those lines on both side panels and along the back panel. Slide the Internal Ramp into the box, pressing it firmly into the hot glue. Ensure there are no gaps at the back where a tiny finger could get pinched.
- Seal the Top: Apply glue to the top edges of the back and side panels. Carefully align the Top Panel (the one with the hole) and press it down. Make sure the hole is positioned toward the front half of the box so the ball drops squarely onto the upper part of the ramp.
- Build the Catch Tray: Finally, glue the Tray Front Lip to the very front edge of the extended base. Glue the two Tray Side Lips to the sides of the extended base, connecting the main box to the front lip. This creates the walled enclosure that catches the ball.
The Invisible Mending Technique for Cardboard
Even with hot glue, exposed corrugated cardboard edges look messy and are prime targets for a baby to pull apart. We are going to use a technique borrowed from bookbinding to seal the edges.
- Take standard masking tape (or heavy-duty paper packing tape) and cut strips the exact length of your exterior seams.
- Carefully fold the tape over every exposed edge—the corners of the box, the edges of the tray, and most importantly, the inside rim of the drop hole.
- Rub the tape down firmly with the back of a spoon to burnish it into the cardboard. This not only hides the ugly corrugated zig-zags but dramatically increases the structural integrity of the box, making it highly resistant to crushing.
At this stage, you have a fully functional, highly durable object permanence box. It cost you exactly $0.00 in new materials. You could stop here, but as a frugal DIY expert, you know that presentation is everything.
Aesthetic Upgrades: From Trash to Treasure
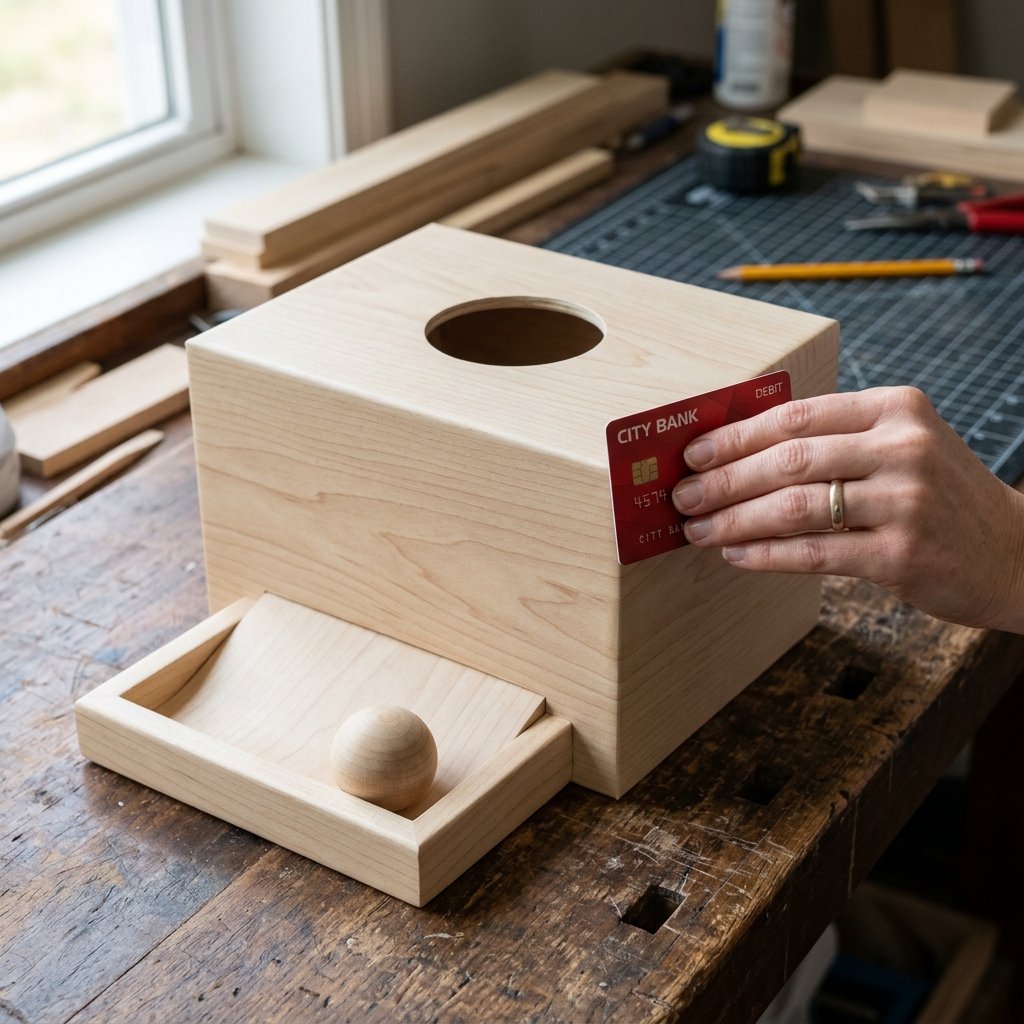
The Dollar Tree Interior Designer Touch
An unfinished cardboard box looks like, well, an unfinished cardboard box. But with a budget of $1.25 to $5.00, we can camouflage our rugged construction so effectively that your friends will ask which boutique you bought it from. This is where we elevate the project from a simple craft to a stunning piece of nursery decor.
Option 1: The Faux-Wood Masterpiece (Highly Recommended)
The most authentic way to mimic a $40 Montessori toy is to use wood-grain contact paper. You can find rolls of this at the Dollar Tree, Walmart, or hardware stores for incredibly cheap.
- Measure and Cut: Unroll the contact paper and cut panels that are slightly larger (about 1 inch extra on all sides) than the exterior faces of your box.
- The Peel and Stick: Start with the top panel. Peel back a small section of the backing paper, align it over the drop hole, and slowly smooth it down using a credit card to push out any air bubbles.
- Wrapping the Edges: Use your utility knife to cut a slit in the contact paper over the center of the drop hole. Cut radial lines outward like a pie, then fold these ‘pizza slices’ of contact paper down into the hole, adhering them to the inside edge. This creates a flawless, seamless rim. Wrap the excess paper around the outside corners of the box, just like wrapping a premium gift.
- The Inside Contrast: For a striking look, leave the inside of the tray and the ramp as natural cardboard, or line them with a solid, high-contrast color like matte black or soft sage green.
Option 2: The High-Contrast Infant Vision Scheme
Babies, especially those under 6 months, respond incredibly well to high-contrast black and white patterns. You can use non-toxic acrylic paint and painter’s tape to create a striking, modern look.
- Prime the Box: Cardboard absorbs paint quickly. Apply a base coat of white gesso or a primer/paint combo. Let it dry completely.
- Tape the Design: Use painter’s tape to create bold, geometric stripes or chevron patterns across the box.
- Paint and Peel: Paint over the taped areas with black non-toxic acrylic paint. While the paint is still slightly tacky, carefully peel away the tape to reveal razor-sharp, professional lines.
| Aesthetic Style | Materials Needed | Estimated Cost | Vibe |
|---|---|---|---|
| Rustic Faux-Wood | 1 Roll Wood-Grain Contact Paper | $1.25 – $3.00 | Classic Montessori, Natural, Calming |
| Modern Geometric | Painter’s Tape, Non-Toxic Black & White Paint | $2.00 – $5.00 | Contemporary, High-Contrast, Stimulating |
| Textile Wrapped | Scrap Fabric, Mod Podge or Spray Adhesive | $0.00 (from stash) | Cozy, Soft-Touch, Upcycled Bohemian |
Whichever finish you choose, ensure that all materials are fully adhered and completely dry before handing the toy over to your little one. The final result will be a heavy-duty, visually stunning piece of educational equipment that completely belies its humble, zero-budget origins.
Playtime Guide: Introducing the Box to Your Baby
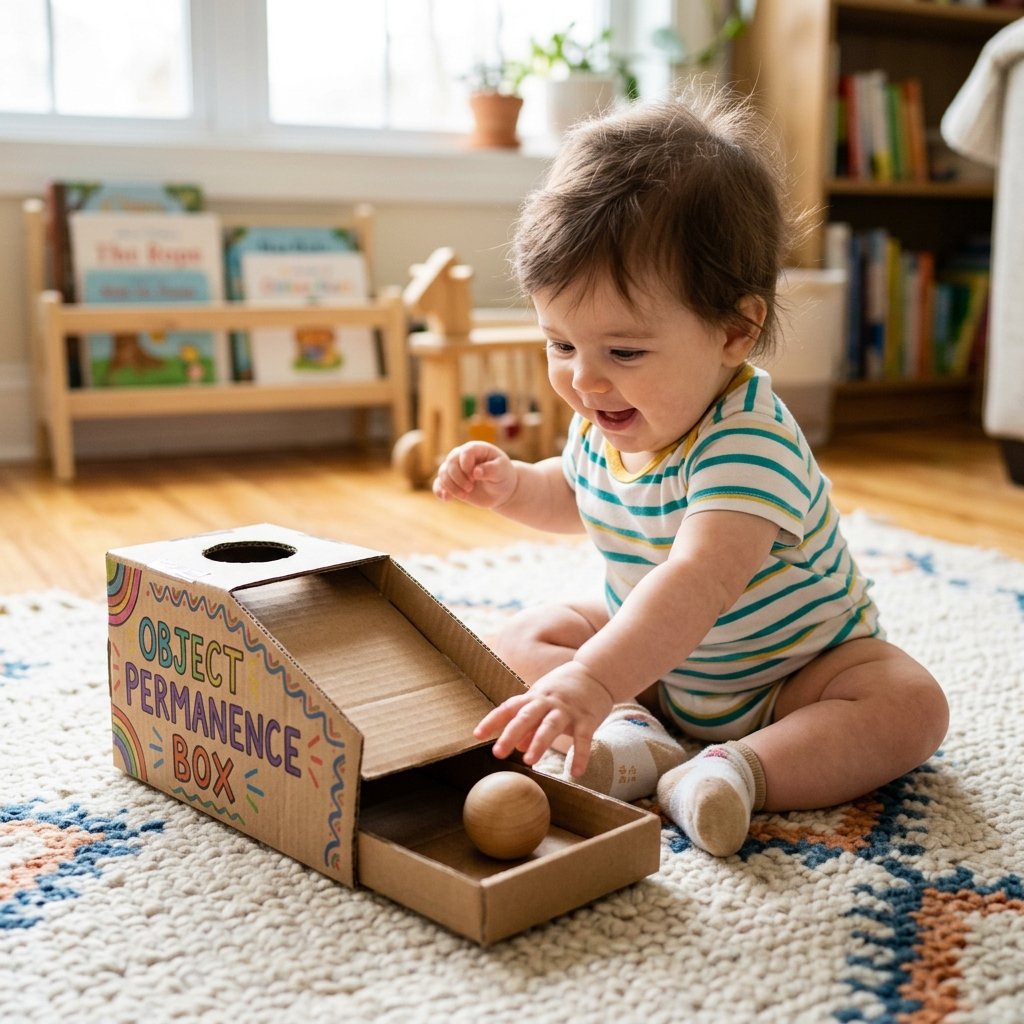
Maximizing the Educational Value
You have measured, cut, glued, and styled. The box is a masterpiece. But the real magic happens when your baby interacts with it. Introducing a new developmental toy requires a bit of strategy to ensure they get the maximum cognitive benefit without getting frustrated.
The Step-by-Step Introduction
- The Demonstration Phase: Sit on the floor with your baby. Place the box in front of them. Do not force them to touch it immediately. Take the wooden ball and say, ‘Watch the ball.’ Drop the ball into the hole. Let it roll into the tray. Exaggerate your facial expression with a big smile and say, ‘There it is!’ Repeat this 3 to 4 times.
- The Assisted Play Phase: Hand the ball to your baby. Guide their hand over the hole and help them release it. When the ball rolls out, clap and offer positive reinforcement. This builds the initial connection of cause and effect.
- The Independent Discovery Phase: Step back. Let your baby explore the box. They might try to put the ball in the tray first, or they might try to look down the hole. Let them experiment. The struggle of trying to align the ball with the hole is where the actual brain development occurs.
Frugal Parenting Mantra: If your baby ignores the box on day one, do not get discouraged. Brain development is not linear. Put the box away and bring it out a week later. A toy that costs $0 carries zero guilt if they don’t love it immediately!
Troubleshooting and Extending the Toy’s Life
As your baby masters the basic drop, you can upgrade the difficulty to keep the toy relevant for months to come, further stretching your zero-budget investment.
- Texture Swaps: Instead of a smooth wooden ball, introduce a knobby massage ball, a soft wool felt ball, or a crinkle ball. This adds a layer of sensory exploration to the object permanence lesson.
- The Fabric Cover: Once they master the box, drape a small washcloth over the front tray. Now, when the ball drops, it is hidden completely until they lift the cloth. This is ‘Advanced Object Permanence’.
- Color Sorting: If you build a slightly larger box, you can cut two holes and paint the rims different colors. Hand them a red ball and a blue ball, encouraging them to match the ball to the correct hole.
By building this box yourself, you haven’t just saved $40. You have actively participated in your child’s educational journey, crafting a tool with your own hands that directly fosters their growth. That is the true essence of resourceful, practical parenting.
Conclusion
The Ultimate Return on Investment
Let us review the scoreboard. You took a piece of trash destined for the recycling bin. You spent an hour of focused, satisfying craft time using tools you already owned. You engineered a structurally sound, aesthetically pleasing, and highly educational toy. And you kept $40 firmly in your bank account. That is a massive win for any budget-savvy parent.
The DIY Cardboard Object Permanence Box is more than just a frugal hack; it is a testament to the idea that providing the best for your child does not require an endless budget. It requires love, a little bit of ingenuity, and the willingness to look at an empty shipping box and see the potential for magic. Every time you hear the satisfying rumble of that ball rolling down the cardboard ramp, and every time you see your baby’s face light up with discovery, you will be reminded of your own resourcefulness.
So, the next time you find yourself scrolling through an overpriced baby boutique, remember this project. Take a deep breath, close the tab, and go see what you can build from the recycling bin. Happy crafting, and happy saving!

Makenzie is the founder and lead writer at MoneyHackTips.com — a personal finance blog dedicated to delivering street-smart financial wisdom for real people on real budgets. With 300+ published articles covering everything from debt management to investing fundamentals, Makenzie’s mission is to make every dollar work harder. When not writing about money hacks, Makenzie is testing frugal living strategies, optimizing side hustles, and helping readers build financial freedom from scratch.