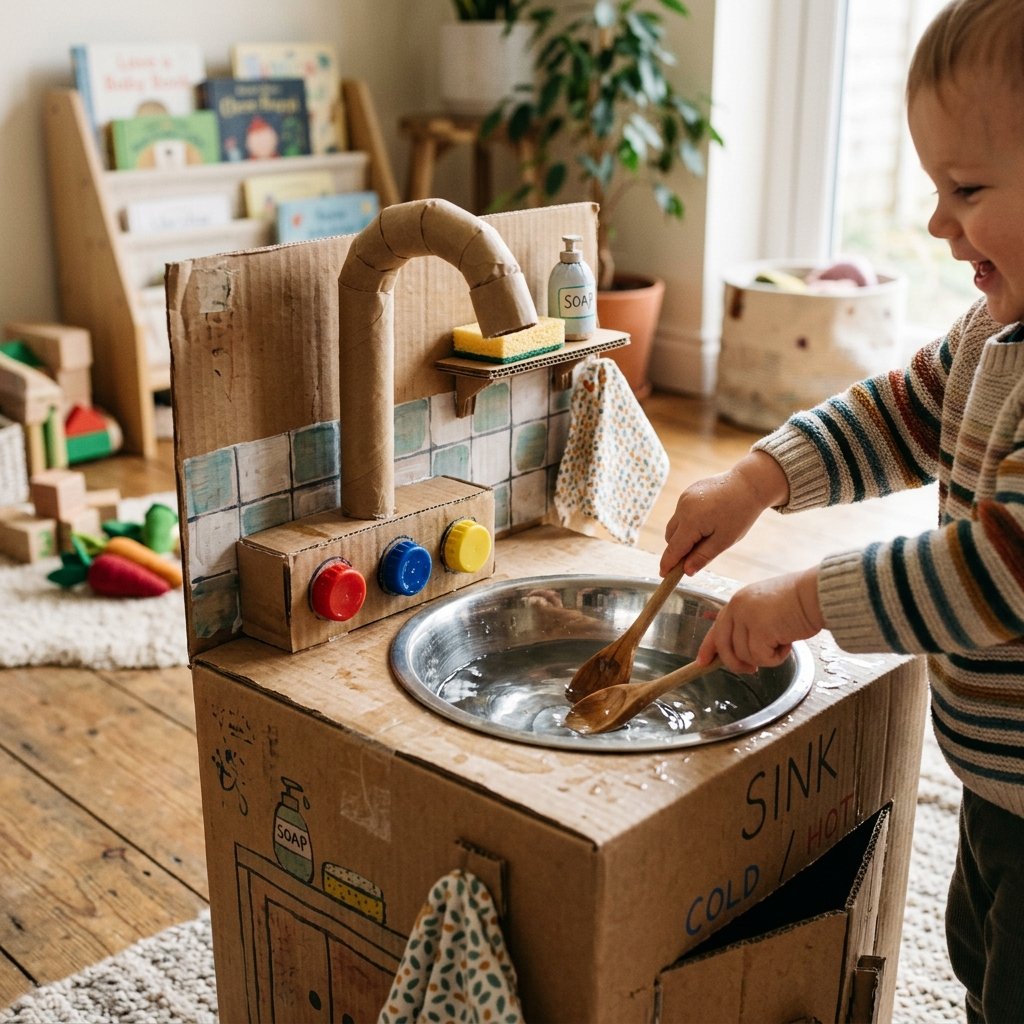

Let us face a universal truth of parenting: you can spend a small fortune on a massive, bells-and-whistles plastic play kitchen, and your toddler will still spend more time playing with the cardboard box it came in. It is a tale as old as time, but as frugal DIYers and resourceful parents, we can use this phenomenon to our advantage. Why fight the magnetic pull of the mighty cardboard box when you can elevate it? Welcome to the ultimate trash-to-treasure masterclass where we turn standard shipping boxes into an elegant, rugged, and infinitely entertaining DIY Cardboard Kitchen Sink Toy.
This project is the epitome of budget-savvy craftsmanship. We are talking about taking materials you were going to throw into the recycling bin and engineering them into a functional sensory play station that will keep little hands busy for hours. Whether you are a handy dad looking for a weekend workshop project with the kids, or a crafty mom wanting to create a custom Montessori-inspired play space without the boutique price tag, this guide is your blueprint.
We will dive deep into structural reinforcement techniques, aesthetic upgrades using dollar-store contact paper, and the mechanical illusions that make cardboard knobs actually turn. Grab your utility knife, fire up the hot glue gun, and let us build something incredible out of absolutely nothing.
The Frugal Upcycler’s Mantra: Why buy for $150 what you can build for $0 with a little ingenuity, a sharp blade, and a weekend afternoon?
The Anatomy of a Cardboard Masterpiece: Planning and Sourcing
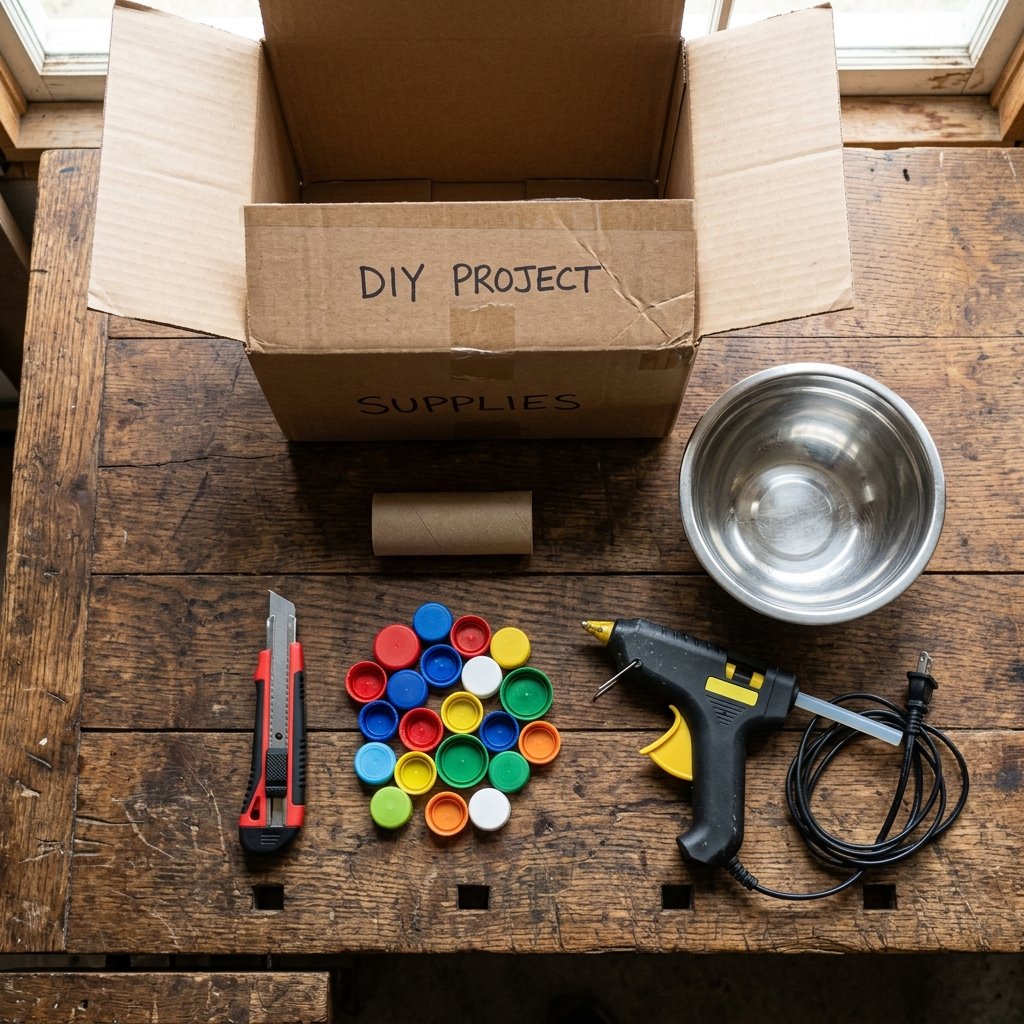
Before we make a single cut, we need to understand our medium. Cardboard is the unsung hero of the crafting world—it is structural, forgiving, and entirely free. But not all cardboard is created equal. For a toddler toy that needs to withstand aggressive dish-washing and enthusiastic button-mashing, you need the right materials.
Hunting for the Perfect Boxes
Your ideal base is a double-walled corrugated box. Think appliance boxes, heavy-duty moving boxes, or those pristine diaper boxes you have been hoarding in the garage. You will need one large box for the main cabinet/base, and several extra flat pieces for reinforcing the countertop and crafting the fixtures.
- The Cabinet Base: A medium-to-large box (roughly 18 inches tall by 24 inches wide is ideal for toddler height).
- The Basin: A cheap plastic tub from the Dollar Tree or a lightweight stainless steel mixing bowl you already own.
- The Faucet: An empty paper towel roll or wrapping paper tube.
- The Knobs: Recycled milk jug caps or water bottle caps.
- Hardware: Brass paper fasteners (brads) to allow the knobs to spin.
Let us take a look at why this DIY approach completely obliterates the store-bought competition when it comes to value and practicality.
| Feature / Metric | Store-Bought Plastic Sink | Our Zero-Budget DIY Cardboard Sink |
|---|---|---|
| Estimated Cost | $45 – $150 | $0 – $5 (using household recycling) |
| Assembly Time | 1 – 2 hours (frustrating instructions) | 1 – 2 hours (creative, fun crafting) |
| Customizability | Zero (stuck with factory colors) | Infinite (paint, faux marble, custom height) |
| End of Life | Sits in a landfill for centuries | 100% Recyclable or compostable |
Safety First, Handy Parents: When cutting heavy-duty corrugated cardboard, always use a fresh, sharp utility knife. A dull blade requires more force and is more likely to slip. Keep all blades out of reach of little hands, and ensure any hot glue has completely cooled before letting your toddler inspect your craftsmanship.
Building the Cabinet Base: Structural Integrity for Heavy Play
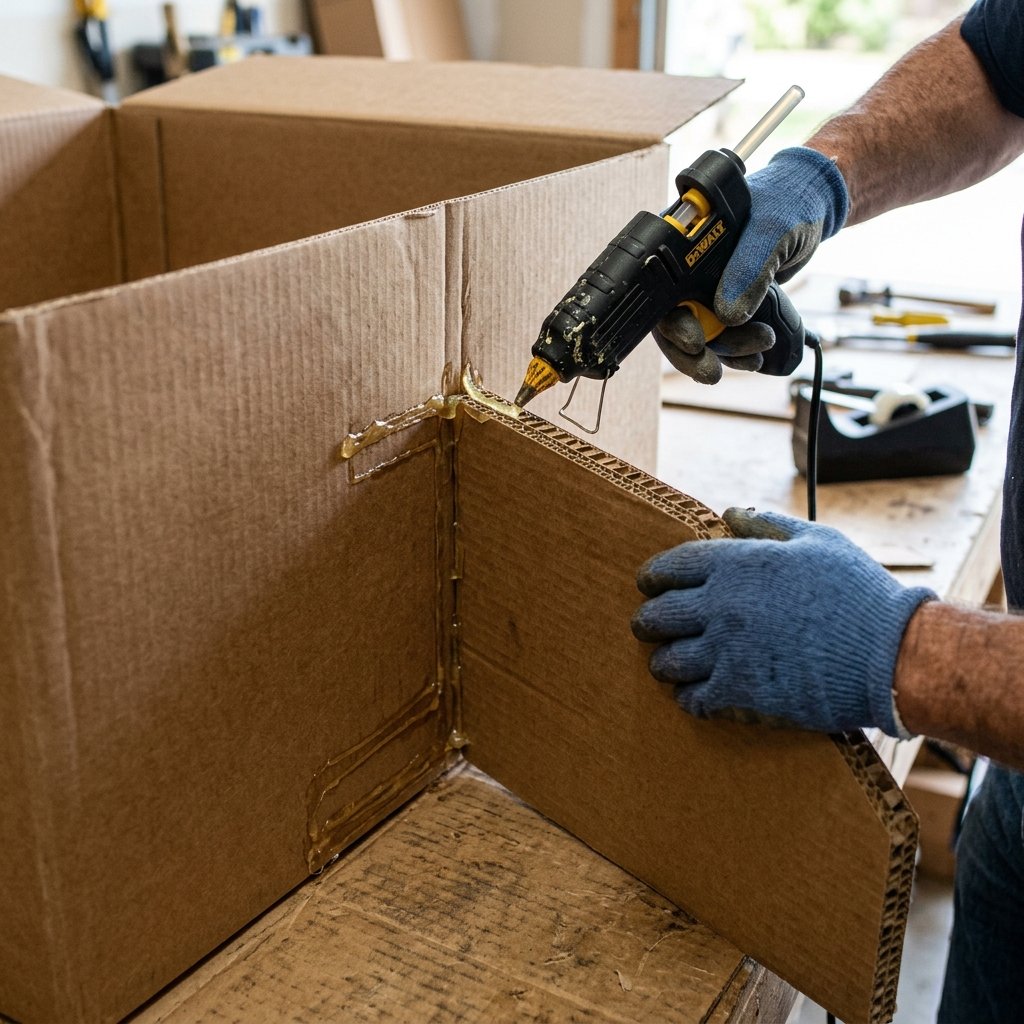
Toddlers are not exactly known for their gentle touch. If we are going to build a cardboard sink, it needs to be rugged. The secret to a long-lasting cardboard toy lies in how you brace the interior.
Step-by-Step Base Construction
- Seal the Bottom: Take your main box and heavily tape the bottom flaps shut. Use wide packing tape or duct tape. For an extra masculine, industrial look, use silver duct tape along all the bottom edges to protect against floor scuffs.
- Reinforce the Walls: Cut spare pieces of cardboard to match the inner dimensions of the box’s walls. Hot glue these panels to the inside walls. This double-layering technique creates a surprisingly rigid structure that won’t cave in when your little one leans on it.
- Create the Countertop: Fold the top flaps of the box inward and glue them flat against the reinforced walls, leaving the top open. Now, cut a pristine, flat piece of heavy-duty cardboard that is exactly 1 inch wider and longer than the top opening. This will be your overhanging countertop.
- Bracing the Counter: Before attaching the countertop, cut two long strips of cardboard and glue them vertically inside the box, spanning from the floor to the top edge, right in the middle. This acts as a load-bearing pillar so the sink does not sag.
By taking these extra 15 minutes to reinforce the base, you upgrade your project from a flimsy weekend craft to a durable piece of play furniture that can withstand months of heavy sensory play.
Cutting the Sink Basin and Installing the Countertop
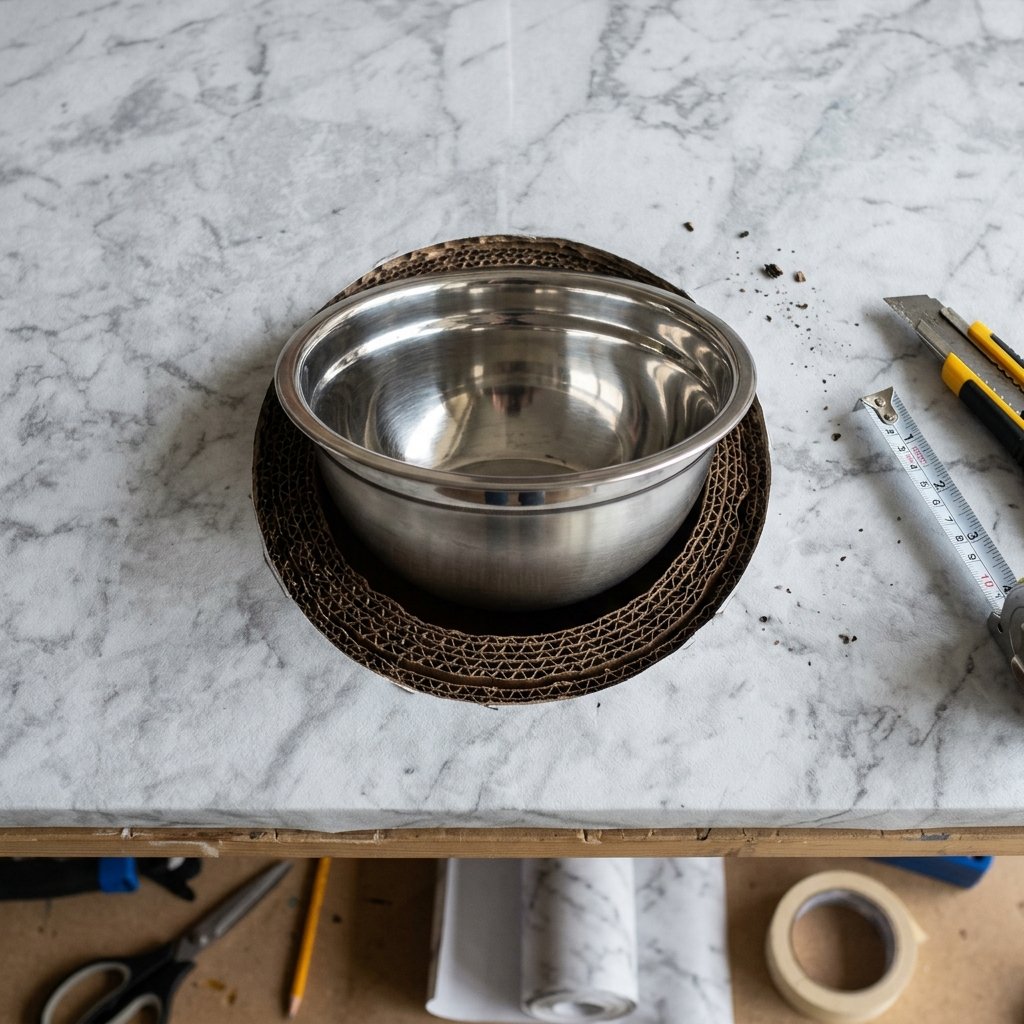
Now comes the satisfying part—creating the actual sink. This is where your chosen basin (the stainless steel bowl or plastic tub) comes into play. We want a drop-in sink look, just like a high-end kitchen island.
The Drop-In Sink Technique
- Trace the Basin: Place your bowl upside down on your custom countertop piece. Position it slightly off-center to leave room for a drying rack or soap dispenser later. Trace the circumference with a pencil.
- The Pro-Cut: Do not cut exactly on the line! If you do, the bowl will fall straight through. Instead, draw a second circle about 1/2 inch inside your traced line. Cut along this inner circle using your utility knife.
- Test the Fit: Drop your bowl into the hole. The lip of the bowl should catch perfectly on the cardboard edge, creating a seamless, sturdy basin.
- Attach the Countertop: Run a generous, thick bead of hot glue along the top edges of your reinforced base and your center support pillar. Carefully press the countertop down. Hold it firmly for 60 seconds while the glue sets.
If you want to get truly fancy on a dime, this is the moment to wrap your countertop in faux-marble contact paper from the Dollar Tree before dropping the basin in. For just $1.25, you transform brown corrugated cardboard into a luxurious, wipeable surface that mimics a custom granite installation.
Engineering the Faucet and Spinning Knobs
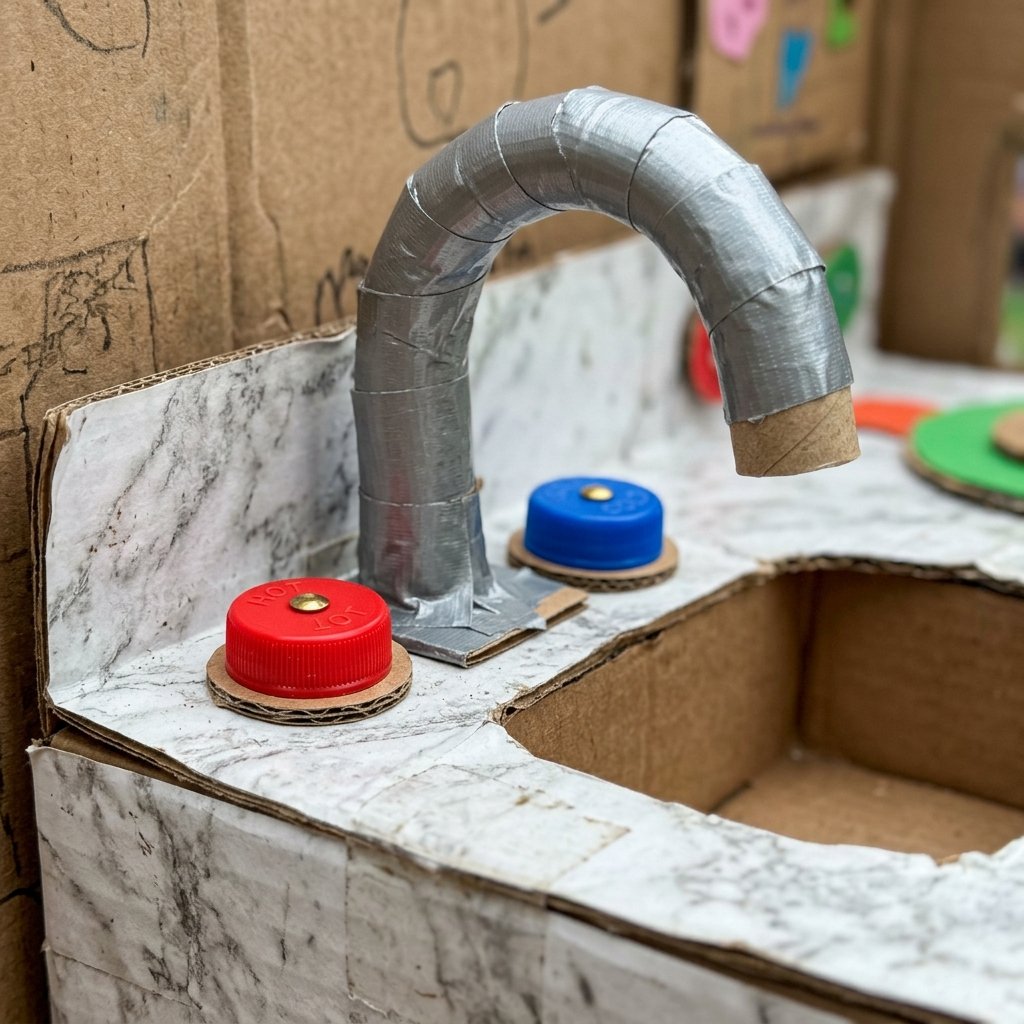
A play sink is nothing without fixtures. Here is where your resourceful creativity shines. We are going to build a high-arc faucet and hot/cold knobs that actually spin—a mechanical detail that toddlers absolutely adore.
Crafting the High-Arc Faucet
Take an empty paper towel tube. To create the iconic curve of a kitchen faucet, make three small, angled slits (about halfway through the tube) near one end, spaced 1 inch apart. Gently bend the tube at these slits; the cardboard will overlap itself, creating a curve. Secure the curve with hot glue and wrap it tightly in aluminum tape or silver duct tape to give it a metallic, stainless-steel finish.
Installing the Spinning Knobs
Static knobs are boring. Let us make them interactive using items from your recycling bin.
- Prep the Knobs: Take two large plastic bottle caps (milk jug caps work perfectly). Poke a small hole directly in the center of each cap using an awl or the tip of your utility knife.
- Prep the Counter: Poke two corresponding holes in the cardboard countertop, just behind the sink basin, spaced about 4 inches apart.
- The Magic Mechanism: Take a brass paper fastener (brad). Push it through the hole in the bottle cap, then push it through the hole in the countertop. Reach underneath the countertop and spread the brass legs flat to secure it.
- Test the Spin: Give the caps a flick. They should spin freely! You can paint one red for hot and one blue for cold to add educational value to the play.
Finally, hot glue your curved faucet directly between the two spinning knobs. Hold it steady until the glue is completely cool to ensure it stands tall and proud.
Aesthetic Upgrades: Painting, Sealing, and Styling
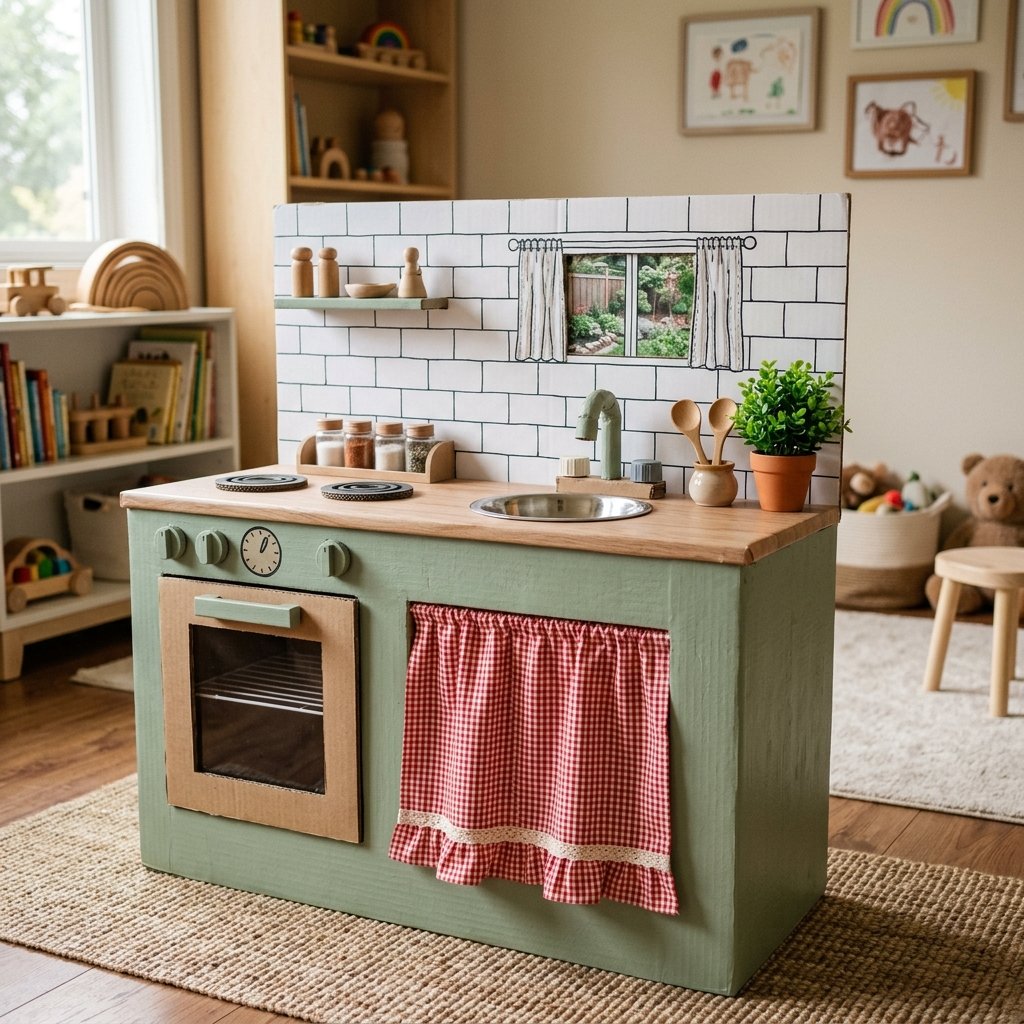
You have built a functionally brilliant toy, but let us elevate it to heirloom status. The beauty of cardboard is that it takes paint and adhesives exceptionally well. Whether you want a rustic farmhouse vibe or a sleek modern look, a few budget-savvy touches will get you there.
Painting and Waterproofing
If you prefer a painted look over contact paper, use acrylic craft paint. However, cardboard can warp if it gets too wet, so use a primer first or apply the paint in thin, even coats. Once dry, seal the entire surface—especially the countertop—with a clear, non-toxic acrylic sealer or Mod Podge.
The Frugal Decorator’s Tip: Sealing the cardboard is crucial if you plan to let your toddler use actual water or wet materials in the sink. While cardboard will never be 100% waterproof, a good coat of Mod Podge or clear packing tape over high-traffic areas will drastically extend the lifespan of the toy against inevitable splashes.
Adding Storage and Details
- The Cabinet Skirt: Take a scrap of fabric or an old dish towel. Cut it to the width of the sink base. Use a bead of hot glue along the front edge of the countertop to attach the fabric, creating a cute, rustic skirt that hides the open space below.
- Under-Sink Storage: Cut an opening in the front of the base box to create a cabinet door. You can store extra play dishes, wooden spoons, and sensory bin fillers inside.
- The Backsplash: Glue a flat piece of cardboard to the back of the countertop, standing vertically. Draw subway tiles on it using a black Sharpie and a ruler for an ultra-trendy, high-end kitchen aesthetic.
Sensory Play Extensions: How to Use Your DIY Sink
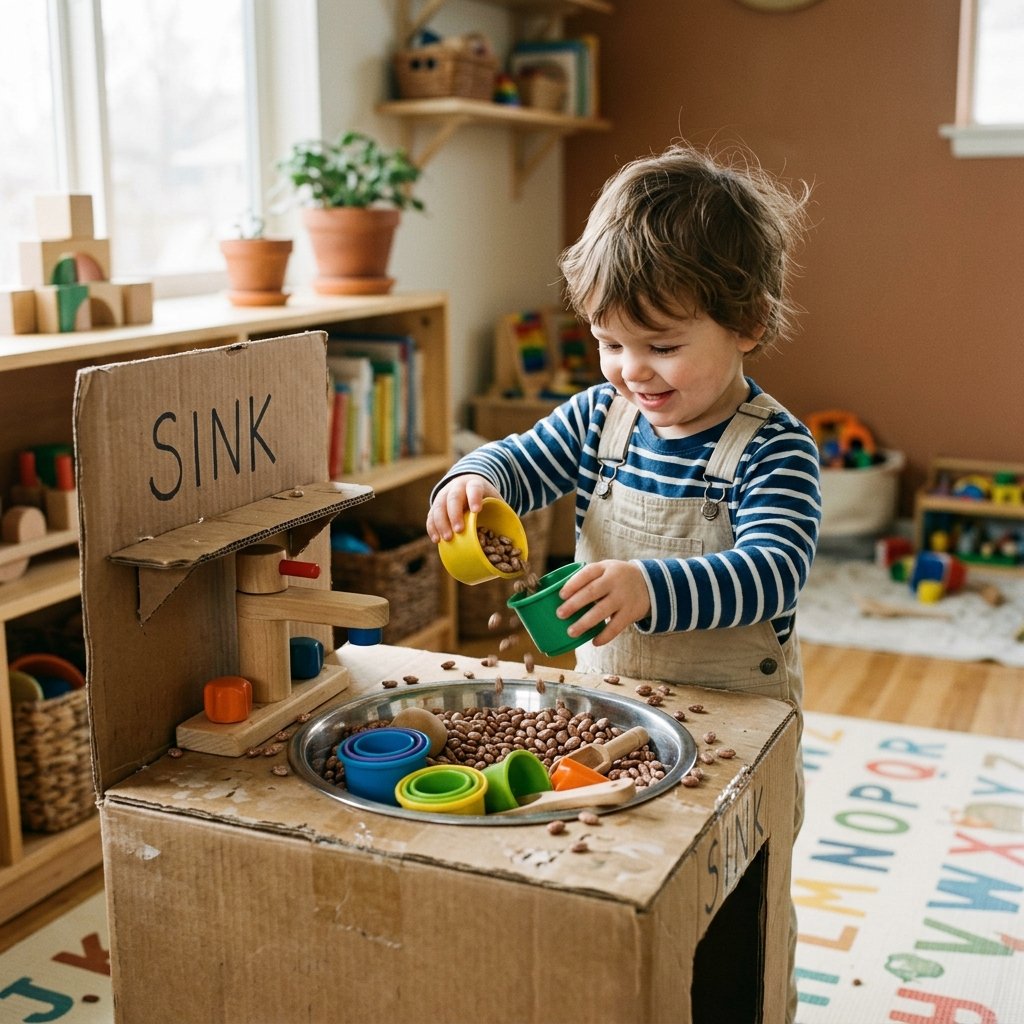
The construction is complete, the glue is dry, and your masterpiece is ready for its debut. But how do you maximize the play value? This DIY cardboard kitchen sink is essentially a versatile sensory table disguised as furniture.
Dry Sensory Play (Low Mess, High Engagement)
For everyday indoor play, keep the liquids away and focus on tactile dry materials. Fill the stainless steel basin with:
- Dried Beans or Rice: Provide measuring cups, funnels, and spoons. Toddlers will spend hours scooping, pouring, and transferring the materials.
- Pom-Poms and Tongs: Excellent for fine motor skill development. Have them ‘wash’ the pom-poms with a dry sponge.
- Oatmeal and Hidden Treasures: Hide small plastic toys or puzzle pieces in a bed of dry oats and let your toddler excavate them.
Wet Sensory Play (Supervised and Prep-Heavy)
If you are feeling brave, or if you take the sink out to the patio, you can introduce real water. Because you used a real bowl or plastic tub, the water stays contained.
| Sensory Material | Mess Level | Skill Developed |
|---|---|---|
| Dry Pasta / Beans | Low (Easy to sweep) | Scooping, volume concepts, auditory sensory |
| Soapy Water & Sponges | High (Requires towels) | Practical life skills, temperature, cause & effect |
| Kinetic Sand | Medium | Molding, fine motor strength, tactile feedback |
| Shaving Cream | High (Wipe down required) | Sensory exploration, pre-writing skills (drawing in foam) |
To do a wet washing station safely: place a large beach towel under the cardboard sink. Fill the bowl with just 1 inch of water and a drop of tear-free baby shampoo. Give them a sponge and plastic play dishes. They will scrub those dishes with the focus of a Michelin-star dishwasher. If the cardboard gets a little splashed, simply wipe it down immediately—your Mod Podge or contact paper layer will protect it!
Conclusion
There you have it—a masterclass in transforming the humble cardboard box into a functional, durable, and beautiful play kitchen sink. By applying a little rugged craftsmanship, some clever upcycling tricks, and a dash of budget-savvy creativity, you have bypassed the expensive toy aisle and built something truly special with your own two hands.
Not only did you save money, but you also created an eco-friendly toy that can be endlessly customized, repaired with a simple strip of tape, and eventually recycled when it has served its purpose. Your toddler gets hours of sensory engagement and practical life play, and you get the immense satisfaction of knowing you built it from scratch. So save those shipping boxes, heat up that glue gun, and watch your child’s imagination run wild at their brand new, zero-budget kitchen sink. Happy crafting, and keep upcycling!

Makenzie is the founder and lead writer at MoneyHackTips.com — a personal finance blog dedicated to delivering street-smart financial wisdom for real people on real budgets. With 300+ published articles covering everything from debt management to investing fundamentals, Makenzie’s mission is to make every dollar work harder. When not writing about money hacks, Makenzie is testing frugal living strategies, optimizing side hustles, and helping readers build financial freedom from scratch.