
The Magic of the Humble Box
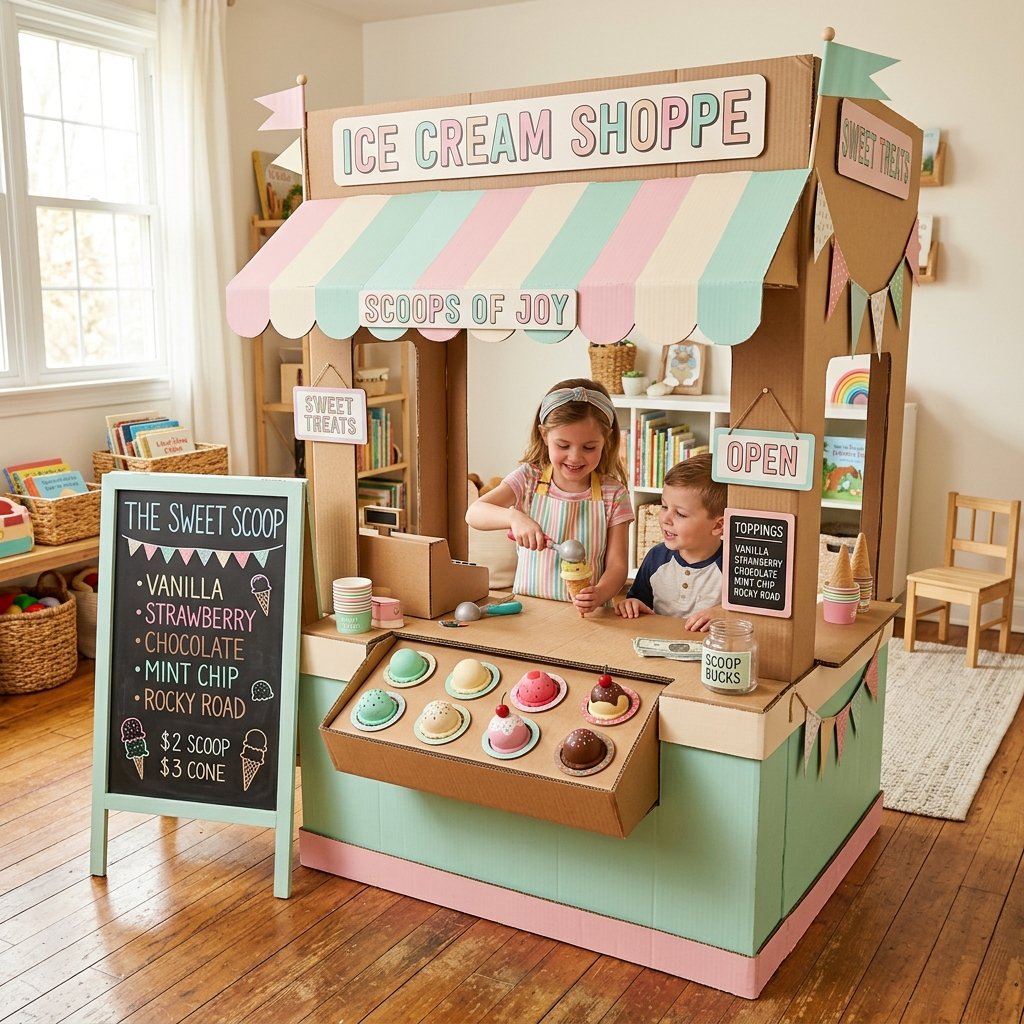
In a world of flashing plastic toys and $200 play sets that take up half the living room, there is a quiet, rugged power in the cardboard box. As a frugal DIYer, you don’t see trash; you see raw lumber. You see a blank canvas for imagination. Building a DIY Cardboard Ice Cream Shop isn’t just about saving money—though you will save a fortune—it’s about engineering a bespoke experience for your children that teaches them the value of creativity and resourcefulness. This project is a masterclass in ‘trash-to-treasure’ philosophy, combining structural integrity with whimsical design. We are going to take those Amazon boxes piling up in the garage and turn them into a 5-star play destination that will keep the little ones busy for hours on end. Grab your box cutter and your hot glue gun; we’re going to build something legendary.
The Master Architect’s Blueprint: Sourcing and Prep
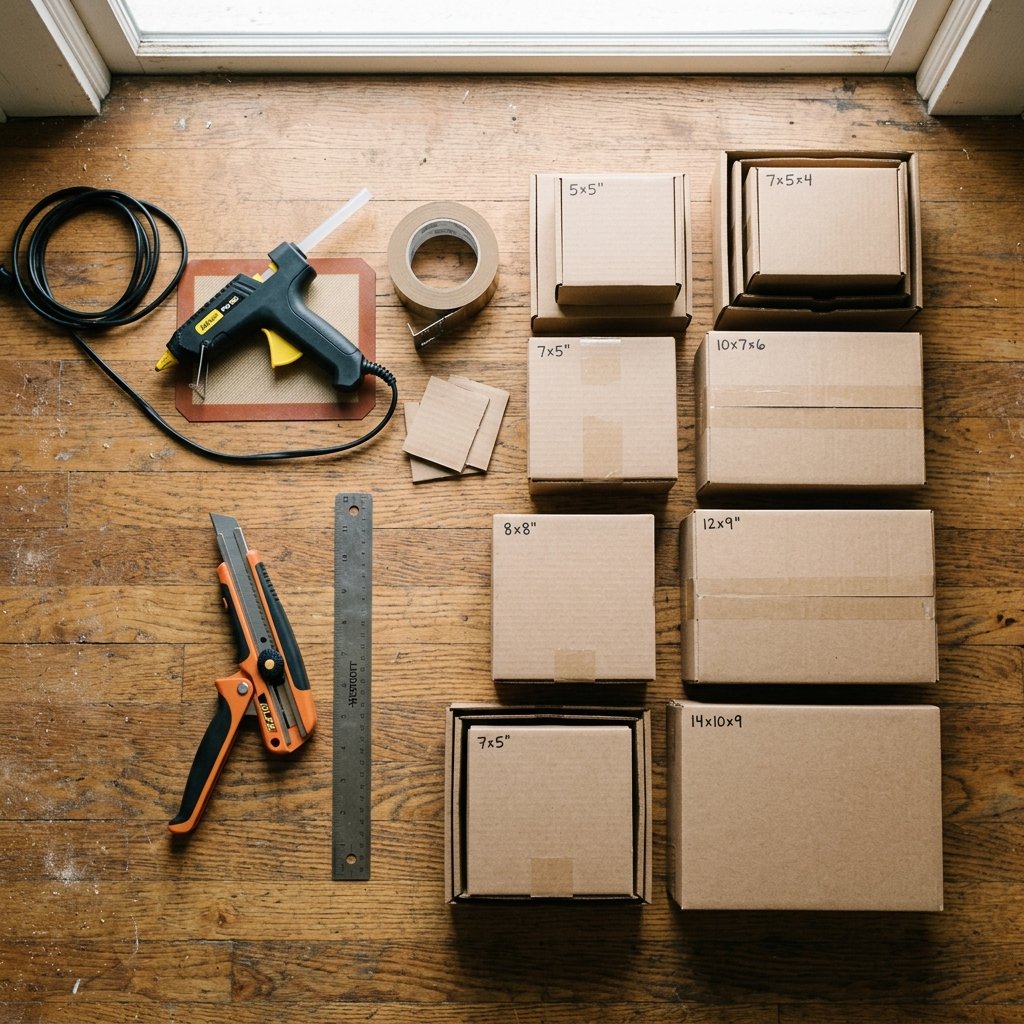
Before we start gluing, we need to talk about material quality. Not all cardboard is created equal. For a build that survives the ‘enthusiasm’ of a toddler, you need double-walled corrugated cardboard. This is the heavy-duty stuff usually found in appliance boxes or shipping containers for furniture. If you don’t have any, a quick trip to the back of a local appliance store can net you a goldmine of 100% free building materials.
Materials Needed & Estimated Cost
| Item | Source | Estimated Cost |
|---|---|---|
| Large Appliance Box (Base) | Recycling/Appliance Store | $0.00 |
| Medium Boxes (Counter/Shelving) | Shipping Deliveries | $0.00 |
| Heavy-Duty Hot Glue (20pk) | Dollar Tree / Craft Store | $1.25 – $5.00 |
| Box Cutter & Extra Blades | Toolbox | $0.00 |
| Leftover House Paint / Acrylics | Garage Scraps | $0.00 |
| Duct Tape or Packing Tape | Pantry/Junk Drawer | $0.00 |
| TOTAL PROJECT COST | – | $1.25 – $5.00 |
Safety First: Always use a sharp blade. A dull blade requires more force, which leads to slips. Change your box cutter blades every 10-15 cuts to maintain precision and safety.
Start by flattening your boxes and inspecting them for structural weaknesses. We want clean, dry pieces. Avoid cardboard that has been damp or has excessive oil stains. We are aiming for a rugged, professional finish, so the foundation must be solid.
Structural Engineering: Building the Frame
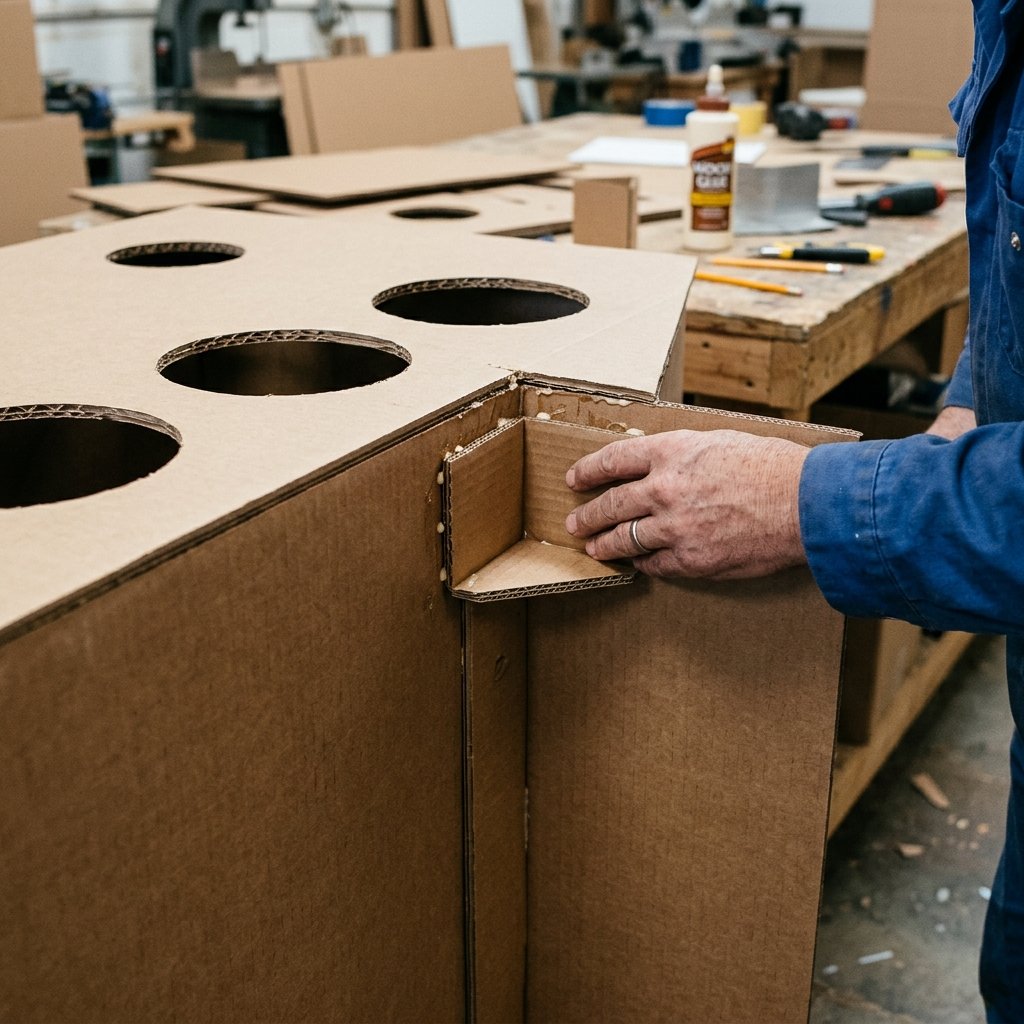
Now, we move into the ‘construction’ phase. We aren’t just taping boxes together; we are building a structure. The shop needs three main components: the Main Counter, the Display Freezer, and the Overhead Awning.
Step-by-Step Framing
- The Counter: Take your largest box and cut it to a height of 22-26 inches (standard toddler height). To ensure it doesn’t buckle, glue ‘L-shaped’ cardboard pillars into the four interior corners. This simple trick increases the load-bearing capacity by 300%.
- The Freezer Cutout: On the top surface of the counter, use a bowl to trace 4-6 circles. Carefully cut these out. These will hold our ‘ice cream tubs’ (upcycled yogurt containers).
- The Awning Support: Use two long, sturdy cardboard tubes (from wrapping paper or heavy-duty shipping) and hot glue them to the back corners of the counter. These will support our fabric or cardboard roof.
For the ‘glass’ of the freezer, don’t buy expensive plexiglass. Use the clear plastic film from a large toy package or a $1.00 clear shower curtain liner. It gives that high-end look without the high-end price tag.
The Gastronomy of Cardboard: Crafting Scoops & Cones
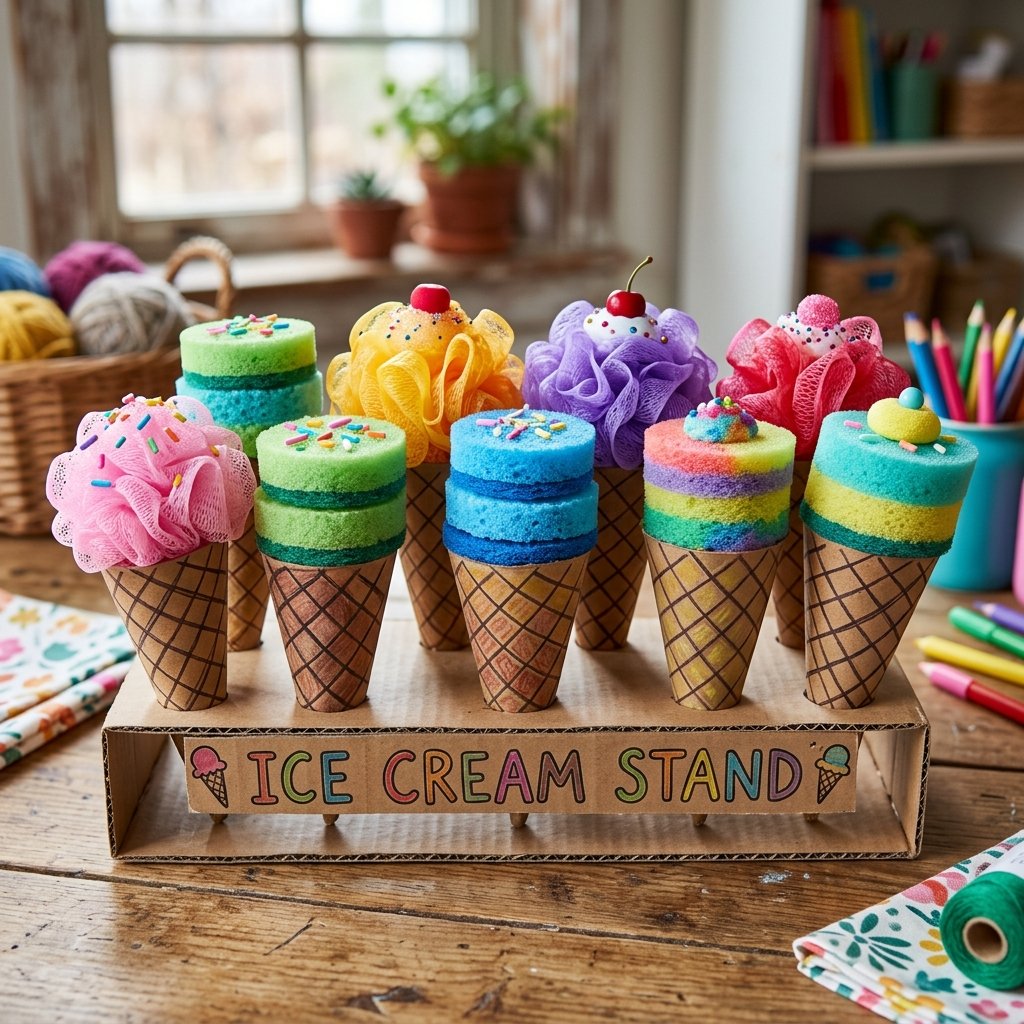
A shop is nothing without its inventory. This is where we get crafty. We want ‘ice cream’ that feels tactile and looks delicious. Forget the expensive plastic food sets; we are making bespoke artisanal scoops.
Upcycled Flavor Menu
- The Cones: Roll squares of thin cardboard (cereal boxes work best) into a cone shape. Use a brown marker to draw a waffle pattern. Total cost: $0.00.
- The Scoops: Use old sponges cut into spheres, or ball up colorful socks that have lost their mates. For a more ‘pro’ look, use Dollar Tree loofahs. Take them apart, bunch the mesh into balls, and secure with a zip tie. They look exactly like gourmet sorbet!
- The Toppings: Use hole-punch scraps as ‘sprinkles’ and brown yarn as ‘chocolate sauce.’
| Store-Bought Play Food | DIY Upcycled Version | Savings |
|---|---|---|
| Plastic Ice Cream Set ($25) | Cardboard & Sponges | $25.00 |
| Plastic Cones ($10) | Cereal Box Cones | $10.00 |
| Play Money ($8) | Money Origami / Hand-Drawn | $8.00 |
The tactile nature of these handmade items encourages more sensory play than hard plastic ever could. Plus, if a ‘scoop’ gets lost, you can make a replacement in under 60 seconds.
Visual Merchandising: Painting & Branding
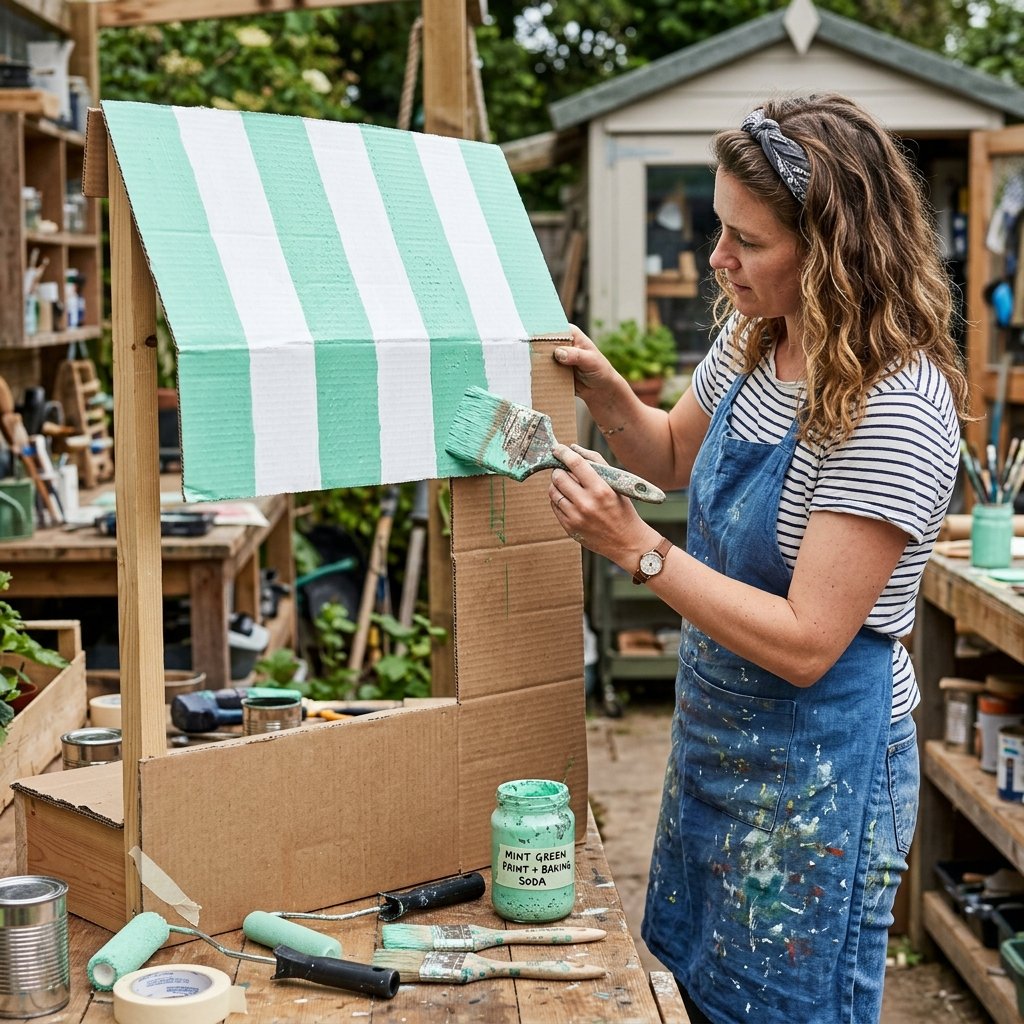
This is where the magic happens. We want to move away from the ‘brown box’ look and into a vintage boutique aesthetic. Using leftover paint from your last home renovation is the ultimate budget-savvy move.
The ‘Baking Soda’ Paint Trick
If you want your cardboard to look like expensive matte ceramic or wood, mix one tablespoon of baking soda into a cup of acrylic paint. This creates a thick, textured finish that covers cardboard seams perfectly and adds a rugged, high-end feel.
- The Palette: Stick to 3 colors for a professional look. A ‘Mint Green,’ ‘Creamy White,’ and ‘Dusty Rose’ create an instant 1950s parlor vibe.
- The Signage: Use a piece of cardboard painted with black chalkboard paint (or just black acrylic). Use a white chalk marker to write the ‘Flavor of the Day.’
- The Awning: If you don’t have scrap fabric, paint alternating stripes of white and your primary color directly onto a flat sheet of cardboard. Score the cardboard every 2 inches to create a ‘scalloped’ edge that hangs down.
Pro Tip: To prevent the cardboard from warping while painting, apply thin coats rather than one heavy coat. If it starts to curl, weigh the edges down with heavy books until dry.
The Economy of Play: Money Origami & Tips
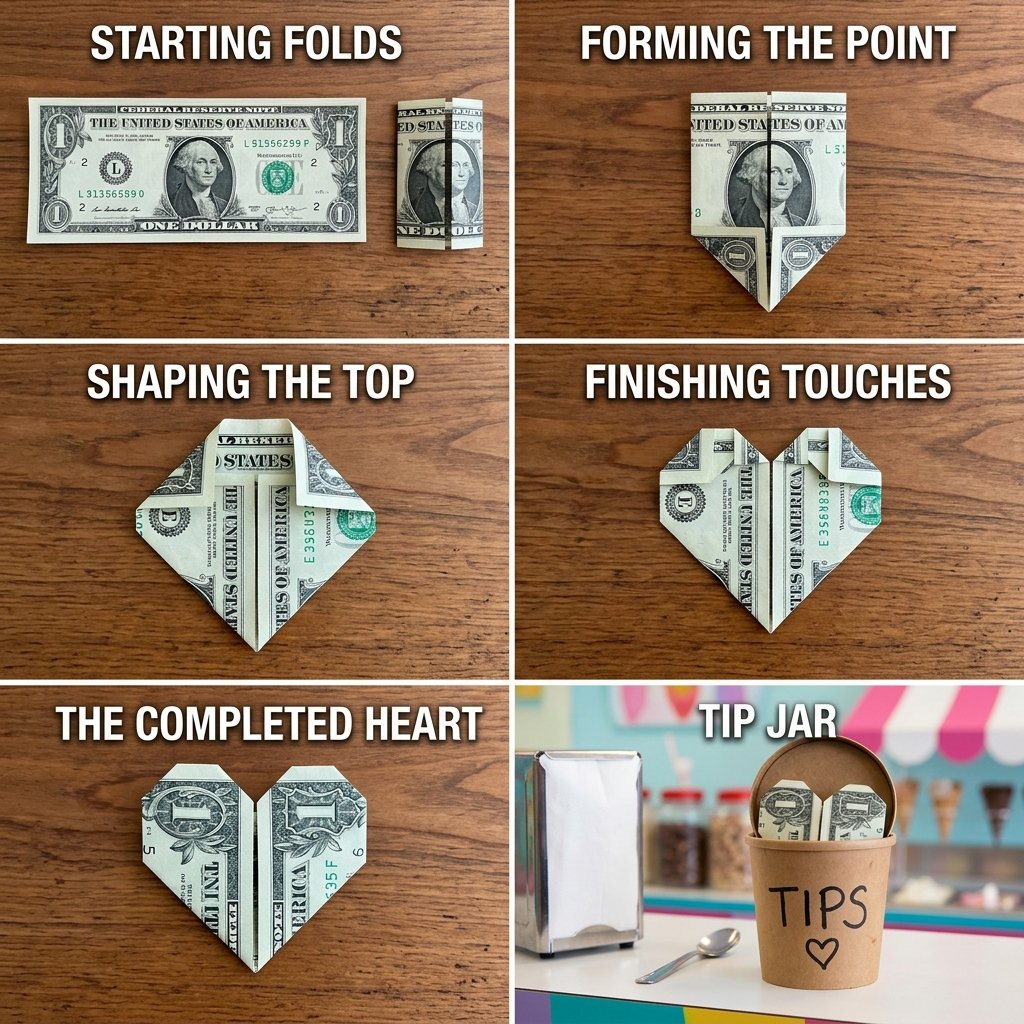
To make the play experience educational, we need a currency system. As a master of money origami, I recommend creating a few ‘special’ bills for the shop’s tip jar. This adds a layer of masculine-elegant detail that kids find fascinating.
Folding the ‘Heart’ Tip
- Take a crisp play-money bill (or a real $1 bill for a ‘Grand Opening’ gift).
- Fold the bill in half lengthwise, then unfold to create a center crease.
- Fold the bottom edge up to meet the center crease.
- Turn the bill over. Fold the bottom corners up to the center line to form a point.
- Turn the bill back over. Fold the top edge down about 1/2 inch.
- Fold the top corners down to create the rounded top of the heart.
- Tuck the flaps into the center pocket to secure.
Presenting these ‘hearts’ as tips for the ‘scooper’ adds a delightful, crafty touch to the game. It teaches children about gratitude and the value of service while they play.
Conclusion
A Legacy of Imagination
Building this DIY Cardboard Ice Cream Shop is more than just a weekend project; it is an investment in your child’s creative development. By using upcycled materials and your own two hands, you’ve created a toy that is sturdier, more beautiful, and infinitely more meaningful than anything found on a big-box store shelf. You’ve saved over $150, kept cardboard out of the landfill, and provided a backdrop for years of memories. Remember, the most magical toys aren’t bought—they are built. Now, go grab a scoop of that ‘sponge’ strawberry and enjoy the fruits of your labor. Happy crafting!

Makenzie is the founder and lead writer at MoneyHackTips.com — a personal finance blog dedicated to delivering street-smart financial wisdom for real people on real budgets. With 300+ published articles covering everything from debt management to investing fundamentals, Makenzie’s mission is to make every dollar work harder. When not writing about money hacks, Makenzie is testing frugal living strategies, optimizing side hustles, and helping readers build financial freedom from scratch.