
Welcome, fellow frugal DIYers, handy parents, and resourcefully-creative upcyclers! If you have a little one at home, chances are you are swimming in an ocean of empty glass baby food jars. You rinse them, you toss them in the recycling bin, and you watch as perfectly good, heavy-duty glass is hauled away. But what if I told you that those tiny, unassuming glass jars hold the secret to one of the most satisfying, high-end kitchen organization hacks on the planet? Today, we are going to dive deep into the ultimate trash-to-treasure project: learning how to turn old baby food jars into a high-end uniform spice rack for absolutely free.
Let us face facts. Have you looked at the price of those uniform, aesthetically pleasing spice jar sets at premium home goods stores lately? They can easily run you upwards of a hundred dollars for a set of twenty jars. As budget-savvy crafters and rugged DIYers, we refuse to pay a premium for something we can build better, stronger, and more stylishly with our own two hands. We believe in the power of upcycling, the thrill of the zero-dollar budget, and the deep satisfaction of turning household cast-offs into masculine-elegant, highly functional home decor.
“Trash is just a treasure that hasn’t met a creative mind yet. Save those jars, save your cash, and build something beautiful.”
In this comprehensive masterclass, we are going to cover everything from the chemical-free, elbow-grease methods of removing stubborn label adhesive, to the art of faux-finishing lids to look like brushed brass or cast iron. We will explore zero-budget labeling techniques that rival professional printing, and even touch on how to build a rugged, custom-fit display using scrap materials. Whether you are a frugal mom trying to organize the kitchen chaos, a handy dad looking for a weekend garage project, or a crafty gift-giver wanting to create custom spice blends for friends, this guide is your blueprint to zero-waste victory. Roll up your sleeves, grab that stash of glass jars, and let us get to work!
The Mismatched Spice Cabinet Dilemma (And Why Upcycling is the Cure)
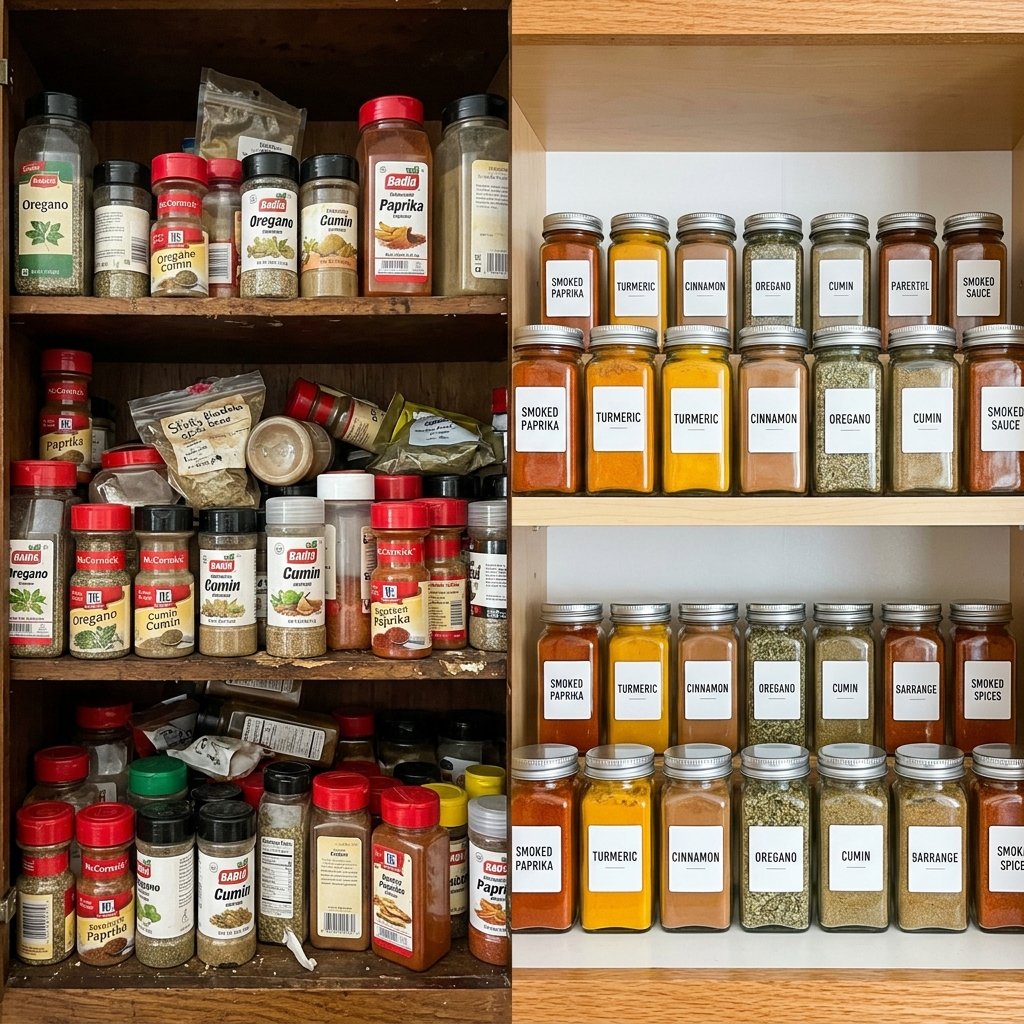
Every great DIY project begins with a problem that desperately needs solving. Open your kitchen cabinet right now and take a hard look at your spice collection. If you are like most people, it is a chaotic jumble of mismatched plastic containers, oversized bulk bags, and tiny tins that tumble out every time you reach for the cumin. Not only is this visually overwhelming, but it is deeply impractical. Mismatched jars make it impossible to see what you have, leading to duplicate purchases and wasted money.
The True Cost of Kitchen Aesthetics
The home organization industry has capitalized on this chaos, selling the dream of the “perfectly uniform pantry.” But that dream comes with a hefty price tag. When you buy a pre-made spice rack, you are paying for the brand name, the packaging, and the shipping of empty air. Let us break down the brutal reality of retail pricing compared to our resourceful, zero-budget approach.
| High-End Retailer / Brand | Material Quality | Estimated Cost (Set of 24) | Our DIY Upcycled Cost |
|---|---|---|---|
| Luxury Home Store (e.g., Williams Sonoma) | Glass & Matte Black Metal | $150.00 | $0.00 |
| Trendy Boutique (e.g., Anthropologie) | Glass & Brushed Brass | $120.00 | $0.00 |
| Big Box Organizer (e.g., Container Store) | Plastic/Glass & Bamboo | $80.00 | $0.00 |
| The Frugal Upcycler (You) | Heavy-Duty Upcycled Glass | PRICELESS | $0.00 |
As you can see, the savings are astronomical. By utilizing baby food jars, you are not just saving money; you are actively participating in a zero-waste lifestyle. Baby food jars are typically made of high-quality, thick glass designed to withstand extreme temperature changes during the sterilization process. This makes them incredibly durable, far superior to the thin, cheap glass used in budget spice sets. They are the perfect, rugged vessel for preserving the volatile oils in your expensive spices.
Embracing the Crafty-Expert Mindset
Approaching this project requires a shift in perspective. You are no longer just a consumer; you are a creator. You are looking at a piece of recycling and seeing a blank canvas. This is the essence of practical, rugged DIY. It is about taking control of your environment and crafting solutions that fit your specific aesthetic and spatial needs without opening your wallet. As we move into the preparation phase, keep this mindset at the forefront. Every bit of scrubbing and painting is an investment in your home’s functionality and beauty.
De-Gunking and Prepping: The Secret to Crystal Clear Glass
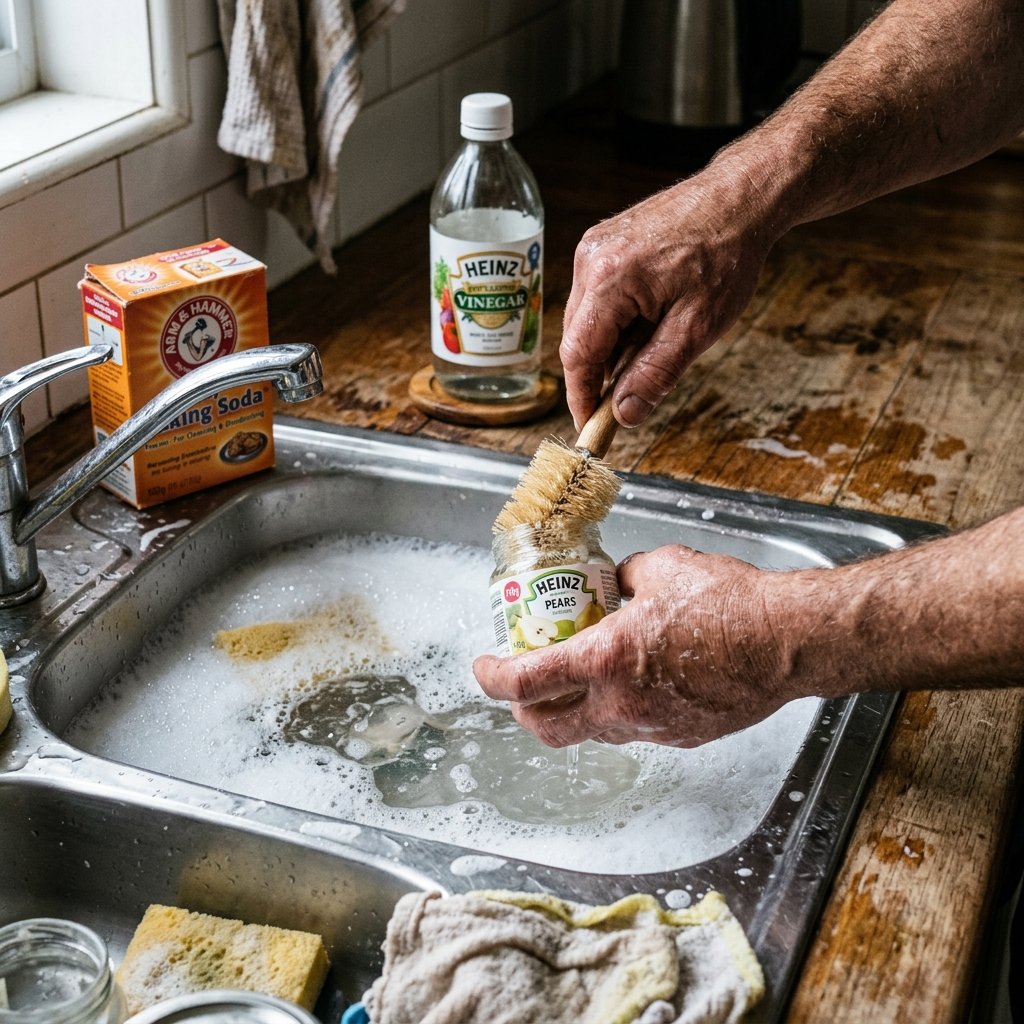
The most crucial step in transforming trash to treasure is the preparation. A high-end finish demands a pristine canvas. Baby food jars are notorious for having industrial-strength adhesive holding their labels in place. If you try to peel them off dry, you will be left with a sticky, paper-covered nightmare. But fear not, frugal DIYers, we have a foolproof, chemical-free method to strip these jars down to bare, sparkling glass using items you already have in your pantry.
Step-by-Step: The Zero-Budget Adhesive Eradication Method
Forget expensive chemical goo-removers. We are going to use the power of heat, oil, and mild abrasives to break down the glue molecules. Here is the rugged, step-by-step process for batch-cleaning your jars.
- The Boiling Water Bath: Fill your kitchen sink or a large basin with boiling hot water. Add a generous squirt of heavy-duty dish soap and a cup of plain white vinegar. Submerge your empty, rinsed baby food jars completely. Let them soak for at least 30 minutes. The heat will soften the adhesive, and the vinegar will help break down the paper.
- The Mass Peel: After the soak, the paper portion of the labels should slide off with a gentle push of your thumb. Discard the paper. You will likely be left with a gummy residue on the glass. Do not panic; this is normal.
- The Magic Paste: In a small bowl, mix equal parts baking soda and any cheap cooking oil (vegetable, canola, or even olive oil). Stir it into a thick paste. The oil dissolves the sticky adhesive, while the baking soda acts as a gentle, non-scratch abrasive.
- Scrub and Polish: Smear the paste generously over the sticky areas of the jars. Let it sit for 10 minutes to penetrate the glue. Then, take an old toothbrush or a coarse scouring pad and scrub the glass. The gunk will pill up and slide right off.
- The Final Rinse: Wash the jars one last time with hot, soapy water to remove any residual oil. Dry them thoroughly with a lint-free cloth or let them air dry upside down on a rack.
“Patience in the prep work guarantees perfection in the final product. Never rush the de-gunking phase; crystal clear glass is the hallmark of a luxury item.”
Eradicating Lingering Odors
Sometimes, baby food jars (especially those that held savory meals containing garlic or meat) can retain a faint odor in the lids. To ensure your delicate spices like cinnamon or cardamom are not tainted by the ghost of pureed peas, we must neutralize the lids. Submerge the metal lids in a bowl of straight white vinegar overnight. If the smell persists, lay the lids out in direct sunlight for a full day. The UV rays are a powerful, free deodorizer that will blast away any remaining organic scent compounds.
Painting and Sealing the Lids for a Premium Finish
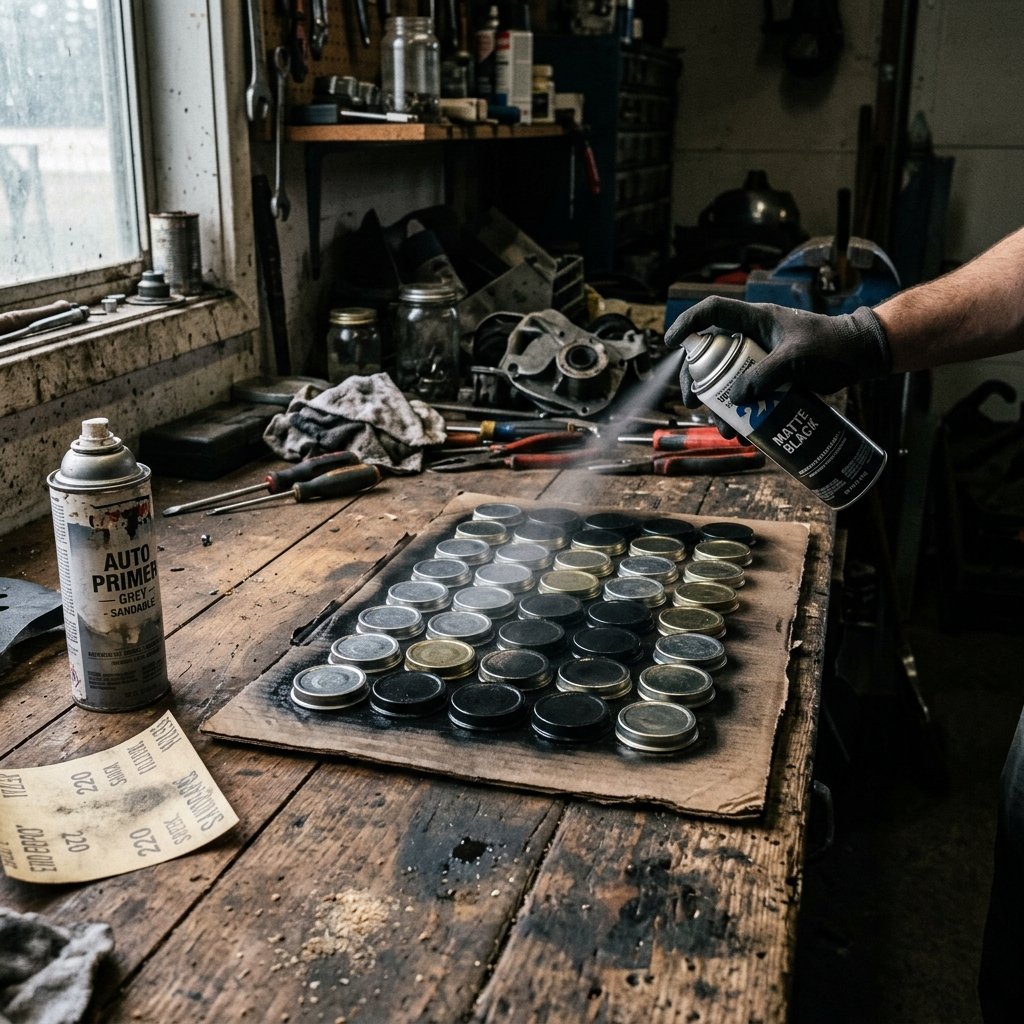
Now that we have pristine glass vessels, it is time to tackle the lids. Standard baby food jar lids are often garishly colored, plastered with brand logos, or feature expiration dates stamped in black ink. This is the dead giveaway of an upcycled item. To elevate our spice rack to a masculine-elegant, high-end status, we must transform these lids. Paint is our greatest weapon here, but painting metal requires technique to ensure it does not chip or peel the moment you try to open a jar of paprika.
Choosing Your Aesthetic: The Dupe Strategy
Before you spray, you must choose your vibe. Are you going for a modern farmhouse look? A rugged, industrial loft feel? Or a sleek, minimalist aesthetic? Here are the most popular high-end finishes you can replicate for pennies:
- Matte Black Iron: The ultimate modern, masculine look. It hides imperfections flawlessly and contrasts beautifully with brightly colored spices.
- Brushed Brass/Gold: Perfect for achieving that Anthropologie-style vintage elegance. It adds warmth to a kitchen.
- Hammered Copper: A rustic, textured finish that looks incredibly expensive and high-end.
The Master Craftsman’s Guide to Painting Lids
To achieve a factory-grade finish that will withstand years of twisting and turning, you cannot just blast the lids with cheap spray paint. You must follow the holy trinity of painting: Scuff, Prime, and Seal.
- Scuffing the Surface: Take a piece of fine-grit sandpaper (around 220 grit) and lightly sand the top and sides of every metal lid. You are not trying to remove the existing paint; you are just giving the surface some ‘tooth’ so the new paint has something to grip onto. Wipe away the dust with a damp cloth.
- The Primer Coat: Place your lids on a piece of scrap cardboard in a well-ventilated area. Apply a light, even coat of a high-quality bonding primer designed for metal or plastic. Do not skip this step! Primer is the glue that holds your color coat to the lid. Let it dry completely according to the manufacturer’s instructions.
- Applying the Color: Shake your chosen color spray paint vigorously for at least two minutes. Hold the can 8-12 inches away from the lids and apply the paint in light, sweeping motions. It is much better to do three thin coats than one thick, drippy coat. Allow 15 minutes of drying time between each coat.
- The Protective Sealant: Spices mean cooking, and cooking means greasy fingers and moisture. To protect your beautiful finish, apply a final topcoat of clear matte or satin polyurethane spray. This seals the paint, making the lids wipeable and highly durable against kitchen wear and tear.
“Safety First: Always spray paint outdoors or in a highly ventilated garage, and wear a proper respirator mask. Lung health is the ultimate wealth!”
Once sealed, let the lids cure undisturbed for at least 48 hours. Paint may feel dry to the touch in an hour, but it takes days to fully harden and cure. Patience here ensures your high-end look lasts a lifetime.
Crafting Custom Minimalist Labels on a Zero-Dollar Budget
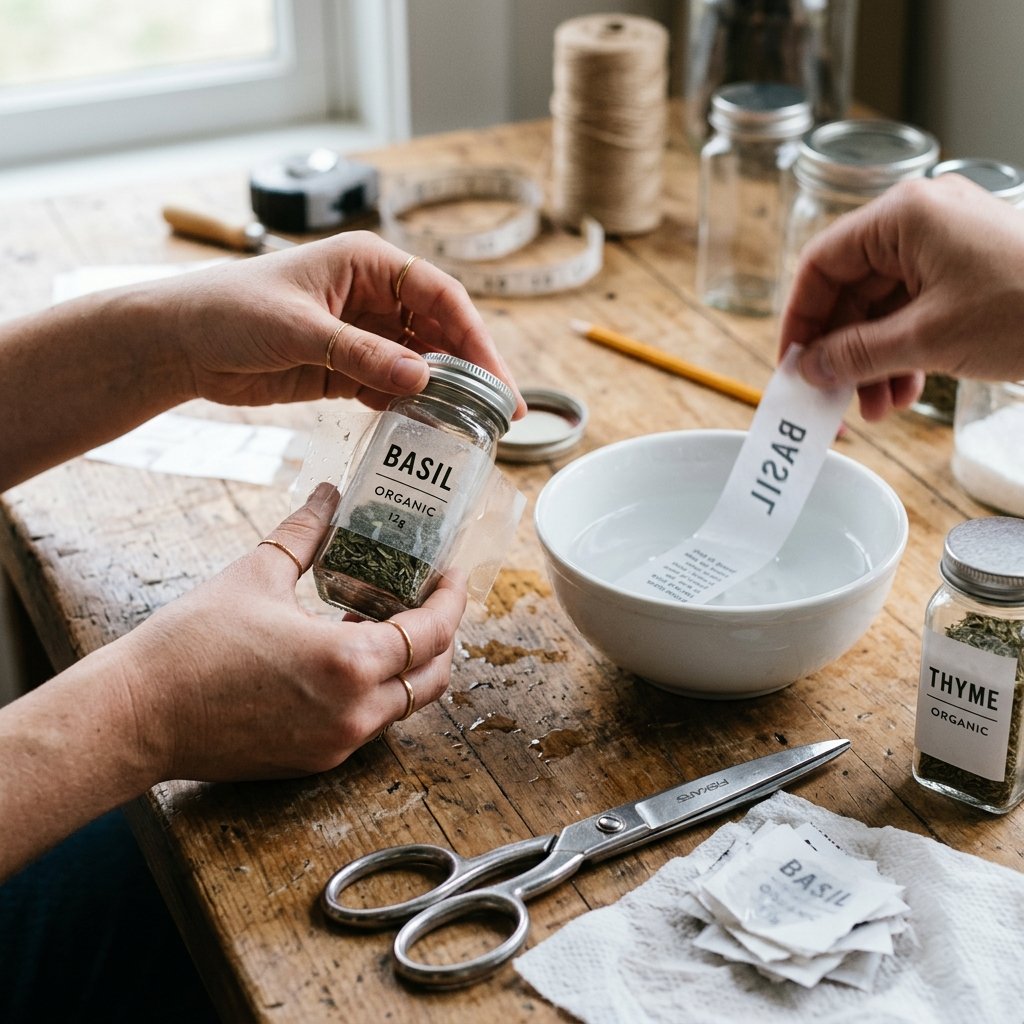
A spice jar without a label is just a mystery waiting to ruin your dinner. But a beautifully labeled spice jar? That is the hallmark of a bespoke, organized kitchen. Custom labels can be shockingly expensive to order online, but as resourceful crafters, we have several brilliant, budget-savvy methods to create waterproof, minimalist labels using things you already have in your home office.
Method 1: The Packing Tape Image Transfer Trick
This is an absolute favorite among frugal DIYers. It allows you to create transparent, waterproof labels that look like they were professionally screen-printed directly onto the glass. It requires nothing more than a laser printer, clear packing tape, and water.
- Design Your Labels: Open any free word processing or design software. Create a list of your spices using a clean, modern font (like Helvetica, Montserrat, or a vintage typewriter font). Ensure the text size fits the front of your baby food jars. Crucial Note: You must print this on a laser printer, not an inkjet. Inkjet ink will bleed; laser toner is made of plastic and will transfer perfectly.
- Tape and Burnish: Cut a strip of heavy-duty clear packing tape and place it directly over your printed words. Use the back of a spoon or a credit card to rub (burnish) the tape hard against the paper. You want the toner to stick firmly to the adhesive side of the tape.
- The Soak: Cut out each individual label. Drop them into a bowl of warm water and let them soak for 5 to 10 minutes.
- Rub Away the Paper: Take a label out of the water. Using your thumb, gently rub the wet paper on the back. The paper will pill up and wash away, leaving the black toner magically fused to the clear tape!
- Dry and Apply: Let the tape dry sticky-side up. Once dry, the tape regains its stickiness. Apply it directly to your clean glass jar for a flawless, transparent, high-end label.
Method 2: The Milk-Glue Vintage Paper Label
If you prefer an opaque, rustic, or vintage apothecary look, this method is for you. It sounds crazy, but milk acts as an incredibly strong, natural adhesive for paper on glass, and it dries completely clear and matte.
- Print and Cut: Design your labels on standard printer paper. You can add vintage borders or rustic elements. Cut them out to the desired size.
- The Milk Dip: Pour a small amount of regular cow’s milk (skim or whole, it does not matter) into a shallow dish. Lightly dip the back of your paper label into the milk, ensuring it is lightly coated but not soaking wet.
- Position and Smooth: Place the label onto the glass jar. Slide it into the perfect position. Use a dry paper towel to gently press from the center outward, squeezing out any excess milk and air bubbles.
- Let it Cure: As the milk dries, the proteins bind the paper tightly to the glass. It will not smell, and it will hold fast. To make it water-resistant, you can lightly brush over the dried label with a thin coat of clear nail polish or Mod Podge.
| Labeling Method | Best For… | Required Materials | Cost |
|---|---|---|---|
| Packing Tape Transfer | Minimalist, transparent, modern look | Laser print, clear packing tape, water | $0.00 (from household stash) |
| Milk-Glue Method | Vintage, apothecary, rustic look | Standard paper, printer, milk | $0.00 (from fridge) |
| Chalkboard Paint | Ever-changing spice blends, dark aesthetic | Chalkboard paint, chalk marker | ~$3.00 (if paint needed) |
Building the Display: Tiered Inserts and Magnetic Mounts
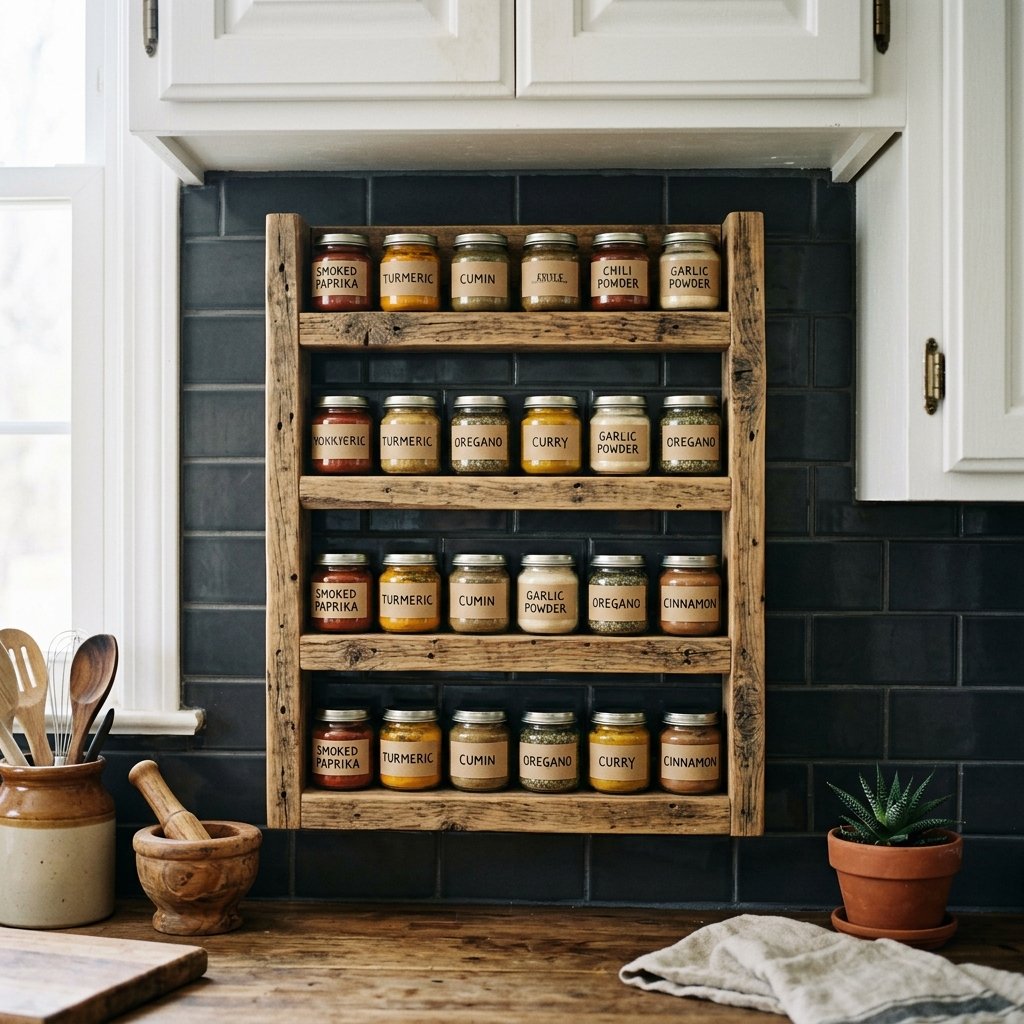
You have perfectly cleaned jars, flawlessly painted lids, and bespoke labels. Now, you need a way to display your masterpiece. Tossing them back into a dark cabinet defeats the purpose of this high-end upgrade. As handy parents and rugged makers, we are going to build a custom display solution. Depending on your kitchen layout, you have two brilliant, budget-friendly options: a scrap-wood tiered drawer insert, or a space-saving magnetic under-cabinet mount.
Option 1: The Scrap Wood Tiered Drawer Insert
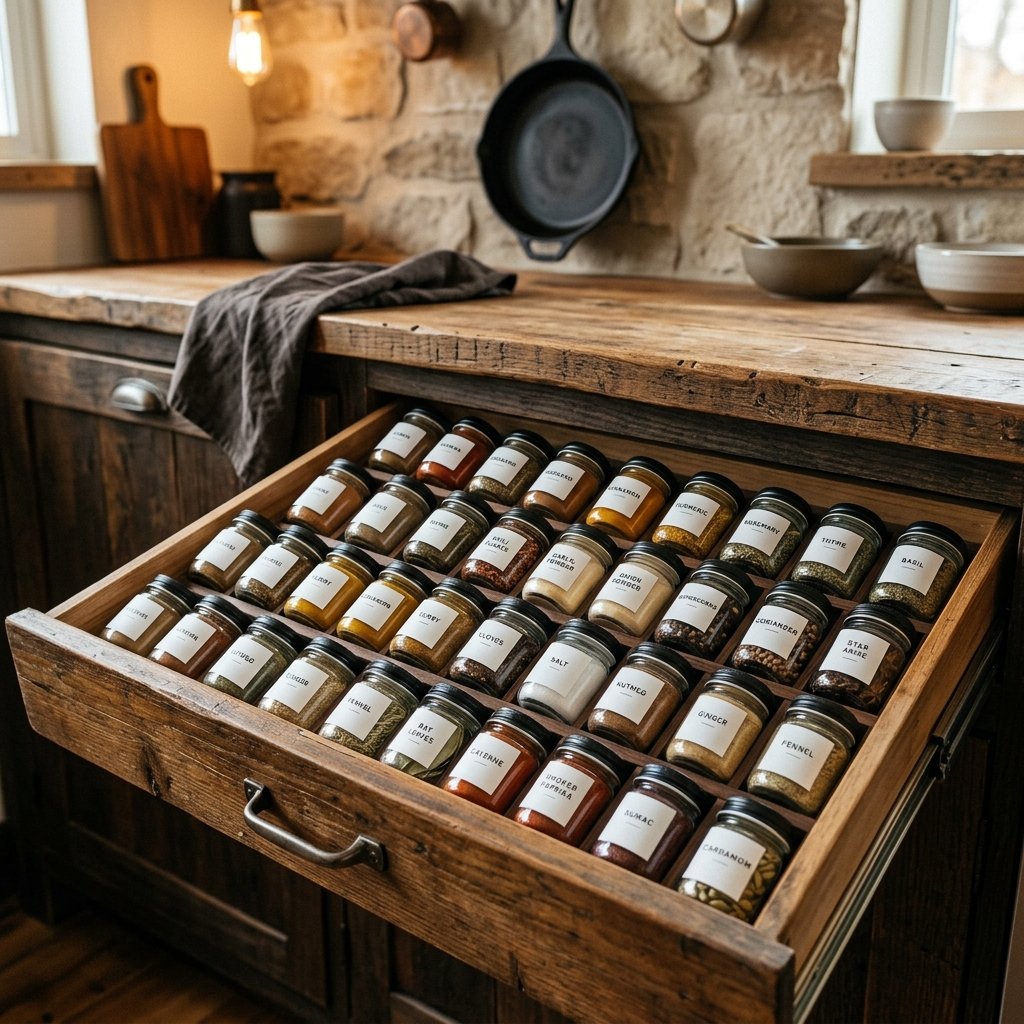
If you have a dedicated spice drawer, laying the jars flat so you can read the labels is the ultimate luxury. Pre-made acrylic drawer inserts cost a fortune, but you can build a custom wooden one using scrap material from your garage.
- Measure Twice, Cut Once: Measure the interior width and depth of your kitchen drawer. Determine how many rows of baby food jars will fit.
- Gather Scrap Wood: Look for thin strips of wood. Leftover plywood, pine lattice strips, or even disassembled wooden shipping pallets work perfectly. You will need a base piece (optional) and several angled riser pieces.
- Cut the Risers: Cut your wood strips to match the width of your drawer. To create the angled tier, you can simply glue a small square dowel or a thick strip of cardboard under the back edge of each flat wooden strip. This tilts the jar forward, making the label easily readable.
- Assembly: Use wood glue or small brad nails to assemble the tiered steps. If you want to elevate the look, stain the wood with a rich walnut or dark oak finish, or simply rub it down with some butcher block oil for a natural, rugged, masculine finish.
- Install: Slide the custom insert into your drawer and arrange your gorgeous upcycled jars.
Option 2: The Magnetic Under-Cabinet Spice Rack
If drawer space is at a premium, utilize the dead space underneath your upper kitchen cabinets. This method creates a floating, gravity-defying spice rack that looks incredibly modern and keeps your spices within arm’s reach while cooking.
- Sourcing Magnets: You will need strong neodymium magnets (rare earth magnets). You can often salvage these from old electronics, broken hard drives, or purchase a small pack relatively cheaply online if you do not have any on hand.
- Attaching to the Lids: Using a high-strength, two-part epoxy (like J-B Weld or Gorilla Epoxy), glue one strong magnet to the inside top of each painted baby food jar lid. Let the epoxy cure completely for 24 hours. Safety Note: Super glue is not strong enough to hold a glass jar full of spices; you must use epoxy!
- The Metal Mounting Strip: You need a magnetic surface under your cabinet. You can use a strip of galvanized steel from a hardware store, or even an old, flat metal ruler. Screw this metal strip securely into the underside of your kitchen cabinet.
- The Floating Display: Simply fill your jars, screw on the magnetized lids, and “click” them up onto the metal strip. The jars will hang beautifully, freeing up counter and cabinet space.
“A true craftsman looks at empty space and sees potential. The underside of a cabinet is prime real estate just waiting to be utilized.”
Filling, Organizing, and Maintaining Your Bespoke Spice Arsenal

The final step in this glorious trash-to-treasure journey is the most satisfying: filling your new uniform jars and organizing them. This is where the visual impact of your hard work truly comes to life. But transferring spices from bulk bags or old containers into your new baby food jars requires a bit of finesse to avoid a dusty, sneezing mess.
The Art of the Transfer
Do not try to pour spices directly from a wide-mouth container into your new jars. You will waste expensive spices and create a mess. Instead, fashion a makeshift funnel. If you do not have a small metal kitchen funnel, simply take a piece of clean scrap paper, roll it into a cone, and tape the edge. Snip the bottom to fit perfectly into the mouth of the baby food jar. Pour your spices slowly. For clumpy spices like brown sugar or garlic powder, use a chopstick to help push the powder through the funnel.
Strategic Organization Systems
How you organize your spices says a lot about how you cook. Here are the three most practical ways to arrange your new high-end arsenal:
- The Alphabetical Purist: The most common and foolproof method. From Allspice to Za’atar. Perfect for large collections where you need to find something instantly without thinking.
- The Flavor Profile Grouping: Grouping spices by cuisine or use. Keep your Italian herbs (basil, oregano, thyme) together. Keep your baking spices (cinnamon, nutmeg, clove) in their own section, and your spicy heat (cayenne, chili flakes, paprika) in another. This is highly practical for intuitive cooks.
- The Frequency of Use Matrix: Place your daily drivers (salt, black pepper, garlic powder, onion powder) at the very front or in the most accessible spot. Push the specialty, rarely used spices (cream of tartar, whole cloves) to the back.
Long-Term Maintenance of Your DIY Spice Rack
To keep your upcycled spice rack looking like a million bucks, practice basic maintenance. Keep your spices away from direct sunlight and extreme heat (do not mount your rack directly over the stove if possible), as heat and light degrade the essential oils in spices, making them bland. When a jar is empty, simply wash the glass portion in the dishwasher. Wipe the painted lid gently with a damp cloth—do not soak the painted lids or put them in the dishwasher, as extreme heat and harsh detergents can compromise the clear coat and paint over time.
By following these steps, you have not only saved a significant amount of money, but you have also kept dozens of glass jars out of the landfill, honed your crafting skills, and built a custom, high-end organizational system that will serve your family for years to come. You have proven that with a little ingenuity, some elbow grease, and a resourceful mindset, absolutely free materials can be transformed into stunning home decor.
Conclusion
And there you have it, friends! You have successfully navigated the ultimate frugal upcycling journey. We took what most people consider garbage—sticky, smelly, mismatched baby food jars—and transformed them into a sleek, uniform, high-end spice rack that rivals anything you could buy in a luxury home goods store. You learned the chemistry of zero-budget glue removal, the master craftsman techniques for painting and sealing metal, and the clever hacks for creating stunning, transparent labels without spending a dime.
This project is a testament to the power of the DIY spirit. It proves that a beautiful, organized, and masculine-elegant home does not require a massive budget; it simply requires a shift in perspective and a willingness to get your hands dirty. Every time you reach for a pinch of oregano or a dash of cinnamon, you will feel that deep, rugged satisfaction of knowing you built this system yourself, from scratch, for absolutely free.
Do not let the momentum stop here! Look around your home. What other “trash” is waiting to become treasure? Tin cans can become rustic lanterns; old t-shirts can become rugged shop rags; cardboard boxes can be transformed into epic kids’ playhouses. Keep that resourceful, crafty-expert energy alive. We would absolutely love to see your finished spice racks! Share your zero-budget transformations with us, and keep crafting, keep saving, and keep building a beautiful life on a budget.

Makenzie is the founder and lead writer at MoneyHackTips.com — a personal finance blog dedicated to delivering street-smart financial wisdom for real people on real budgets. With 300+ published articles covering everything from debt management to investing fundamentals, Makenzie’s mission is to make every dollar work harder. When not writing about money hacks, Makenzie is testing frugal living strategies, optimizing side hustles, and helping readers build financial freedom from scratch.